 MercurioDEMO · fictitious data
User guide
Mercurio · sales and business management
Customers and suppliers, quotations, orders, delivery notes and invoices; stock with its batches and warehouses, logistics, subscription services, treasury, accounting and Spanish taxes; and all of it for whichever group company you choose: every screen explained with real screenshots of the demo.
Getting started
Getting started
How to sign in, what is in each part of the screen, how to change company, language and theme, and where to find help.
Mercurio is cloud-based sales and business management for your companies: customers and suppliers, quotes, orders, delivery notes and invoices, stock with its batches and warehouses, logistics, subscription services, treasury, accounting and taxes. It is all designed for a group of companies: customers, suppliers and items are shared, and each company has its own (its warehouses, its series, its documents, its accounts).
Each person sees what their profiles allow (a sales rep does not see the accounts; the warehouse does not see margins), and each feature (batches, CRM, accounting…) is switched on or off in the account settings: if something in this guide does not appear on your screen, it is for one of those two reasons.
Sales
CRMSell more, and on timeCustomersWho you sell to, and howQuotesOffers with an expiry dateOrdersWhat needs deliveringDelivery notesWhat goes out of the doorInvoicesInvoice, collect and reportPrice lists, special terms and promotionsWhat price you sell atPurchasing
SuppliersWho you buy from, and on what termsPurchasingFrom the order to the supplier’s invoicePurchase suggestionsWhat to order, how much and whyWarehouse
ItemsWhat you buy and sellStockWhat there is, where, and what it is worthStocktakesCount and square up the stockTraceabilityWhere it comes from and where it goesFinance
TreasuryCollect, pay and reconcile the bankAccountingThe books, up to date, without typingTaxesEvery form, in its own timePlanning
ForecastsWhat you will sellB2B
B2B channelsOrders that come in on their ownThe customer portalYour customers order by themselvesAnalysis
ReportsThe figures, in detailSet-up
AutomationsRepetitive work, done by itselfSet-upThe account ready, step by stepSettingsThe account, tailored to youUsers and profilesWho signs in and what they doPlatform
PlatformThe service at a glanceAppendices
GlossaryWhat each thing means#Signing in
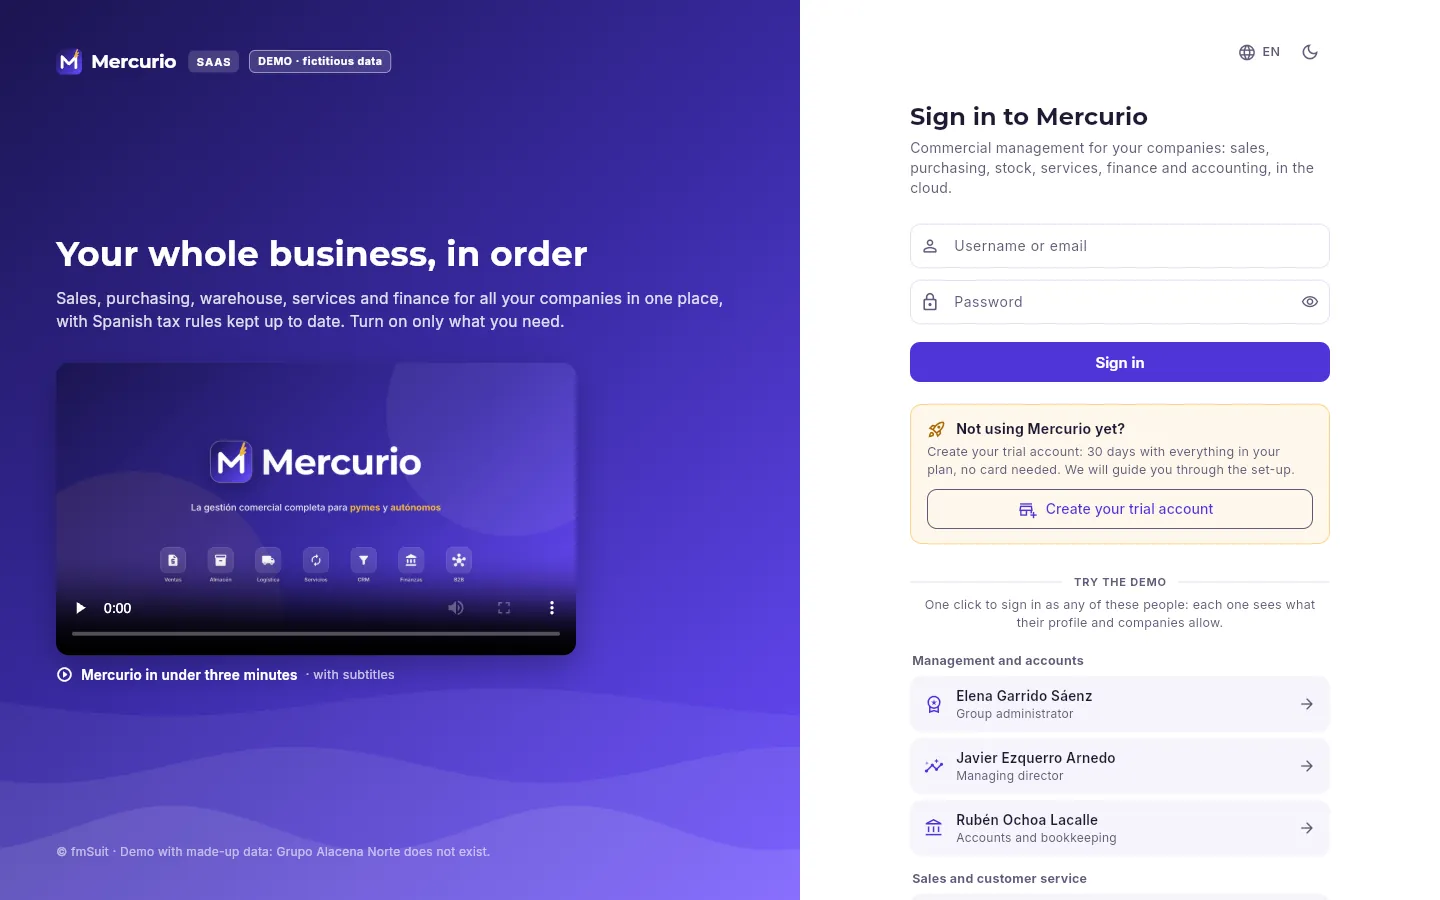 123456
- 1Your username or your email: either works.
- 2Your password; the eye next to it shows it while you type.
- 3Signs in with those details.
- 4To try Mercurio with your own companies: a 30-day trial account.
- 5In the demo, sign in with one click as any of the people in the group: each one sees what their role needs.
- 6Language and theme (light or dark), even before signing in.
Type your username or email and your password, and click Sign in.
If you have been given a temporary password, Mercurio asks you for a new one before you continue.
If you have access to several accounts (an accounting firm that handles several clients, for example), you go into the last one you used and switch account from your menu.
#The screen
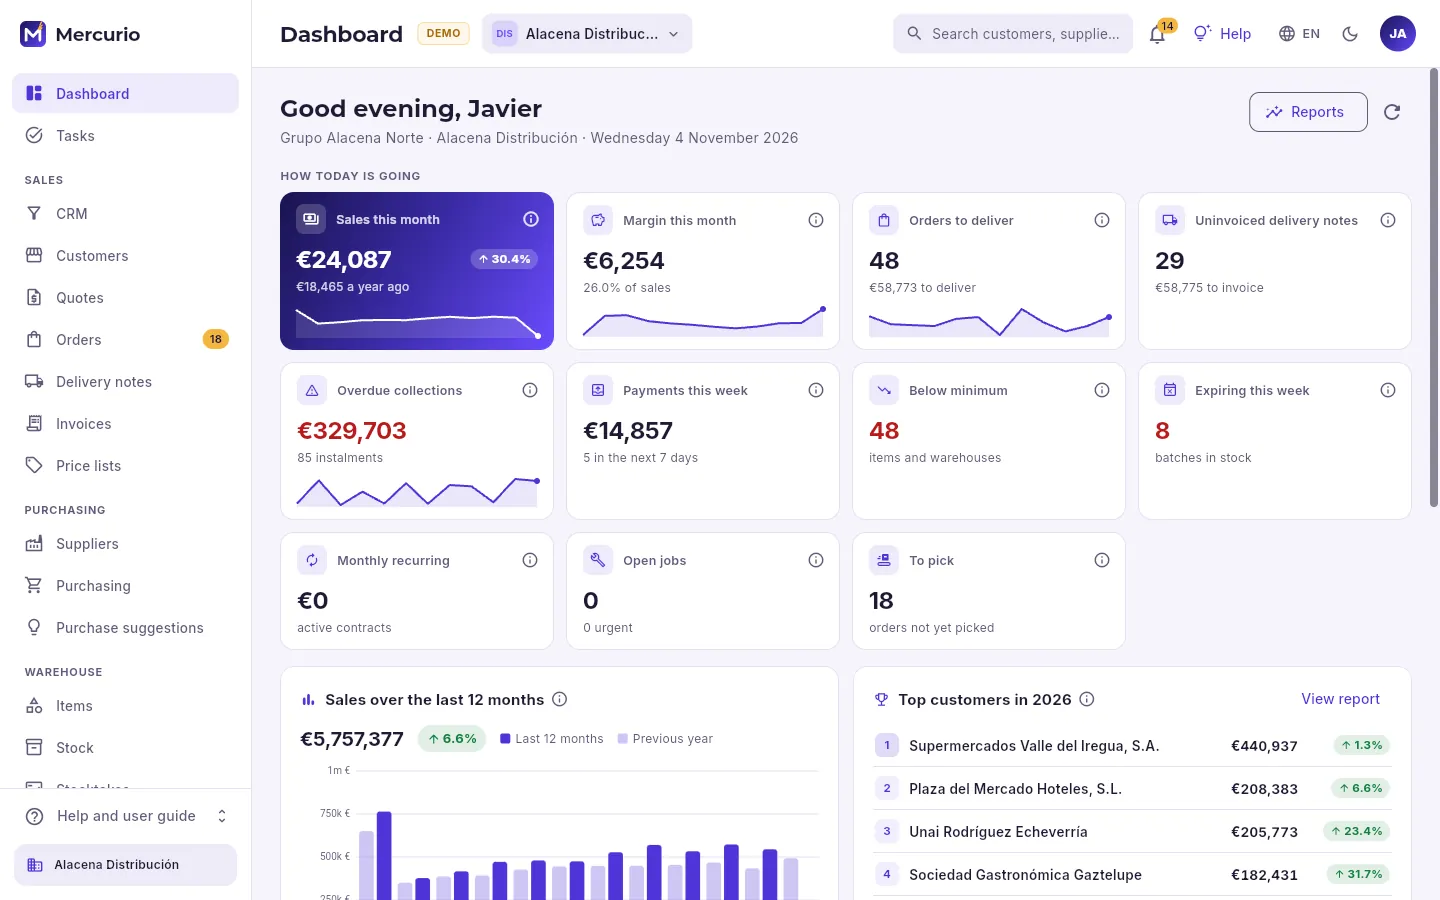 12345678
- 1The sidebar: the sections, grouped (sales, purchasing, warehouse…). Only those your profile can see and the features switched on appear; a number next to one flags what is pending.
- 2The company you are working with: everything you see (documents, stock, figures) belongs to it.
- 3The search box: customers, suppliers, items, documents, batches and serial numbers, from any screen.
- 4The bell: your notifications (what is assigned to you, what is expiring, what has failed), with the unread ones.
- 5The help for this screen (also with F1).
- 6The language and the light or dark theme.
- 7Your menu: your account, Claude, your password and signing out.
- 8Help and the user guide, also from the sidebar.
The screen is always the same: on the left, the sidebar with the sections; at the top, the top bar with the section name, the company, the search box and your tools; and in the middle, the content. Records (a customer, a document, an item) open in a panel on the right, without losing the list underneath: close them with the ✕ or with Esc, and widen them by dragging their left edge.
#The company you are working with
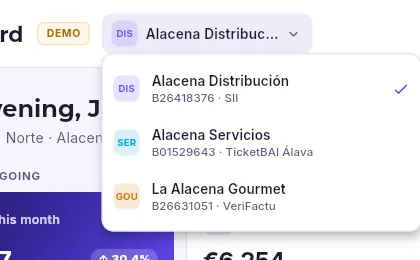 12
- 1The selected company, ticked. Each one shows its tax ID and how its invoices are recorded with the tax authority (SII, TicketBAI or VeriFactu).
- 2Click another to switch: the screen reloads with its data.
Customers, suppliers and items are the same for every company in the group (with their own terms, prices and accounts in each one). Everything else belongs to each company: the warehouses and their stock, the series and documents, treasury, accounting and taxes. You only see the companies you have been given: a sales rep may work with two and not see the third. The selected company is remembered in your browser.
#Help and the user guide
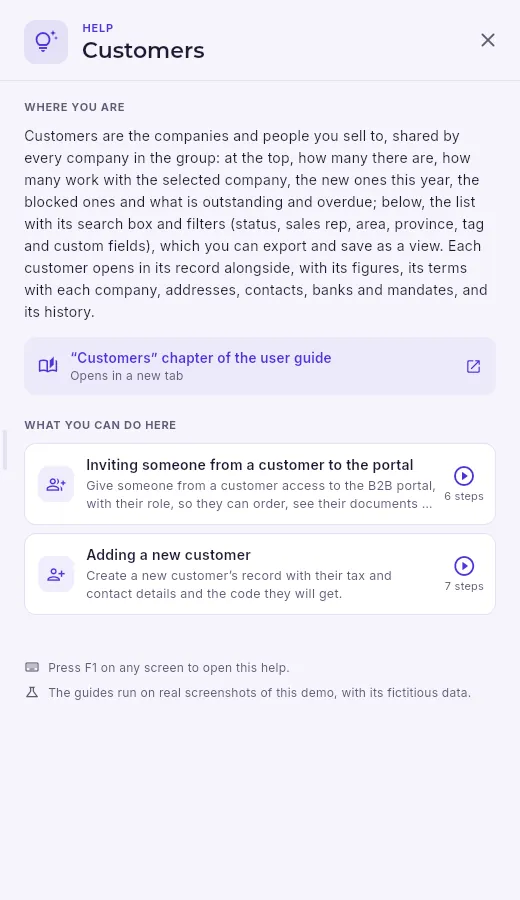 1234
- 1Where you are: what this screen is and, if you have a record open, what that record is.
- 2This screen’s chapter in this guide, in your language.
- 3The animated guides: a task step by step on real screenshots, with the focus moving around the screen.
- 4F1 opens this help on any screen, even with a record or a dialogue open.
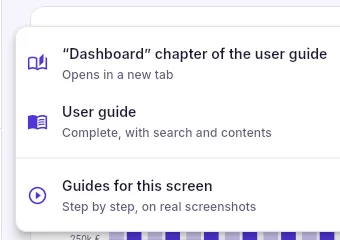 123
- 1The chapter for the section you are in.
- 2The whole guide, with its contents and its search box.
- 3The help for this screen, with its guides.
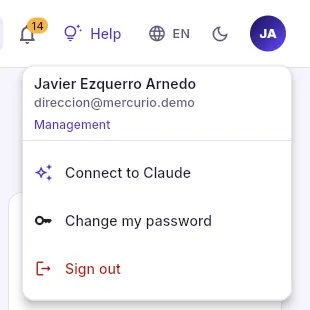 1234
- 1Who you are, in which account and with which profile.
- 2To ask Claude about your data, with your own permissions.
- 3Your password.
- 4Sign out (on a shared computer, always).
The guide opens in another browser tab, in the language you have chosen. It has a search box (/ key), a contents list that follows your reading, and each screenshot enlarges with a click; hovering over a number highlights what it points to.
#Language and theme
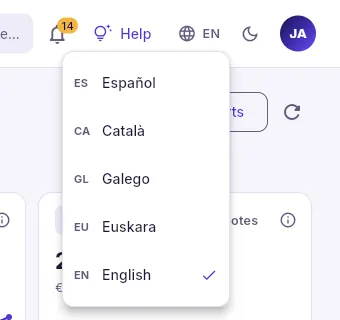 1
- 1Spanish, Catalan, Galician, Basque and English. It changes straight away, without signing out.
 1
- 1The theme button: from dark to light and back.
The language is the screen’s: the documents you send to a customer (quotes, invoices, emails) go out in the language of their record, not yours. Language and theme are remembered in your browser.
#On a phone
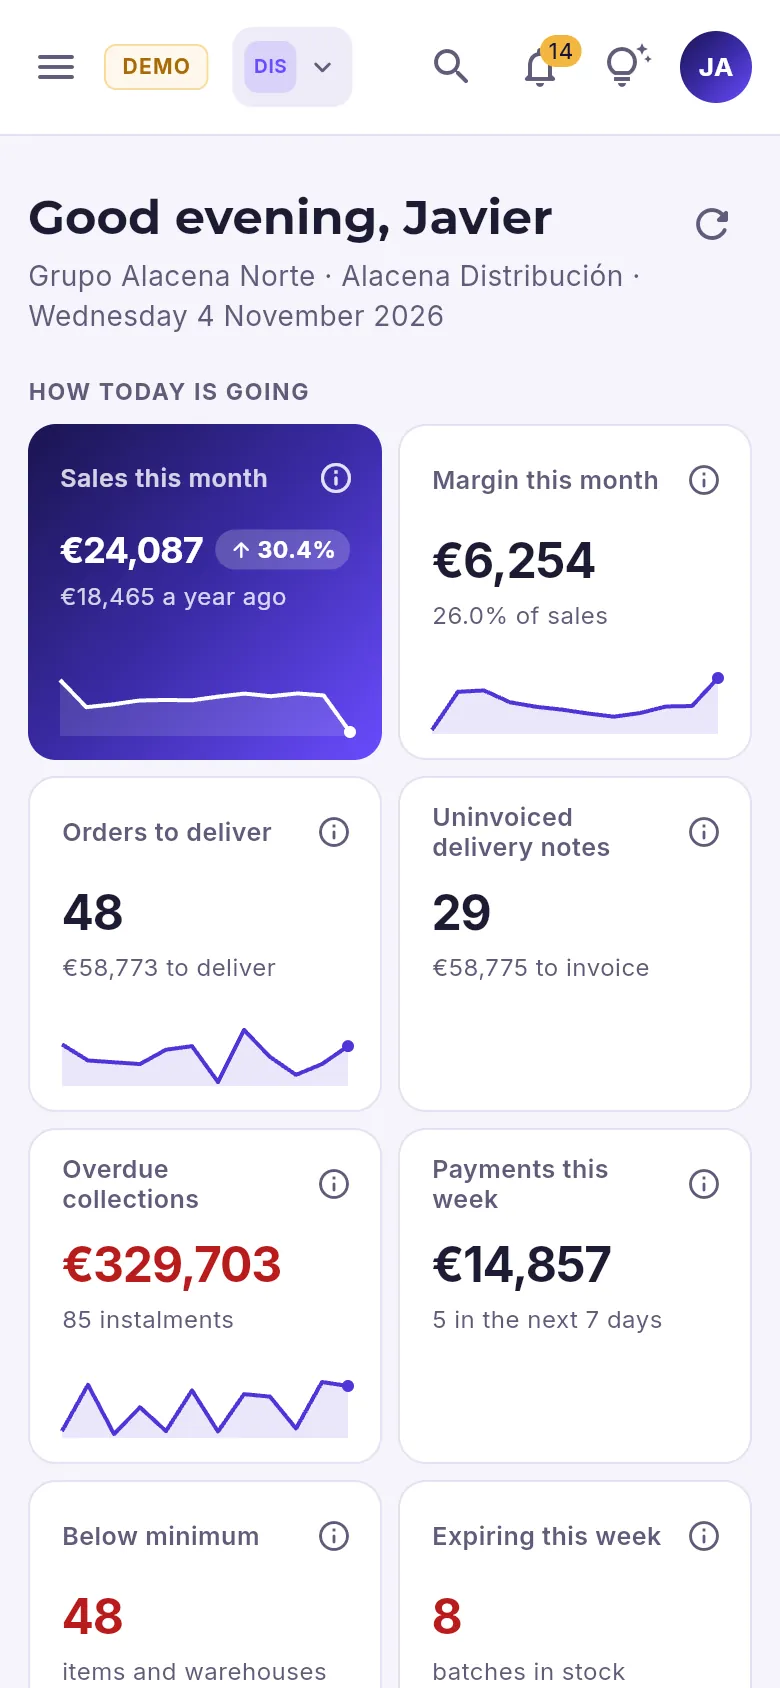 123456
- 1The sections (the sidebar, folded away).
- 2The company.
- 3The search box.
- 4Notifications.
- 5Help.
- 6Your menu, with the language and the theme.
Mercurio works the same on a computer, a tablet and a phone: on small screens lists turn into cards and records take up the whole screen. The warehouse also has its own app for handheld scanners, which works offline.
Day to day
Dashboard
The selected company at a glance: how today is going, the year’s sales and the customers and items that matter most, with whatever your profile lets you see.
The Dashboard is the first thing you see when you sign in. It is not the same for everyone: it shows what your profile can see of the company selected at the top. Management sees sales, margin, collections and payments; a sales rep, sales, margin and what is still to be delivered; the warehouse, what has to be picked and what is running short. If you change company, the Dashboard changes with it.
#What you see
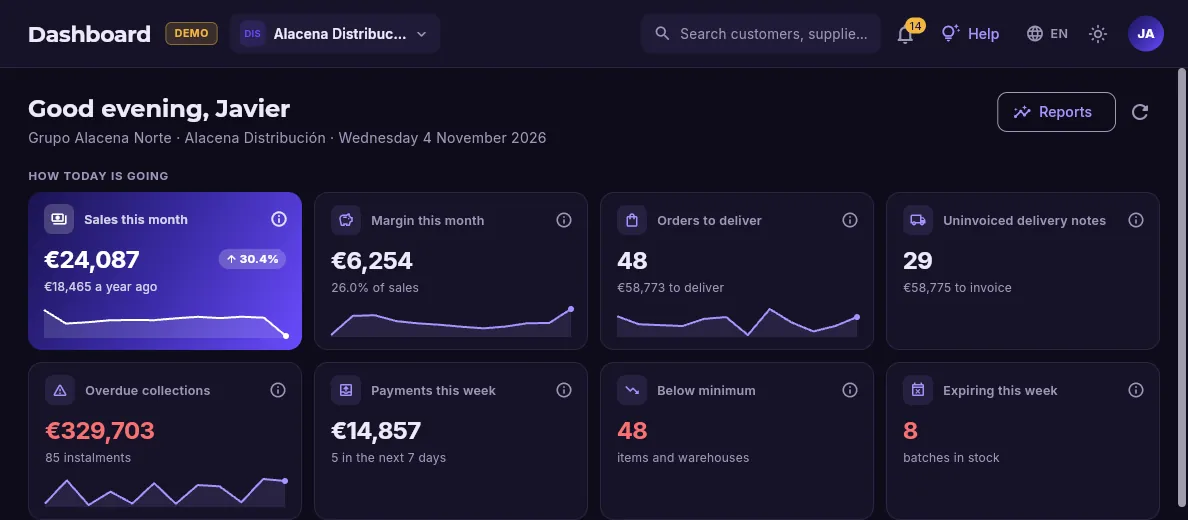
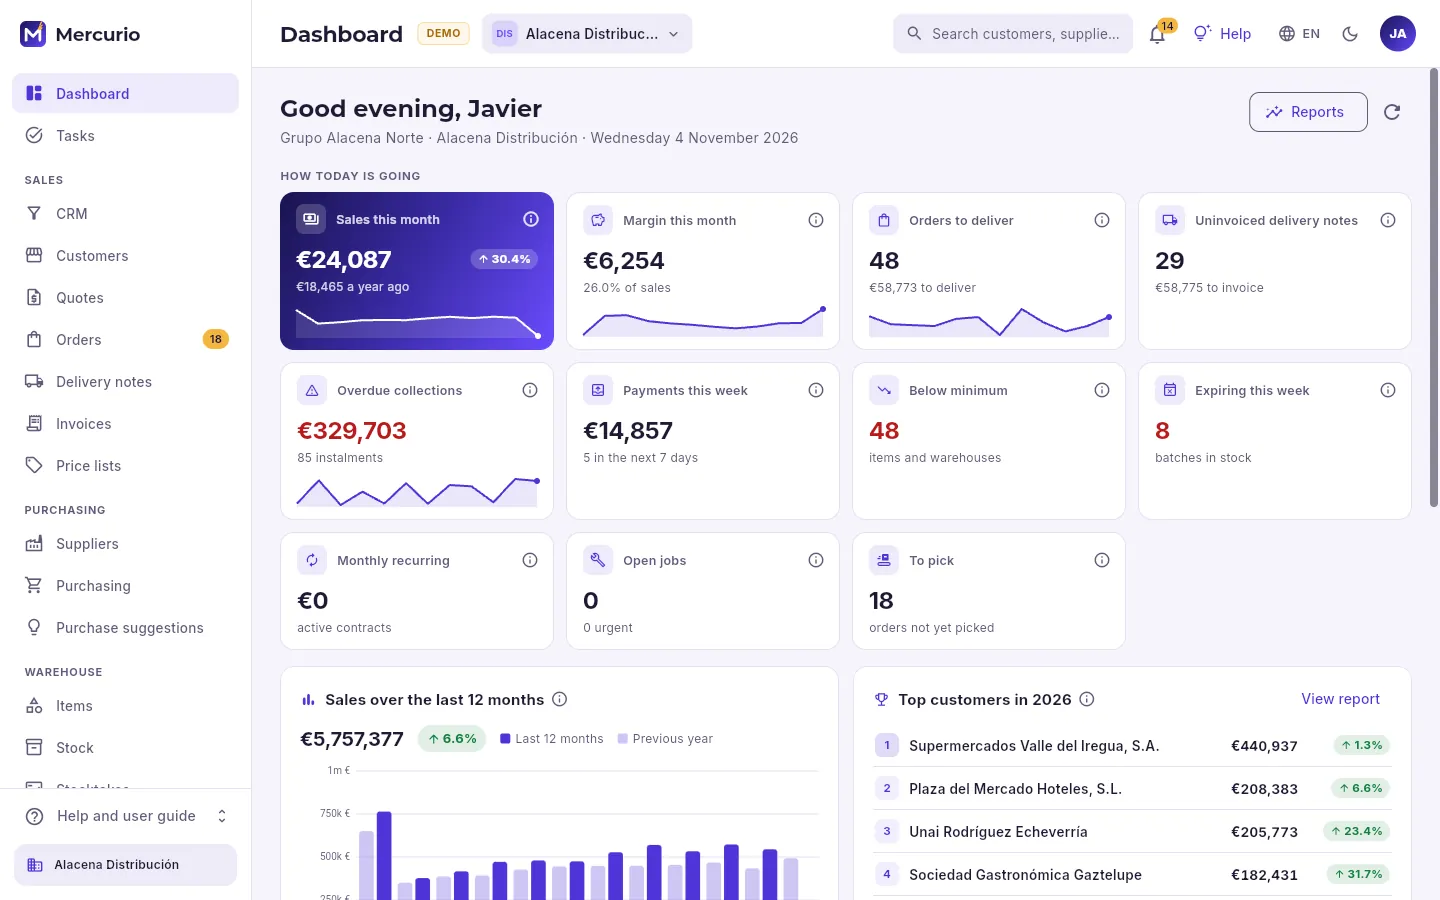 12345678
- 1The greeting, the account, the company and today’s date (the company’s, which is what counts for dates).
- 2How today is going: the company’s indicators, one per card.
- 3Each card, with its figure, the comparison and the line for the last twelve months. Click it to see the detail.
- 4The ⓘ: what the figure shows, how it is calculated and how to read it.
- 5In red, what needs attention (here, overdue collections).
- 6The full reports, to go beyond the Dashboard.
- 7Recalculates the figures (it says how long ago they were calculated).
- 8Sales month by month against the previous year.
Management’s indicators, from left to right and top to bottom:
| Indicator | What it counts |
|---|---|
| Sales this month | What has been invoiced this month so far, compared with the same days last year. |
| Margin this month | Sales minus the cost of what was sold, in euros and as a percentage of sales. |
| Orders to deliver | Customer orders with something still to be delivered (not counting those on hold), and their amount. |
| Uninvoiced delivery notes | Deliveries not yet invoiced, and what they add up to. |
| Overdue collections | Customer due dates that should already have been collected. |
| Payments this week | What has to be paid to suppliers over the next seven days. |
| Below minimum | Items below their minimum stock in some warehouse. |
| Expiring this week | Batches expiring over the next seven days (and those already expired). |
| Monthly recurring | What the service contracts in force invoice each month. |
| Open jobs | Technical service jobs not yet closed (and the urgent ones). |
| To pick | Orders the warehouse has not started picking yet. |
#The ⓘ of each figure
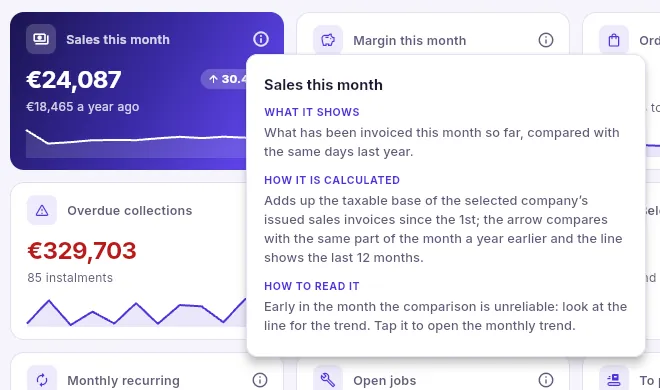 1
- 1The ⓘ, in three parts: what the figure shows, exactly how it is calculated and how to read it (what to look at and what to do about it).
Every figure in Mercurio has its ⓘ with these three parts, including those in lists and records. Close it by clicking outside or with Esc.
#Further down
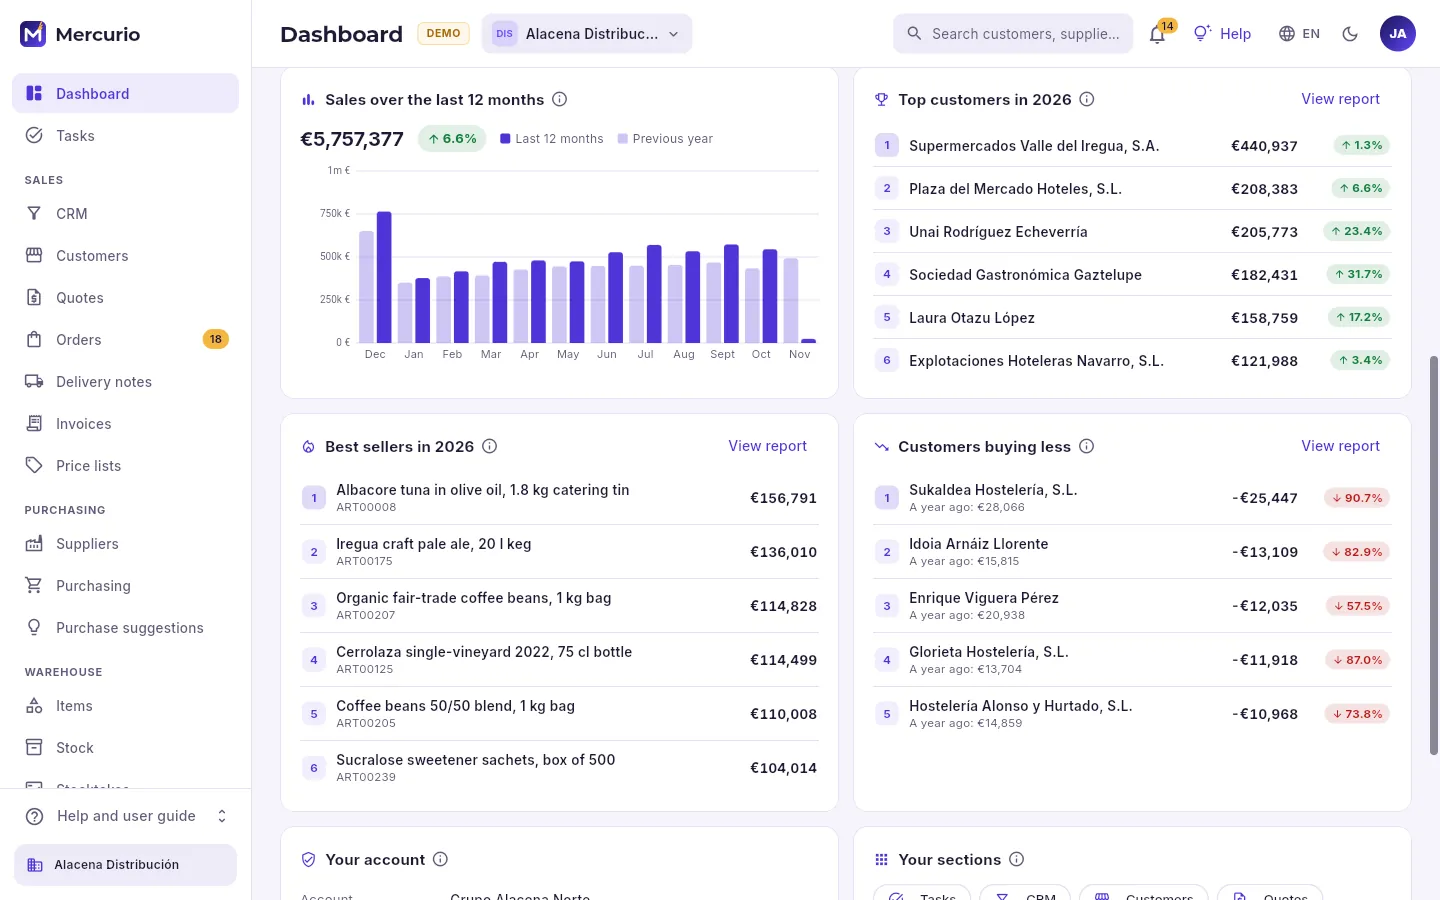 1234
- 1Each month’s sales (the last twelve and the current one, up to today) next to those of the same month a year earlier; on a mobile, the chart slides sideways and starts with the latest months. Hover over a bar to see both figures and click it to see that month’s sales by customer.
- 2The customers who have bought most this year, with how much they are up or down on last year.
- 3The year’s best-selling items.
- 4Customers buying noticeably less than last year: a timely phone call.
Each list has its View report, which opens the full report with its filters; clicking a customer or an item opens its record. At the end, Your account shows which account, company and access you are working with, and Your sections takes you in one click to each section you can open.
#Depending on your role
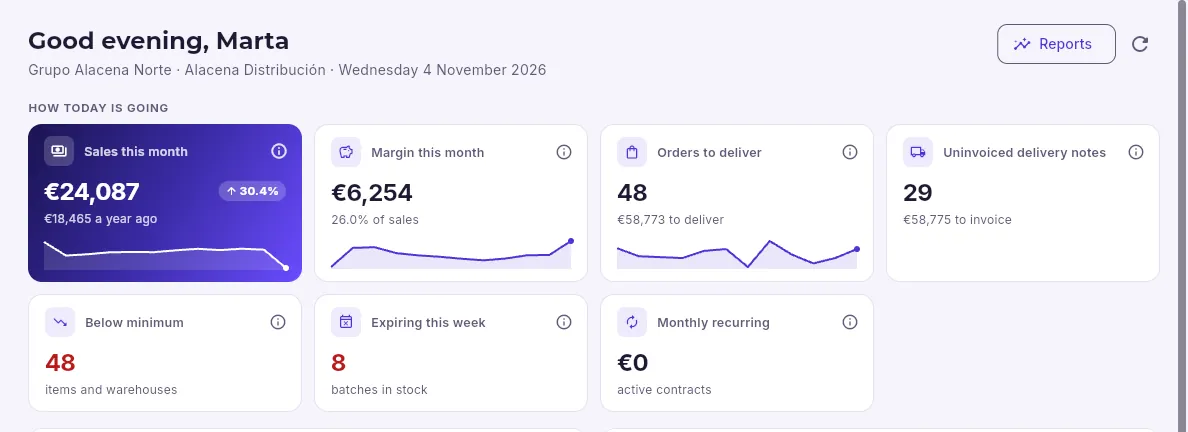 1
- 1A sales rep sees sales, margin and what is still to be delivered, but not collections or payments.
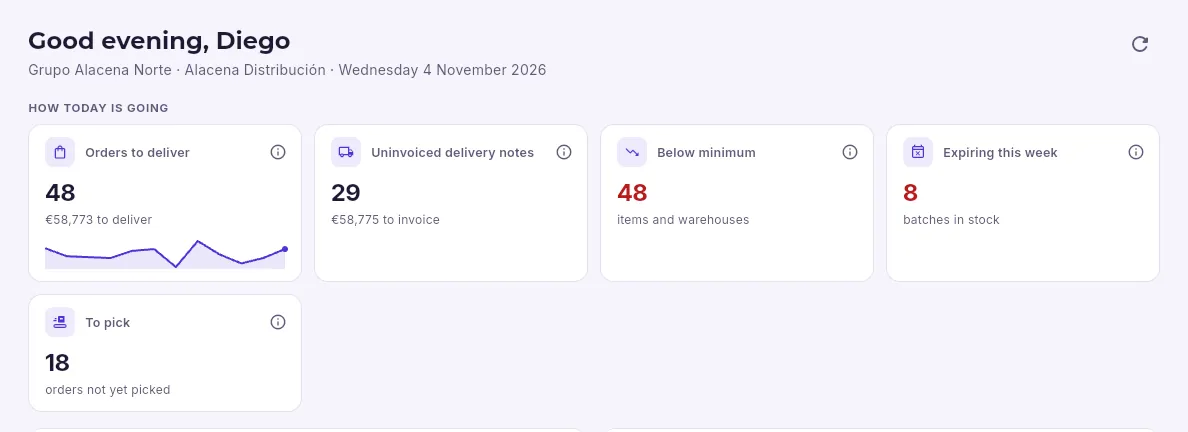 1
- 1The warehouse sees what has to be delivered and picked and the stock, but not sales or margin.
Look at How today is going: anything in red needs attention.
Click the card you are interested in to see its detail (the month-by-month trend or the list of what it counts).
If you are unsure about a figure, open its ⓘ.
Change company at the top to see another one in the group.
Day to day
Tasks
What you have to do and what you ask others to do: tasks with a due date, owner and priority, linked to any customer, document or contract, with subtasks, a checklist, repeats, logged time and templates.
A task is something someone has to do: call a customer, prepare a quote, check an order. It has an owner (a person or a team), a due date, a priority and, almost always, a record it refers to: a customer, a document, a contract, a job, a batch… You are not the only one who creates tasks: automations create them too, as do the CRM (the next step of each opportunity), templates and repeating tasks.
Along the top are the tabs: My tasks (your day), List, Board and Calendar (the same tasks, seen in different ways), Templates and Time.
#My tasks
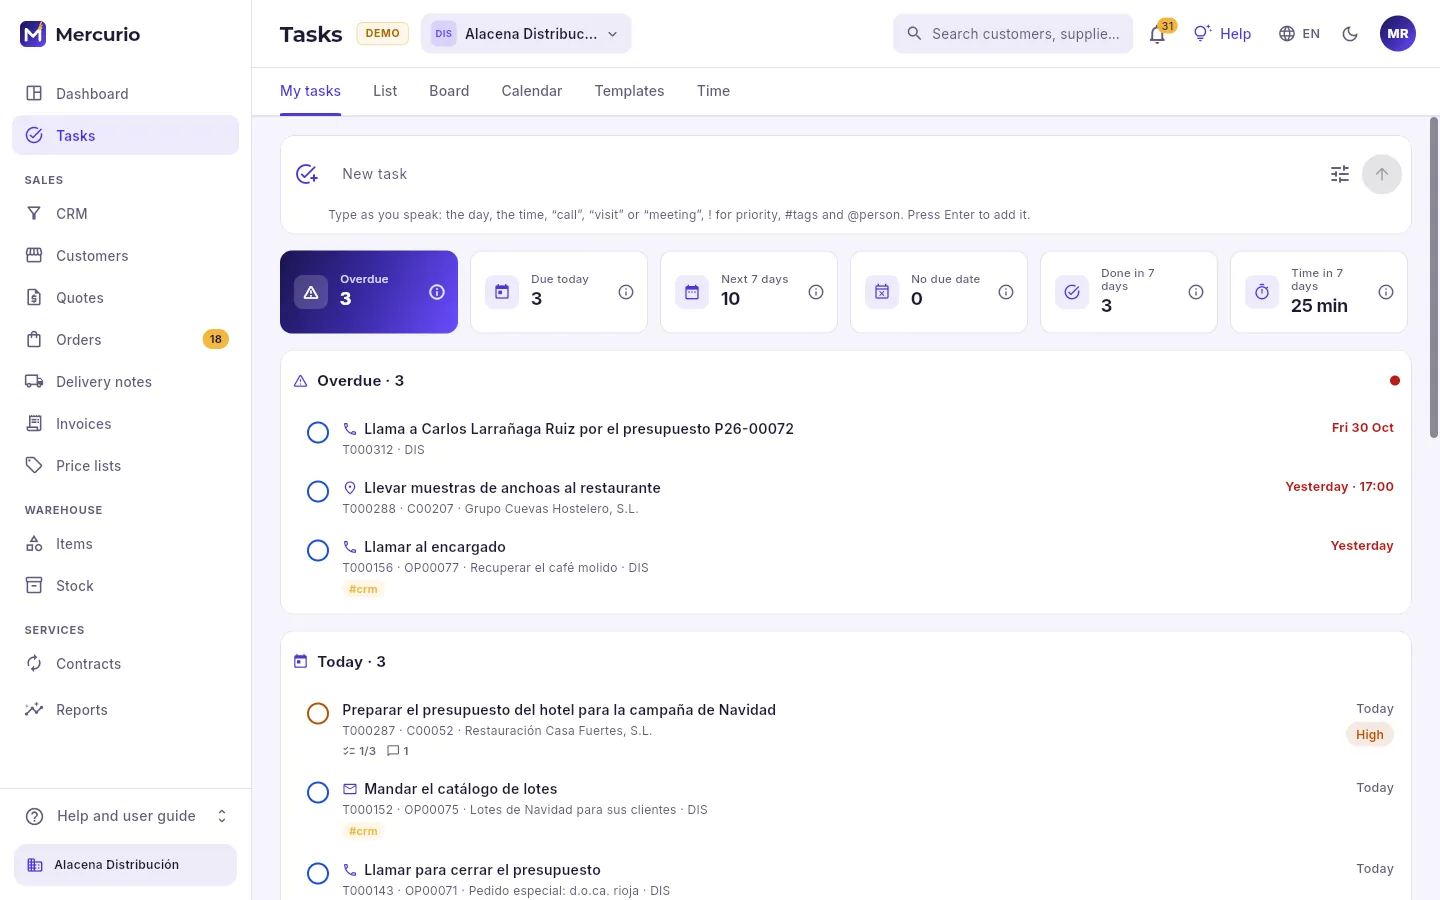 12345
- 1Quick add: type the task as you would say it and press Enter.
- 2The full form, for whatever does not fit in a sentence.
- 3Your overdue tasks, today’s, those for the next 7 days and those with no due date (click one to keep just those), what was done this week and the time logged.
- 4Your open tasks by due date: overdue, today, tomorrow, the next few days, later and no date.
- 5The circle marks it as done. Each row shows its type, its number, the record it belongs to and its due date; click the row to open its record.
My tasks holds your own and, if you belong to a team (customer service, administration…), also your team’s tasks that nobody has taken yet: Claim makes one yours. What you do today stays at the bottom, under “Done today”.
#Quick add: type as you speak
 1234567
- 1The sentence, just as you would write it in a note.
- 2The type, from the verb at the start: call, visit, write, meeting.
- 3The day and the time: today, tomorrow, Friday, “in 3 days”, 15/11, “at 10”…
- 4The priority: “!” is high; “!!” or “urgent”, urgent.
- 5The #tags.
- 6The customer (or supplier) it is linked to: what comes after “to”, “with” or “for”.
- 7Add it (or press Enter).
As you type, Mercurio recognises what it can and shows it underneath as pills; the rest stays as the task’s title (here, “Call Casa Fuertes about the Christmas order”). If a pill is not what you meant (“Friday” was part of the title), click its ✕ and it goes back into the title. It understands all five languages at once, whichever you write in:
| Language | For example |
|---|---|
| Spanish | Visitar Bocados el jueves a las 12 ! |
| Catalan | Trucar a la Glorieta demà a les 10 #renovació |
| Galician | Chamar á Glorieta mañá ás 10 |
| Basque | Deitu Glorietari bihar 10etan |
| English | Call Glorieta tomorrow at 10am #renewal |
With @name you assign it to someone else (if you have the permission to assign tasks).
In Tasks → My tasks (or in a record’s Tasks tab), click in New task.
Type the task as you would say it: what, who for, when, and “!” if it matters.
Look at the pills that appear underneath: remove with their ✕ any that are not what you meant.
Press Enter or Add the task. To add more (description, collaborators, reminder, repeat), More options.
#A task’s record
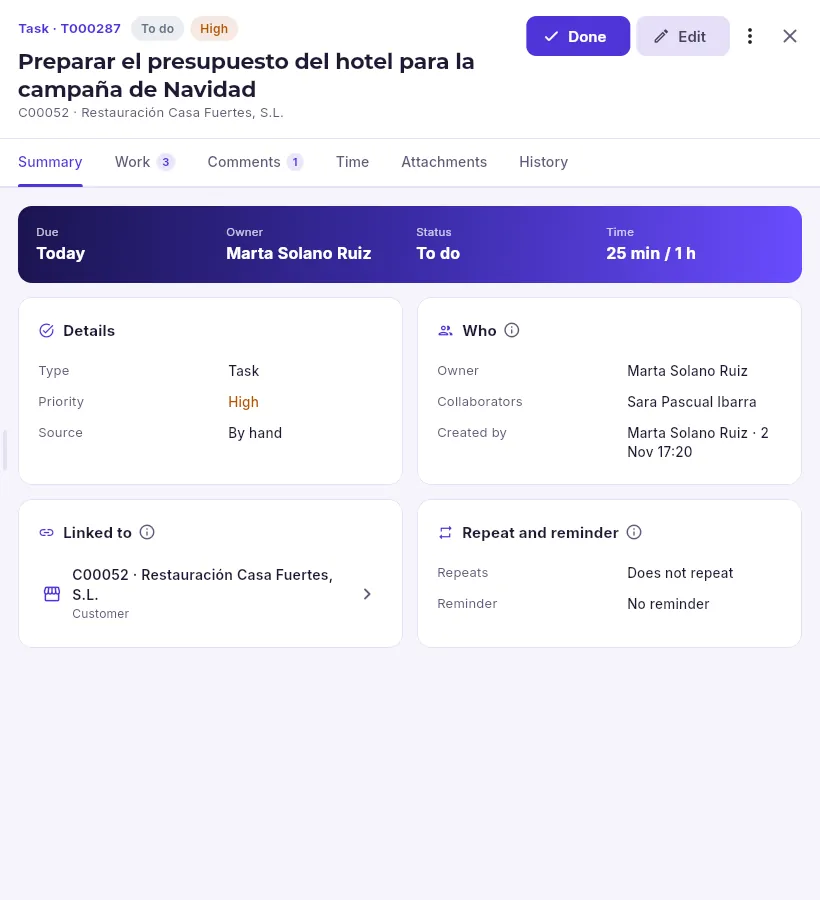 12345678
- 1Its number, its status, its priority, the title and the record it belongs to.
- 2Mark it as done.
- 3Change it; in the menu, change its status, cancel it or delete it.
- 4The work (checklist and subtasks), the comments, the time, the attachments and the history.
- 5Due date, owner, status and the time spent against the estimate.
- 6Who owns it, who is helping and who created it.
- 7The record it refers to: click to open its record.
- 8Whether it repeats and when you are reminded of it.
In Comments, “@name” alerts that person and adds them to the task. In Time, the timer counts how long you have been at it (starting work on an open task puts it “in progress”; each person can only have one running) and you can log time by hand. Attachments holds links to documents in Google Drive, OneDrive or SharePoint: the file stays where it is, with its permissions.
#Checklist and subtasks
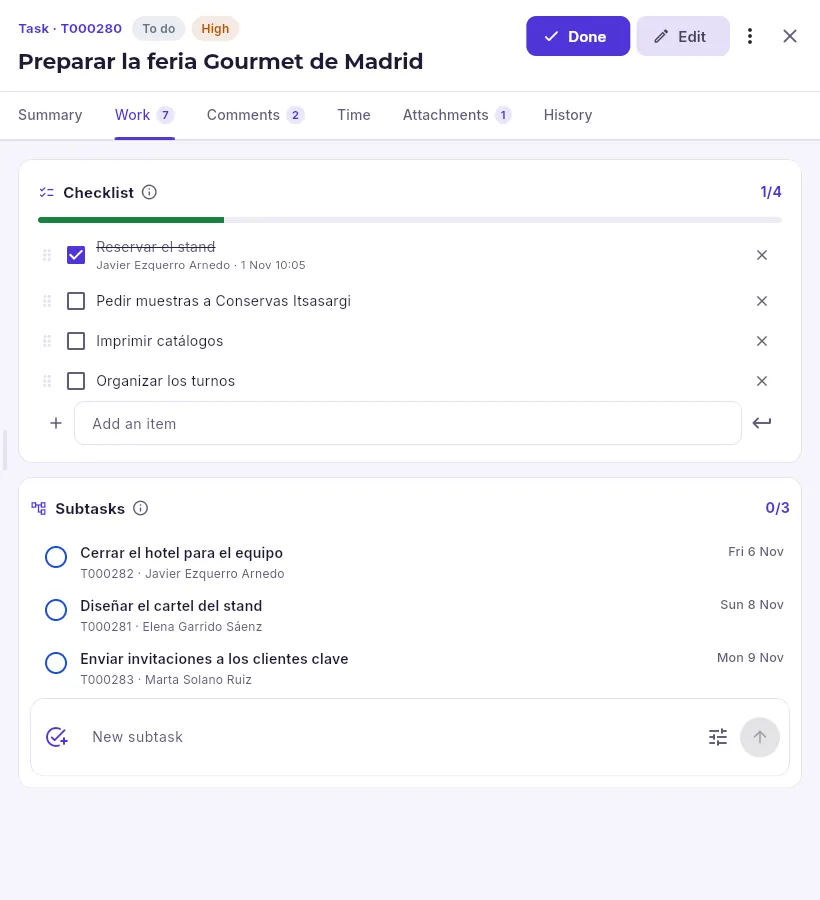 123
- 1The checklist: the steps you tick off, with who and when; drag to reorder them.
- 2The subtasks: parts with their own owner and due date, which inherit the parent task’s record.
- 3Add a subtask with the same quick add.
When you mark a task with open subtasks as done, Mercurio asks whether to close them too; if the parent task is cancelled, so are its subtasks.
#Repeating tasks
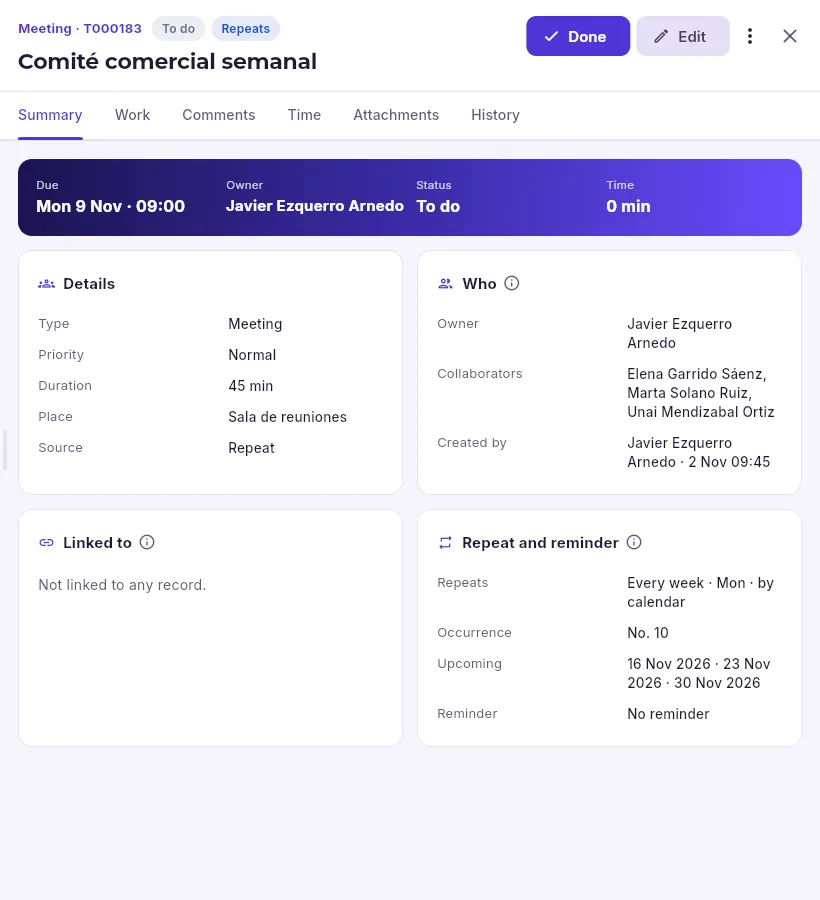 12
- 1A task that repeats says so at the top.
- 2How often, which occurrence this is, the next dates and the reminder.
A task can repeat every so many days, weeks, months or years (or on the last day of the month, or on working days only), and end on a date, after a number of times or never. There are two ways:
- By calendar: the next one is created on its date even if this one is still open (the meeting every Monday).
- On completion: the next one counts from the day you finish this one (checking the cold room 15 days after the last time).
In the calendar, occurrences that do not exist yet are shown with a dashed border.
#Meet or Teams meetings
If the account is connected to Google Workspace or Microsoft 365 and you have connected your personal account (user menu), your tasks and visits go to your Google or Outlook calendar. A meeting task taken to the calendar comes back with its Google Meet or Microsoft Teams link, and its record shows the “Meeting on Google Meet” box (or on Microsoft Teams) with the Join the meeting button.
#List, board and calendar
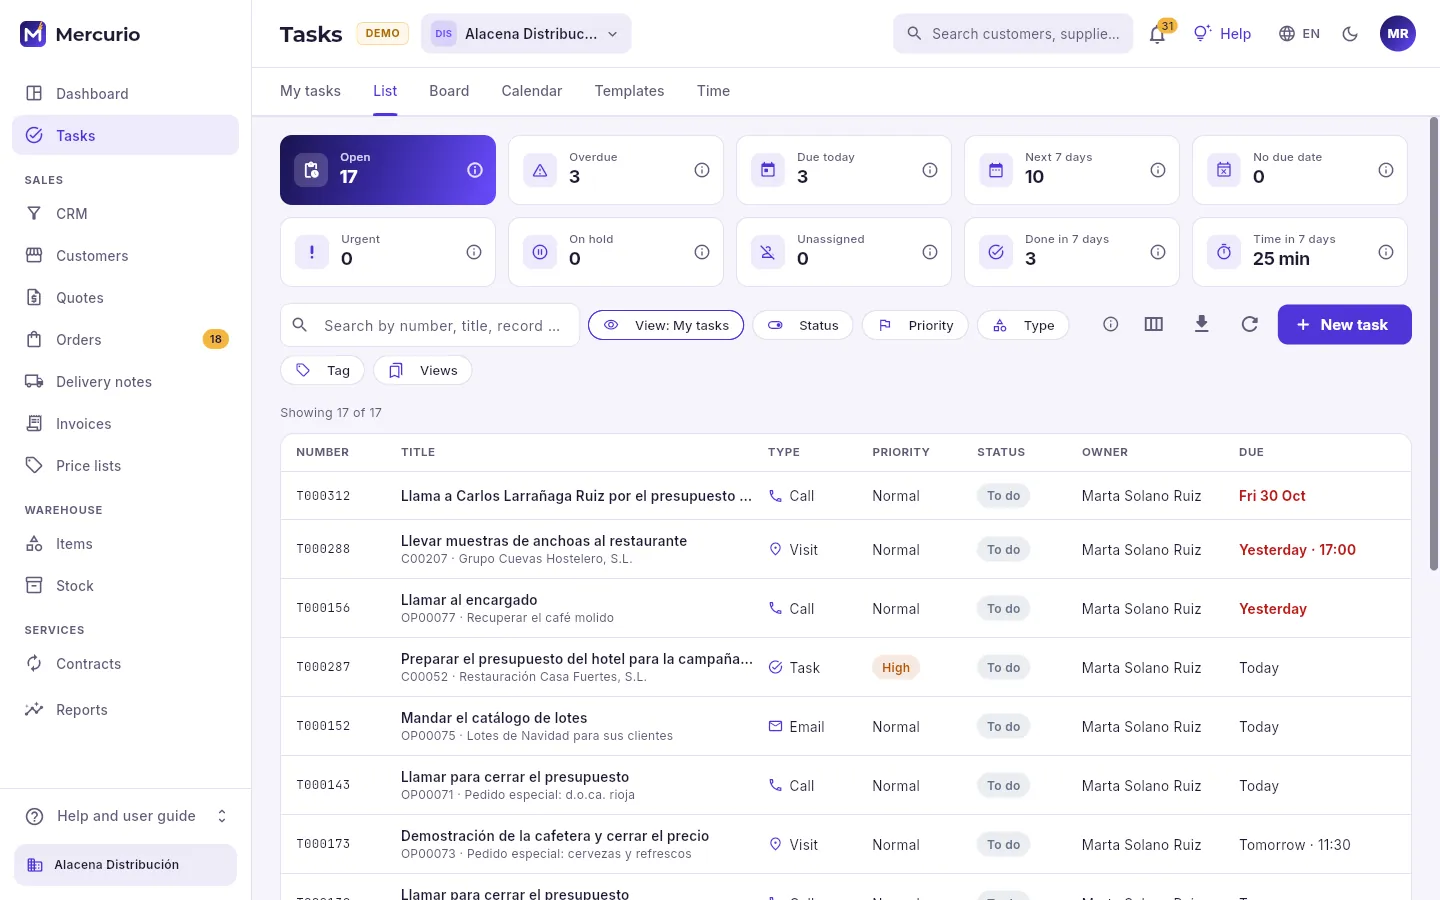 12345
- 1The view’s indicators: open, overdue, due today, next 7 days, no due date, urgent, on hold, unassigned, done and time. Many filter when you click them.
- 2Whose: my tasks, my teams’ tasks, those I assigned, those I am helping with or, with permission, the whole team’s.
- 3Filter by status, priority, type and tag, and save the combination as a view.
- 4Create a task with the full form.
- 5The list, by due date: number, title and record, type, priority, status, owner and due date.
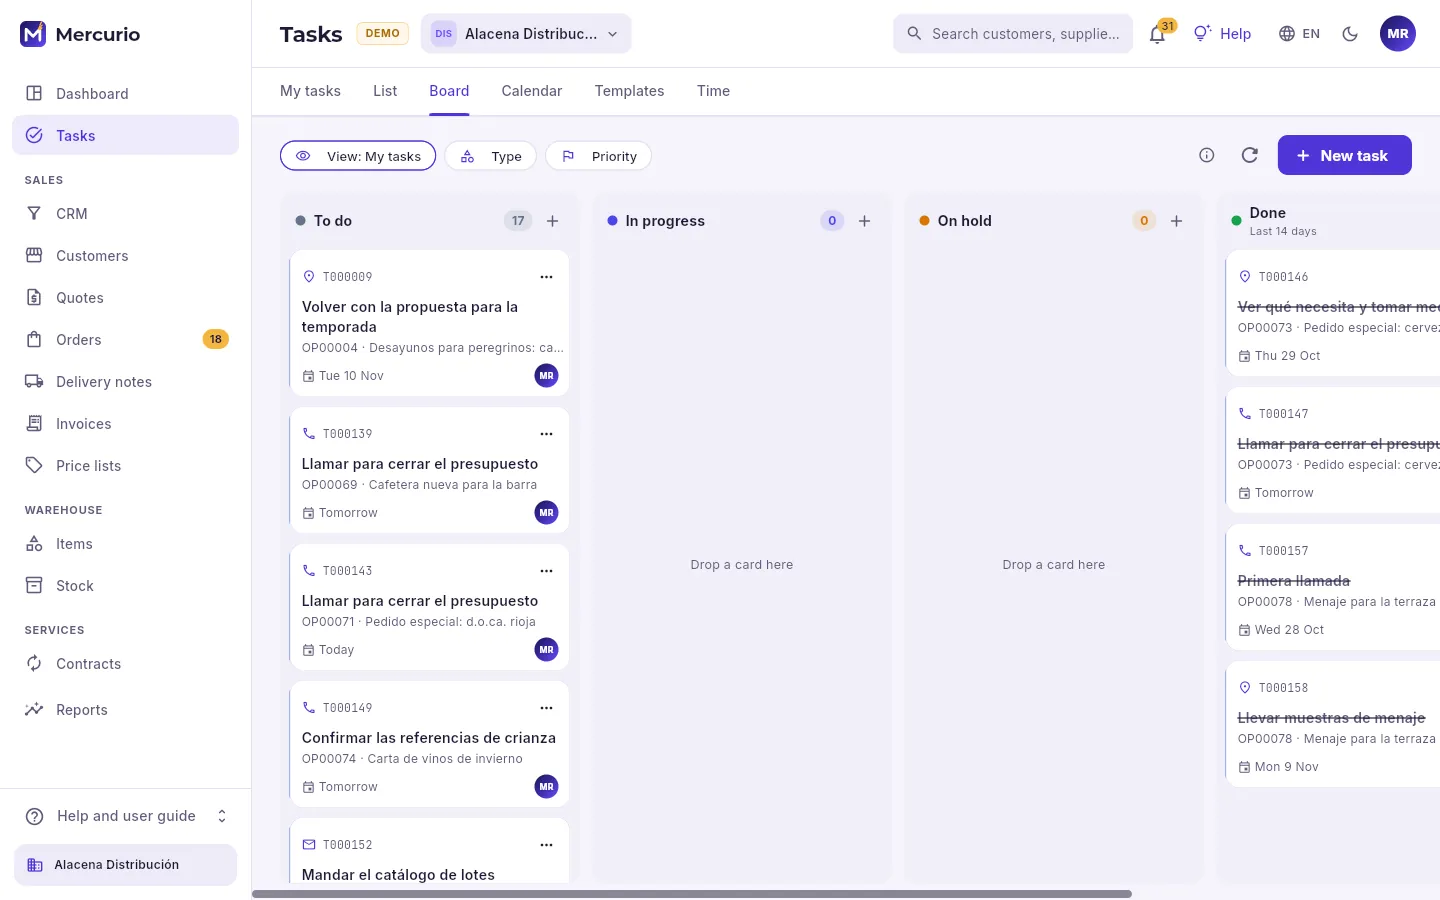 123
- 1One column per status: to do, in progress, on hold and done (those from the last 14 days).
- 2Create a task straight into that column.
- 3Drag a card to another column to change its status (or use its menu).
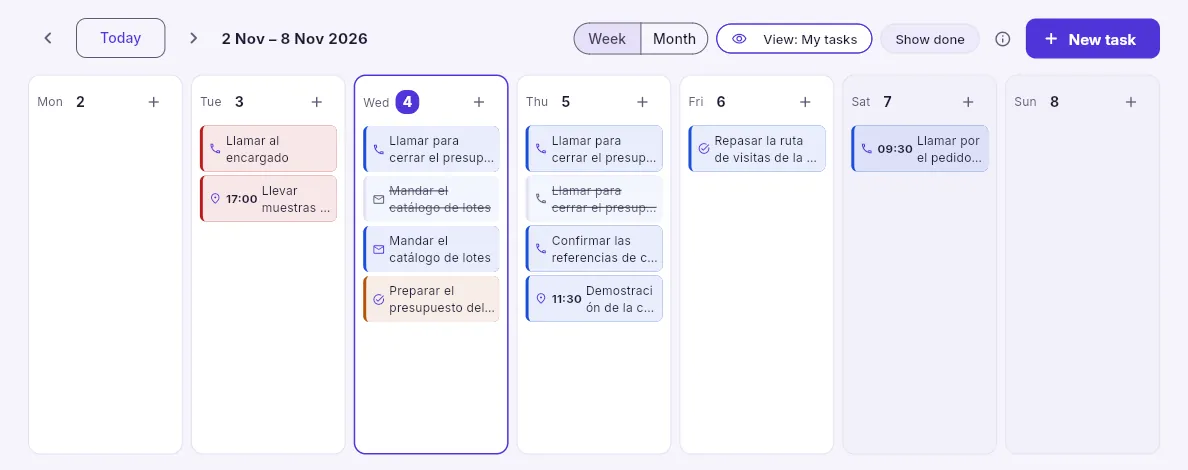 1234
- 1Go to another week or back to today.
- 2Show the week or the month.
- 3Also show the done ones (crossed out).
- 4The + on each day creates a task for that day. Drag a task to another day to move it (it keeps its time).
#Templates
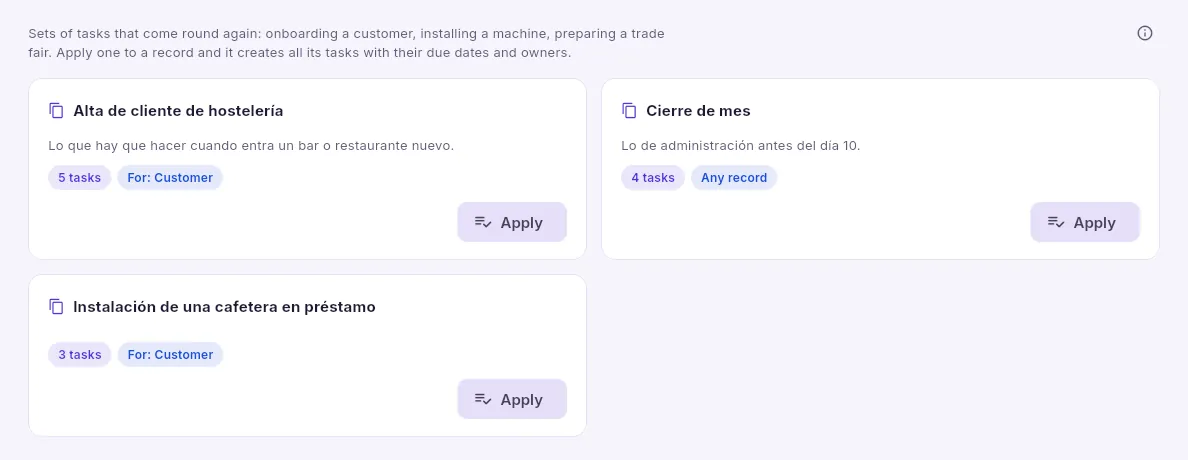 12
- 1A template: a set of tasks that are always done the same way, with how many there are and what type of record they are for.
- 2Apply creates all its tasks, linked to the record you choose, with their due dates counted from a date.
Each task in a template has a relative due date (“2 days before”, “on the same day”, “5 days after”, in working days if you like) and an owner by role: whoever applies the template, the owner you choose when applying it, the customer’s sales rep, a person or a team. Templates can also be applied from the Tasks tab of records and from an automation.
In Tasks → Templates (or in a record’s Tasks tab), click Apply on the template.
Choose the record (unless you are already coming from it) and the reference date: the start date, the installation date, the fair date…
If any task belongs to “the record’s owner”, choose who that is.
Confirm: all the tasks are created with their due dates and owners.
#Time
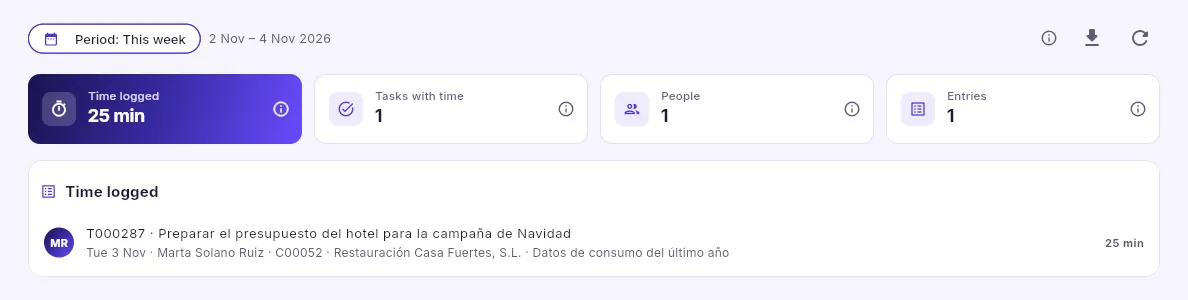 1234
- 1The period: this week, last week, this month or last month.
- 2The time logged, on how many tasks, by how many people and in how many entries.
- 3Export it for a timesheet or to invoice the work to a customer.
- 4Each time entry: the task, who, when and how long.
#The Tasks tab on records
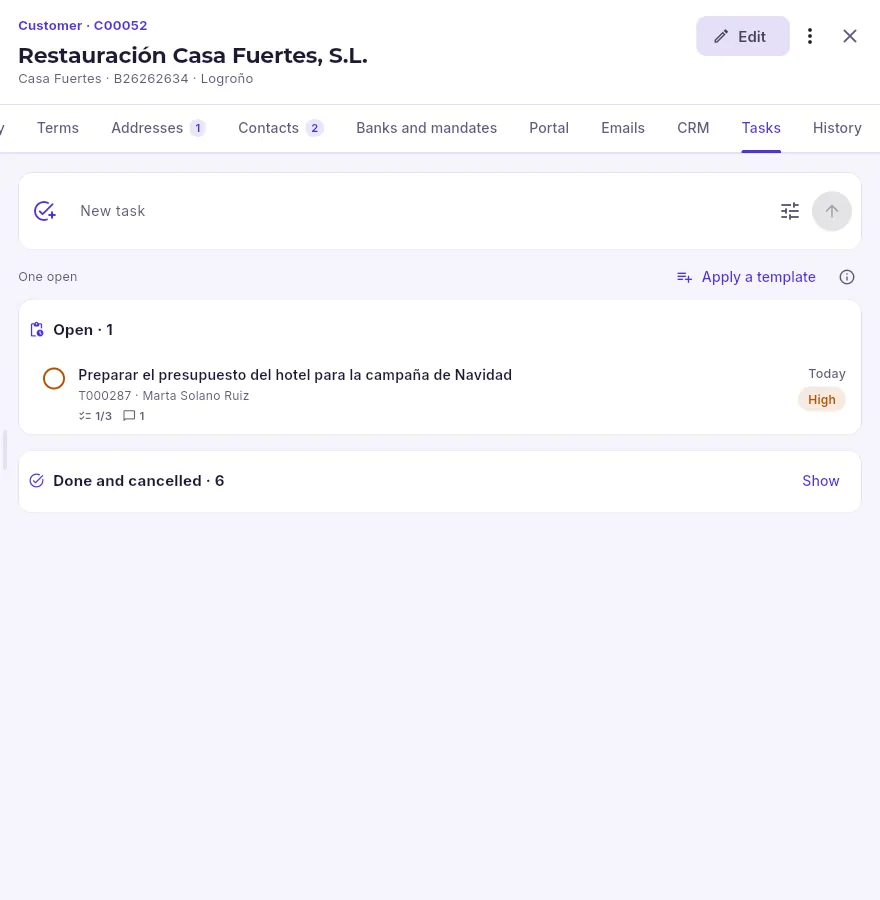 12
- 1The Tasks tab in a customer’s record (also in suppliers, documents, contracts, jobs, opportunities…).
- 2Quick add: the task stays linked to this record.
The tab shows the tasks linked to the record and, for a customer or supplier, also those on their documents, contracts and jobs (private ones only if you are involved), open ones first. From there you can also apply a template meant for that type of record.
Sales
CRM
Day-to-day sales work: the leads that come in, opportunities until they are won or lost, visits and their routes, each sales rep’s portfolio with their priorities, targets and commission, and the sales analysis of every customer.
The CRM is the sales rep’s desk. It gathers everything that happens before an order —who has asked, which opportunities are open, who needs a visit— and what is worth knowing about each customer so you do not lose them. It is not a separate program: it works on the same customers, quotes and invoices as the rest of Mercurio, so whatever is invoiced counts towards targets and commission on its own.
- 1LeadSomeone asks: through the website, the portal, email, the phone or a trade fair.
- 2OpportunityIf it is worth it, it becomes a customer and an opportunity, with its amount and its decision date.
- 3QuoteSending it moves the opportunity to “proposal”; accepting it, to won with its amount.
- 4CustomerTheir sales status and their analysis tell you how things are going and what to do so you do not lose them.
Along the top are the tabs: Today, Opportunities, Leads, Visits, Routes, Portfolio, Targets and Commission (whoever sets up the CRM also sees Settings). A sales rep sees their own; whoever runs the team can choose whose to see.
#Today: your day
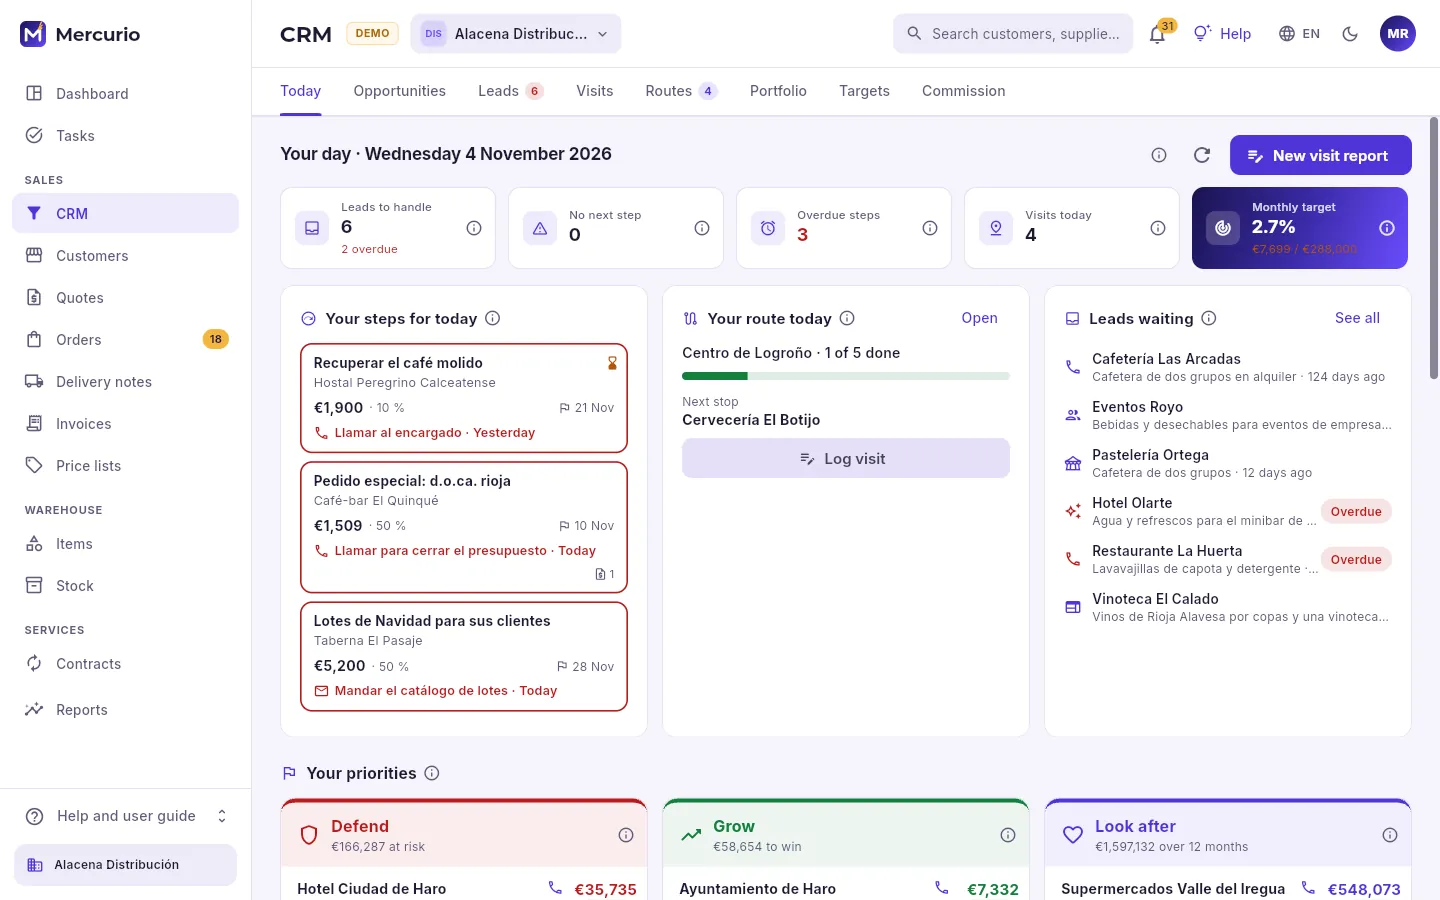 1234567
- 1Your day, with the company’s date. The ⓘ explains where each thing comes from.
- 2What is urgent, in figures: leads to handle (and those already past their deadline), opportunities with no next step, overdue steps, today’s visits and how you are doing against the monthly target. Click one to go to it.
- 3The next steps of your opportunities that are due today or already overdue, oldest first.
- 4Your visit route for today: how many stops you have done and the next one, with Log visit when you arrive.
- 5The leads with the nearest reply deadline; in red, those already past it.
- 6Log a visit, a call or a meeting you have just had.
- 7Below, your priorities: who to defend, where to grow and who to look after.
Today is the first thing worth checking in the morning. It all comes from a single database query with your leads, your opportunities, your routes and your customers’ sales summary, so it opens instantly, on your phone too.
#Your priorities: defend, grow and look after
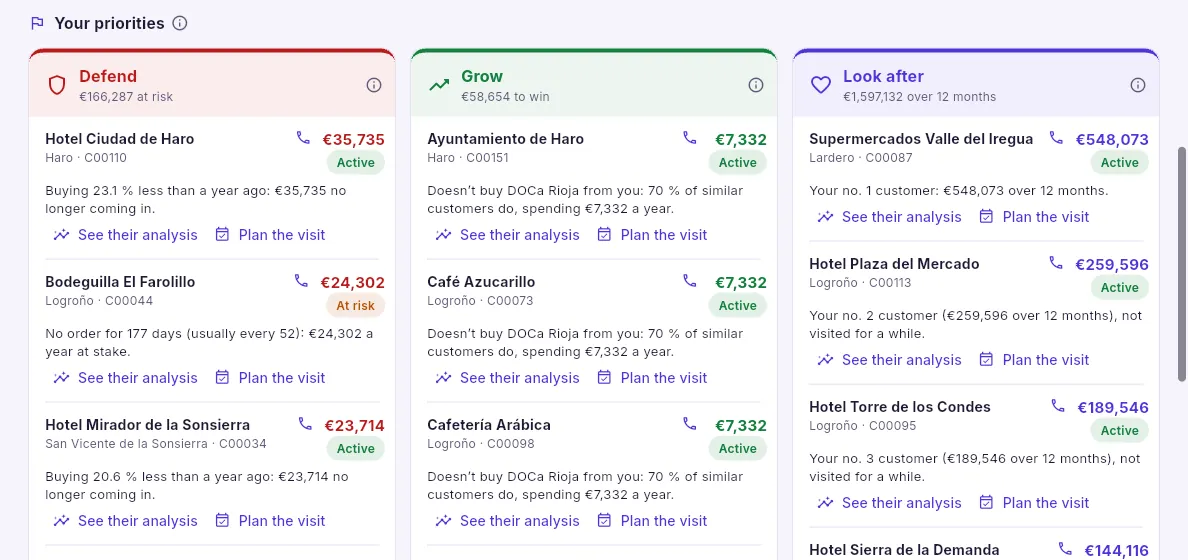 1234
- 1Defend: customers who have stopped ordering when they used to, who buy much less than a year ago or who were lost recently, with the euros at stake.
- 2Grow: the family that customers like them buy and they do not, or what they are short of their annual potential.
- 3Look after: your best customers by purchases over the last 12 months; flagged, those who have not had a visit for a while.
- 4Each customer with a sentence explaining why they are there, their phone, See their analysis and Plan the visit.
#Opportunities and their board
An opportunity is a possible sale to a customer: what they want, how much it could be worth and when they will decide. It moves through the pipeline stages (new, qualified, proposal sent, negotiation…) until it is won, lost or postponed. Each stage has its probability, and the weighted amount is the amount times that probability: what, realistically, you expect to win.
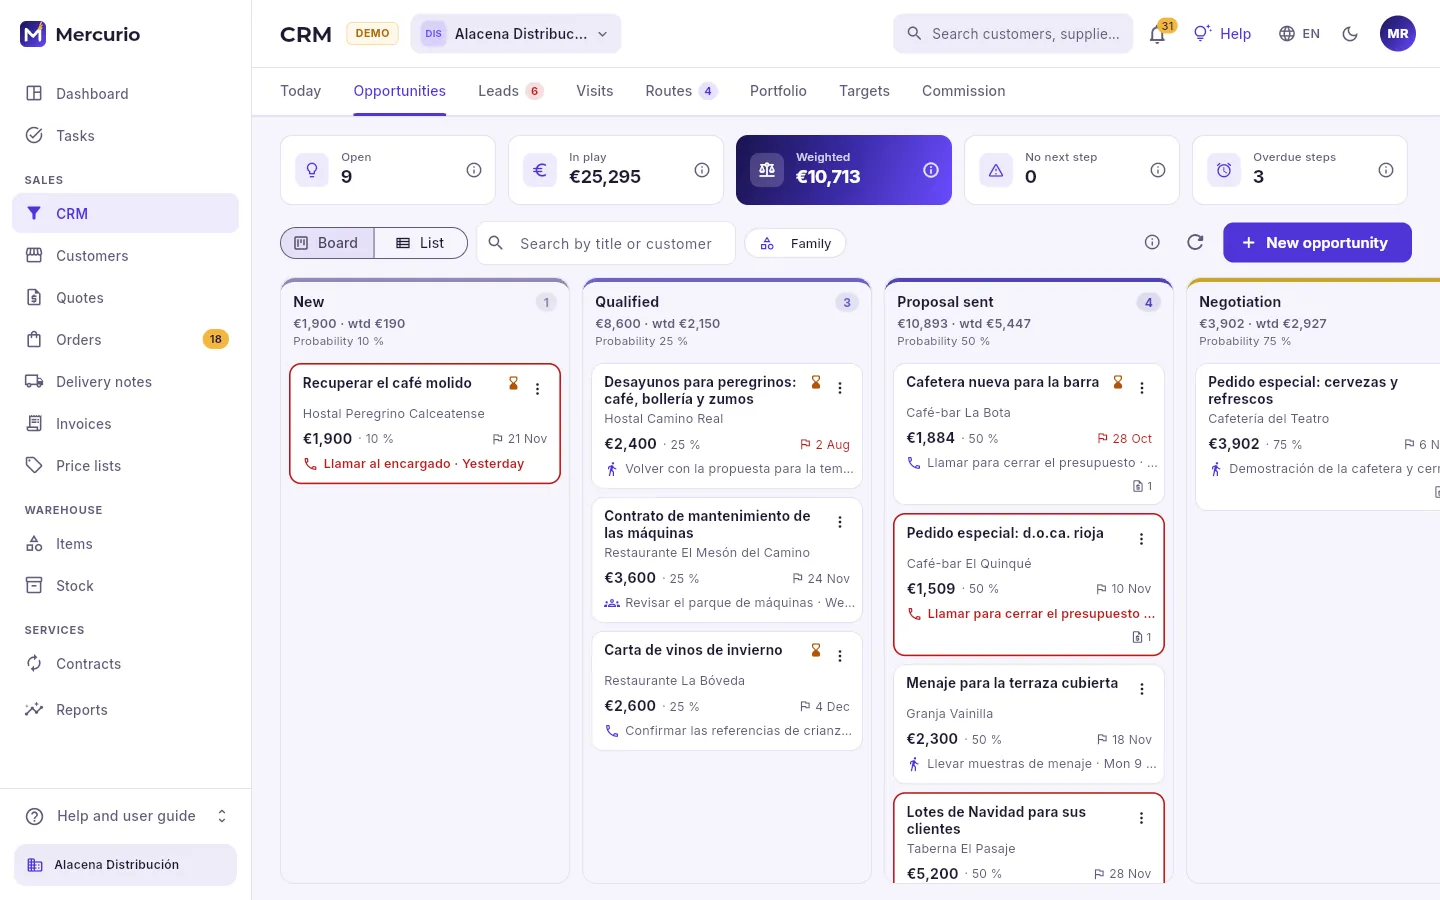 123456
- 1How many are open, what they add up to, the weighted amount and those that need attention (no next step, or an overdue one: click them to filter).
- 2View them as a board (one column per stage) or as a list (with what was won and lost in 12 months, the win rate and the average cycle).
- 3Search by title or customer and filter by family.
- 4Open a new opportunity.
- 5Each column shows how many it holds, their amount and their weighted amount.
- 6Each card: title, customer, amount and probability, decision date and its next step. In amber, no next step; in red, overdue; the clock, it has been in the stage too long.
To move an opportunity to another stage, drag it to another column (on a phone, press and hold) or use its Move to… menu. While you drag it, the destination column lights up.
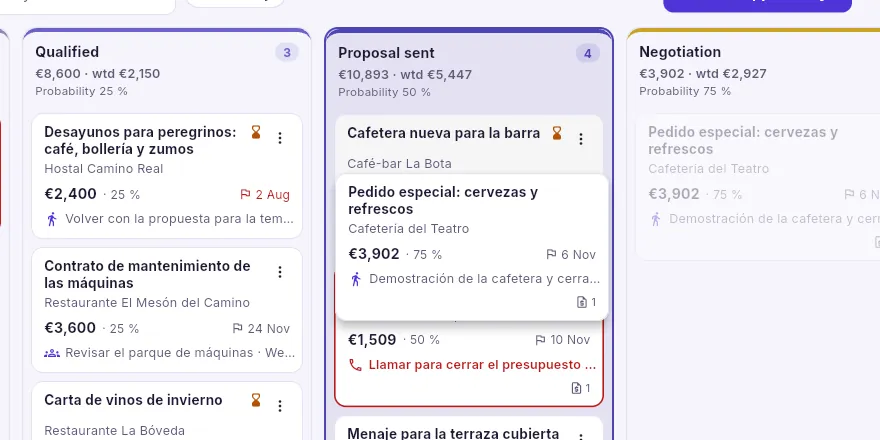 1
- 1The card, dragged over the destination column: dropping it changes its stage.
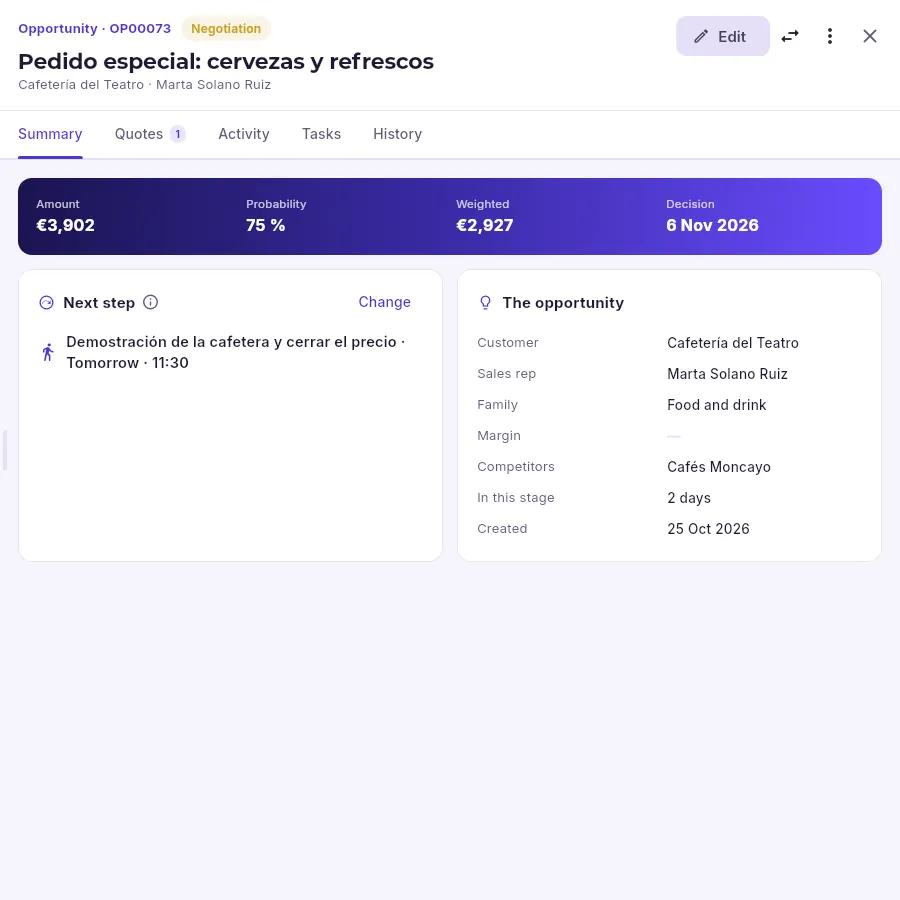 1234567
- 1Its code, its stage, its title, the customer and the sales rep.
- 2Change its details: amount, margin, family, competitors, decision date…
- 3Move it to another stage; in the menu, win it, lose it or postpone it, and create or link a quote.
- 4Its quotes, the activity (visit reports and contacts), its tasks and the history of stage changes.
- 5Amount, probability (its stage’s, or the one you give it), weighted amount and the date it will be decided.
- 6What will be done with it next; Change to set another one.
- 7Its details: customer, sales rep, family, margin, competitors and how long it has been in the stage.
In CRM → Opportunities, find its card on the board.
Drag it to the column of its new stage and drop it (or open its Move to… menu and choose the stage).
If it has no next step pending, write what you will do and when: it is recorded as a task for you.
To win it, lose it or postpone it, use the menu on its record: it will ask you for the final amount, the reason or the date it comes back.
#Leads and their qualification
A lead is someone who asks: through the website form, the customer portal, email, the phone, a trade fair, a referral or Claude. Mercurio checks whether they are already a customer (by tax ID, email or the last nine digits of their phone number), warns you if it is a repeated request and assigns it by itself: to the customer’s sales rep or, if they are new, through the assignment rules (area, channel, postcode, family) to the sales rep with the lightest load.
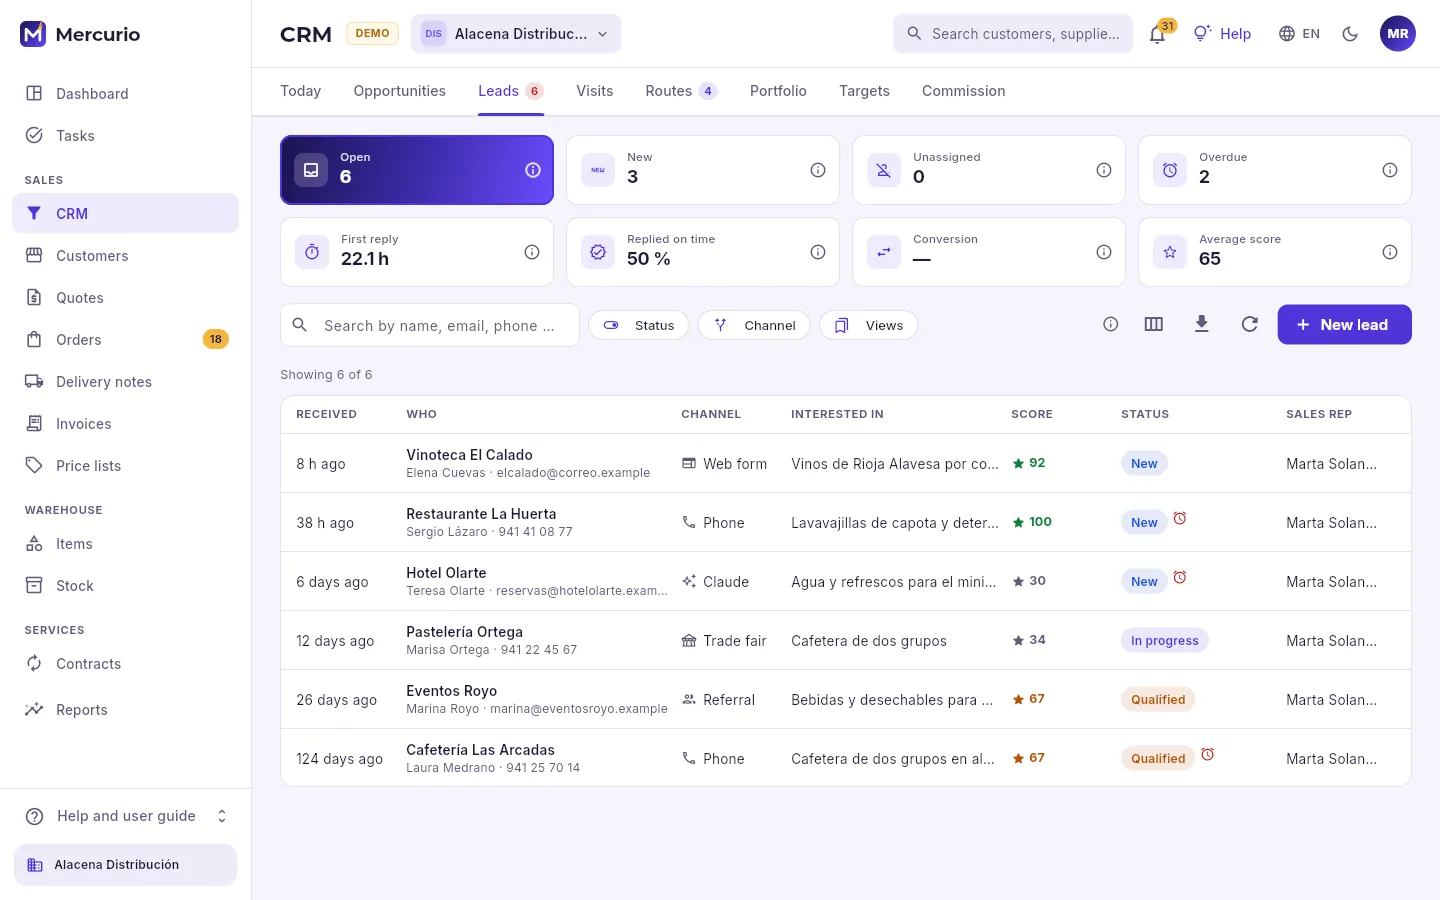 12345
- 1Open leads, new ones (untouched), those with no sales rep and those already past their first-reply deadline. Click one to filter.
- 2How they are handled: hours to the first reply, how many on time, how many are converted and the average score.
- 3Search, and filter by status and channel.
- 4Record one that comes in by phone or at a trade fair.
- 5Each lead: when it arrived, who is asking, through which channel, what they are interested in, its score, its status and its sales rep.
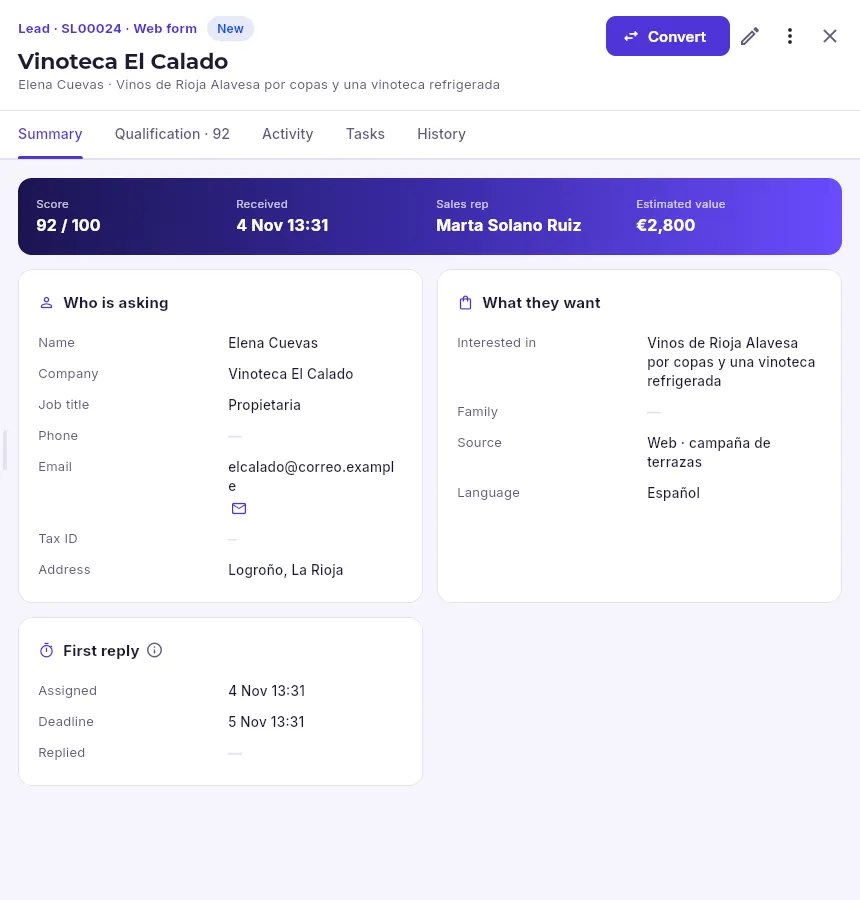 12345678
- 1Its code, the channel it came through and its status.
- 2Convert into a customer (the existing one, or a new one with their details) and, if you like, into an opportunity.
- 3Take it yourself, mark it in progress, qualify it, log a contact or discard it (with the reason).
- 4The qualification questions and the points for each answer.
- 5Its score from 0 to 100, when it arrived, its sales rep and the estimated amount.
- 6Who they are: name, company, job title, phone, email and address.
- 7What they are interested in, in their own words, the family, the source (the campaign, the trade fair…) and their language.
- 8The first-reply deadline: from when it is assigned, the hours set in the CRM settings.
In CRM → Leads, start with those that are Overdue and with the new ones.
Open the lead: if it has no sales rep, I’ll take it (in its menu) makes it yours.
Call or write and log the contact; answer what you know in the Qualification tab.
If it is worth it, click Convert: choose the customer it matches or add a new one, and tick whether you also want to create the opportunity.
If it is not, Discard it with the reason: it stays in the history and can be reopened.
#Visits and the visit report
Every visit, call, meeting, video call or email with a customer is logged in a visit report: how it went, what was discussed and what needs doing next. Visit reports feed the customer analysis and the routes (the last contact), and they are best logged from your phone, as you leave the customer.
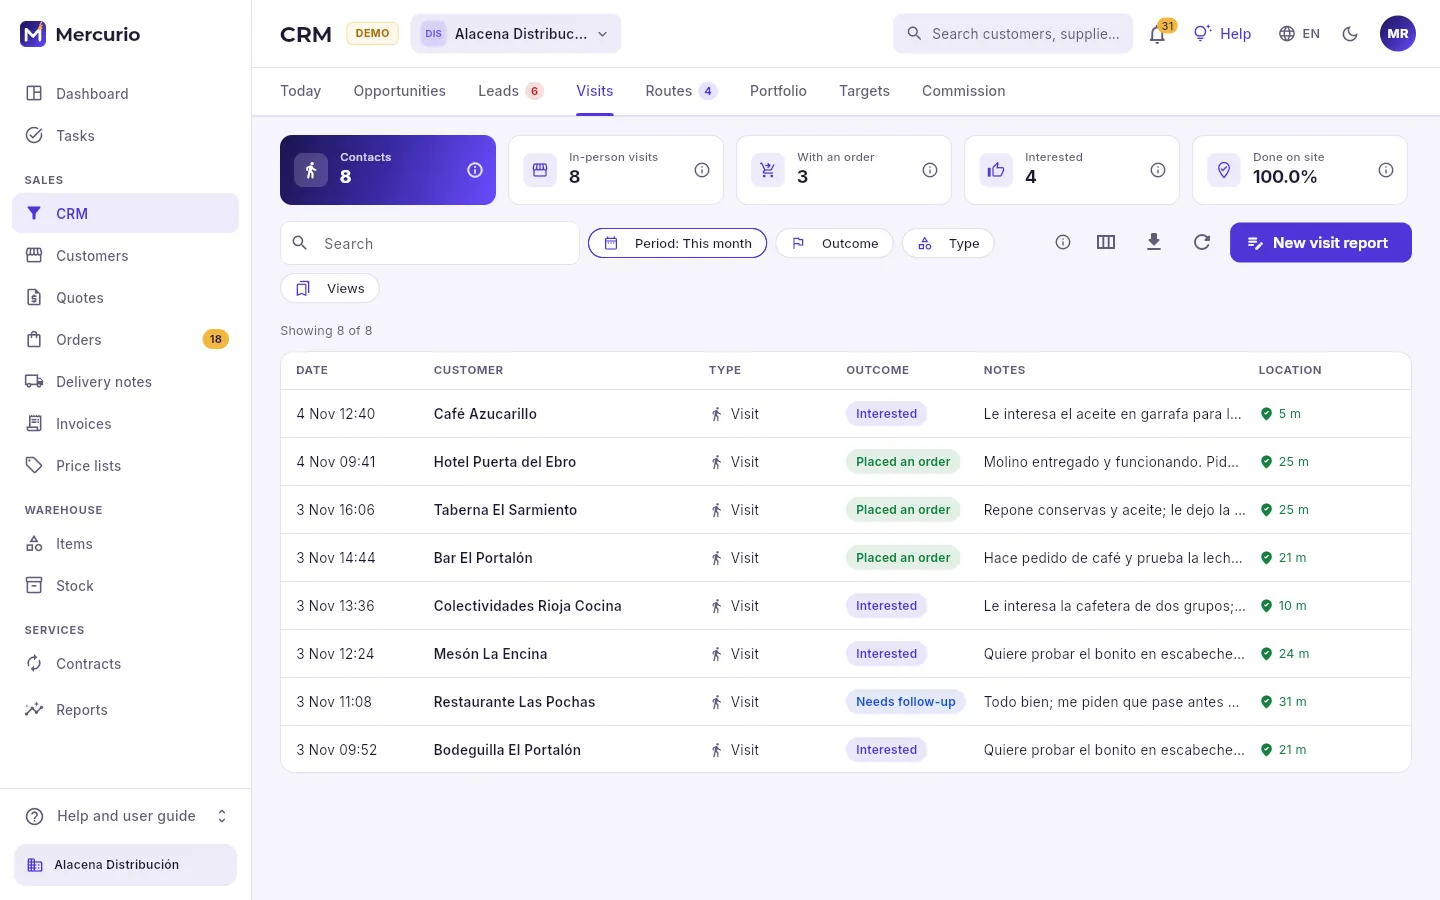 1234
- 1The contacts in the period, how many in person, how many ended in an order or with interest, and what share of the visits was logged at the customer’s premises.
- 2The period and the filters by result and type of contact.
- 3Log a visit report.
- 4The visit reports, latest first: customer, type, result, notes and whether the location was at the customer’s.
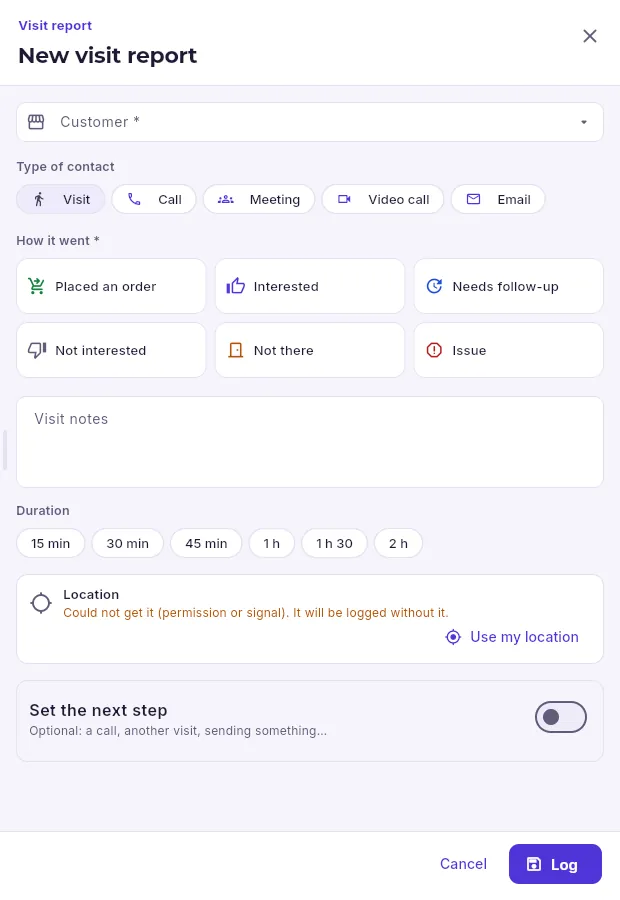 1234567
- 1The customer (already filled in if you come from their record, a route or an opportunity).
- 2Type of contact: visit, call, meeting, video call or email.
- 3How it went (required): placed an order, interested, needs follow-up, not interested, not there or issue.
- 4What they said, what you showed them, what is still pending.
- 5The location when logging it (if the browser provides it): it tells whether you were at the customer’s.
- 6The next step: a call, another visit, sending something. Required if there is an open opportunity.
- 7Saves the visit report.
When the visit is over, open CRM → Today and click Log visit on your route (or New visit report if it was not planned).
Check the customer and choose the type of contact and how it went.
Write the notes and the duration; let the browser add the location.
If something is still pending, switch on Set the next step with what you will do and when.
Click Log.
#Routes
A route is a day’s visit plan: the customers, in the order you will go round them. Mercurio suggests who to see from your portfolio and opens the route in Google Maps.
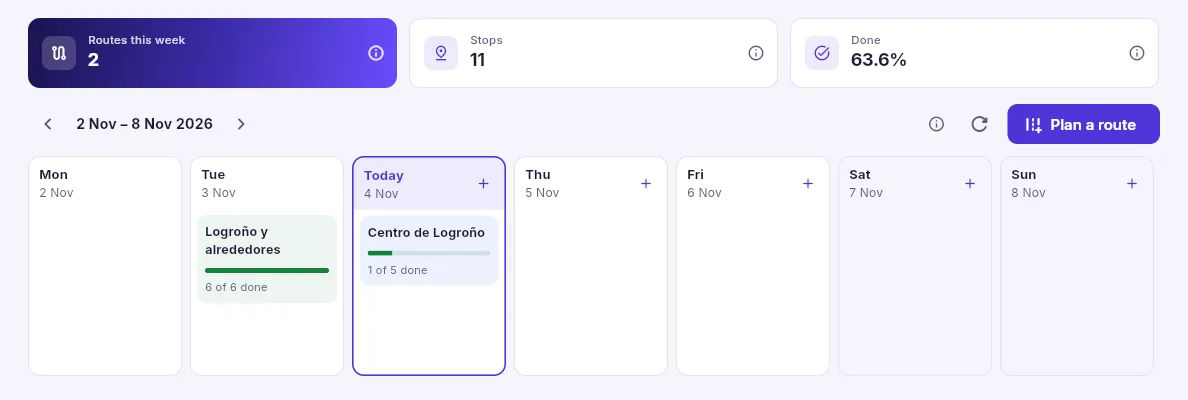 1234
- 1This week’s routes, their stops and how much has been done.
- 2Change week.
- 3Plan a new route (or with the + on each day).
- 4Each route on its day, with its completed stops: click to open it.
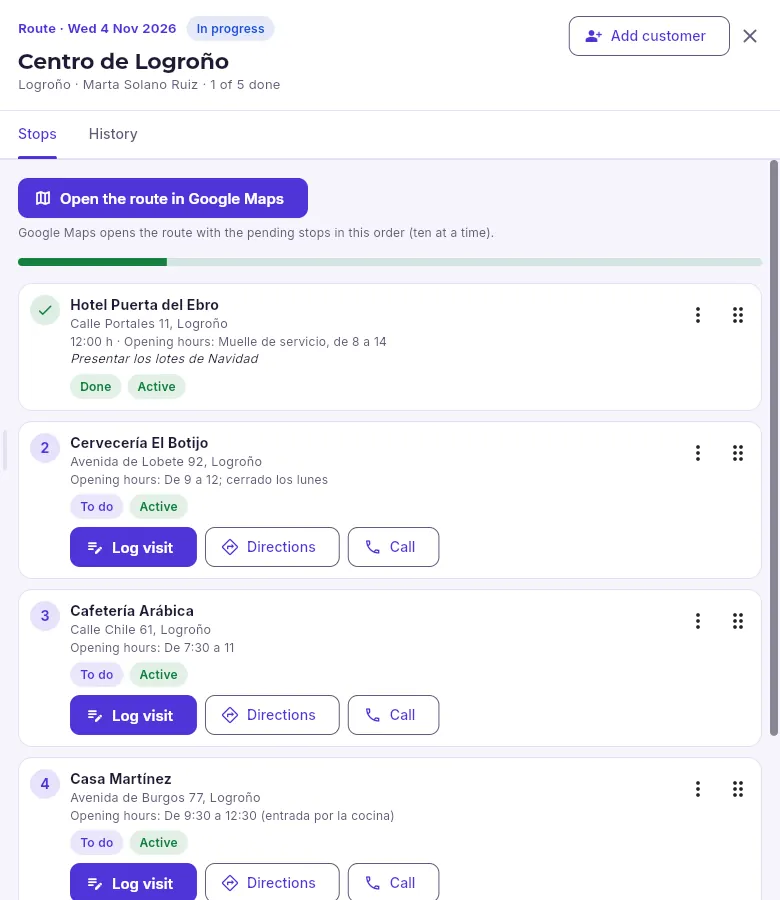 123
- 1Add another customer to the route.
- 2Google Maps opens the route with the pending stops, in order.
- 3At each stop: log the visit, get directions and call.
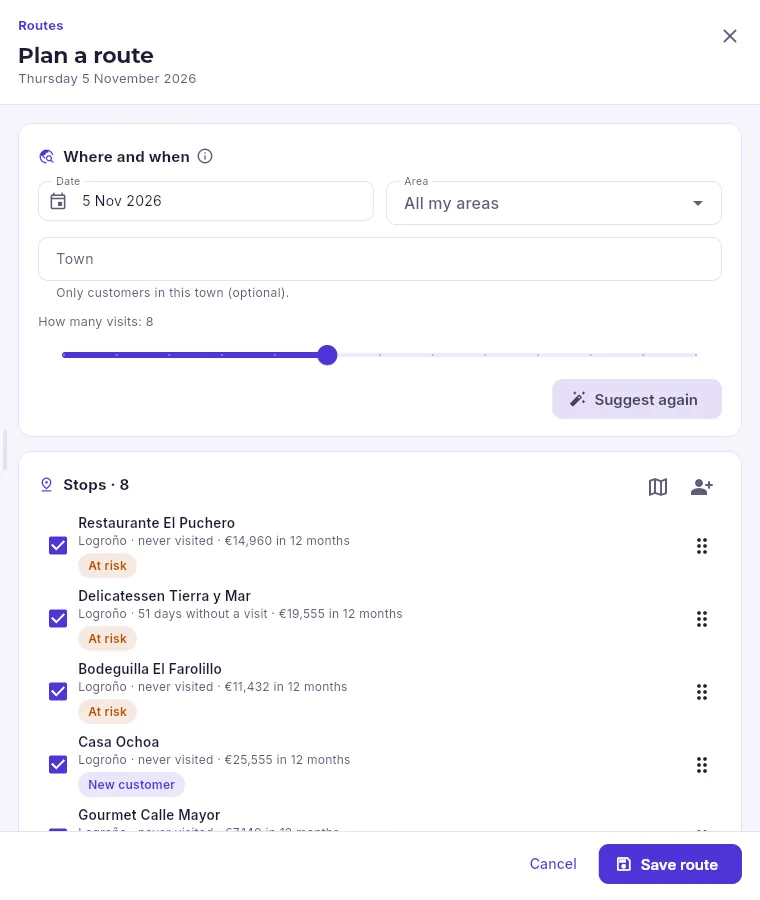 1234
- 1The day, the area (or all of yours), the town if you like and how many visits.
- 2The suggestion is redone with whatever you change above.
- 3The suggested customers, each with its reason; remove the ones you do not want and drag them into order.
- 4Saves the route on its day.
In CRM → Routes, click Plan a route (or the day’s +).
Choose the day, the area and, if you like, the town and how many visits.
Click Suggest customers: Mercurio suggests those from your portfolio by priority and in route order.
Remove the ones you do not want, add others and drag them into order.
Give it a name if you like and click Save route.
#Portfolio
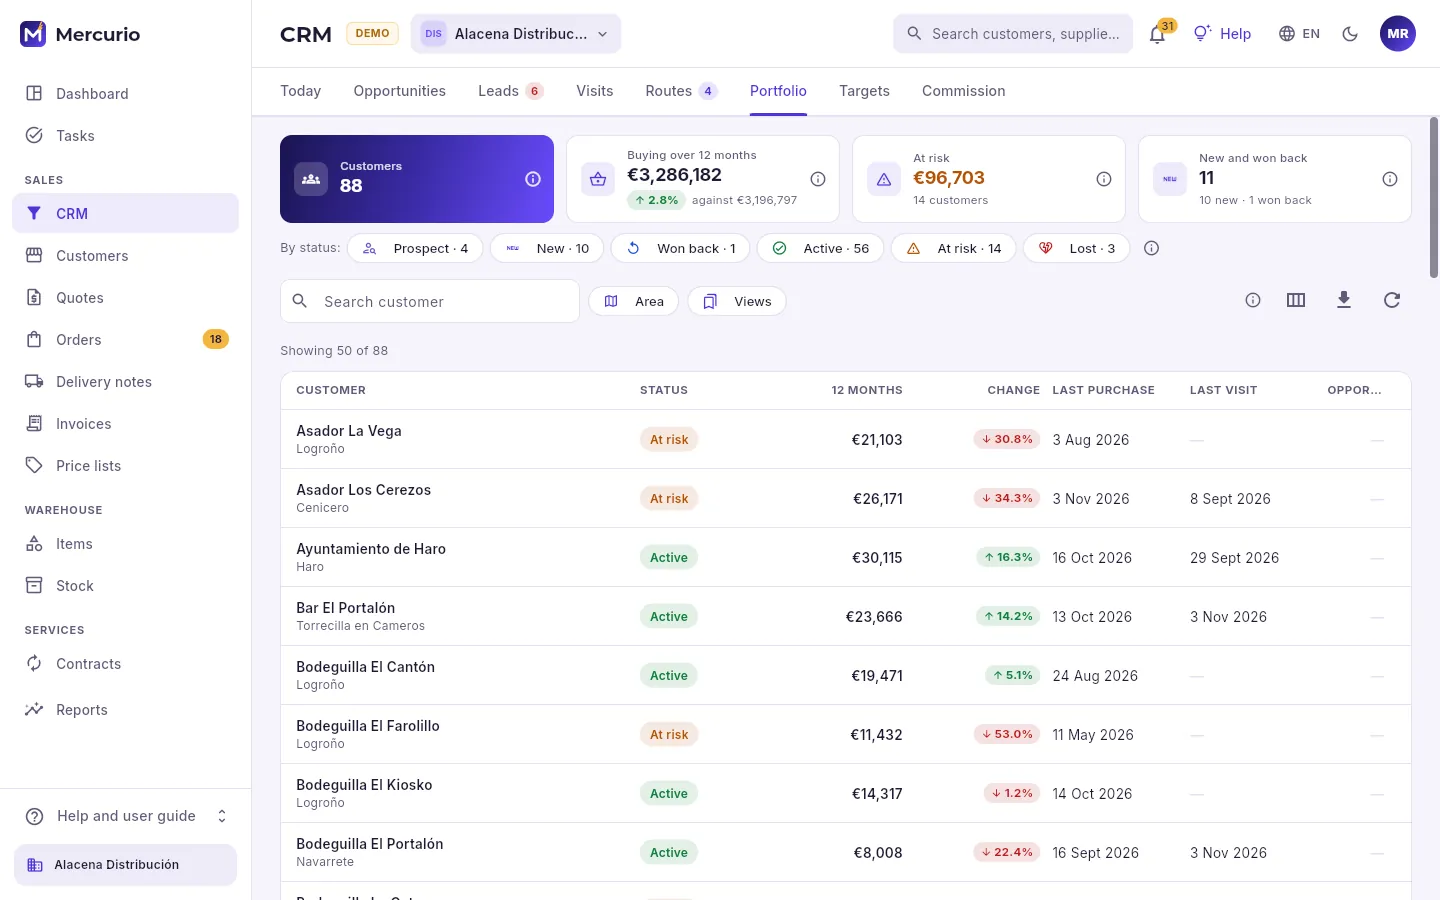 1234
- 1The customers in your portfolio, what they buy over 12 months against the previous 12, what the at-risk ones have stopped buying, and the new and won-back ones.
- 2How many there are in each sales status; click one to see them.
- 3Search, filter by area and save views.
- 4Each customer with their status, what they buy over 12 months and how it has changed, their last purchase, their last visit and their open opportunities. Click one to see their sales analysis.
Each customer’s sales status is set by rules on their purchases over the last 12 months and the previous 12, for each company:
| Status | What it means |
|---|---|
| Prospect | They have not bought anything yet. |
| New | Their first purchase is recent. |
| Won back | They have started buying again after a long time without doing so. |
| Active | They buy as usual. |
| At risk | They have stopped ordering when they used to, or buy much less than a year ago. |
| Lost | They have not bought for more months than the settings allow. |
| Dormant | They have gone even longer without buying. |
The status is reviewed every week and after each invoice, and it only alerts you when it changes. It can be set by hand with a note (the automatic review respects it until you put it back on the rules) from the customer’s analysis.
#A customer’s sales analysis
The sales analysis brings together on one screen everything worth knowing about a customer before you call or visit them. It opens from the portfolio, from the priorities (See their analysis) and in the CRM tab of each customer’s record.
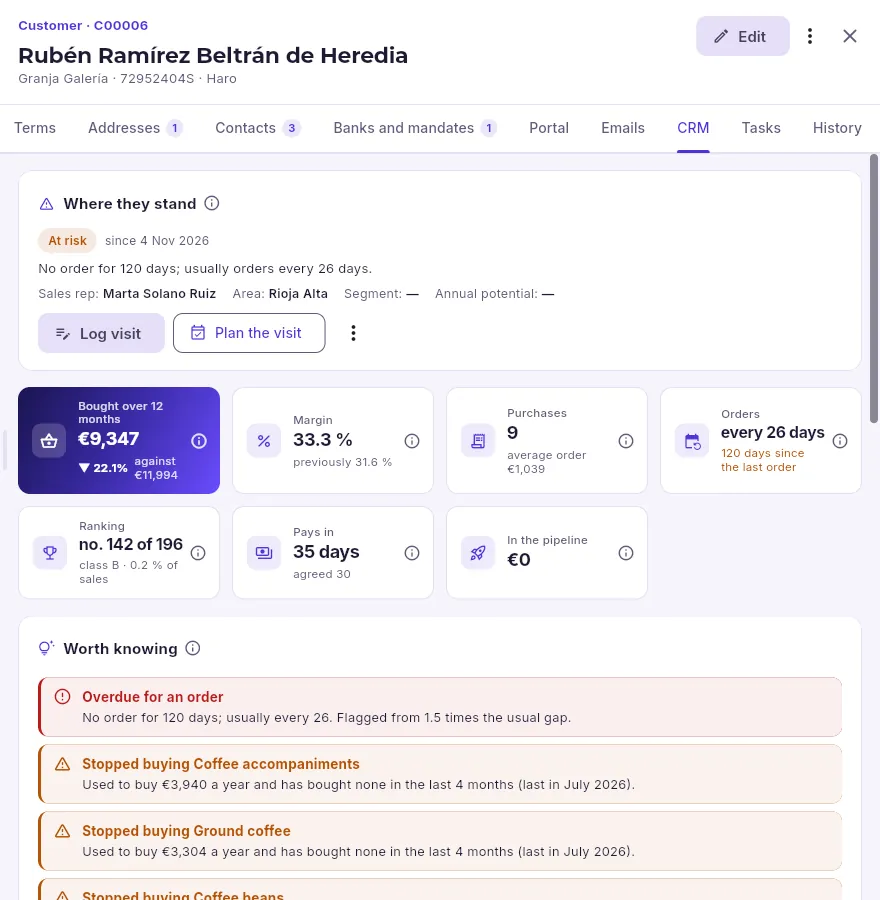 12345
- 1The CRM tab of the customer’s record.
- 2Where they stand: their sales status and why, since when, their sales rep, their area, their segment and their annual potential.
- 3Log a visit, or plan it into your route for a given day.
- 4Their figures: 12-month purchases and how they have changed, margin, number of purchases and average ticket, how often they order, their ranking among customers, how many days they take to pay and what is already in the pipeline.
- 5Worth knowing: alerts with their reasons, from the most serious (red) to those that are just for information.
Further down come the 24-month trend with what is already in the pipeline (orders, quotes, opportunities and recurring fees), this year against last year month by month, the mix by family (in amber, those they have stopped buying), their seasonality and strong months, how they pay (actual days to payment, delay, unpaid bills and credit used), their price against their segment’s average, their visits, their opportunities and the history of their sales status.
#Targets
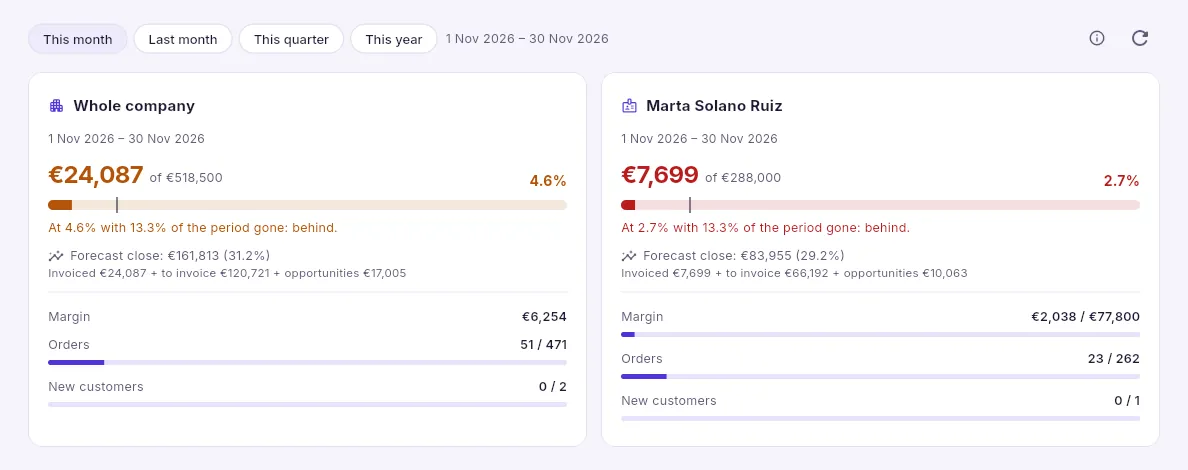 123
- 1The period: this month, last month, the quarter or the year.
- 2The target for the whole company and, next to it, each sales rep’s: what has been invoiced against the target, with a mark showing the time elapsed.
- 3The other targets: margin, orders and new customers.
#Commission
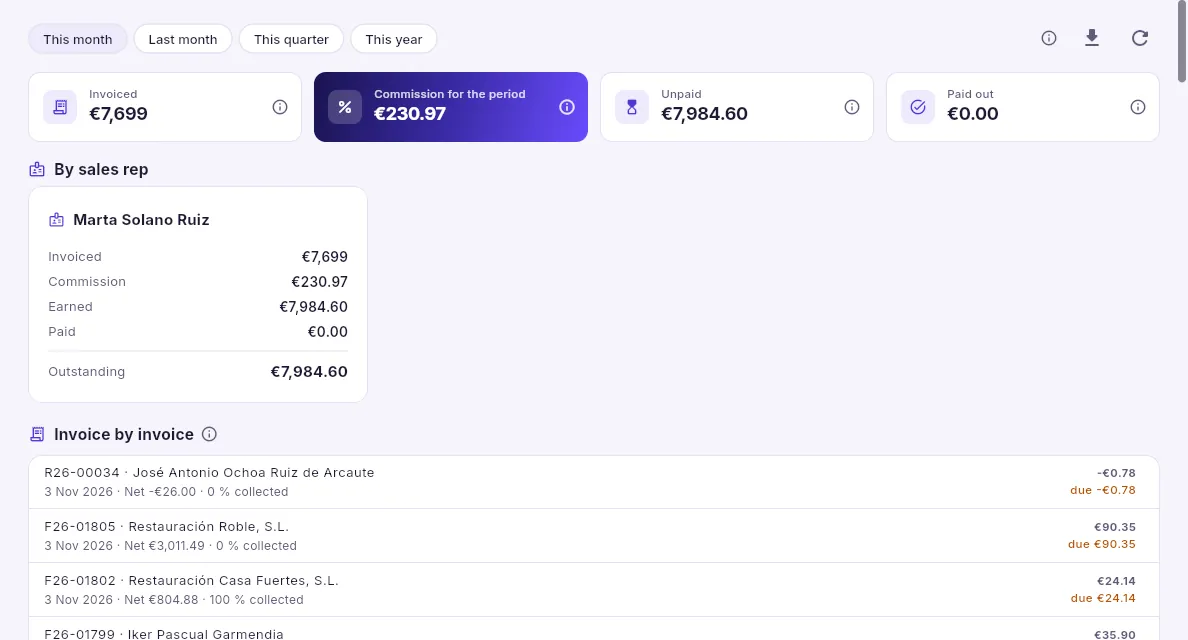 123
- 1What was invoiced with a sales rep in the period, its commission, what is still to be paid out and what has already been paid out.
- 2Each sales rep in detail: commission, earned (what has already been earned), paid out and outstanding.
- 3Each invoice with its commission, what has been collected and what is outstanding: click one to open it.
Sales
Customers
The companies and people you sell to, shared by the whole group, with their terms with each company, their addresses, contacts and banks, and what they owe you.
A customer is one record for the whole group: their company name, tax ID, addresses and contacts are the same for every company. What changes from one company to another are their terms (price list, discounts, payment method, credit risk, sales rep) and their figures: if Alacena Distribución and La Alacena Gourmet both sell to them, each has its own.
#The list
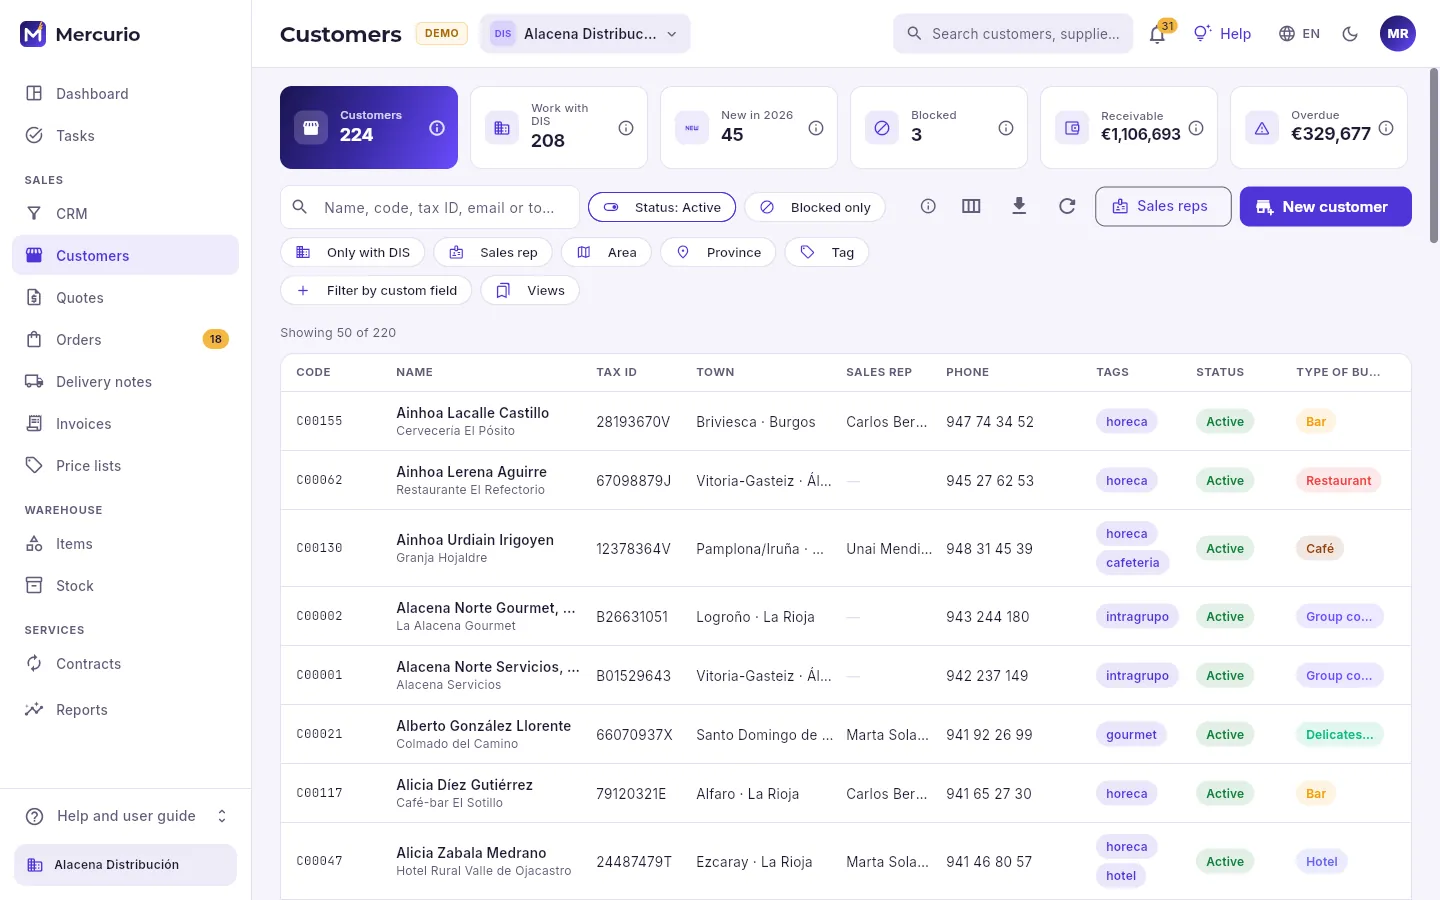 12345678
- 1The indicators: how many customers there are, how many work with the selected company, the new ones this year, the blocked ones, what is outstanding and what is overdue. Each with its ⓘ.
- 2The search box: by name, trading name, code, tax ID, email or town.
- 3Active, inactive or all (active by default).
- 4The filters: blocked, only those of the selected company, by sales rep, area, province, tag or a custom field. Views saves a combination of filters so you can come back to it.
- 5Which columns are shown, exporting what is filtered to a spreadsheet and reloading.
- 6The account’s sales reps: their area, their commission and which customers are assigned to each.
- 7Add a customer.
- 8The list: code, name (with the trading name underneath), tax ID, town, sales rep, phone, tags, status and type of business. Click a row to open its record.
The list brings customers 50 at a time (above it, it says how many there are: “Showing 50 of …”) and, at the end, Load more brings the next 50. You do not need the whole list to search or filter, because the database does the search across all of them. Filters combine with each other.
#A customer’s record
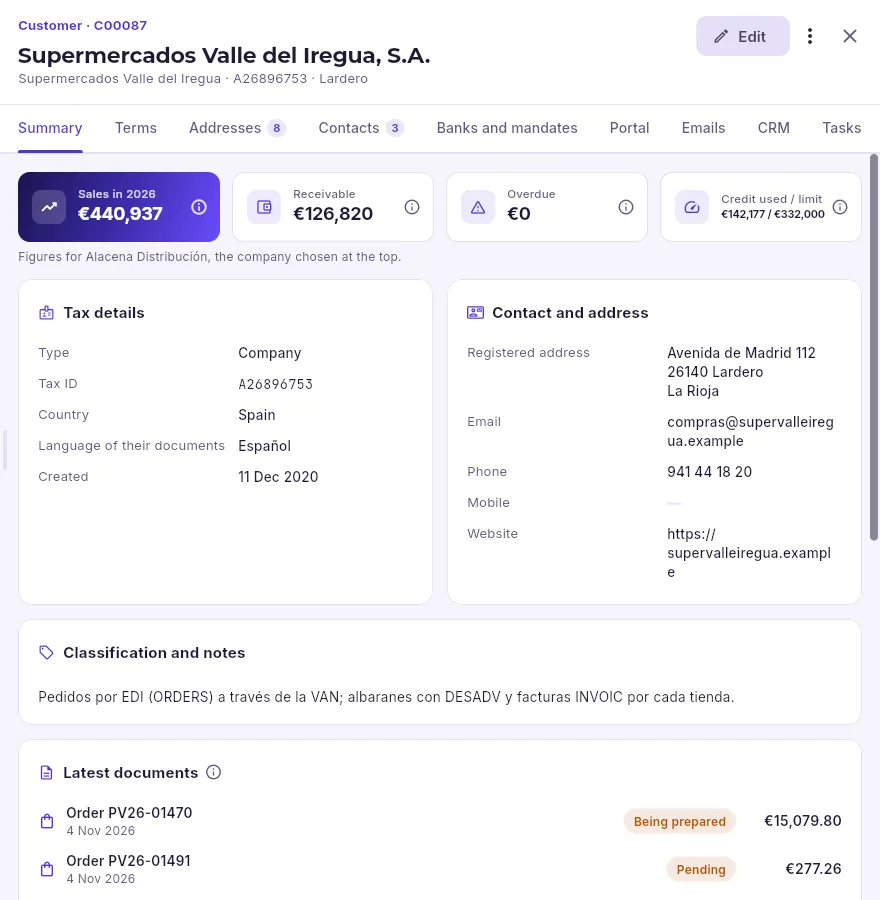 1234567
- 1Their code, name, trading name, tax ID and town.
- 2The record opens read-only: to change their details, Edit.
- 3More actions: block or unblock them, deactivate or reactivate them, and make them a supplier as well.
- 4The tabs: summary, terms, addresses, contacts, banks and mandates and, depending on the account’s features, portal, emails, CRM and tasks; the last one, history (slide the bar to see the ones that do not fit).
- 5Their figures with the selected company: sales this year, outstanding, overdue and credit used against their limit.
- 6Their tax and contact details, shared by the whole group.
- 7Their latest orders, delivery notes and invoices: click one to open it.
The record opens in the right-hand panel and the list stays underneath: you can go from one customer to another without losing your filters. Widen it by dragging its left edge (it remembers the width you leave it at).
#Terms with each company
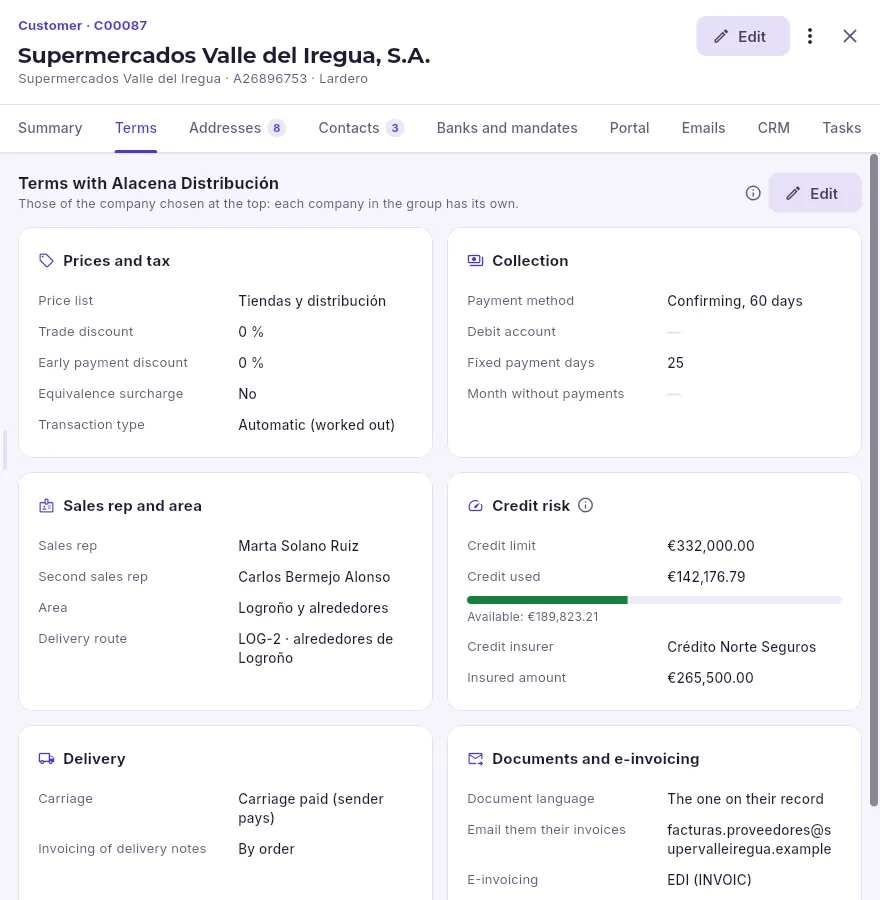 12345
- 1The terms belong to the company selected at the top: each company in the group has its own.
- 2Their price list, their discounts, whether they carry equivalence surcharge and the transaction type (domestic, intra-EU, export…).
- 3How they pay: payment method, debit account, fixed payment days and the month with no payments.
- 4Who looks after them, their area and their delivery route.
- 5Their credit limit and how much they have used, with what is still available.
Further down are delivery (carriage and how often their delivery notes are invoiced) and documents and e-invoicing (in which language they go out, whether they are emailed and in which format). Documents use everything you put here on their own: when you create an order for them, their price list, discounts and payment method are already there.
#Addresses, contacts and banks
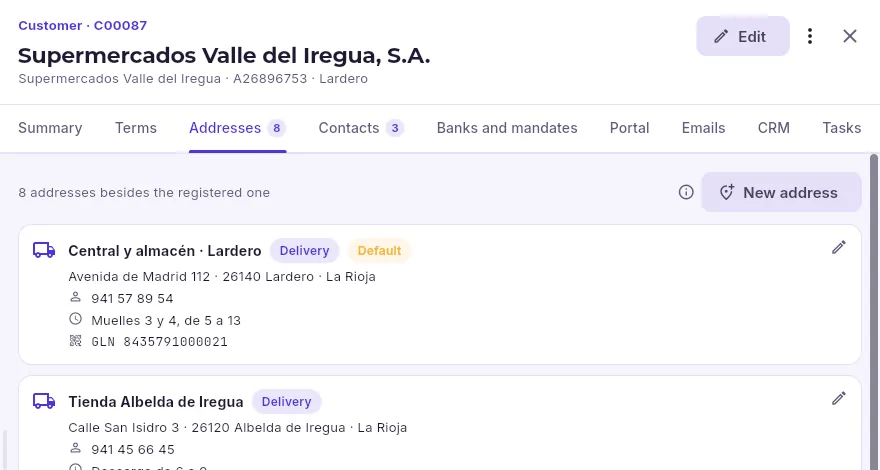 12
- 1Add another address: for delivery, invoicing or collection, with its opening hours and its contact.
- 2Each address says what it is for and which one is used by default on orders, with its phone, its opening hours and, if the customer orders by EDI, its GLN (the code of that delivery point); the pencil changes it.
Contacts has the customer’s people with their position, phone and email. Banks and mandates has their accounts and their SEPA mandates for collecting by direct debit. Portal says who from the customer signs in to their B2B portal and with which role; Emails, the emails exchanged with them, if the account has Google Workspace or Microsoft 365 connected; CRM, their sales analysis, opportunities and visits; and Tasks, theirs and those of their documents. History shows every change to the record, who made it and when, including changes to their addresses, contacts and terms.
#Adding a customer
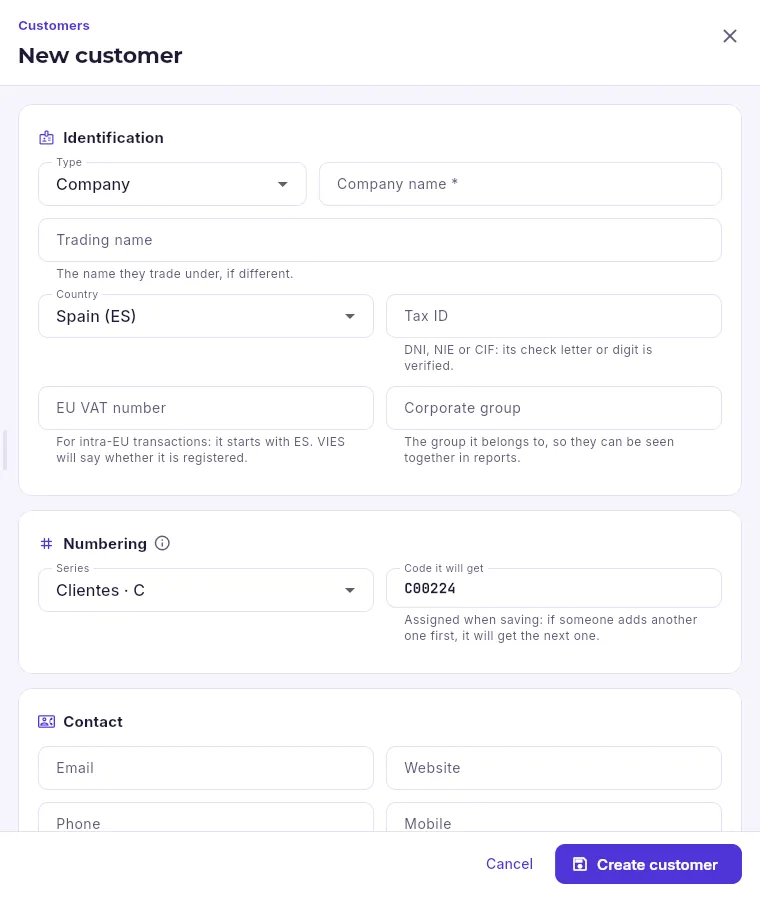 1234567
- 1Company, sole trader or private individual.
- 2The name on the invoices (required).
- 3The name they trade under, if different.
- 4Their tax ID: the letter or check digit is validated, and Mercurio checks that no other customer has it already.
- 5To sell to another EU country: the EU VAT number, which is checked against VIES.
- 6The customer series and the code they will get when you save.
- 7Saves the customer and opens their record.
In Customers, click New customer.
Choose the type (company, sole trader or private individual) and type the Company name and the Tax ID.
Fill in the contact details: email (where their documents will go), phone, and the Language of their documents.
Click Create customer: they get the next code in the series and their record opens.
In their record, open Terms and click Edit to set their price list, payment method, sales rep and credit limit with the selected company. If other companies in the group sell to them, change company at the top and repeat.
Add their delivery addresses, their contacts and, if they pay by direct debit, their bank and mandate.
Sales
Quotes
The offers you make to your customers, with how long they are valid: how much is at stake, which ones are about to expire, how many are accepted and how they become orders or invoices.
A quote is an offer: what you are selling a customer, at what price and until when it is valid. It does not move stock or create anything to collect: it is the first link in the sale. If the customer accepts it, it becomes an order (or goes straight to an invoice) with one click and without retyping anything; if not, it is left declined with its reason, or expired once its date has passed.
- 1QuoteThe offer, with how long it is valid.
- 2OrderWhat the customer firmly orders.
- 3Delivery noteThe delivery: the stock goes out.
- 4InvoiceIt is numbered, collected and reported to the tax authority.
#The list
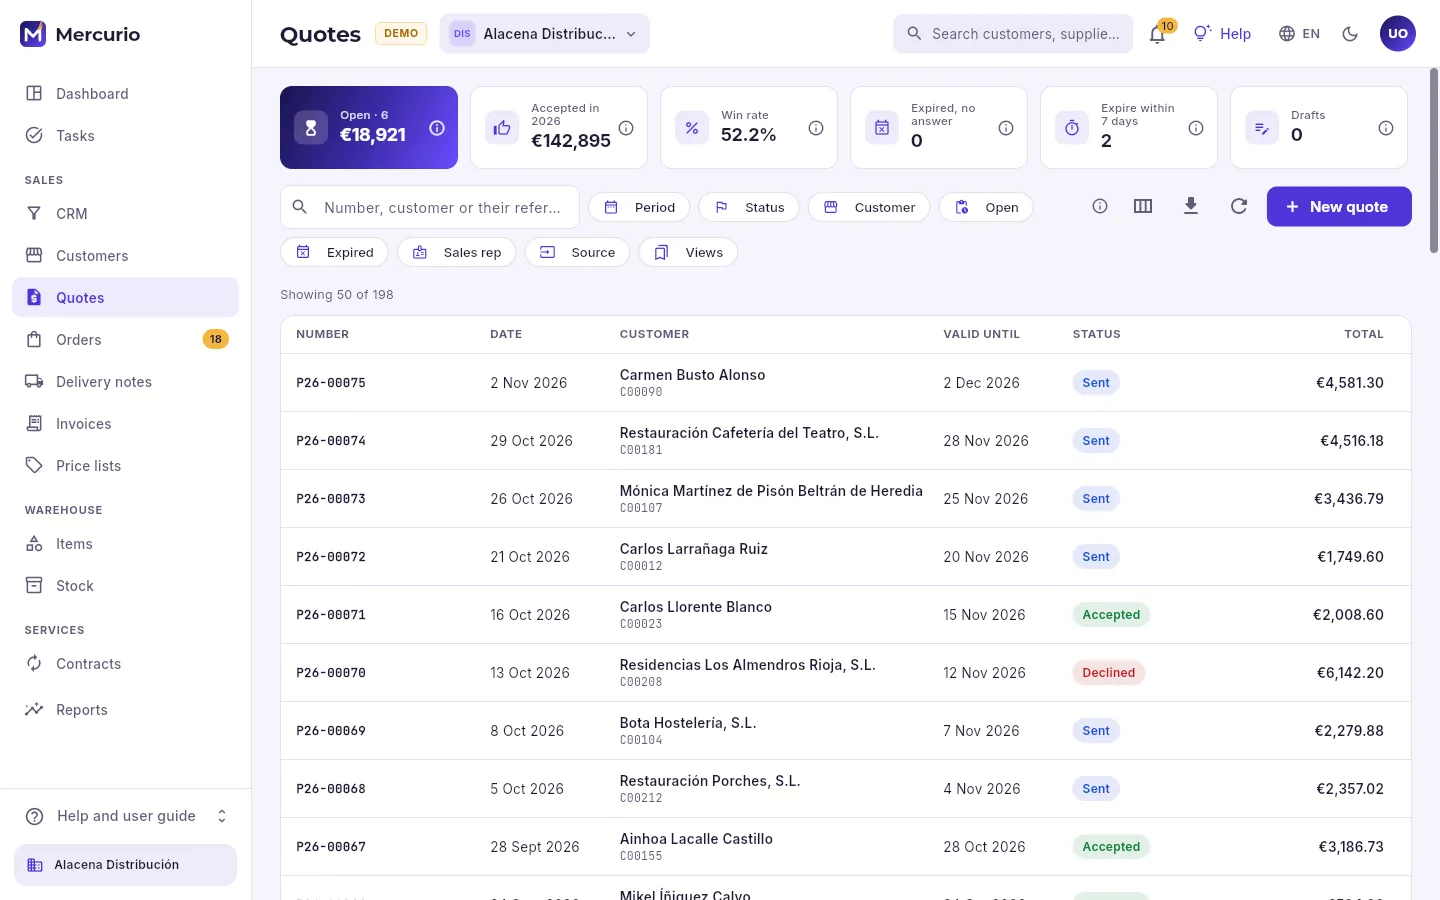 123456
- 1The indicators for the whole company: what is open (sent and with no answer), what has been accepted this year, the win rate, those expired with no answer, those expiring within 7 days and the drafts. Those with a frame filter the list when you click them.
- 2The search box: by number, by customer or by the customer’s reference.
- 3The filters: period, status, customer, only open ones, only expired ones, sales rep and source. Views saves a combination so you can come back to it.
- 4Which columns are shown, exporting what is filtered to a spreadsheet and reloading.
- 5Create a quote.
- 6The list: number, date, customer, validity (in red if it has already passed), status and total. Click a row to open its record.
The list brings the quotes 50 at a time and, at the end, Load more brings the next 50; the database does the searching and filtering across all the selected company’s quotes. The statuses of a quote are: draft (no number yet), sent (issued and waiting for an answer), accepted, declined (with its reason, shown under the number), expired and void.
#A quote’s record
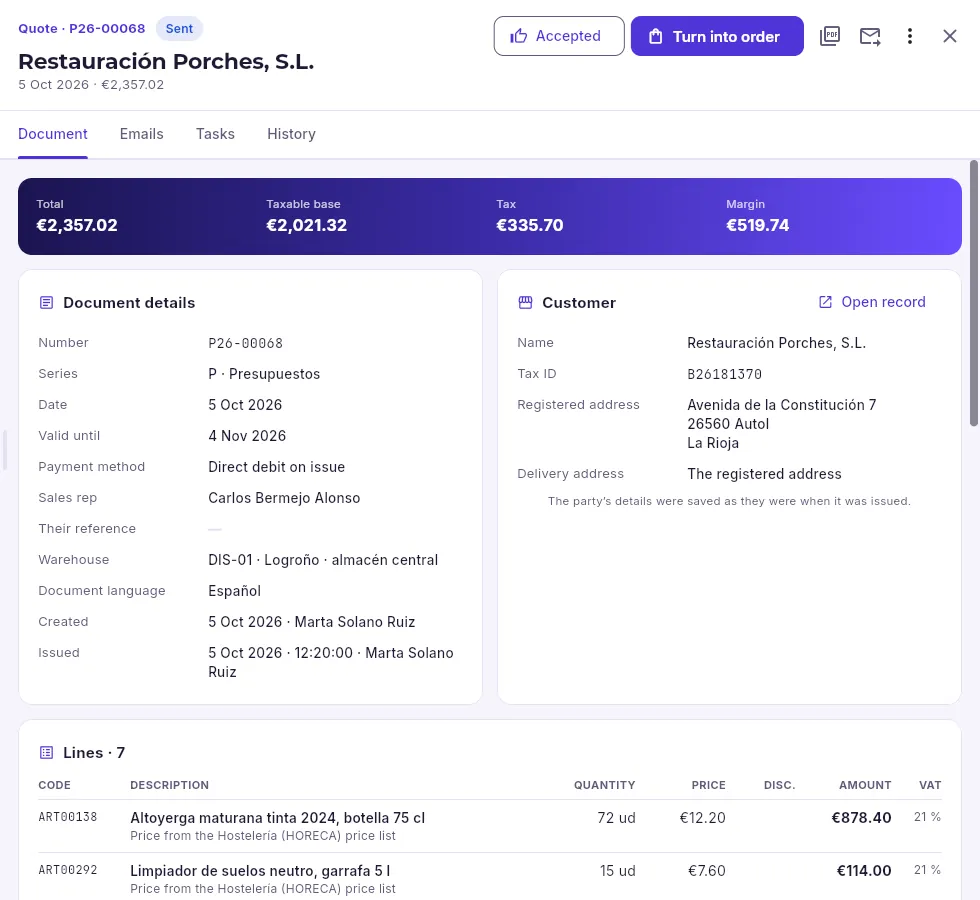 12345678
- 1The type, the number and the status; underneath, the customer, the date and the total.
- 2The main actions: mark it accepted or turn it into an order (which also accepts it).
- 3The quote’s PDF, and send it by email to the customer with the PDF attached.
- 4More actions: declined (with its reason), mark as expired, void, duplicate and internal notes.
- 5The tabs: the document, its emails, its tasks and the change history.
- 6The figures: total, taxable base, tax and, if your profile can see margins, the margin on cost.
- 7Its details: series, date, valid until, payment method, sales rep, the customer’s reference, warehouse and language.
- 8The customer as they were when it was issued; Open record opens their record.
Further down are the lines (with where each price came from: the price list or the special term that was applied), the totals with the tax breakdown, the remarks and the internal notes. An issued quote can no longer be changed: if it needs altering, Duplicate makes a draft copy for you to correct and send again.
#Creating a quote
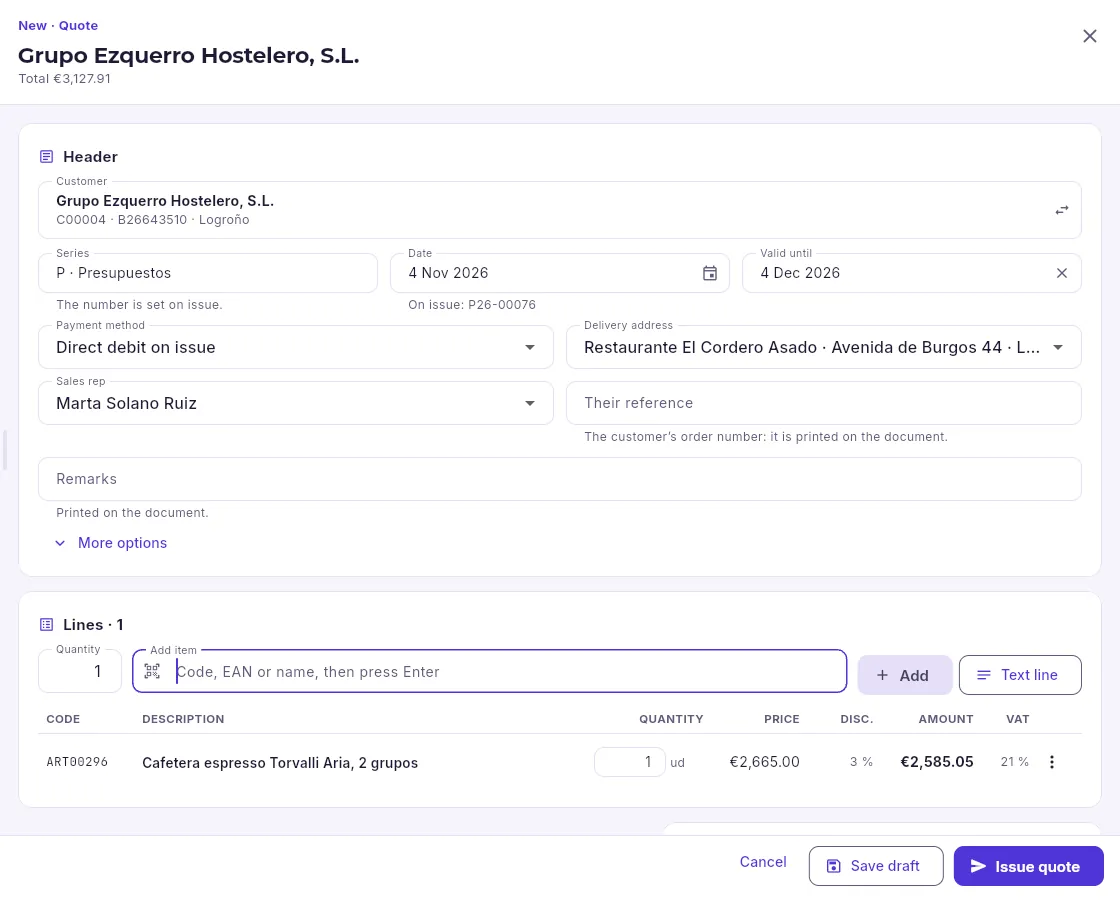 1234567
- 1The customer: choosing them brings in their payment method, delivery address, sales rep, language and price list with this company.
- 2The date (underneath, the number it will get when issued) and until when it is valid: one month by default. On the left, the series, if there is more than one.
- 3Payment method, delivery address, sales rep and the customer’s reference (their order number, which is printed on the document).
- 4More options: document language, transaction type, early payment discount, warehouse and internal notes.
- 5The lines: the quantity and the item by its code, EAN or name (Enter, and on to the next one). Text line adds a free-text line.
- 6Each line with its price and discount, set by the pricing engine. You change the quantity right there; click the line for everything else.
- 7Save draft (no number) or Issue quote: it is numbered and marked as sent.
In Quotes, click New quote: the editor opens alongside, without losing the list.
Click Choose the customer, search by name, code, tax ID or town and choose them. If they do not yet work with the selected company, they will be given the default terms when you save.
Check the validity: one month from today by default.
Add the lines: type the item’s code, EAN or name and choose it from the list (or press Enter). Change the quantity on the line itself.
If needed, click a line to change its price, discounts or tax, or to add notes to it.
Click Save draft to leave it ready, or Issue quote to number it and mark it as sent.
From its record, send it to the customer with the envelope (Send by email) or download the PDF.
#Where each price comes from
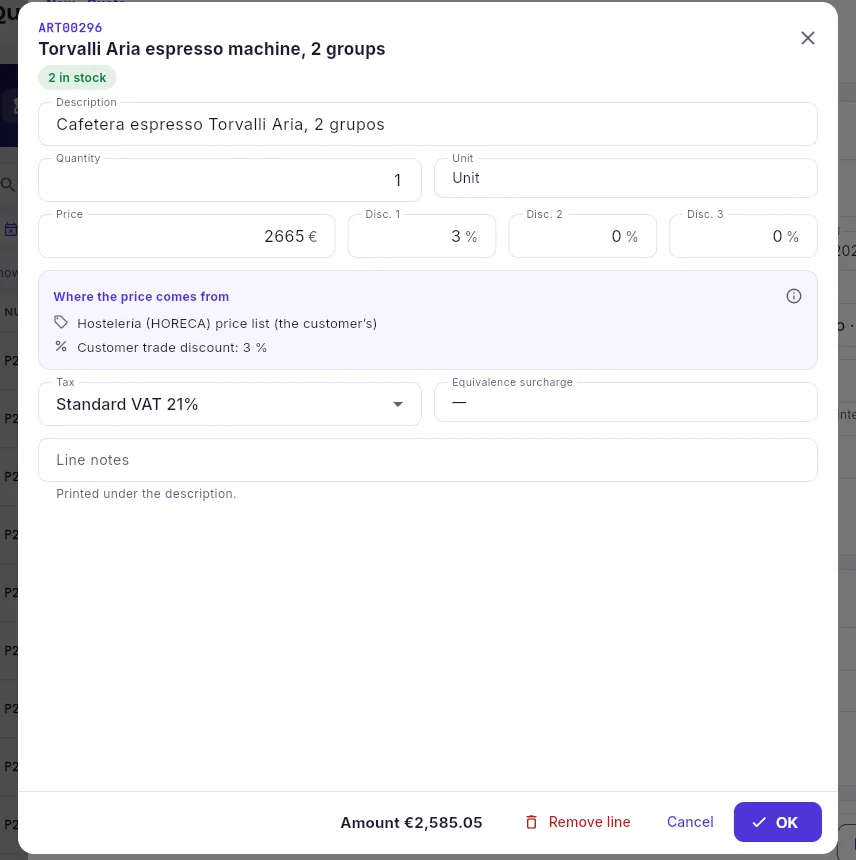 1234
- 1The price and up to three cascading discounts (10% and 5% make 14.5%).
- 2Where the price comes from: the customer’s price list (or the default one), the winning special term, their trade discount and current promotions.
- 3The line’s tax and, if the customer is under the equivalence surcharge scheme, its surcharge.
- 4Notes printed under the description on the document.
The price of each line is calculated by the pricing engine, the same one used by orders, invoices, the customer portal and the Price lists simulator: it looks at the customer’s price list and its quantity breaks, the winning special term, the customer’s trade discount and current promotions. If you change the price by hand, it is kept and marked “manual price”; Use the engine price puts it back to the calculated one.
#Accepting, declining and turning into an order
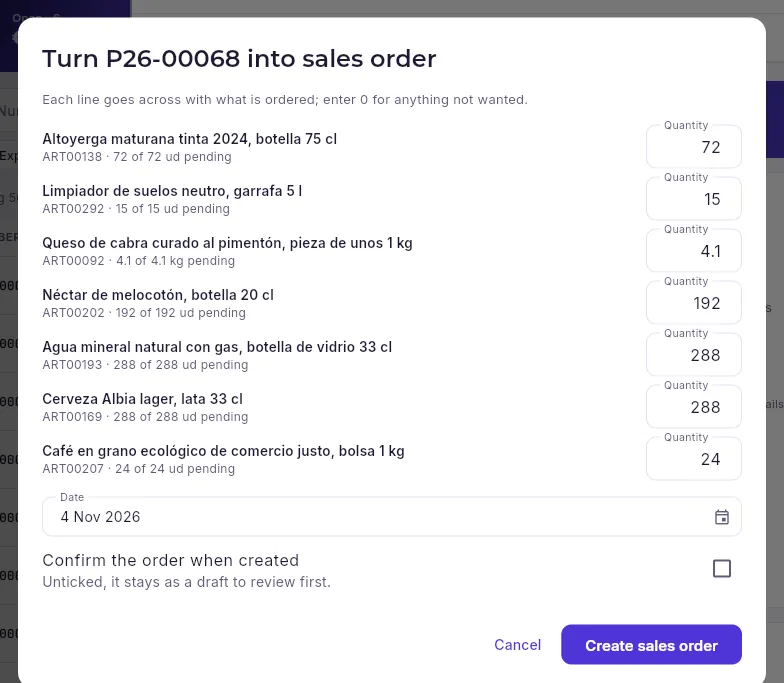 1234
- 1Each line goes across with what was quoted: enter 0 for anything the customer does not want, or change the quantity.
- 2The order date: today, unless you change it.
- 3Tick it to confirm the order straight away (it is numbered and reserves the stock); unticked, it stays as a draft.
- 4Creates the order and opens it; the quote is left accepted and linked to it.
Accepted only changes the status (the customer has said yes but is not ordering yet). Turn into order creates the order with the quote’s lines; those who can invoice also see Invoice, to turn it straight into an invoice (for a job that is paid in one go, for example). In both cases the quote is marked accepted automatically, and each one’s document chain links to the other. Declined… asks for the reason (price, lead time, the competition…): it shows in the list and helps you improve the next ones.
Sales
Orders
What your customers firmly order from you: what is still to deliver, what is late and what is on hold, and how it is delivered with delivery notes, in full or in part.
An order is what the customer firmly orders: what, how much and for when. When you confirm it, it is numbered and reserves the stock, and from then on it counts in what has to be delivered. It is delivered with one or more delivery notes (all at once or in several shipments) and invoiced afterwards with the delivery notes; if the company does not use delivery notes, the order is invoiced directly.
Orders arrive by many routes: the office enters them (by hand or from a quote), the customer places them on the B2B portal, or they come in by EDI from a large retailer, or from an online shop or a marketplace. They all end up here, with their source in view.
#The list
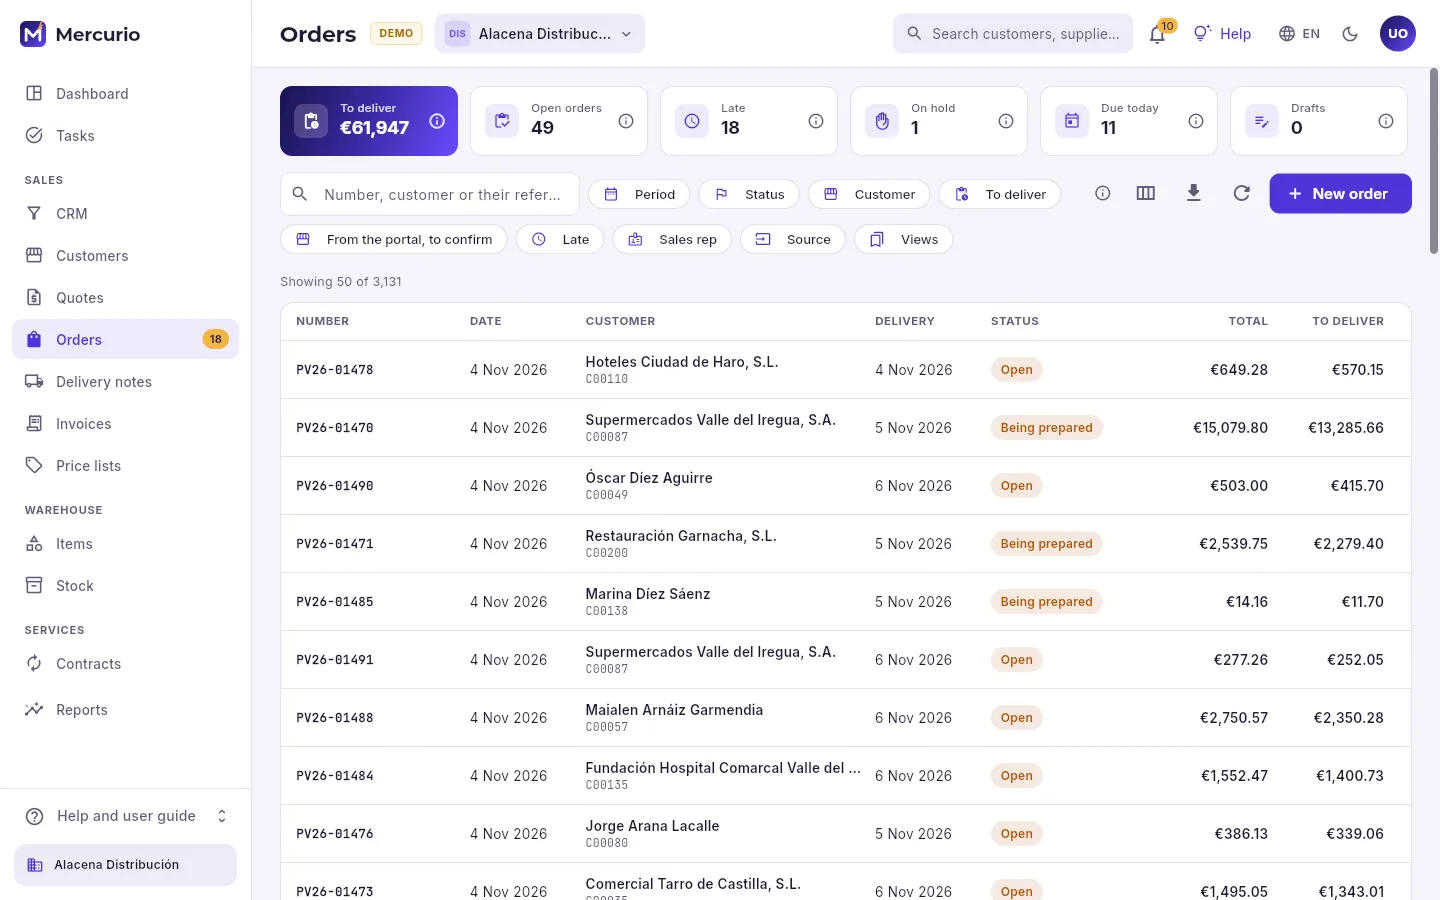 123456
- 1The indicators: what is still to deliver (in euros, before tax), open orders, late ones, those on hold, those due for delivery today and the drafts. Those with a frame filter the list.
- 2The search box: by number, by customer or by their reference (the customer’s order number).
- 3The filters: period, status, customer, what is still to deliver, those from the portal awaiting confirmation, late ones, sales rep and source.
- 4From the portal, to confirm: the orders your customers have placed on the B2B portal that are waiting for you to confirm them.
- 5Enter an order by hand.
- 6The list: number, date, customer, delivery date (in red if it has already passed), status, total and what is still to deliver on each one. Click a row to open its record.
The statuses of an order are: draft (not confirmed), open (confirmed and to be delivered), being prepared (the warehouse is working on it), part-delivered (partly delivered), delivered, on hold and cancelled. The number next to Orders in the sidebar counts the open ones: confirmed and not yet being prepared.
#An order’s record
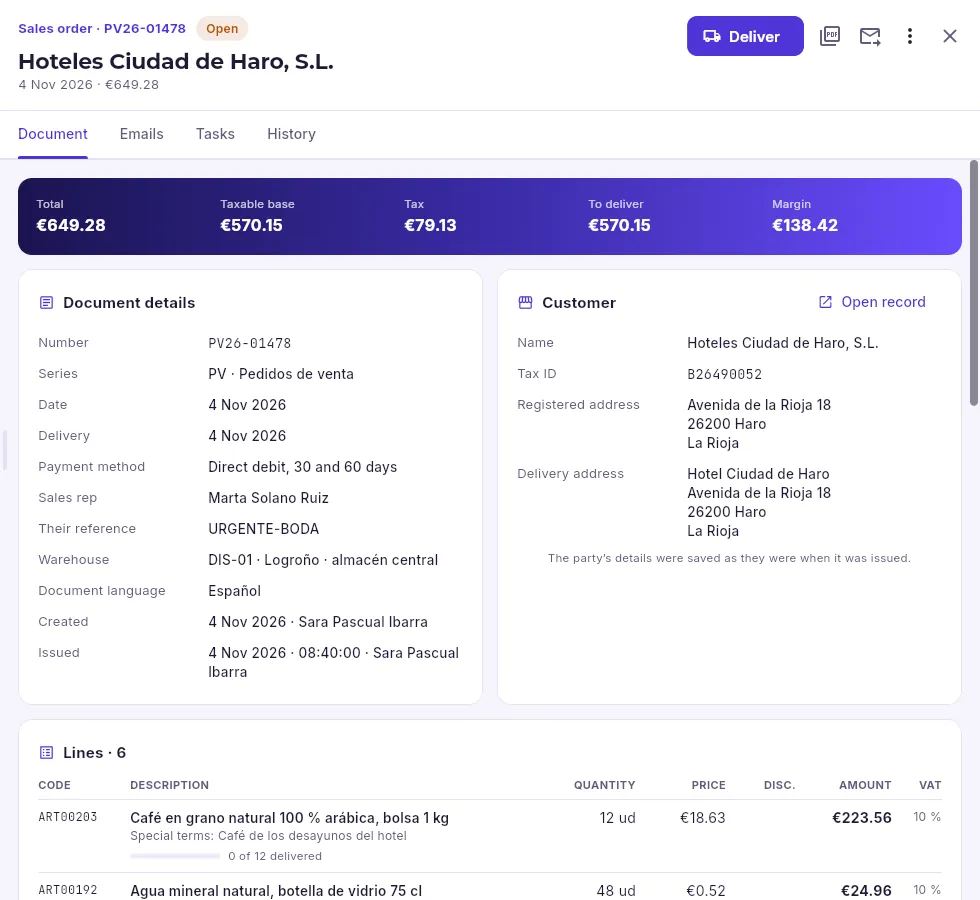 1234567
- 1The order’s number and status.
- 2Deliver: turn it into a delivery note, all of it or part. Those who can invoice also see Invoice.
- 3The PDF (the order confirmation), sending it by email and more actions: being prepared, put on hold, cancel, duplicate and internal notes.
- 4Total, base, tax, what is still to deliver and the margin.
- 5Its details: the delivery date, payment method, sales rep, their reference (the customer’s order number) and the warehouse it ships from.
- 6The customer and the delivery address.
- 7The lines, with where each price comes from and a bar showing what has been delivered on each.
A confirmed order is no longer edited: what changes is what gets delivered. If the customer wants more, you create another order; if they want less, you deliver less and mark it as delivered. Duplicate makes a draft copy (for a customer who orders the same every week, for example).
#Delivering an order
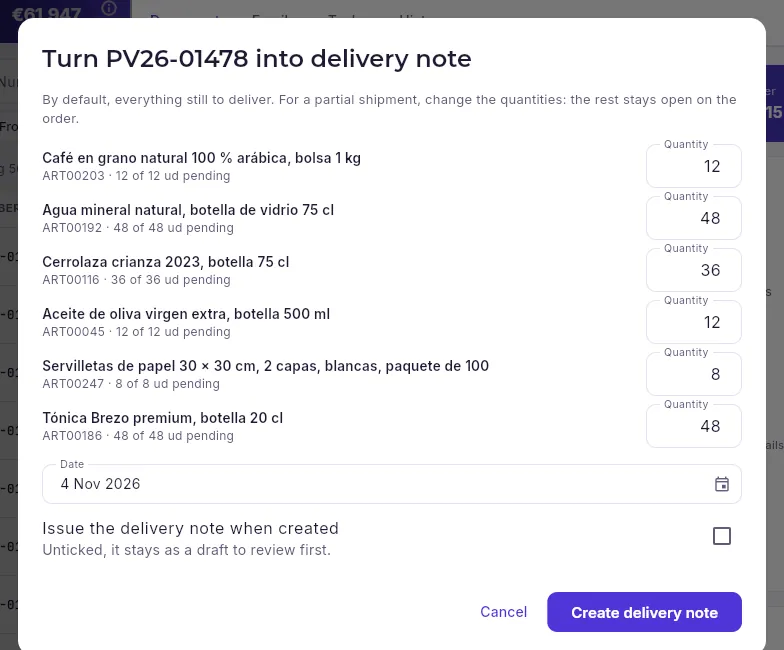 1234
- 1Each line with everything outstanding. For a partial shipment, change the quantities: the rest stays outstanding on the order.
- 2The delivery note date: today, unless you change it.
- 3Tick it to issue the delivery note straight away (the stock goes out); unticked, it stays as a draft so it can be checked.
- 4Creates the delivery note and opens it.
Open the order (from Orders, from the customer’s record or from the search box) and click Deliver.
Check the quantities: they come with everything outstanding. If only part is going out (goods are missing, the customer wants it in two lots), enter what is going out now.
Tick Issue the delivery note when created if the goods are going out now; if not, leave it as a draft for the warehouse to check.
Click Create delivery note: the new delivery note opens.
#What has been delivered, line by line
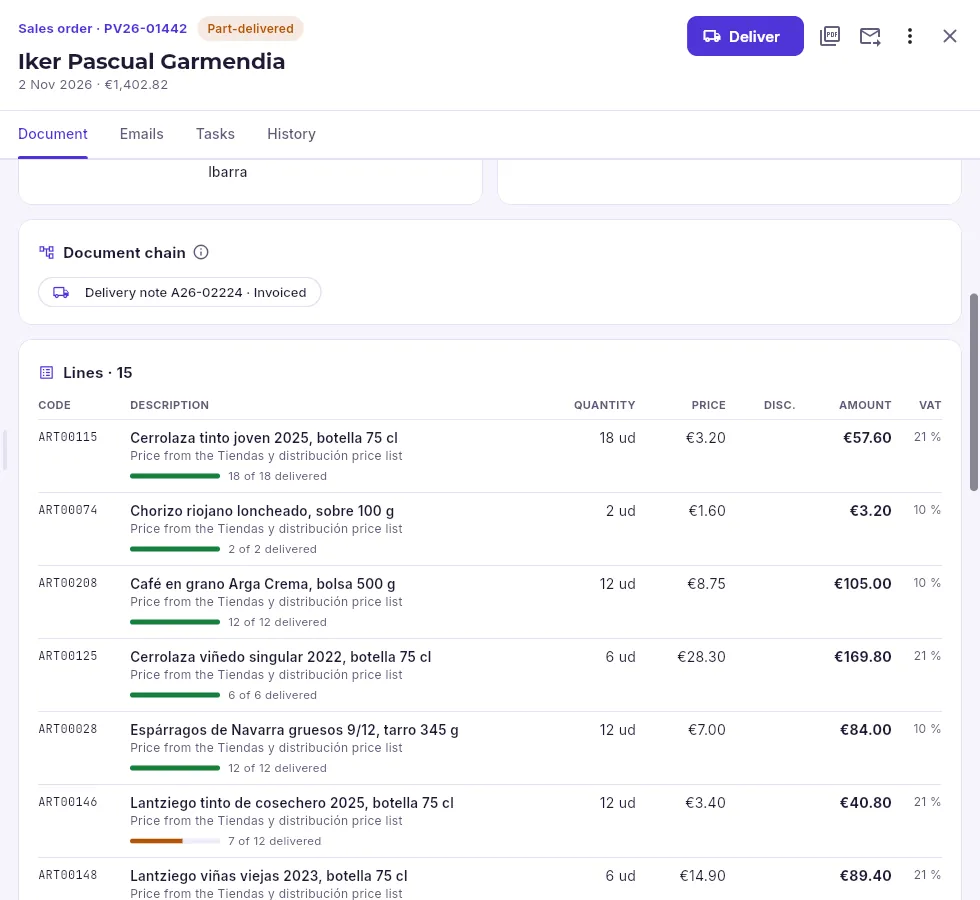 12
- 1The document chain: the delivery notes created from this order, with their status (issued or already invoiced). Click one to open it on top: its invoice is in its own chain.
- 2Each line says how much of what was ordered has been delivered, with its bar: full means fully delivered.
When part of an order is not going to go out (the customer no longer wants it, the item has been discontinued), Mark as delivered closes the order with what has been delivered: it no longer counts in “To deliver” and the stock reservation is released.
#Orders on hold
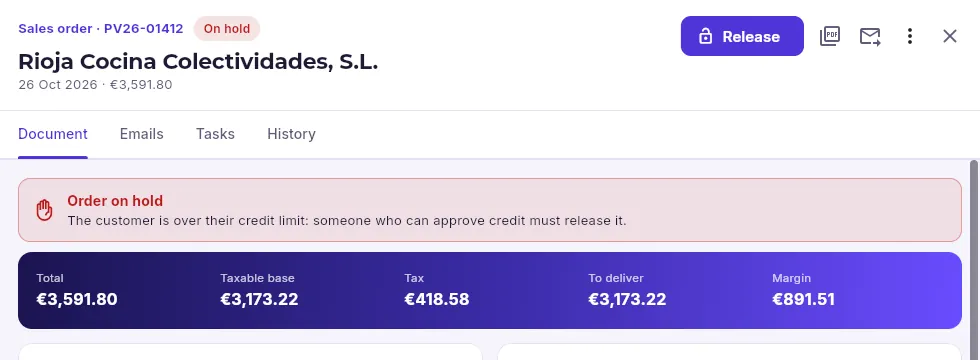 123
- 1The status: on hold.
- 2Why it is on hold: the customer is over their credit limit, has returned or unpaid bills, or someone put it on hold by hand with a reason.
- 3Release: the order goes back to open and can be delivered. Only those who can approve credit risk see it.
An order is put on hold automatically when it is confirmed if the customer is over their credit limit or has unpaid bills, and it can be put on hold by hand with Put on hold… (the customer asks you to wait, a payment is missing…), always with a reason. While it is on hold, nothing leaves the warehouse. It is released by someone with the “Approve credit risk” permission: usually management or administration.
#Orders from the portal, EDI and online shops
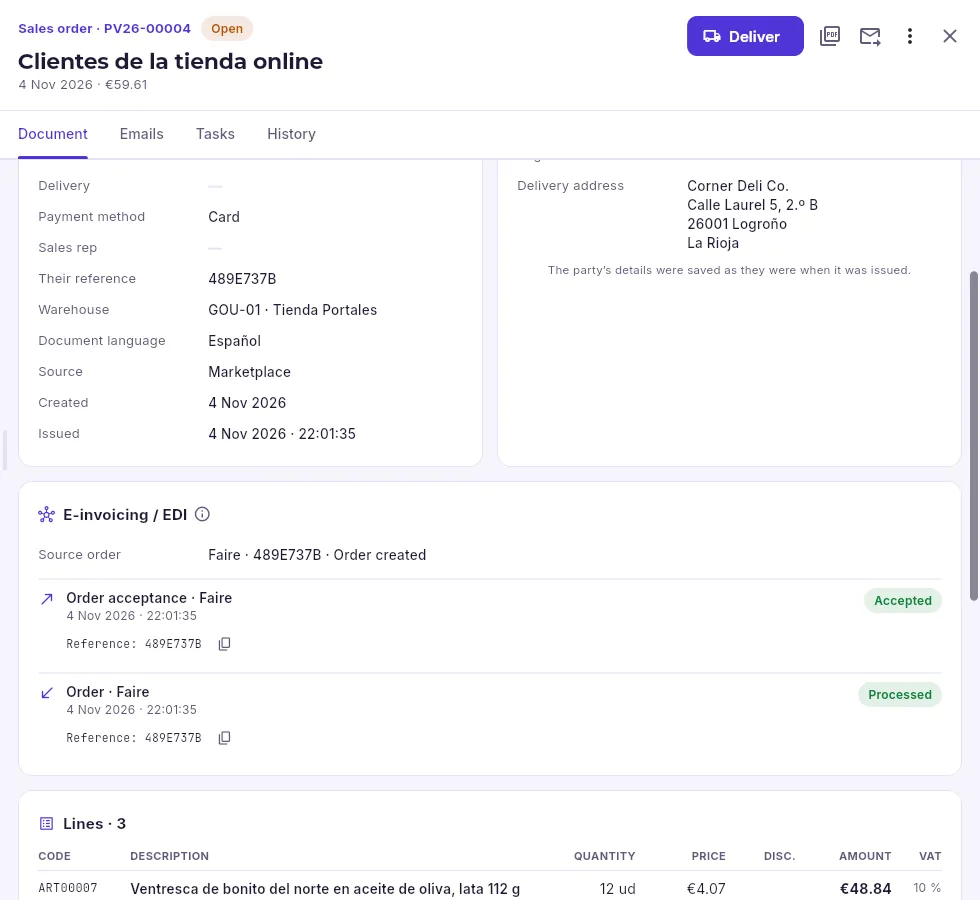 123
- 1Their reference: the order number on the marketplace or in the online shop.
- 2The source: where the order came from (back office, B2B portal, EDI, online shop, marketplace…).
- 3The E-invoicing / EDI block: the source order (from the marketplace or the online shop, with its number) and each message that has come in or gone out through the channel, with its status.
- B2B portal: the customer places the order on their portal and it arrives as a draft (unless the portal is set up to confirm them automatically), with the From the portal, to confirm chip in the list and a warning on its record. Check the lines, the stock and the delivery date and click Confirm order: it is numbered, reserves the stock and the customer sees it confirmed on their portal.
- EDI: orders from large retailers (ORDERS messages) come in automatically through the VAN, the intermediary for EDI messages; the confirmation (ORDRSP), the dispatch advice (DESADV) and the invoice (INVOIC) go out through the same channel.
- Online shops and marketplaces: each order from the shop arrives with its number, which is kept as their reference, and Mercurio sends the shop the available stock.
- Another group company: its purchase order creates here, already confirmed, the mirror sales order, with the Intra-group source and the Mirror order card, which links to the other company’s order. It is delivered like any other; cancelling one also cancels the other as long as nothing has gone out (see Purchasing).
On the record, the E-invoicing / EDI block shows what has come in or gone out through each channel and its status; if something fails, the error says what is missing and Try again sends it again. Channels are set up in B2B.
Sales
Delivery notes
Your deliveries to customers: issuing a delivery note takes the stock out with its batches and serial numbers; it is then invoiced, on its own or together with others. And customer returns.
A delivery note is the document for a delivery: what leaves the warehouse for the customer. When it is issued, it is numbered and the stock goes out, with the batches and serial numbers of each unit; the customer signs it on receipt (on paper or on the delivery driver’s phone). It is then invoiced: on its own, in part, or together with others for the same customer (customers who get one invoice a month, for example).
A delivery note almost always comes from an order (with Deliver, or when picking is finished in Logistics), but you can also create one directly, for a counter sale or a delivery with no order.
#The list
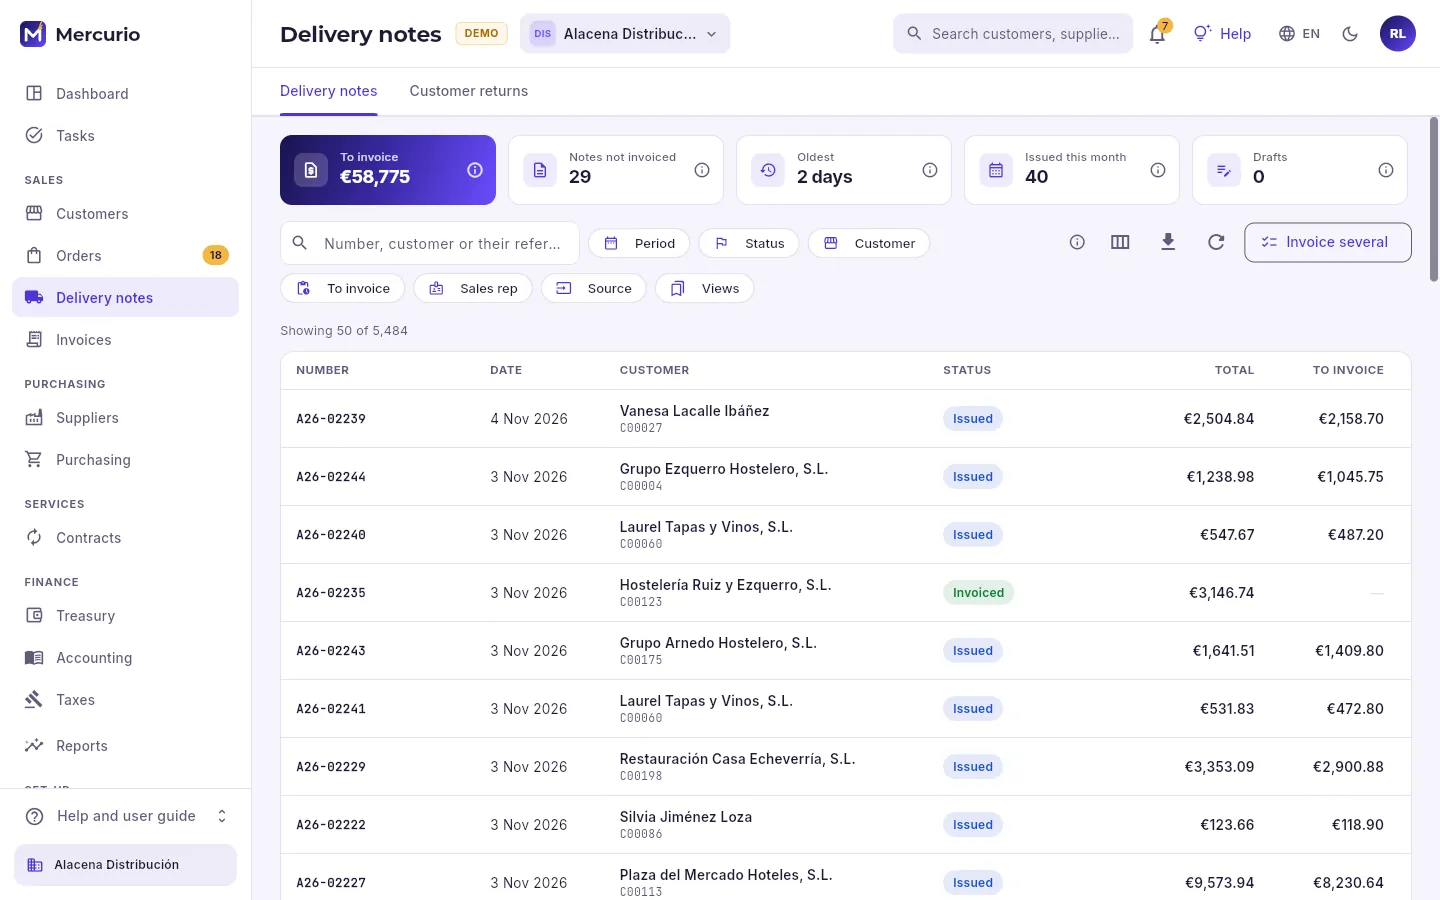 123456
- 1Two tabs: delivery notes and customer returns.
- 2The indicators: what has been delivered and is still to invoice, how many delivery notes have something uninvoiced, the age in days of the oldest, those issued this month and the drafts.
- 3The search box: by number, by customer or by their reference.
- 4The filters: period, status, customer, only what is to invoice, sales rep and source.
- 5Invoice several: tick several delivery notes for the same customer and make a single invoice for them.
- 6The list: number, date, customer, status, total and what is still to invoice on each one.
The statuses of a delivery note are: draft (nothing has gone out yet), issued (delivered, with something to invoice) and invoiced (everything is already on an invoice). Those who cannot invoice do not see Invoice several; those who do not sell do not see New delivery note.
#A delivery note’s record
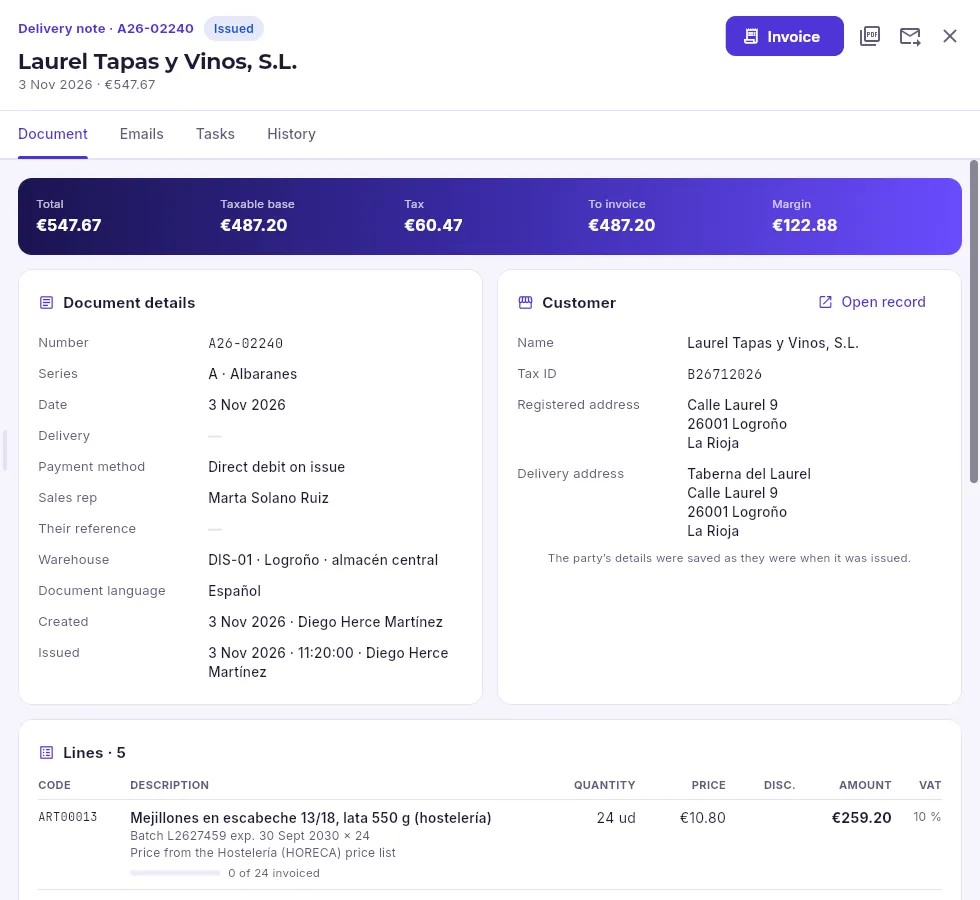 123456
- 1The number and status: issued, with something to invoice.
- 2Invoice: turn it into an invoice, all of it or part.
- 3The PDF, and send it by email to the customer.
- 4Total, base, tax, what is still to invoice and the margin.
- 5Its details: date, delivery date, payment method, sales rep, the customer’s reference and the warehouse it left from.
- 6The customer and the delivery address.
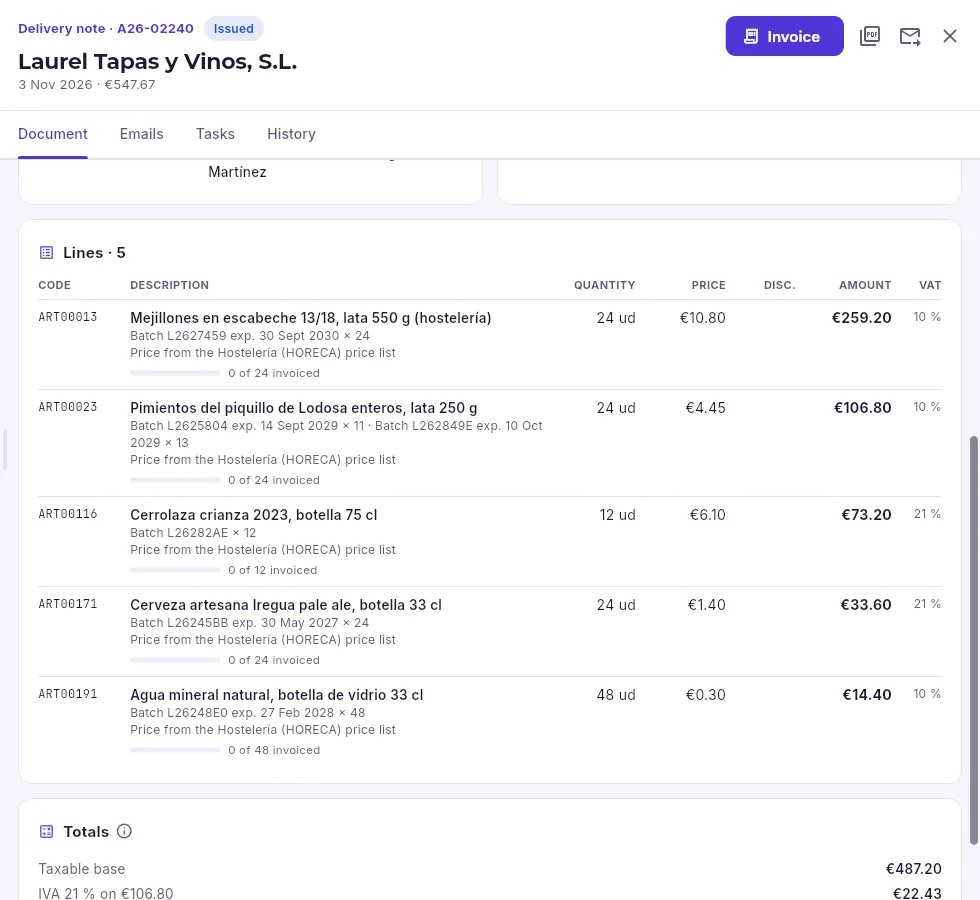 12
- 1Each line with the batches that went out (with their expiry date and how many units of each) or its serial numbers, where the price comes from and a bar showing how much of what was delivered has been invoiced.
- 2The totals, with the base and the tax amount for each VAT rate.
An issued delivery note is not changed: if something has gone wrong (an extra line, a price), it is corrected when invoicing or, if it has already been invoiced, with a corrective invoice. If the customer sends goods back, you create a return (further down).
#Batches and serial numbers
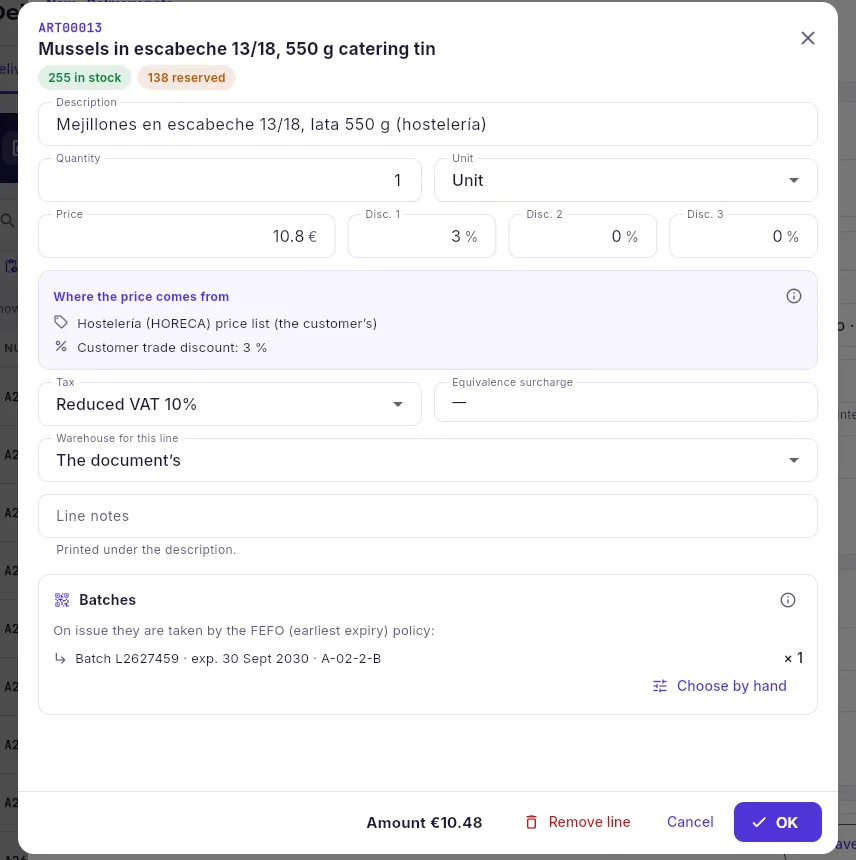 1234
- 1The item’s stock in the warehouse and what is already reserved for other orders.
- 2Which warehouse this line ships from (by default, the document’s).
- 3The batches that will go out: proposed by the item’s policy (here FEFO, earliest expiry first), with their expiry date and location.
- 4Choose by hand starts from that proposal so you can change the quantity from each batch or tick other serial numbers.
For items with batches (tinned food, cheese, wine) or serial numbers (machinery), every unit that goes out is recorded on the delivery note: that way you know who each batch was sold to if it ever has to be recalled (see Traceability). You do not need to choose them one by one: on issue, Mercurio takes them according to the item’s policy:
| Policy | What goes out first |
|---|---|
| FEFO | Whatever expires first (the norm in food). |
| FIFO | Whatever came in first. |
| LIFO | Whatever came in last. |
It never proposes batches that are blocked, quarantined, expired or with less shelf life than the item requires, nor anything reserved for other orders. If there is not enough available, the line says so (“… short”) and the delivery note is not issued until there are goods or you deliver less.
#The PDF and the copy for printing
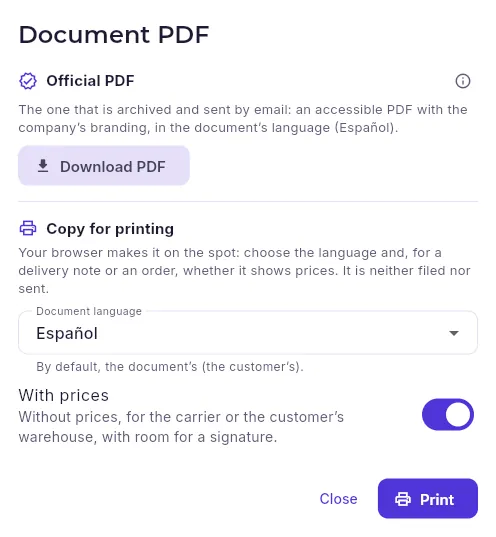 12345
- 1The official PDF: the one that is filed and sent by email, in the document’s language.
- 2Downloads it; if it does not exist yet, the server generates it in a few seconds.
- 3The copy for printing is made by your browser instantly: it is neither filed nor sent.
- 4Which language the copy comes out in (by default, the customer’s).
- 5With prices or without: a delivery note without prices for the carrier or the customer’s warehouse, with room for a signature.
The official PDF is an accessible PDF with the company’s branding (on invoices, also with the tax QR code and the mandatory statements). It is generated once with the details of the issued document and is identical to the one the customer receives. The copy for printing is for everyday needs: printing it in another language or leaving out the prices.
#Invoicing delivery notes
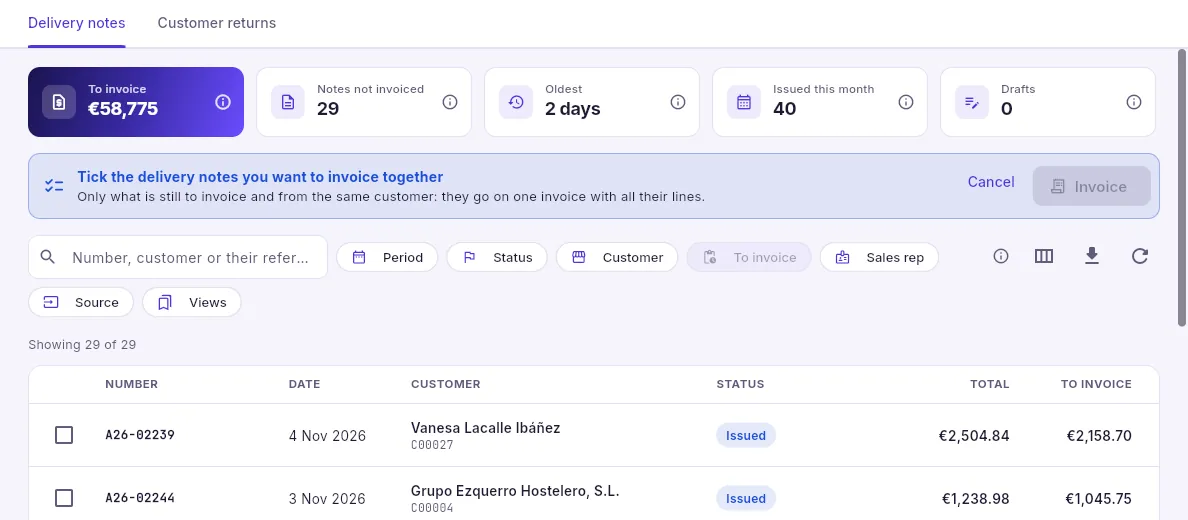 123
- 1Invoice several mode: tick delivery notes for one customer; they are added up at the top and Invoice puts them together on a single invoice.
- 2While you are choosing, the list shows only what is still to invoice.
- 3Each delivery note’s tick box (clicking the row works too).
In Delivery notes, click Invoice several.
Find the customer (it is easier with the Customer filter) and tick their delivery notes: at the top you can see how many you have ticked and their amount. Only those for the same customer with something to invoice can be combined.
Click Invoice: choose the invoice date and series and whether it is issued now or left as a draft.
Confirm: the invoice opens with all the outstanding lines from those delivery notes.
To invoice a single delivery note, open it and click Invoice: each line comes with everything outstanding and you can invoice just part of it (the rest stays to invoice). The animated guide “Invoicing a delivery note” in the help (F1) shows it step by step.
#Returns
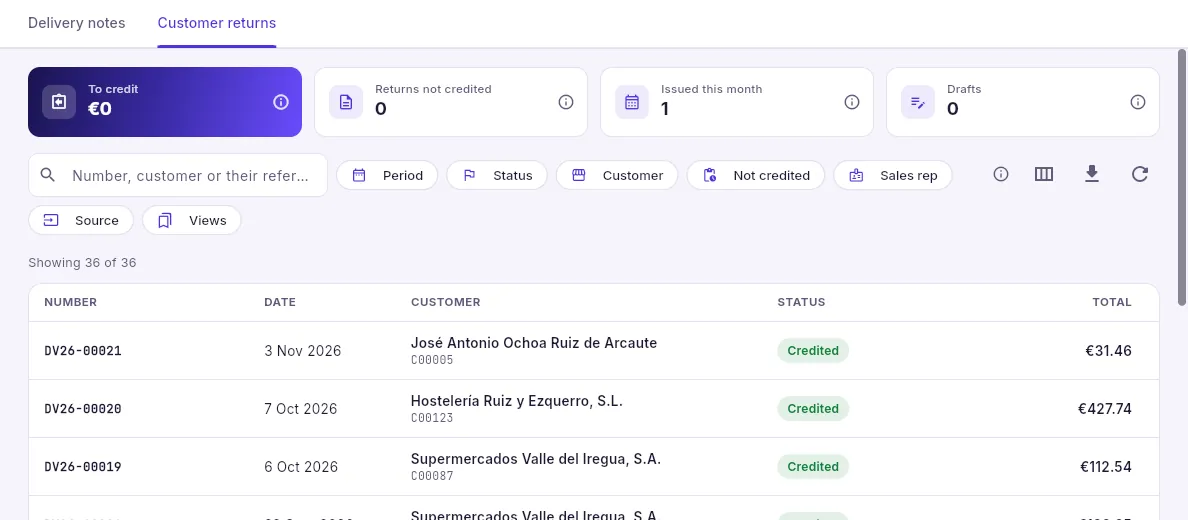 123
- 1What has been returned and not yet credited, how many returns are still to credit, this month’s and the drafts.
- 2Only those still to credit.
- 3Returns, with their status: received (the goods have come back) or credited (it already has its corrective invoice).
A return is created from the invoice for what was sold, with Correct by return… (in Invoices): it is created as a draft with what is coming back and the batches and serial numbers it went out with. When it is recorded, the goods go back into stock; then Credit creates the corrective invoice as a draft for you to review and issue. Customers with a portal can also request a return from there: the office accepts it and it is created in the same way.
Sales
Invoices
Sales invoices: what has been invoiced and what is outstanding, their recording with the tax authority (VeriFactu, SII or TicketBAI), sending them by email and corrective invoices.
An invoice is the document that gives you the right to be paid and goes into the VAT books. It comes from one or more delivery notes, from an order or from scratch, and is prepared as a draft. When it is issued, four things happen at once:
- it is numbered with its series, always in date order;
- its due dates are created (the instalments of its payment method);
- it is posted to the accounts (if accounting is switched on);
- it is recorded with the tax authority using the company’s system: VeriFactu, the SII or TicketBAI.
From then on, an invoice is never changed or deleted: if it has a mistake, it is corrected with a corrective invoice.
#The list
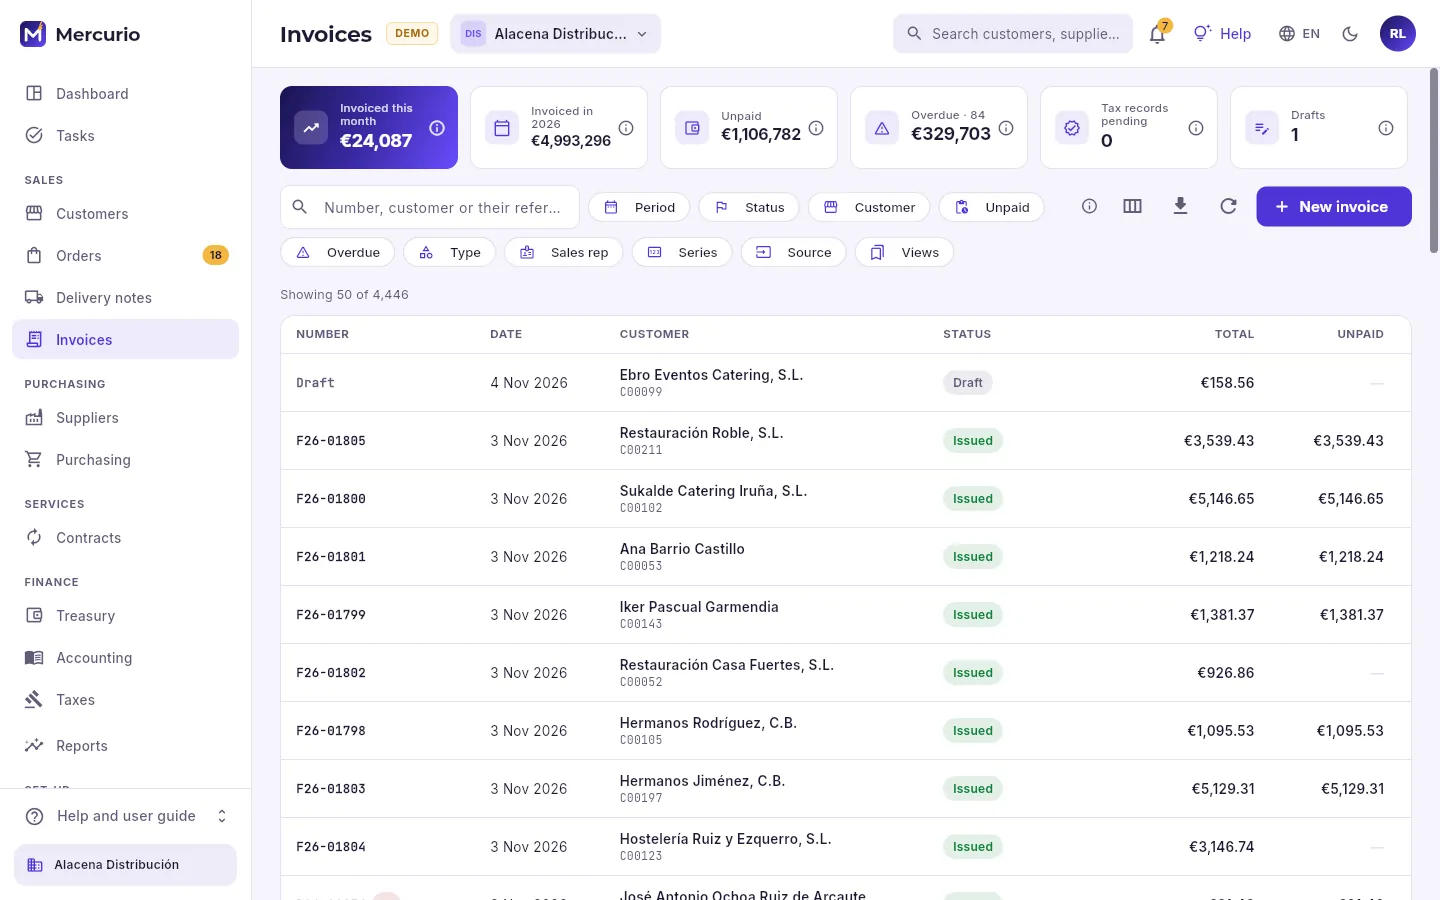 12345
- 1The indicators: what has been invoiced this month and this year (before tax), what is outstanding, what is overdue, the tax records the tax authority has not yet accepted, and the drafts.
- 2The search box: by number, by customer or by their reference.
- 3The filters: period, status, customer, unpaid, overdue, type (standard, simplified or corrective), sales rep, series and source.
- 4Create an invoice from scratch (standard or simplified).
- 5The list: number (with C for corrective invoices and S for simplified ones), date, customer, status (and Overdue if anything on it is overdue), total and what is still to collect.
In Columns you can add the taxable base, the margin, the source and the Tax register column, which shows how each invoice’s recording with the tax authority is going.
#An invoice’s record
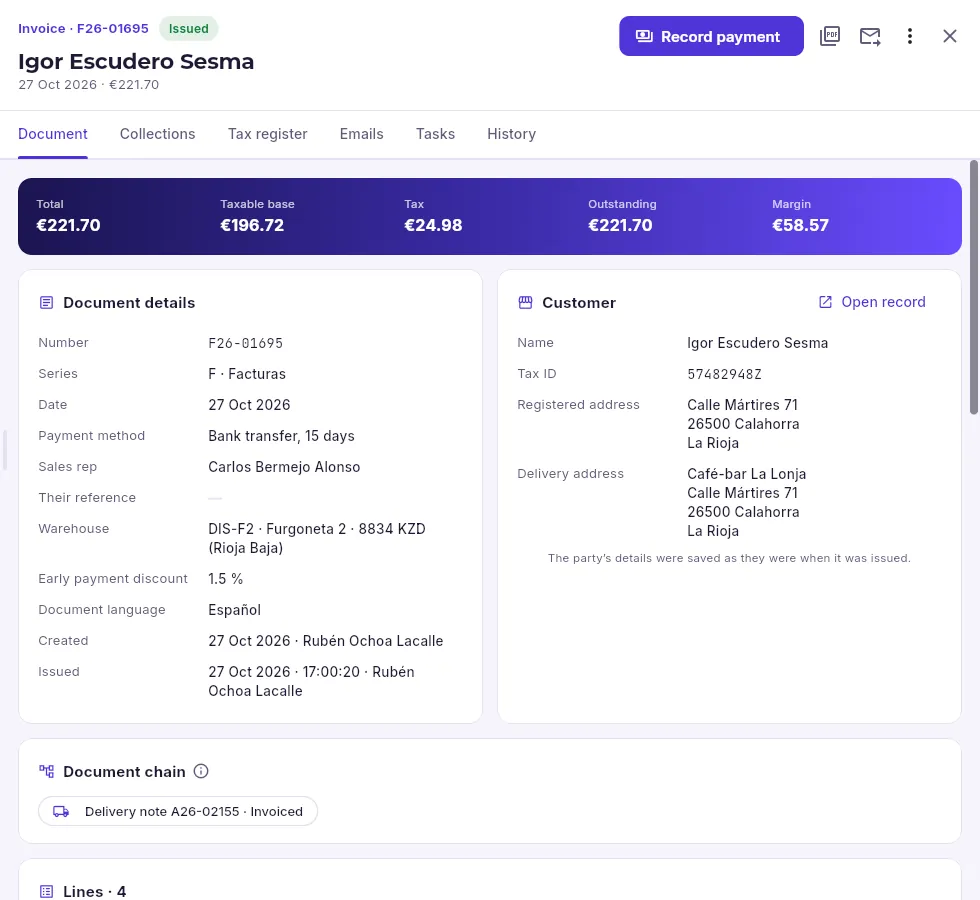 1234567
- 1The number and status: issued.
- 2Record payment: enter what the customer has paid against their due dates.
- 3The PDF (with the tax QR code), and send it by email to the customer.
- 4More actions: correct by difference or by return, view its journal entry, duplicate and internal notes.
- 5The tabs: the document, its collections, its tax register, its emails, its tasks and the history.
- 6Total, base, tax, what is outstanding and the margin.
- 7The chain: the delivery note (or notes) it invoices.
Further down are the lines (each one says which delivery note it comes from), the totals with the breakdown for each tax rate, the mandatory statements the law requires for the type of transaction and, if cost accounting is switched on, its cost centres. The customer’s details are saved as they were when it was issued: if they later change address, the invoice does not change.
#Issuing an invoice
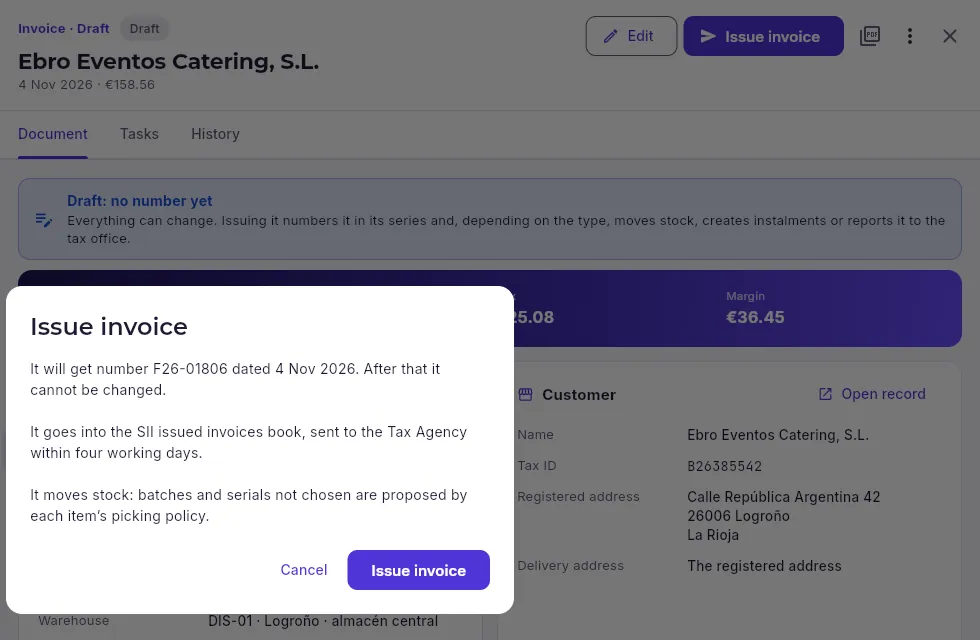 123
- 1A draft can be changed entirely (Edit) and has no number.
- 2On issue: the number it will get, its date, how it is recorded with the tax authority and, if it does not come from a delivery note, the fact that it moves stock.
- 3Confirms and issues it.
Before issuing, Mercurio checks what the law requires: the customer’s tax ID and address on a full invoice, that the date is not earlier than that of the last invoice in the series and, on a simplified invoice, that it does not exceed its limit. If anything is missing, it tells you why and the invoice stays as a draft. If the customer is over their credit limit, issuing it requires the “Approve credit risk” permission.
#Collections and due dates
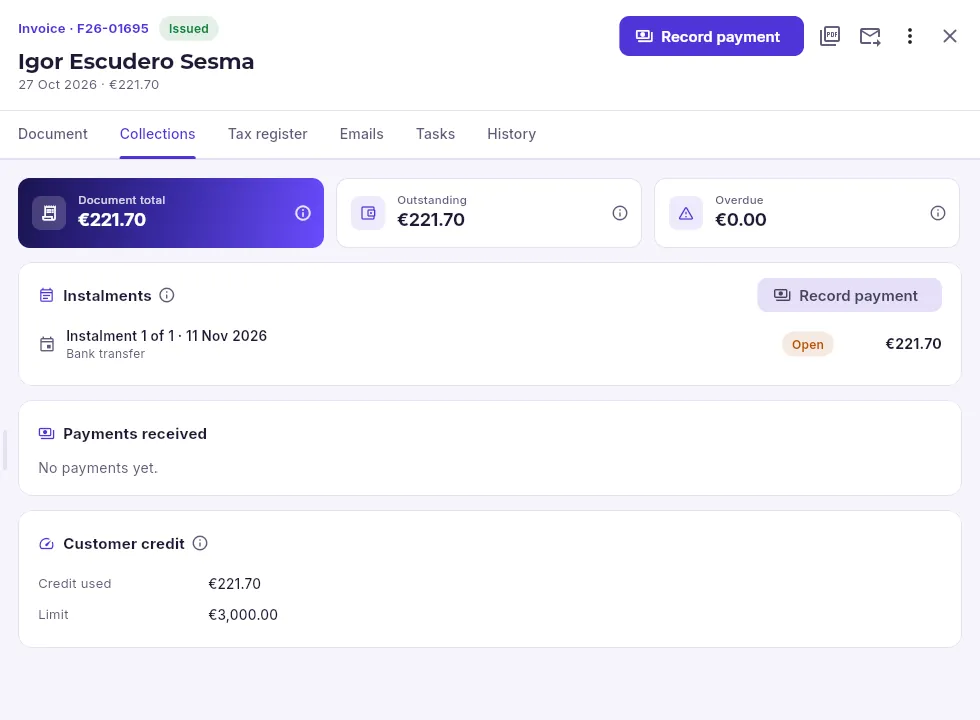 1234
- 1The invoice total, what is still to collect and what is already overdue and unpaid.
- 2The instalments: each one with its date, its method (direct debit, bank transfer…), its amount and its status. Overdue ones in red.
- 3The payments already recorded, with their date, method and reference.
- 4The customer’s credit risk with this company against their limit.
Due dates come from the payment method when the invoice is issued, adjusted to the customer’s payment days and month with no payments. Record payment enters a payment (if it is less than what is outstanding, it is applied in order and the rest stays outstanding); direct debits are collected in bulk with a SEPA batch from Treasury, which also chases overdue ones.
#Recording with the tax authority: the Tax register tab
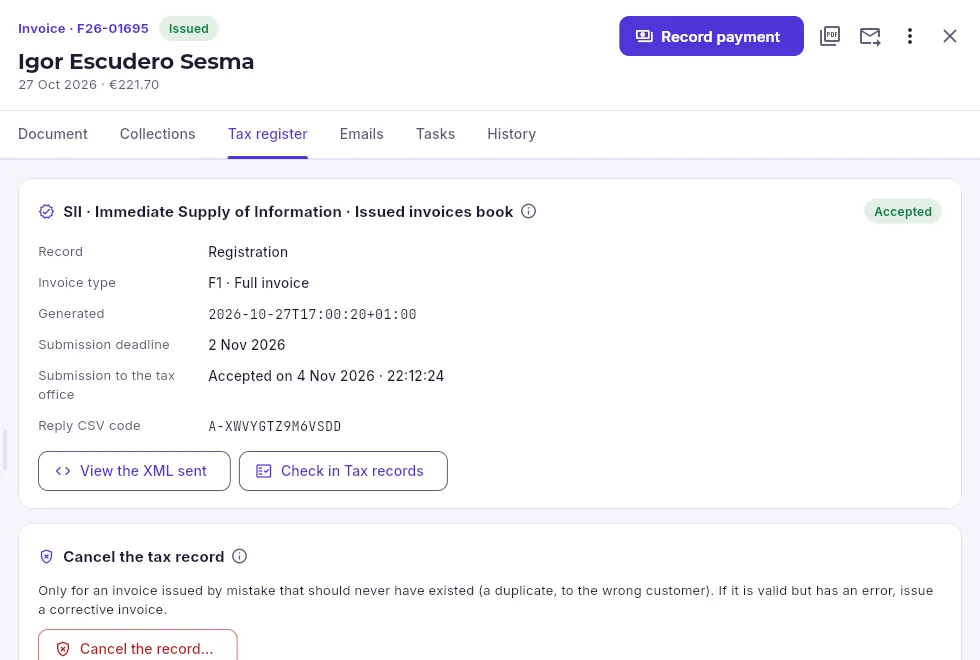 12345
- 1The system and the book: here, the SII, issued invoices book.
- 2The record’s status: waiting to send, sent, accepted, accepted with errors or rejected.
- 3Its details: registration, invoice type (F1 is a full invoice), when it was generated, the submission deadline, when the tax authority accepted it and the CSV code of its reply.
- 4The XML exactly as it was sent and its record in Taxes → Tax records, with the chain verified.
- 5Cancel the record: only for an invoice that should never have been issued.
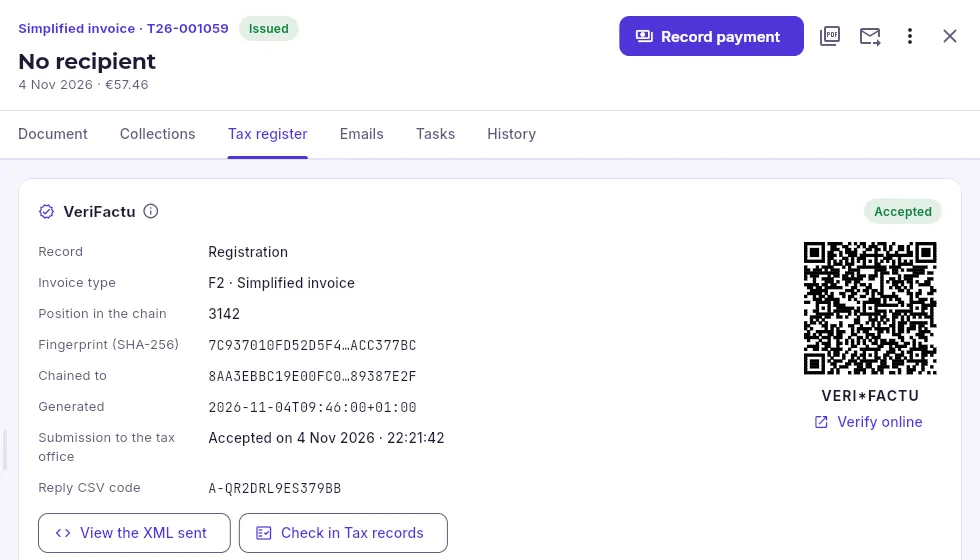 123
- 1A simplified invoice (a shop till receipt), with no recipient.
- 2In VeriFactu, each record carries its fingerprint and that of the company’s previous record: the chain. If anyone tampered with an issued invoice, the chain would break.
- 3The QR code printed on the invoice: with it, the customer checks it on the AEAT website.
The system sends the record by itself, a few minutes after the invoice is issued (in the demo, to a simulator shaped like the official service). If the tax authority does not answer, it retries by itself and the tab says “Waiting after … attempts with no reply”; Try again brings it forward. If the record is rejected or accepted with errors, the reply gives the reason (the customer’s tax ID, their name…): correct it and click Try again. If what is wrong is the invoice itself, correct the invoice with a corrective invoice.
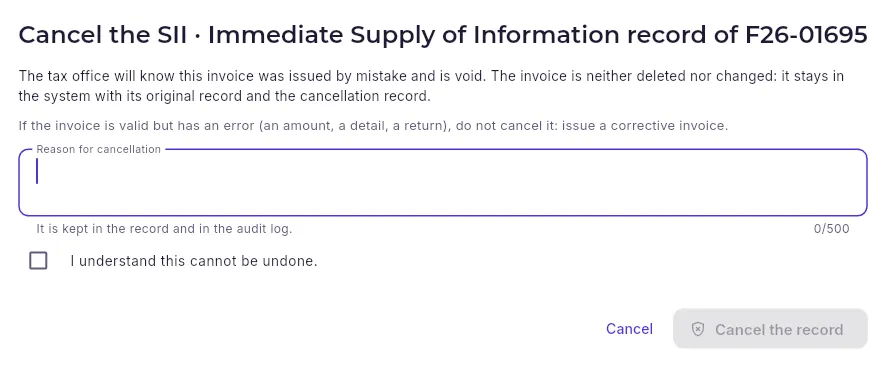 123
- 1The reason: it is kept in the record and in the audit log.
- 2You have to confirm it explicitly.
- 3Creates the cancellation record, which is sent like the others.
#Sending an invoice by email
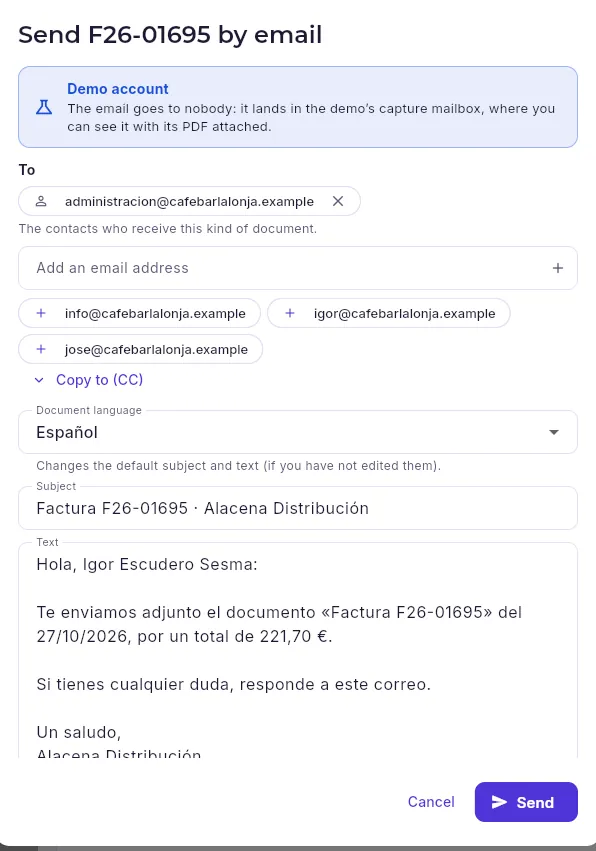 123456
- 1In the demo, the email goes to nobody: it lands in the capture mailbox, with its PDF.
- 2To: the customer’s contacts who receive invoices (if there are none, their invoicing email address or the one on their record). You can remove and add recipients.
- 3Copy to anyone you like.
- 4The language: the customer’s; changing it changes the default subject and text.
- 5The subject and text, which you can edit.
- 6Sends it with the official PDF attached.
Open the invoice and click the envelope: Send by email.
Check the recipients: the customer’s contacts who receive invoices are filled in. Remove or add any you need and, if you like, copy someone in.
Check the language: the subject and text come out in the customer’s language.
Click Send: it goes out with the official PDF attached (if it had not been generated yet, it is generated when sending).
#Correcting an invoice
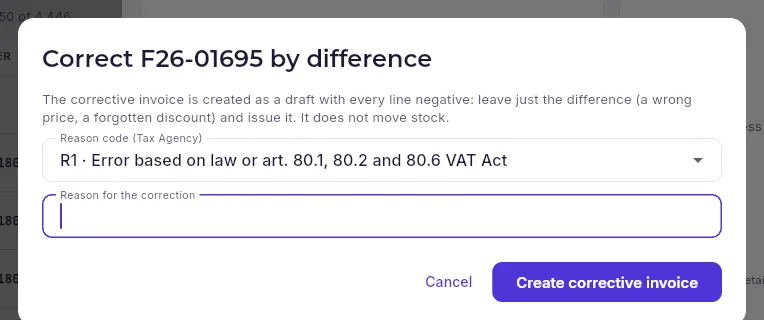 1234
- 1What will happen: the corrective invoice is created as a draft with all the lines negative.
- 2The reason code the tax authority requires: R1 (error based on law), R2 (insolvency), R3 (bad debt) or R4 (other).
- 3The reason, required: it is printed on the corrective invoice.
- 4Creates the draft and opens it.
There are two ways of correcting an invoice, both from the invoice’s More actions:
| By difference | By return | |
|---|---|---|
| What for | A wrong price, a forgotten discount, a detail | The customer sends goods back |
| What is created | The corrective invoice as a draft with all the lines negative: leave just the difference and issue it | The return as a draft with what comes back (and its batches and serial numbers) |
| Stock | Not moved | When the return is recorded, the goods go back into stock |
| Afterwards | Issue the corrective invoice | Credit the return: the corrective invoice is created |
The corrective invoice has its own series (R), is linked to the invoice it corrects and is recorded with the tax authority like any other.
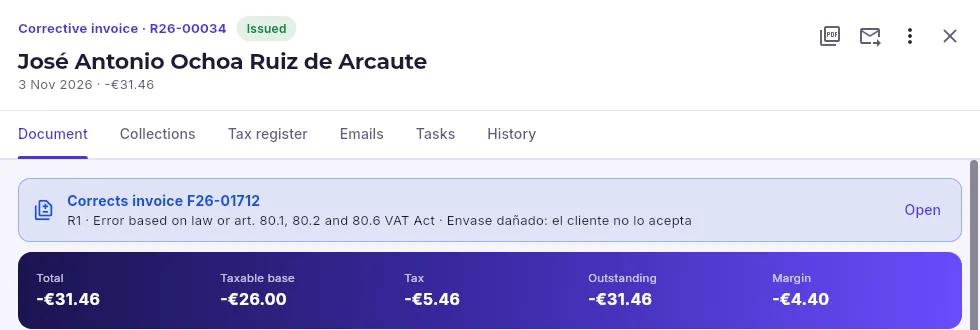 123
- 1A corrective invoice, with its R series.
- 2Which invoice it corrects, with its reason code and reason; Open opens it.
- 3Its amounts, negative: what is credited to the customer.
Open the invoice, click More actions and choose Correct by difference….
Choose the reason code (almost always R1, or R4 if it is something else) and enter the reason.
Click Create corrective invoice: the corrective invoice opens as a draft, with all the lines negative.
Click Edit and leave only the difference: for example, the line with the wrong price, with the difference as a negative amount. Delete the others.
Save it and click Issue invoice.
#Simplified, intra-EU and surcharge invoices
- Simplified invoice (the till receipt): without the recipient’s details, for shop sales. You choose it when creating a new invoice (Standard or Simplified) and it has its own series. It has a limit: €400 (€3,000 in retail and hospitality); above that you must issue a full invoice, with the customer’s tax ID.
- Intra-EU supply: to a customer in another EU country with a VAT number that is valid in VIES. The transaction is intra-EU, VAT is exempt (art. 25 of the Ley del IVA) and the customer declares it in their own country (reverse charge). The invoice carries the mandatory statement and the transaction appears in modelo 349.
- Equivalence surcharge: retailers under this scheme (a local shop, for example) pay, on top of VAT, a surcharge on each line: 5.2% on 21% VAT, 1.4% on 10% VAT and 0.5% on 4% VAT. It is ticked in the customer’s terms and Mercurio applies it automatically.
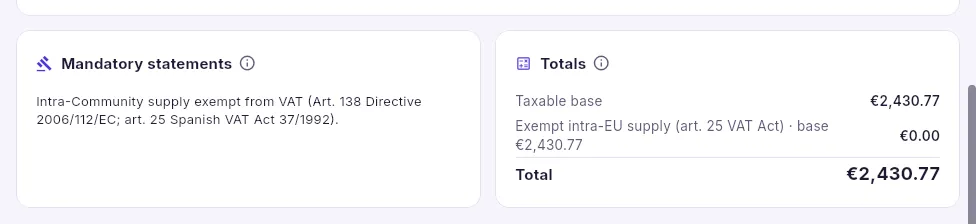 12
- 1The mandatory statement, in the document’s language (here, English).
- 2The base, exempt as an intra-EU supply.
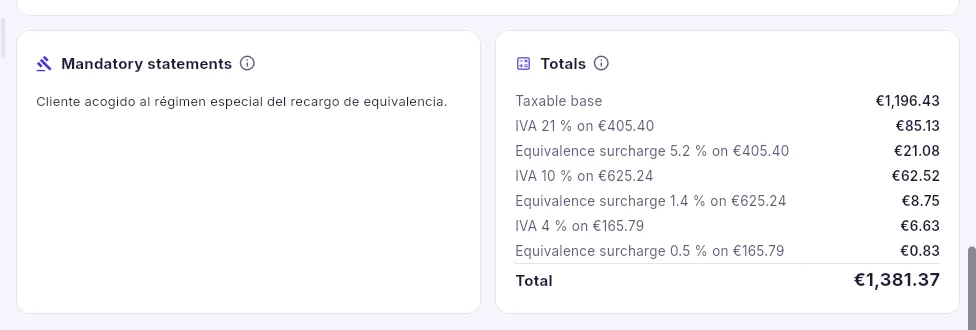 12
- 1The statement for the equivalence surcharge scheme.
- 2VAT and, underneath, the surcharge for each rate.
Mercurio decides the mandatory statements on issue, based on each line’s tax (exempt, intra-EU, reverse charge, corrective, cash accounting…), and they appear exactly like that on the PDF.
#E-invoicing: Facturae, Peppol and EDI
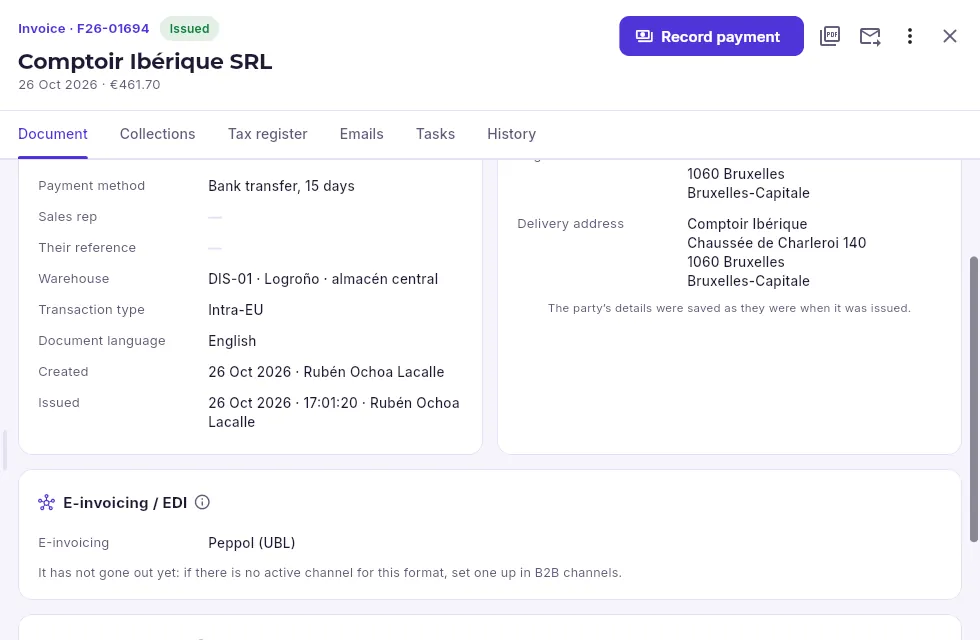 12
- 1The transaction type: intra-EU.
- 2Which channel this invoice goes out through (here, Peppol) and how it is going: if it has not gone out yet, the warning says why.
Some customers do not receive the invoice as a PDF but as an e-invoice: public administrations, as a signed Facturae file sent to FACe (with their DIR3 codes); European companies, through Peppol; large retailers, through EDI (INVOIC). It is set up in the customer’s terms and the invoice goes out by itself when issued through the company’s channel (in B2B). On the record, the E-invoicing / EDI block shows how each submission is going here and at its destination (in FACe: registered, booked, paid or rejected), with its reference; if it fails, the error says what is missing (a GLN, a DIR3 code, the Peppol participant) and Try again sends it again.
Sales
Price lists, special terms and promotions
Selling prices: price lists, the prices and discounts agreed with each customer, promotions and the simulator that tells you what price comes out and why.
The price of each line on a document is set by the pricing engine, always in the same way: in the office, on the customer portal, on orders arriving by EDI or in what Claude is asked. To decide it, it looks, in this order, at:
- 1The price listThe customer’s with that company or, if they have none, the default one; with its quantity breaks and its price on that date.
- 2The special termA price or discount agreed with the customer or with those who have their tag, if there is one.
- 3The trade discountThe one in the customer’s terms, unless the special term brings its own or is a net price.
- 4PromotionsA 3-for-2, a second-unit offer, a volume discount or a free gift, within their dates and channels.
It is all set up in this section, in four tabs: Price lists, Special terms, Promotions and the Price simulator. Special terms and promotions (and quantity breaks) belong to the “Advanced pricing” feature: if it is switched off, their tabs explain this and prices come only from the price lists and each customer’s trade discount.
#Price lists
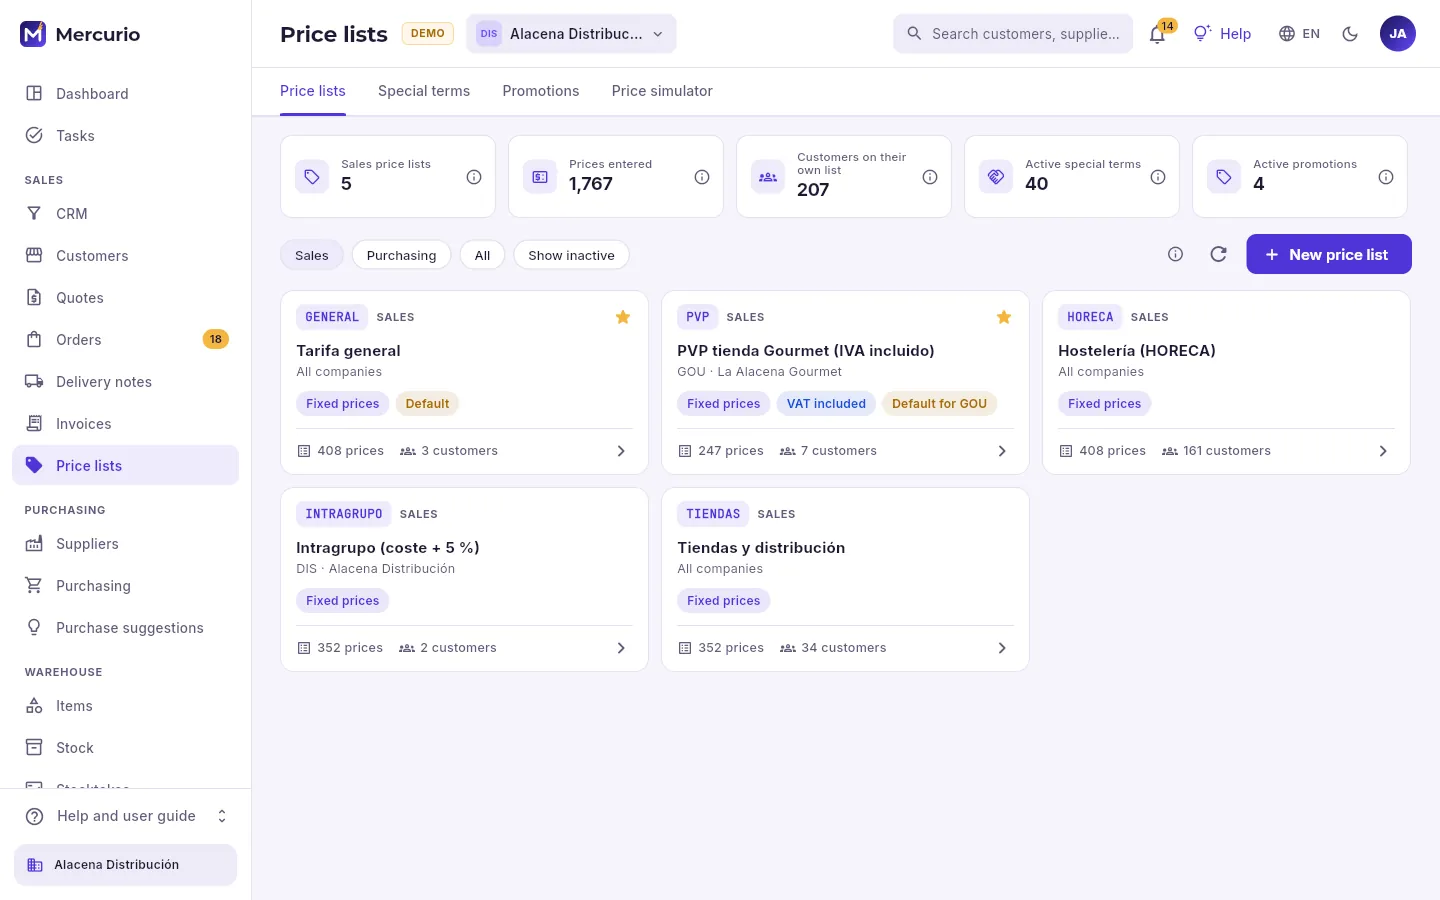 12345
- 1The section’s four tabs.
- 2The indicators: sales price lists, prices entered, customers on their own list, and active special terms and promotions.
- 3Sales lists, purchase lists or all of them, and those that have been deactivated.
- 4Create a price list.
- 5Each card: code, name, whether it is for all companies or for one, how it is calculated (fixed prices, on cost or on another price list), whether it includes VAT, how many prices it has and how many customers use it. The star marks the default one.
A price list is a list of prices. It can be for all the companies in the group or for just one, and it is calculated in one of three ways:
| Price basis | Where it comes from | What for |
|---|---|---|
| Fixed prices | Whatever you enter in its grid, item by item. With no price, the item cannot be sold on it. | The general list, with a price chosen for each item. |
| On cost | The item’s cost (the latest or, if there is none, the standard cost) plus a mark-up. | Selling with a fixed mark-up on what it costs. |
| On another price list | The price on another list, plus or minus a %. | A list = the general one − 10%. |
In the last two, a price entered by hand overrides the calculation. Then it is rounded (to the cent, ending in .95 or .99, or to multiples) and, if it includes VAT (a shop’s retail price), it is converted to the taxable base when selling. Each customer buys on the price list set in their terms with each company; anyone without one buys on their company’s default list or the general one.
#A price list’s prices
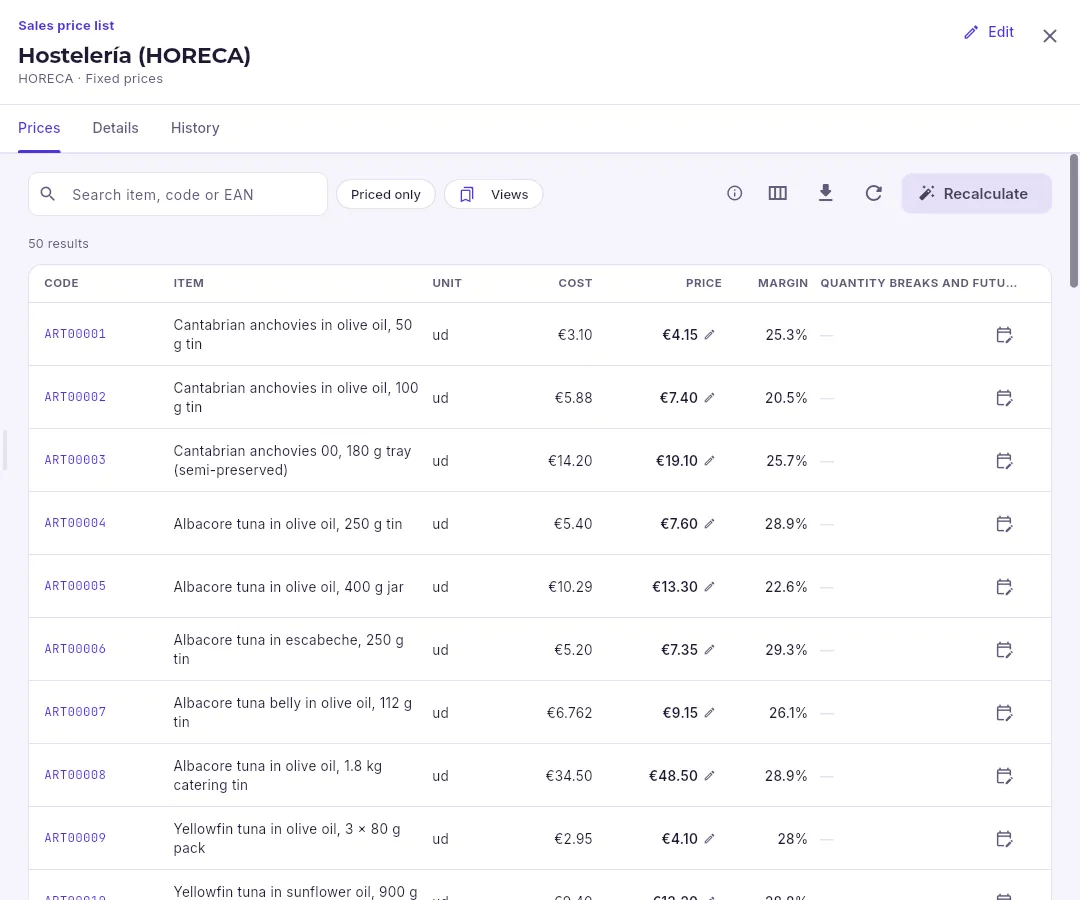 12345
- 1Its prices, its details (how it is calculated, validity, default) and its change history.
- 2Change its details.
- 3Search for an item, and show only the items with a price on this list.
- 4Recalculate: raise or lower prices in one go (all of them or those of one family) by a %, from a given date. Before applying, it tells you how many will change.
- 5The grid: the cost, the single-unit price in force today (click the pencil to change it right there), the margin and, on the right, quantity breaks and future-dated prices.
On a price list, each item has its single-unit price and, if needed, quantity breaks (from 6 units, from 24…) and future prices with their date (January’s increase, prepared in December). When selling, the break with the highest “from” that does not exceed the quantity applies and, within it, the price with the most recent date that has already arrived. The margin is (price − cost) / price.
#Creating a price list
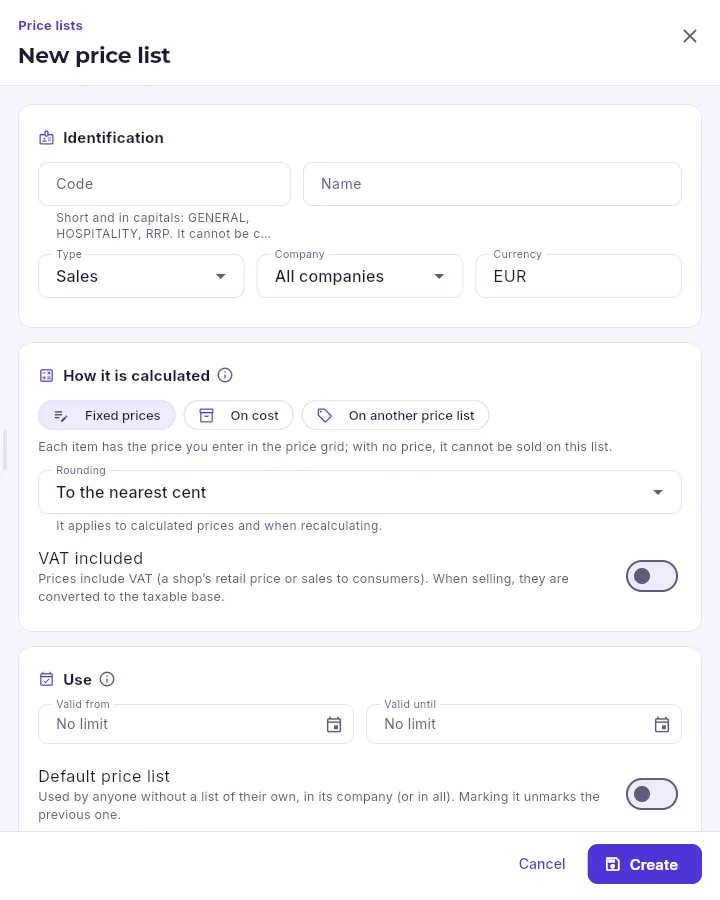 123456
- 1The code (short and in capitals; it cannot be changed later) and the name.
- 2Sales or purchasing, for all companies or for one, and its currency.
- 3How it is calculated: fixed prices, on cost with a mark-up, or on another price list with a %.
- 4Rounding for calculated prices, and whether it includes VAT.
- 5From and until when it is valid, and whether it is the default (the previous default stops being so automatically).
- 6Creates it and opens its record so you can enter the prices.
In Price lists, click New price list.
Enter the code (for example, CATERING) and the name, and choose whether it is for sales and which company it belongs to.
Choose how it is calculated: if it is going to be the general one minus 8%, On another price list, the base price list and −8; if each price is different, Fixed prices.
Choose the rounding and whether it includes VAT.
Click Create: its record opens. If it uses fixed prices, enter the prices in the grid (or keep the calculated ones and enter only those that change).
Assign it to its customers on their record: Terms → price list.
#Special terms
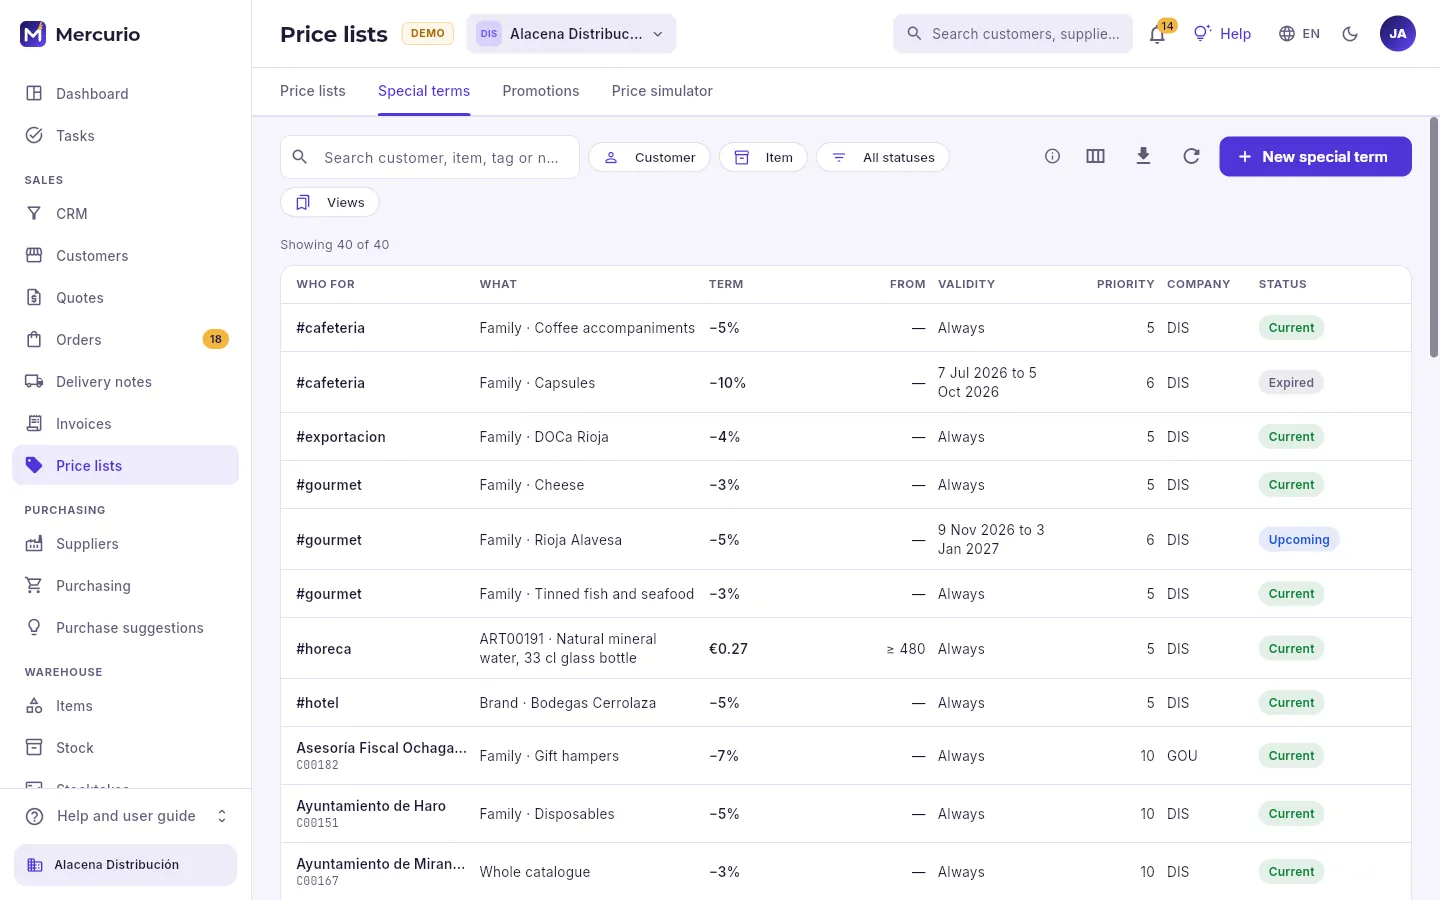 1234
- 1Search by customer, item, tag or note.
- 2Filter by customer, by item or by status: current, upcoming, expired or inactive.
- 3Agree a price or a discount.
- 4Each special term: who for (a customer or a tag, with #), what (an item, a family, a brand or everything), the term (price or discount), from how many units, its validity, its priority, the company and its status.
A special term is an agreed price or discount: with one customer or with everyone who has a tag on their record (#horeca, #gourmet…), for an item, a family, a brand or the whole catalogue, from a given quantity and between two dates. There are three kinds:
- Price: replaces the list price and allows discounts; if it does not include the first discount, the customer’s trade discount applies.
- Net price: replaces the list price and allows no further discounts, not even the trade discount.
- Discounts: up to three, cascading on the list price (10% and 5% make 14.5%).
If several apply to the same sale, the one with the highest priority wins and, if they are equal, the most specific one: a customer before a tag, an item before a family or a brand. On documents, the line says which special term was applied.
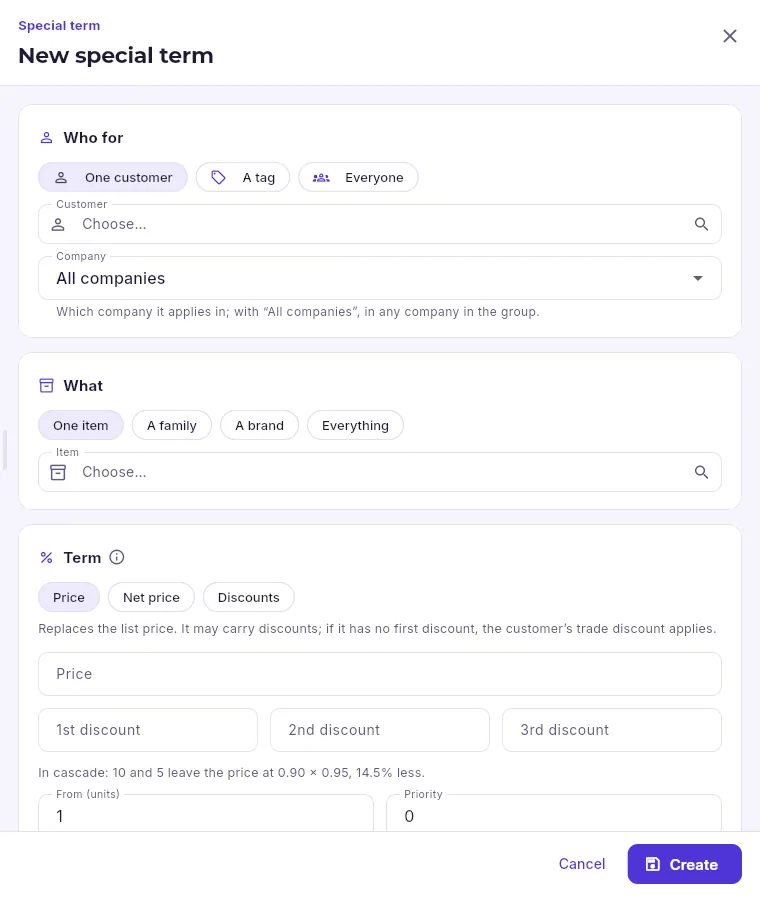 12345
- 1Who for: a customer, those with a tag, or everyone; and which company it applies in.
- 2What: an item, a family, a brand or the whole catalogue.
- 3The term: price, net price or discounts.
- 4Up to three cascading discounts; above them, the agreed price.
- 5Saves it: from that moment on, documents apply it.
#Promotions
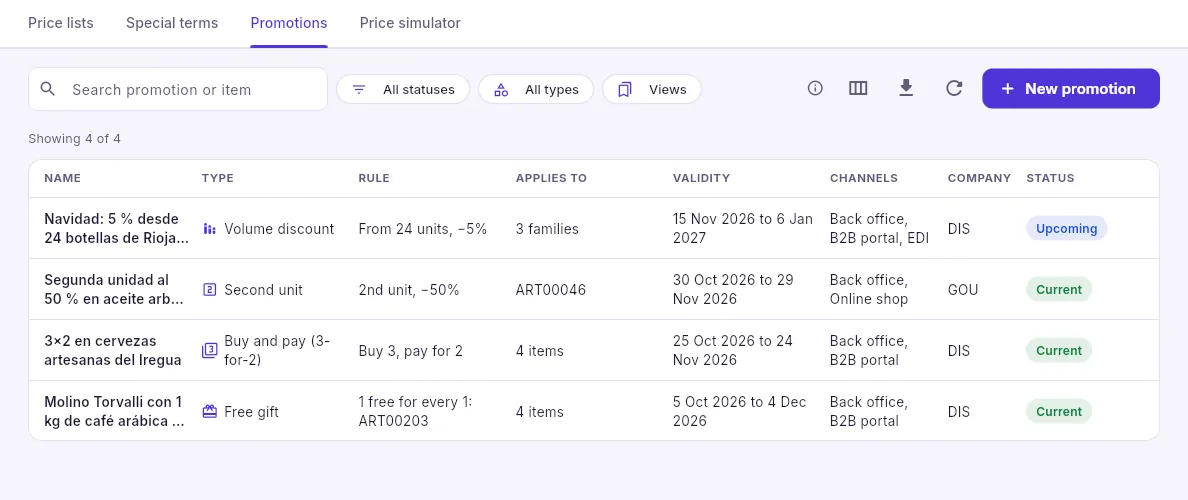 123
- 1Search, and filter by status and by type.
- 2Create a promotion.
- 3Each promotion: its type and rule, which items or families it applies to, its dates, its channels (back office, B2B portal, online shop, EDI), the company and its status.
| Type | What it gives |
|---|---|
| Buy and pay | For every N units, M are paid for: with 3-for-2, one in every three is free. |
| Second unit | The second unit of each pair at a discount (100% = free). |
| Volume discount | From a given quantity, a discount on the whole line. |
| Free gift | For every N units, some units of another item (or the same one) free of charge. |
Promotions apply within their dates and in the channels they specify: one may be for the portal or the online shop only. The engine reports them with each price, and the order or invoice applies them to the line.
#The price simulator
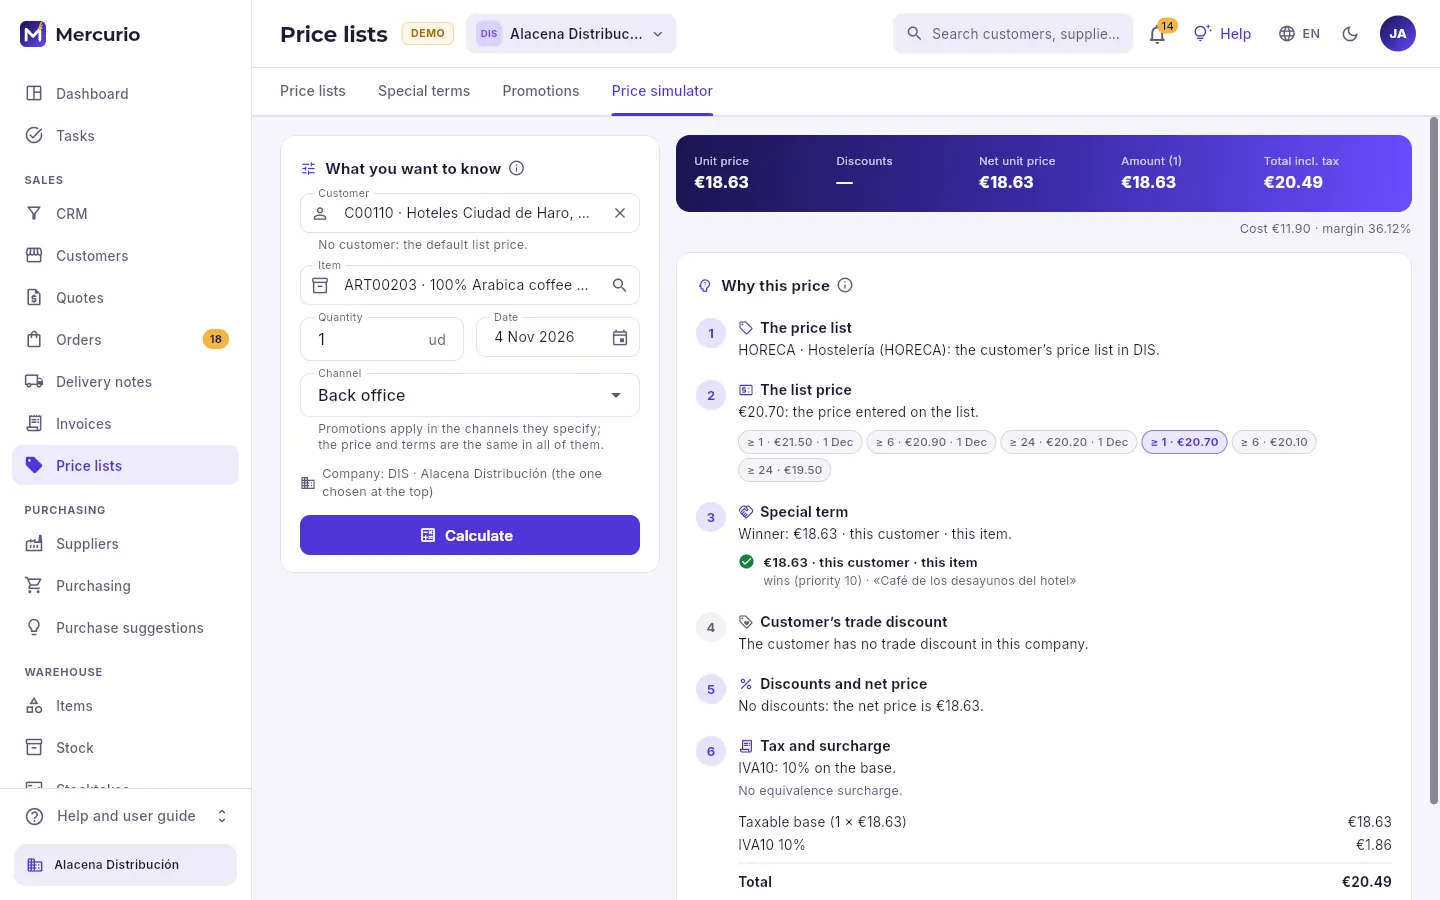 1234
- 1What you want to know: the customer (or none, for the default price list), the item, the quantity, the date and the channel.
- 2Calculates as an order would, in the company selected at the top.
- 3The result: price, discounts, net price, amount and total including tax.
- 4Why this price: each step of the engine (the price list, its price and quantity breaks, the special term that wins and those that do not, the trade discount, the net price, the tax). In colour, the steps that changed something.
The simulator uses the same engine as documents, the portal and Claude: if a customer asks why they are getting a particular price, the answer is here, step by step. Change the quantity to see quantity breaks and promotions, or the date to see a future price.
Purchasing
Suppliers
Who you buy goods from and who provides you with services (creditors), shared by the whole group, with their purchase terms with each company, their withholding and what you owe them.
A supplier sells you the goods you store and resell; a creditor provides you with services or passes on costs to you (the accountants, the rent, electricity, transport) and their invoices go to expenses, not to stock. Both are in this section and you tell them apart with the Type filter.
As with customers, there is one record for the whole group (company name, tax ID, addresses, contacts and banks) and each company has its own terms with them: payment method, lead time, carriage, withholding. The same party can be a customer and a supplier at once, with a single record.
#The list
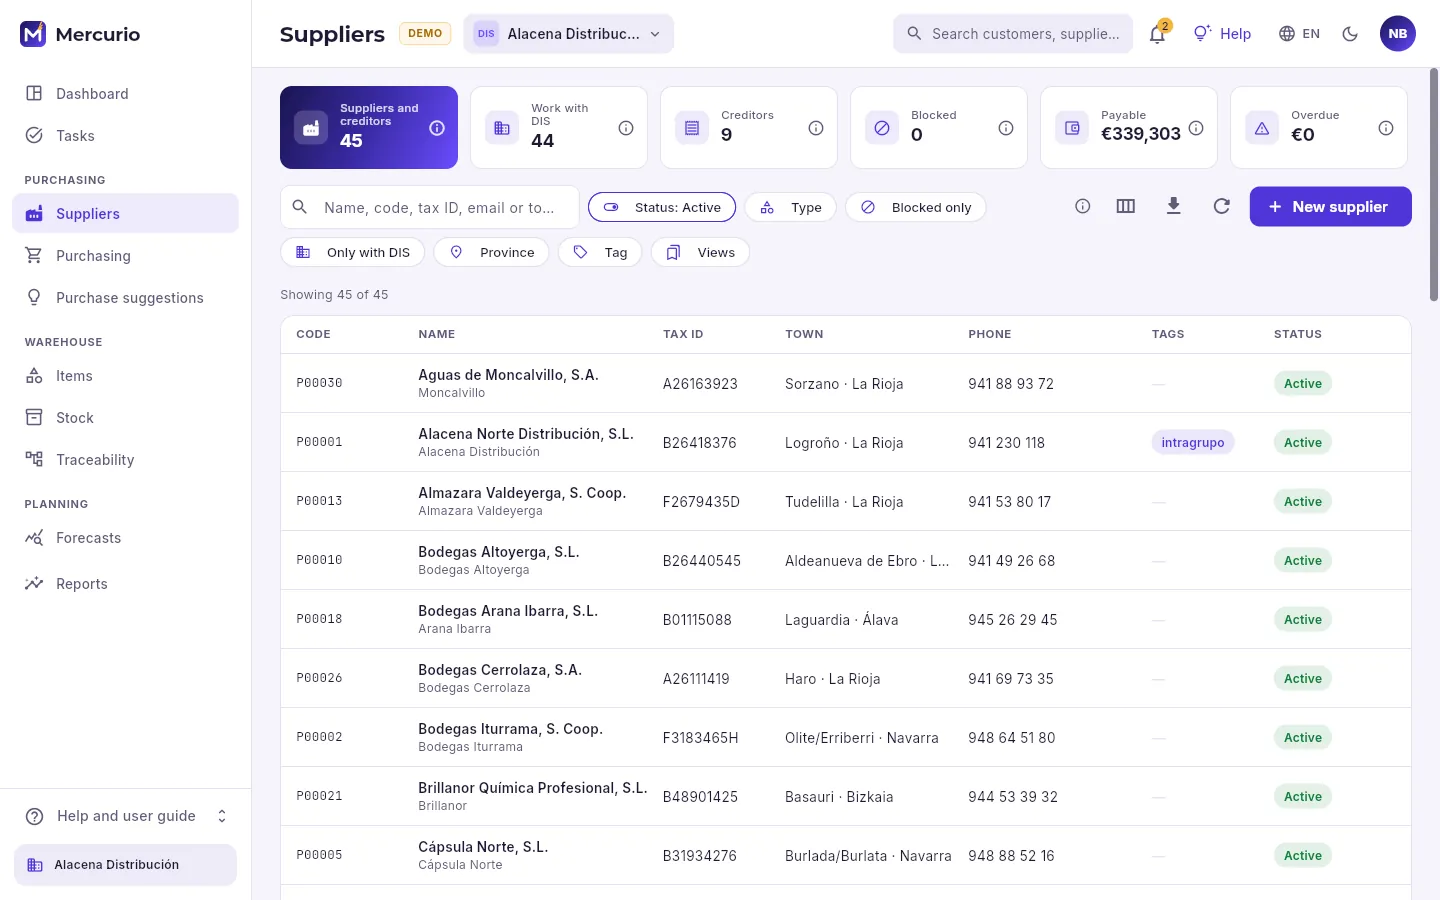 123456
- 1The indicators: how many suppliers and creditors there are, how many work with the selected company, the creditors, the blocked ones, what you owe them and what is overdue. Each with its ⓘ.
- 2The search box: by name, code, tax ID, email or town.
- 3The filters: active or not, suppliers or creditors, blocked, only those that work with the selected company, province and tag. Views saves a combination so you can come back to it.
- 4Which columns are shown, exporting what is filtered to a spreadsheet and reloading.
- 5Add a supplier or a creditor.
- 6The list: code, name (with the trading name underneath), tax ID, town, phone, tags and status. Click a row to open its record.
Supplier codes start with P and creditor codes with A (each with its own series). The list brings them 50 at a time and, at the end, Load more brings the next 50; the database does the search across all of them.
#A supplier’s record
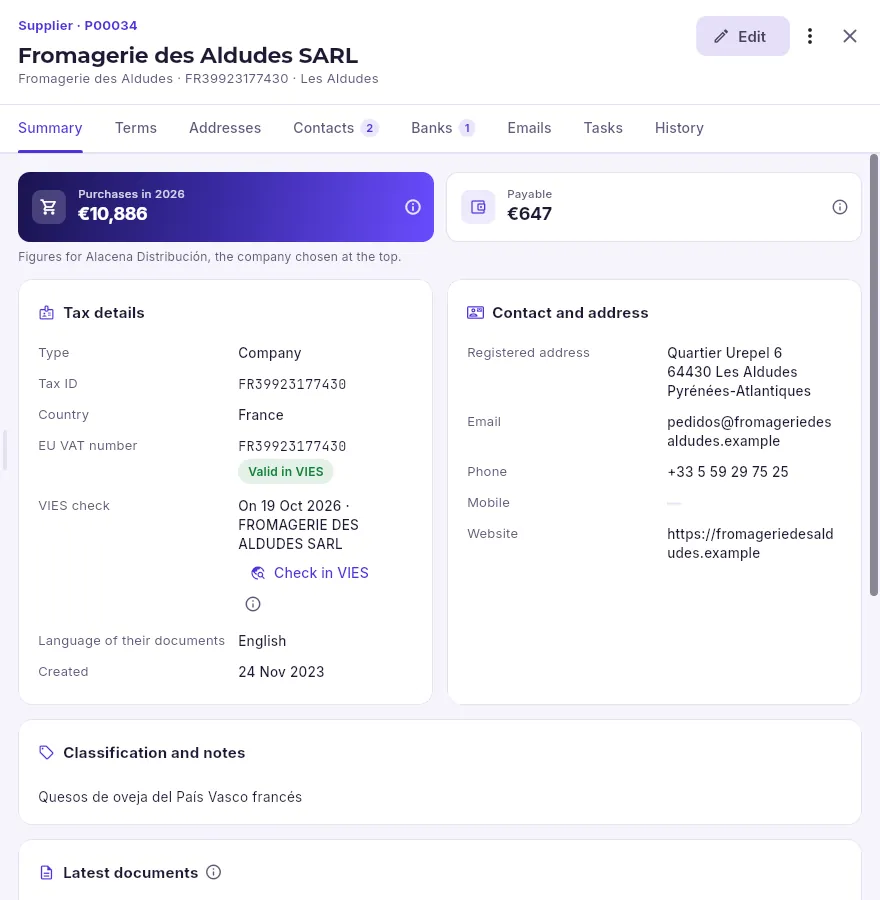 1234567
- 1Supplier or creditor, with their code, name, tax ID and town.
- 2The record opens read-only: to change their details, Edit.
- 3The tabs: summary, purchase terms, addresses, contacts, banks, emails, tasks and history.
- 4What you have bought from them this year and what you owe them, with the selected company.
- 5Their tax details, shared by the whole group. This supplier is French: their EU VAT number shows as valid in VIES, with the date and the name registered there.
- 6Asks VIES again whether their EU VAT number is still registered.
- 7Their registered address, their email (where orders are sent), their phone and their website.
Further down are their classification and notes (tags and notes) and their latest documents (orders, receipts and invoices): click one to open it. In More actions (⋮) you block them so nothing can be bought from them, deactivate them or add them as a customer as well.
#Purchase terms
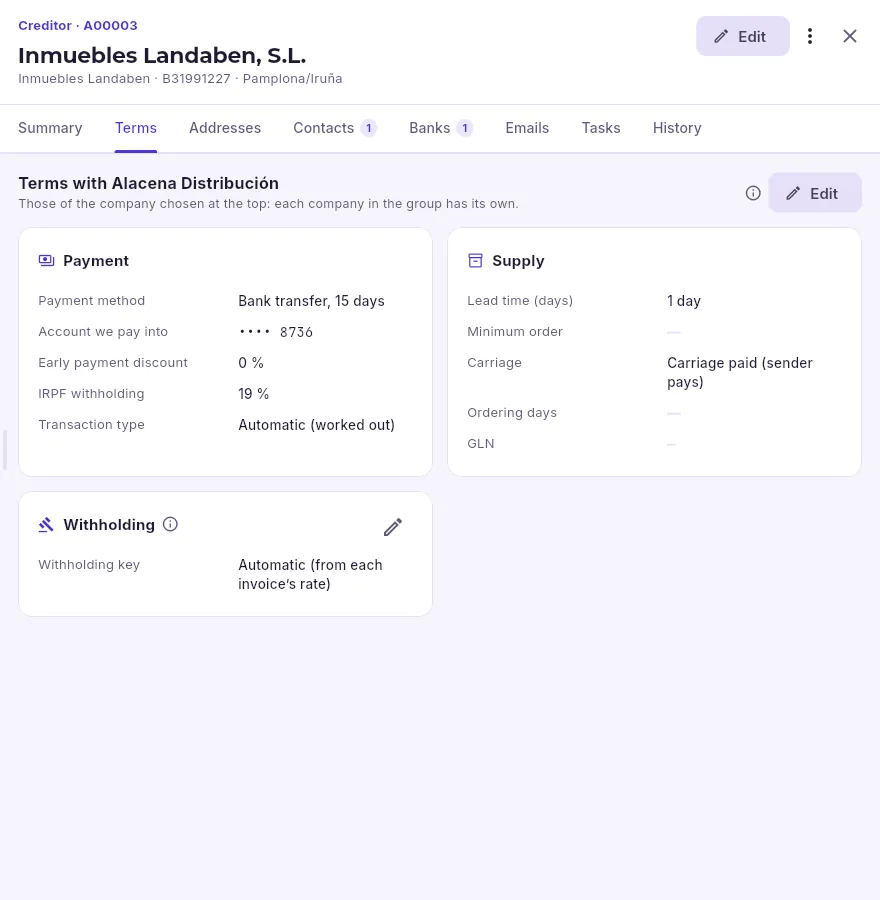 123456
- 1The terms belong to the company selected at the top: each company in the group has its own with them.
- 2How they are paid: payment method, account they are paid into by transfer, early payment discount, their IRPF withholding (Spanish personal income tax) and the transaction type (worked out automatically from their country and EU VAT number).
- 3How they supply: their lead time in days (used by the purchase suggestions), minimum order, carriage, the days on which you order from them and their GLN for EDI.
- 4The withholding settings: which tax forms the tax you withhold from them goes to.
- 5Change the settings (saved without going through Edit).
- 6Change the payment and supply terms.
Documents use what you put here on their own: when you create an order for them, their payment method and carriage are already there; when you record their invoice, their withholding. A document already created keeps the terms it had.
Open the supplier’s record and the Terms tab (with the company that pays them selected at the top).
On the Withholding card, click the pencil (Change withholding settings).
In Withholding key, choose Landlord of premises (forms 115 and 180).
Enter the Property location, its Cadastral reference (20 characters, as on the property tax (IBI) bill) and its address, and save.
#Adding a supplier
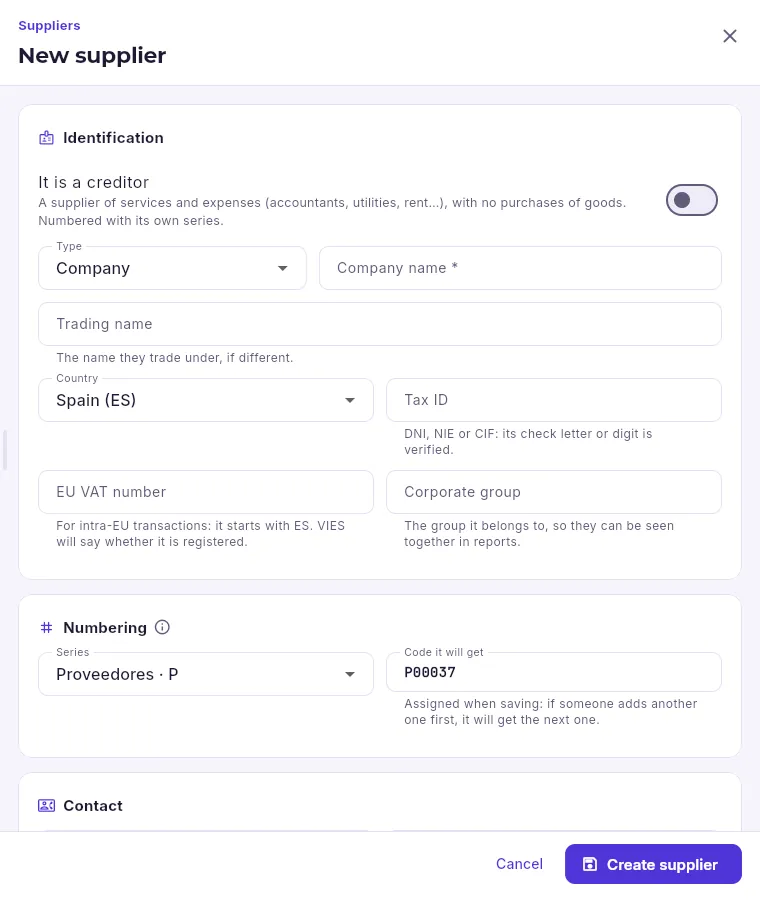 123456
- 1Tick it if they provide you with services or pass on costs (accountants, rent, utilities): they are numbered in the creditors series.
- 2Company, sole trader, private individual, public body or organisation.
- 3The name on their invoices (required).
- 4Their tax ID: the letter or check digit is validated, and Mercurio checks that no other party has it already.
- 5If they are from another EU country, their EU VAT number, which is checked against VIES.
- 6Saves the supplier and opens their record.
In Suppliers, click New supplier.
Choose the type, type the Company name and the Tax ID (and the EU VAT number if they are from another EU country). If they are a creditor, tick It is a creditor.
Fill in the email (where their orders will go), the phone and the language of their documents.
Click Create supplier: they get the next code in their series and their record opens.
In Terms, click Edit and set their payment method, lead time, carriage and, if you withhold tax from them, their withholding. If other companies in the group buy from them, change company at the top and repeat.
Add their contacts and their bank (the account you pay them into by transfer). For them to appear in the purchase suggestions, set them as the supplier on their items’ records (Purchasing tab).
Purchasing
Purchasing
What you order from suppliers, what arrives at the warehouse with its batches, expiry dates and serial numbers, and their invoices, with what is still to be received, invoiced and paid.
A purchase goes through three steps, each with its own document and tab: the purchase order (what you order), the goods receipt (what arrives: it goes into stock) and the supplier invoice (what they charge you: it goes to the accounts, the VAT books and payments). Each document is created from the previous one with whatever is still pending, so the same thing is never received or invoiced twice.
- 1SuggestionsWhat to order from each supplier, and how much.
- 2OrderSent to the supplier, with its PDF by email.
- 3Goods receiptGoes into stock with its batch, expiry date or serial number.
- 4Supplier invoiceWith its number; it creates the payment due dates.
- 5PaymentBy bank transfer, on its own or in a payment run.
#Purchase orders
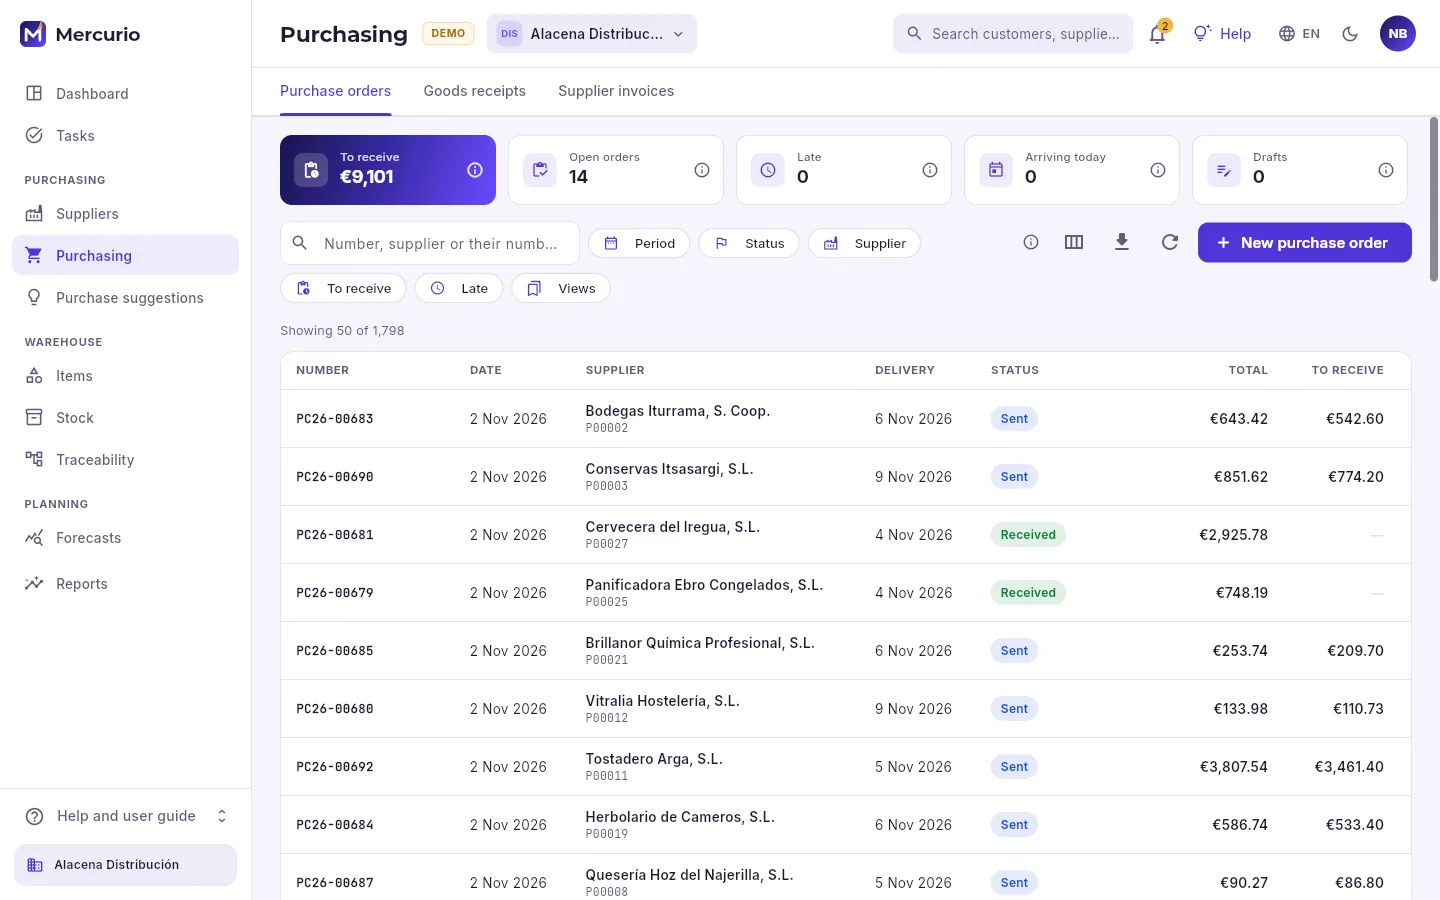 123456
- 1The three tabs: orders, goods receipts and supplier invoices.
- 2The indicators: what is still to arrive (in euros), open orders, late ones, those arriving today and unsent drafts. Those you can click filter the list.
- 3Search by our number, by the supplier or by the number they give it.
- 4The filters: dates, status, supplier, only what is still to be received or what is late, and saved views.
- 5Create an order by hand (those from the suggestions are created automatically, as drafts).
- 6Each order with its date, supplier, expected delivery, status, total and what is still to be received.
An order starts as a draft; when you send it, it gets its number and can no longer be changed, and the envelope on its record emails it to the supplier with the PDF (in the language of their documents). It then becomes part-received or received as the goods arrive, and it can be cancelled as long as nothing has arrived. If you know the rest will not come, Mark as received closes it.
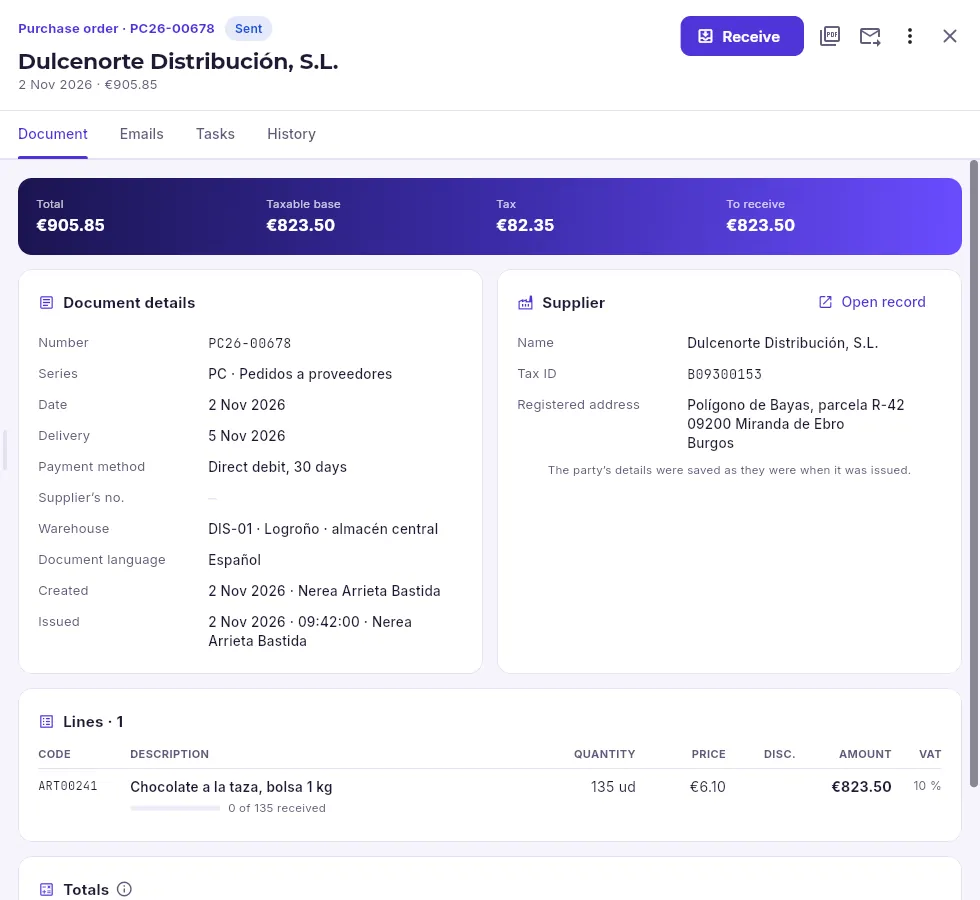 123456
- 1The type, the number and the status (sent).
- 2When the goods arrive: creates the goods receipt with what is pending.
- 3Its PDF, email it, and more actions: record its invoice, cancel it or duplicate it.
- 4The order total, its base, its taxes and what is still to be received.
- 5Date, expected delivery, payment method, the number the supplier gives it and the warehouse it will arrive at.
- 6The lines, with the supplier’s price and, underneath, how much of each has arrived.
#Receiving the goods
When the lorry arrives, open the order and click Receive. What is pending on each line appears: if only part has arrived, change the quantities (the rest stays pending on the order), and enter the date and the number of their delivery note (Supplier’s no.). Once created, the goods receipt opens as a draft so you can record the batches, expiry dates and serial numbers of whatever needs them.
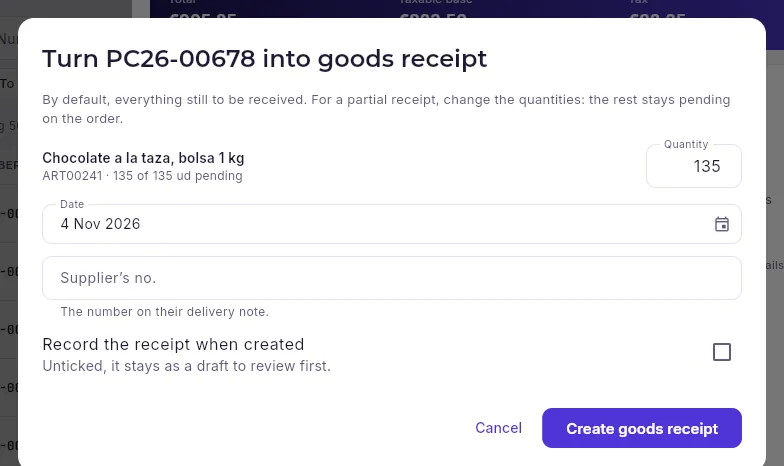 12345
- 1Each line with what is still to arrive. If only part has come, change the quantity: the rest stays outstanding on the order.
- 2The day the goods arrive.
- 3The number of their delivery note, so you can find it later and match it with their invoice.
- 4Unticked, the goods receipt stays as a draft so you can record the batches, expiry dates and serial numbers. Tick it if there is nothing to record: the goods go into stock straight away.
- 5Creates the goods receipt and opens it.
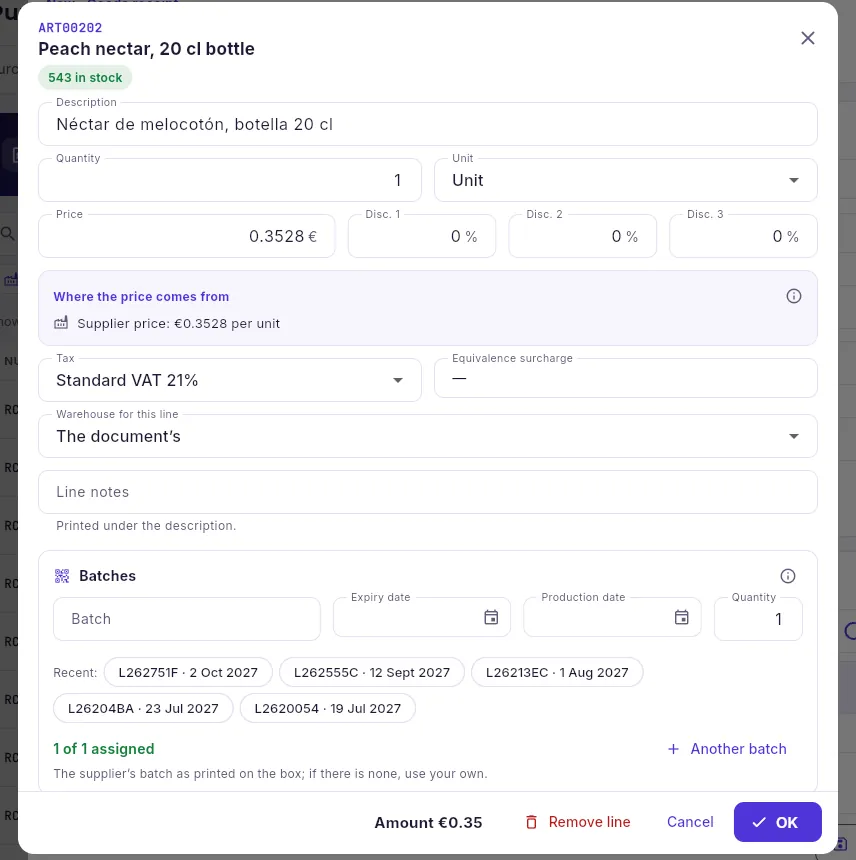 123456
- 1The quantity that has arrived, in the unit you choose (a box of 24 is 24 stock units).
- 2The price agreed with the supplier (the one on the item’s record), with its explanation.
- 3The batch as it comes on the box; if it has none, enter your own. If it already exists, the stock goes into that batch.
- 4Its expiry date (required if the item expires) and its manufacturing date.
- 5This item’s latest batches: click one if a batch you already have arrives again.
- 6If it arrives in several batches, split the quantity between them: the total must match the line.
Every line for an item with batches carries the batch missing warning in red until you record it; an item with serial numbers asks for one number per unit (you can paste them from a spreadsheet). Without them, the goods receipt cannot be recorded. When you click Record receipt, the goods go into stock in the receipt’s warehouse, at the line price, and the order is received (or part-received).
In Purchasing → Purchase orders, open the order (the To receive filter leaves only those waiting for goods).
Click Receive, check the quantities that have arrived and type the Supplier’s no. (the one on their delivery note). Leave Record the receipt when created unticked and create the goods receipt.
In the goods receipt, which opens as a draft, click Edit and, on each line with the batch missing warning, open it and enter its Batch and its Expiry (or its serial numbers).
Click Record receipt.
#Goods receipts
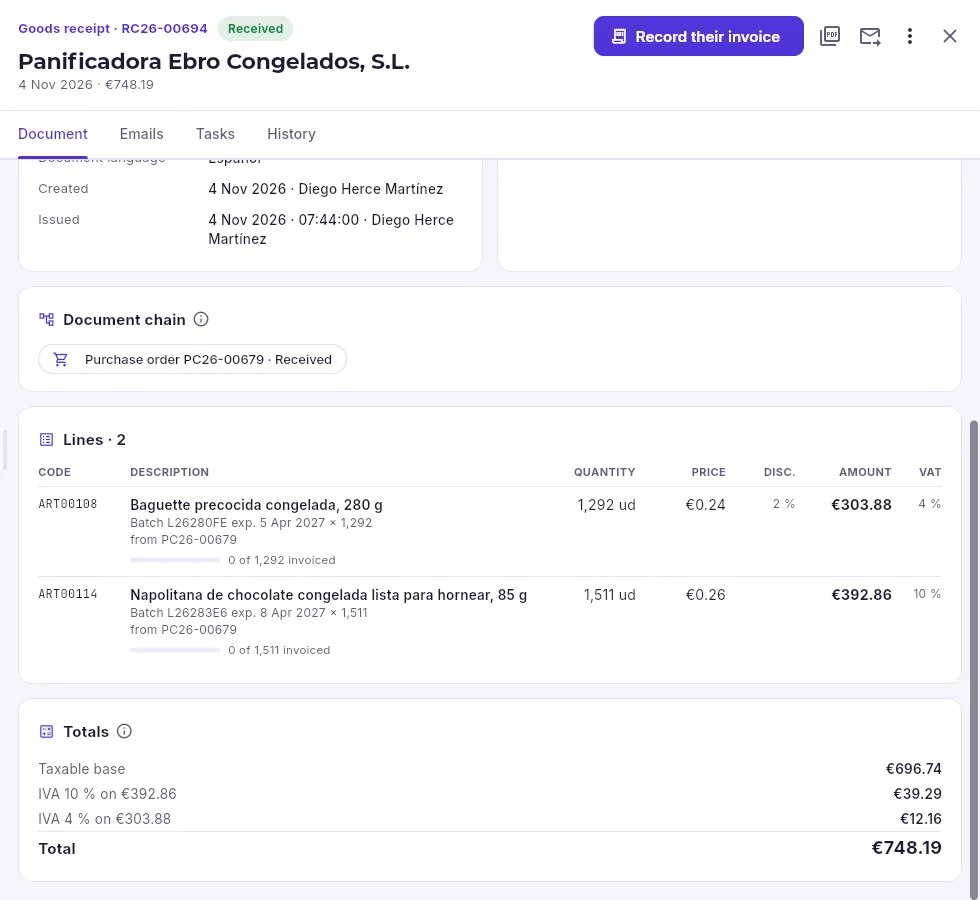 1234
- 1The goods receipt, with its number and status (received).
- 2When the supplier’s invoice arrives, you record it from here with what was received.
- 3Which order it comes from (and, once it has one, its invoice): each document links to its related ones.
- 4Each line with its batch and expiry date, the order it comes from and how much has been invoiced.
In the Goods receipts tab, To invoice is what has been received but whose invoice has not yet arrived; Invoice several records several goods receipts from the same supplier on a single invoice (the usual thing with suppliers who invoice at the end of the month).
#Supplier invoices
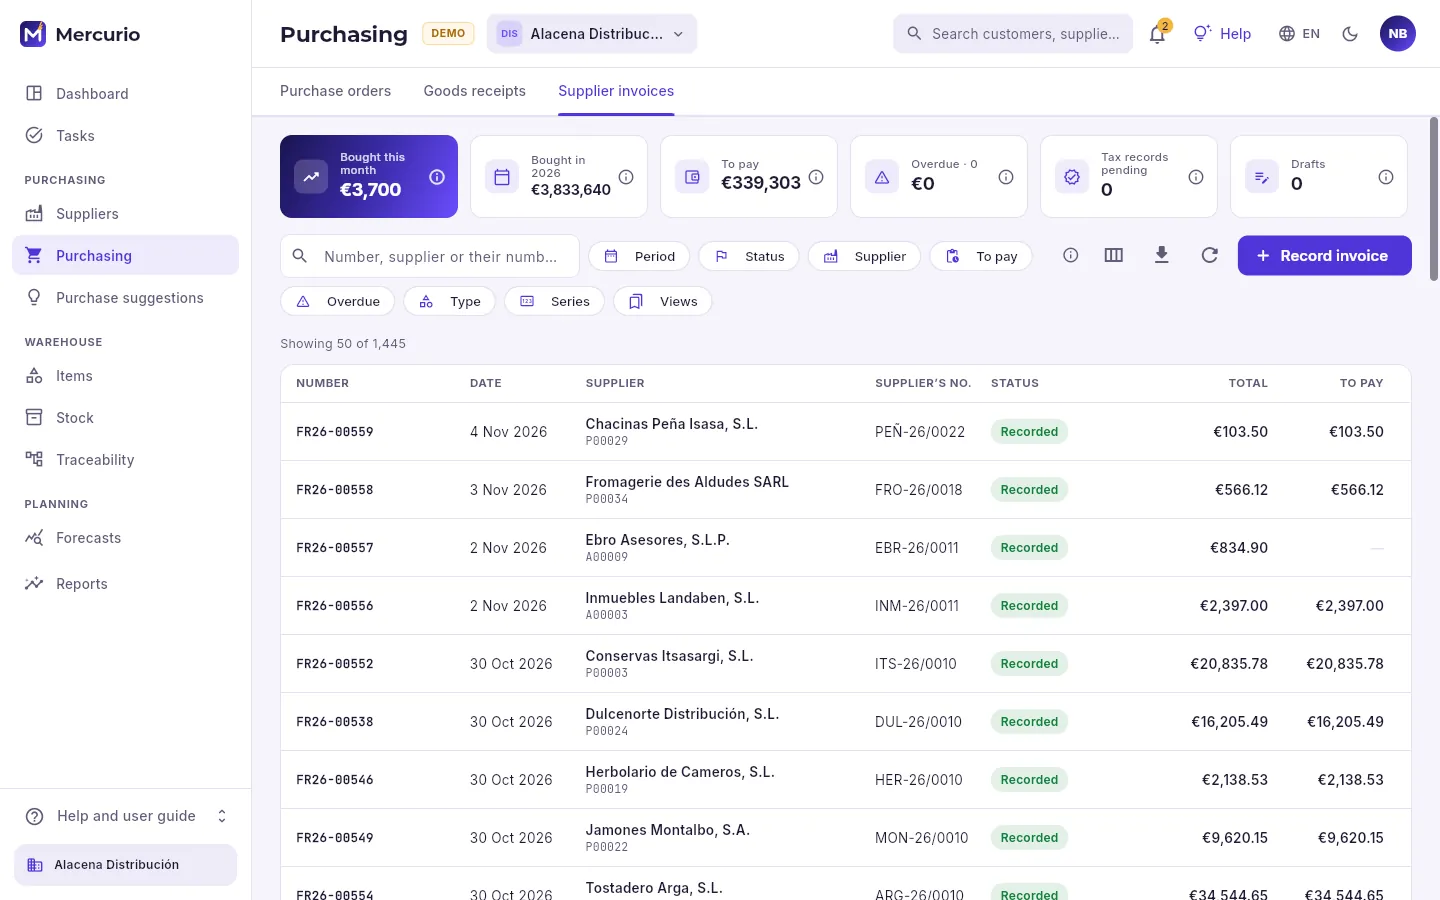 12345
- 1What has been bought this month and this year, excluding taxes.
- 2What you owe suppliers and what is already overdue and unpaid.
- 3With SII (Immediate Supply of Information), the invoices whose record the AEAT (Spanish Tax Agency) has not yet accepted.
- 4The filters: dates, status, supplier, what is still to pay, what is overdue, the type (standard or corrective) and the series.
- 5Record an invoice without a goods receipt: a creditor’s (electricity, the accountants) or one for a service.
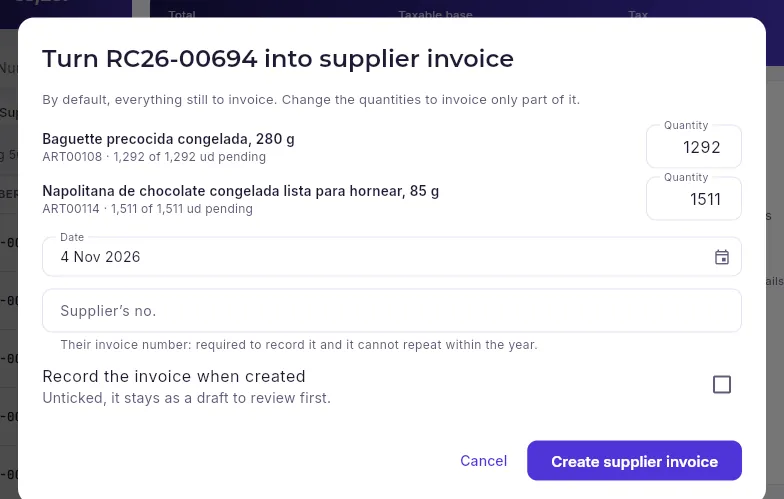 1234
- 1Each line, with what has been received and not invoiced; if the invoice only covers part of it, change the quantity.
- 2The date of their invoice.
- 3The number of their invoice: required to record it, and it cannot be repeated within the year for the same supplier.
- 4Tick it to record it straight away; unticked, it stays as a draft so you can review it.
When you record it, the invoice creates its payment due dates according to the supplier’s payment method, is posted to the accounts (if you keep your accounts in Mercurio), goes into the input VAT book and, with SII, is sent to the AEAT. If it carries withholding, the total to pay is the total minus the withholding, which your company pays to the Tax Agency (forms 111 or 115). An invoice with a wrong price is corrected with Correct by difference…, which creates a corrective invoice as a draft to leave it with the difference.
#Purchases between group companies
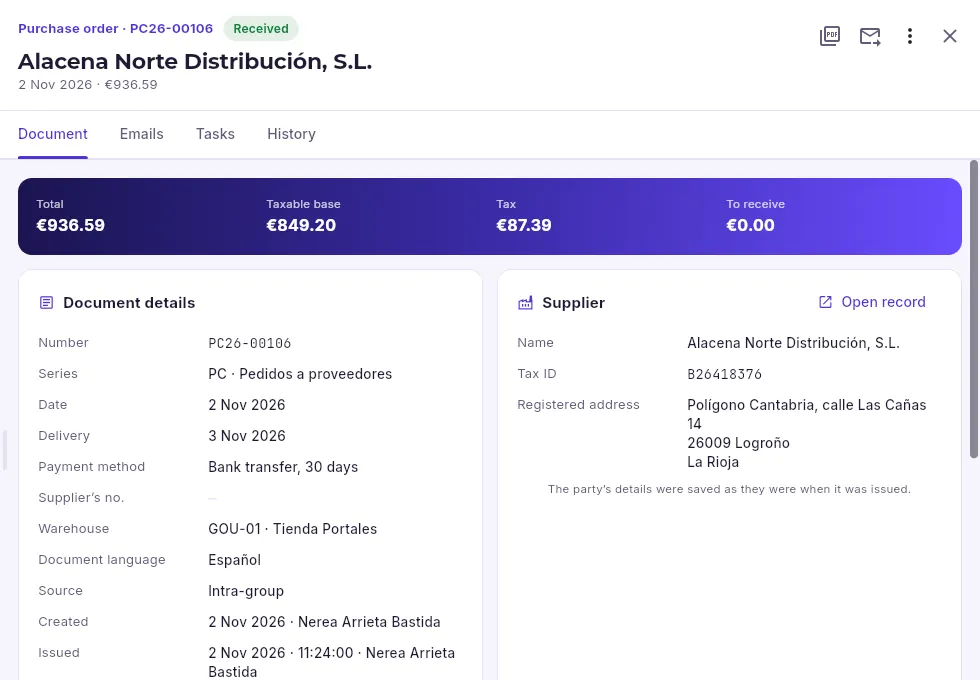 123
- 1An order from La Alacena Gourmet to another company in the group.
- 2Its source, Intra-group: this is how a transaction between group companies is recognised.
- 3The supplier is Alacena Distribución, set up as a supplier with the “intra-group” tag.
When one group company buys from another (in the demo, the Gourmet shop buys from the distributor), you only need to raise the purchase order: the supplier is the other company (a supplier with its tax ID) and, when you send it, Mercurio creates and issues by itself, in the selling company, the mirror sales order: the same lines, with the prices and discounts of your order (what was agreed; a line with no price takes the customer’s price list one), and the delivery date you expect. The buyer does not need to work in the selling company: the system does it.
The two orders are linked. Each one’s record shows the Mirror order card with the other’s company, number, status and total, and Open takes you to it (switching to that company, if you work in it; if not, you can see it but not open it). What the selling company ships is what you receive. Both carry the Intra-group source (on the record and in the Source column of the lists; turn it on in Columns), and the consolidation of accounts in Accounting eliminates those sales and purchases between them so they are not counted twice.
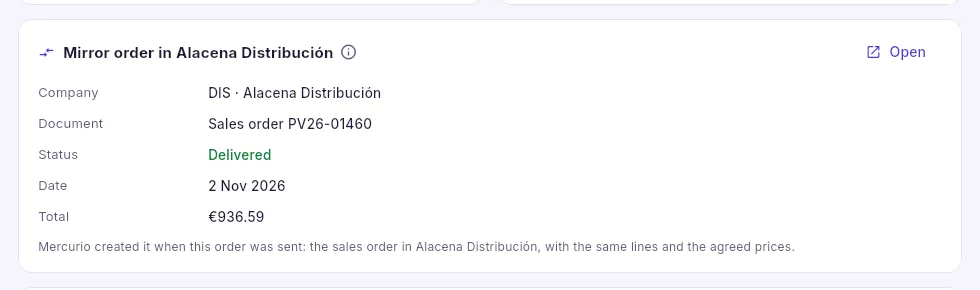 123
- 1The mirror order: the sales order that Mercurio created and issued in Alacena Distribución when this one was sent.
- 2Its company, its number, its status (here, delivered: what Distribución shipped is what Gourmet received), its date and its total.
- 3Opens it: switches to Alacena Distribución and shows it in Sales → Orders. It only appears if you work in that company and can see its orders; if not, the card says so.
Purchasing
Purchase suggestions
What needs ordering from each supplier and what the central warehouse has to send to its other warehouses, worked out from stock, what is on order, what will expire and the sales forecast, and turned into orders with one click.
Every night, after working out the sales forecasts, Mercurio looks at each item in each warehouse and decides whether it needs ordering: it compares what you really have (the available stock) with what you will sell while the order arrives plus a buffer (the reorder point). If it falls short, it suggests the quantity that brings it up to the target, in the supplier’s boxes. You review, remove or change whatever you like and turn the lines into draft orders, one per supplier and warehouse.
#Purchase suggestions
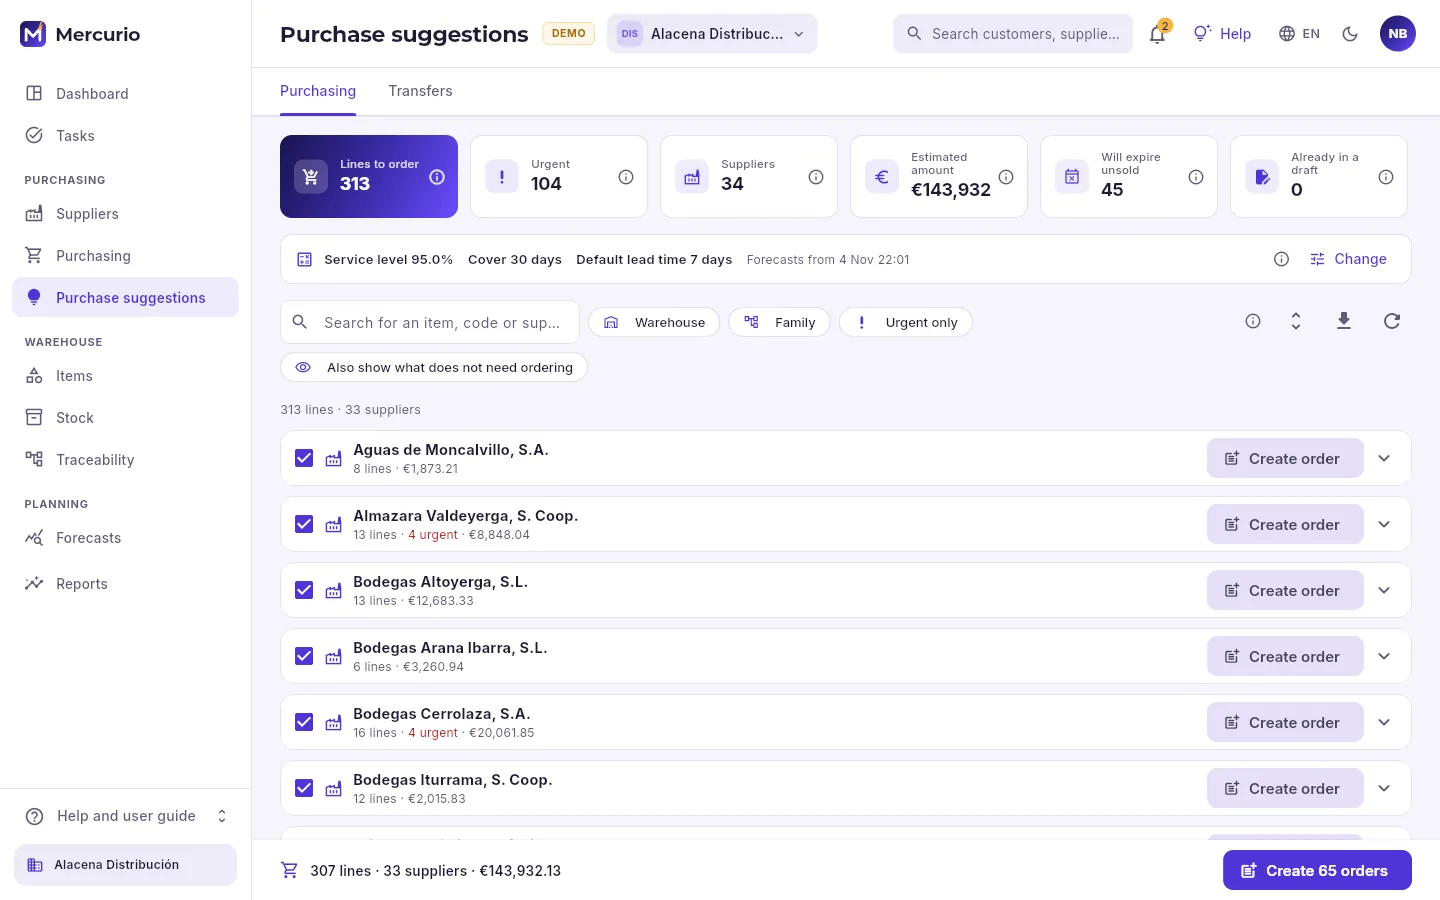 12345678
- 1The purchase suggestions and the transfer suggestions between warehouses.
- 2The indicators: lines to order, the urgent ones, how many suppliers, what it would cost, what will expire unsold and what is already in a draft order.
- 3What the company calculates with: the default service level, cover and lead time, and when the forecasts are from.
- 4Change those three figures (with the “Plan” permission).
- 5The filters: warehouse, family, urgent only and, to check an item, also what does not need ordering.
- 6The lines, grouped by supplier (by name; within each one, urgent lines first): the tick box selects all of that supplier’s lines.
- 7Create that supplier’s order with its selected lines.
- 8Or create all the orders for the selected lines in one go.
#A line and its reasons
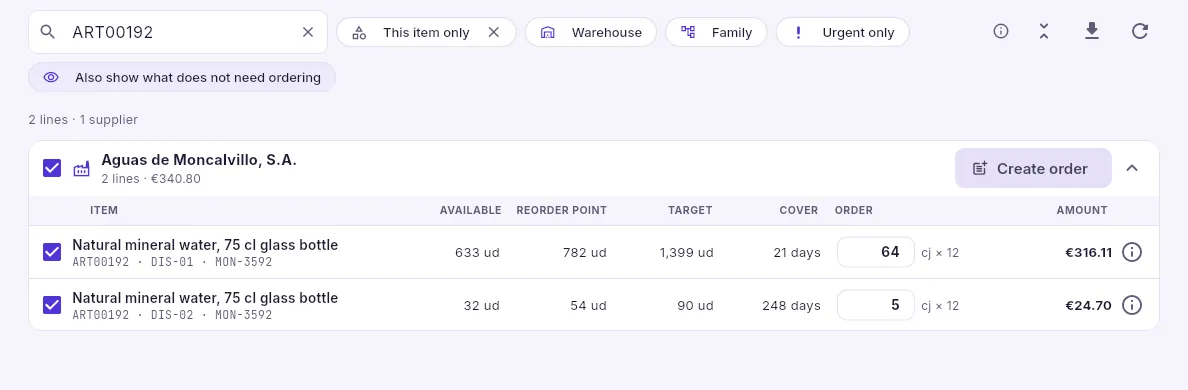 12345
- 1From an item’s record or its forecast you get here with only its lines.
- 2Each line is an item in a warehouse. Untick it if you do not want to order it.
- 3Its available stock (in red if it is below the safety stock), its reorder point, the target and how many days the current stock will last (cover).
- 4What is suggested, in the supplier’s purchase unit (here, boxes of 12): change it if you like.
- 5Opens the calculation step by step.
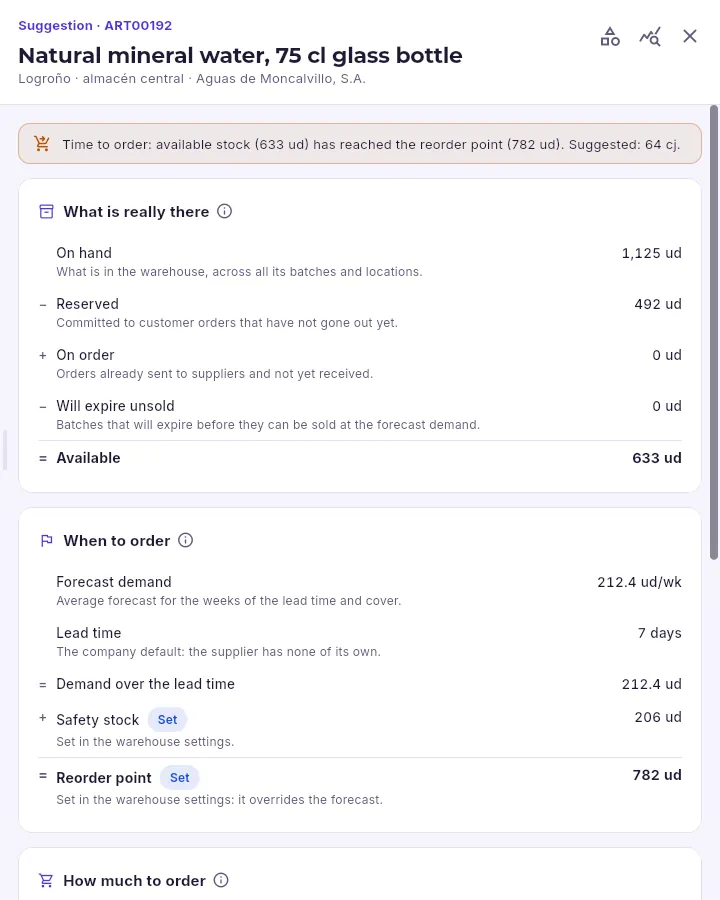 1234
- 1The verdict: why it needs ordering (or not), and how much.
- 2The available stock: on hand − reserved for customers + on order − what will expire unsold.
- 3The reorder point: what will be sold during the supplier’s lead time plus the safety stock. Set means the warehouse setting decides it, not the forecast.
- 4Go to the item’s record or its sales forecast.
#Turning suggestions into orders
 12
- 1How many orders will be created (one per supplier and warehouse), for how many suppliers, with how many lines and their estimated amount.
- 2It creates them as drafts in Purchasing: you review them and send them from there.
In Purchase suggestions, filter by warehouse or family if you like, or keep only the urgent ones with Urgent only.
Expand each supplier and review the lines: untick the ones you do not want and change any quantities you are not happy with (each line’s ⓘ shows you the calculation).
Click Create order on a supplier, or the button at the bottom for all suppliers with selected lines, and confirm with Create.
In Purchasing → Purchase orders, review each draft and send it.
#Transfer suggestions
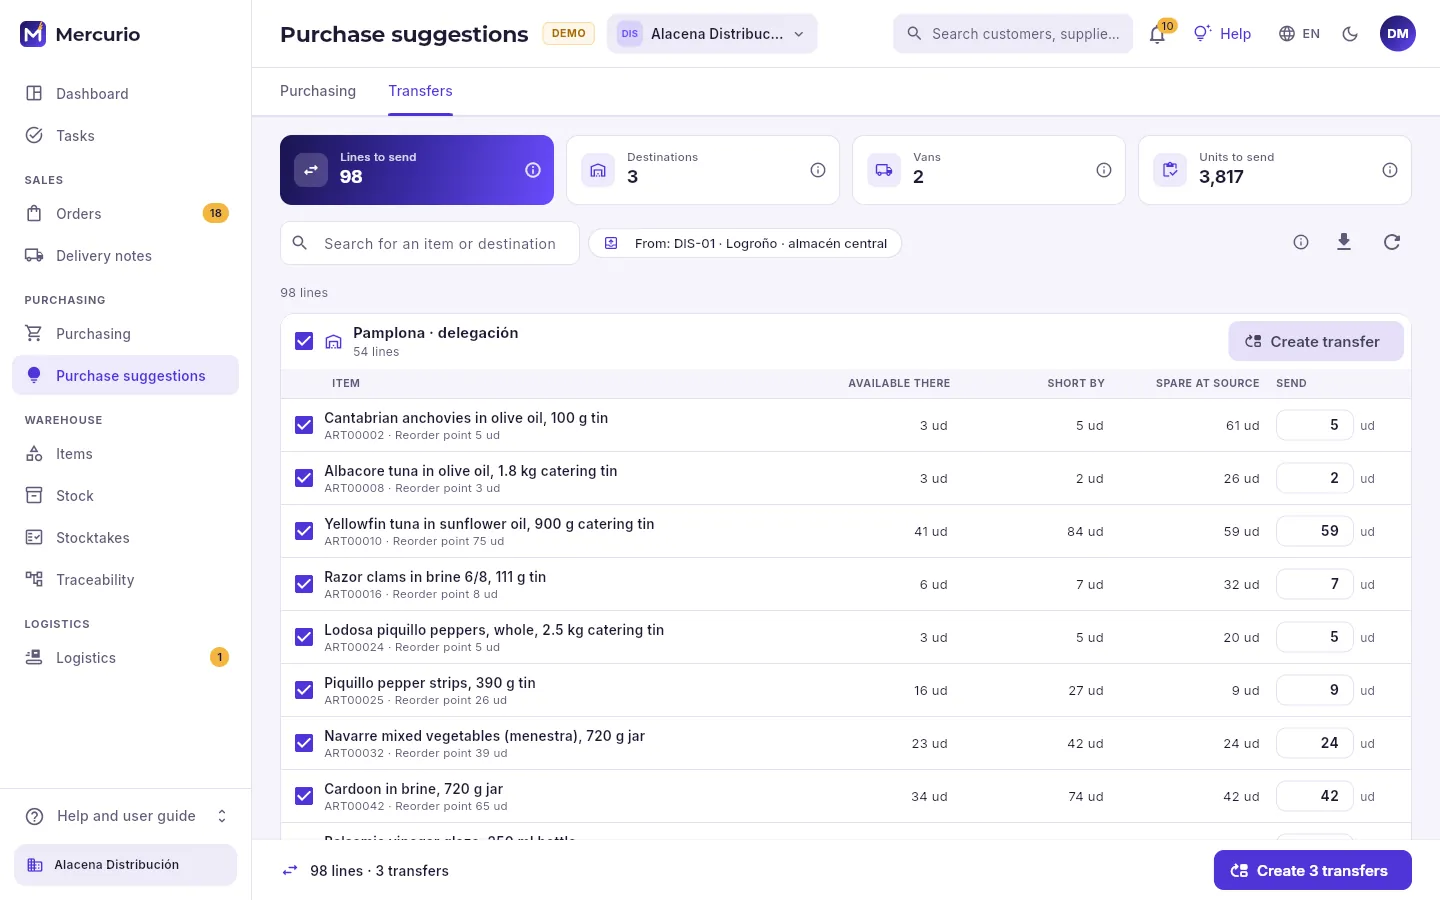 1234
- 1The lines to send, to how many destinations, how many vans need loading and the total units.
- 2The warehouse that sends (the central one, by default).
- 3Creates the transfer for that destination, as a draft in Stock.
- 4For each destination, each item with what is available there, what it is short of, what the source has to spare and what is proposed to send (editable).
A destination (a branch, a shop or a van-sales van) appears when what is available there, plus what is already on the way, drops below its reorder point, its minimum or two weeks of its forecast. It is offered what it is short of up to its maximum (or two weeks of forecast), without exceeding what the source has to spare above its own reorder point. Vans have their own forecast: what each one sells. Transfers are created as drafts in Stock so you can prepare and send them.
Warehouse
Items
What you buy, store and sell, shared by the whole group: families, units, batches, expiry dates and serial numbers, variable weight, kits, barcodes, suppliers and custom fields.
An item is anything you put on a document: a product kept in the warehouse, but also a service, carriage, a returnable container with its deposit, a contract fee or a kit (several items sold as one). Items belong to the whole account, shared by every company in the group; what changes from one company to another is their stock, their prices in each price list and their cost.
#The list and the families
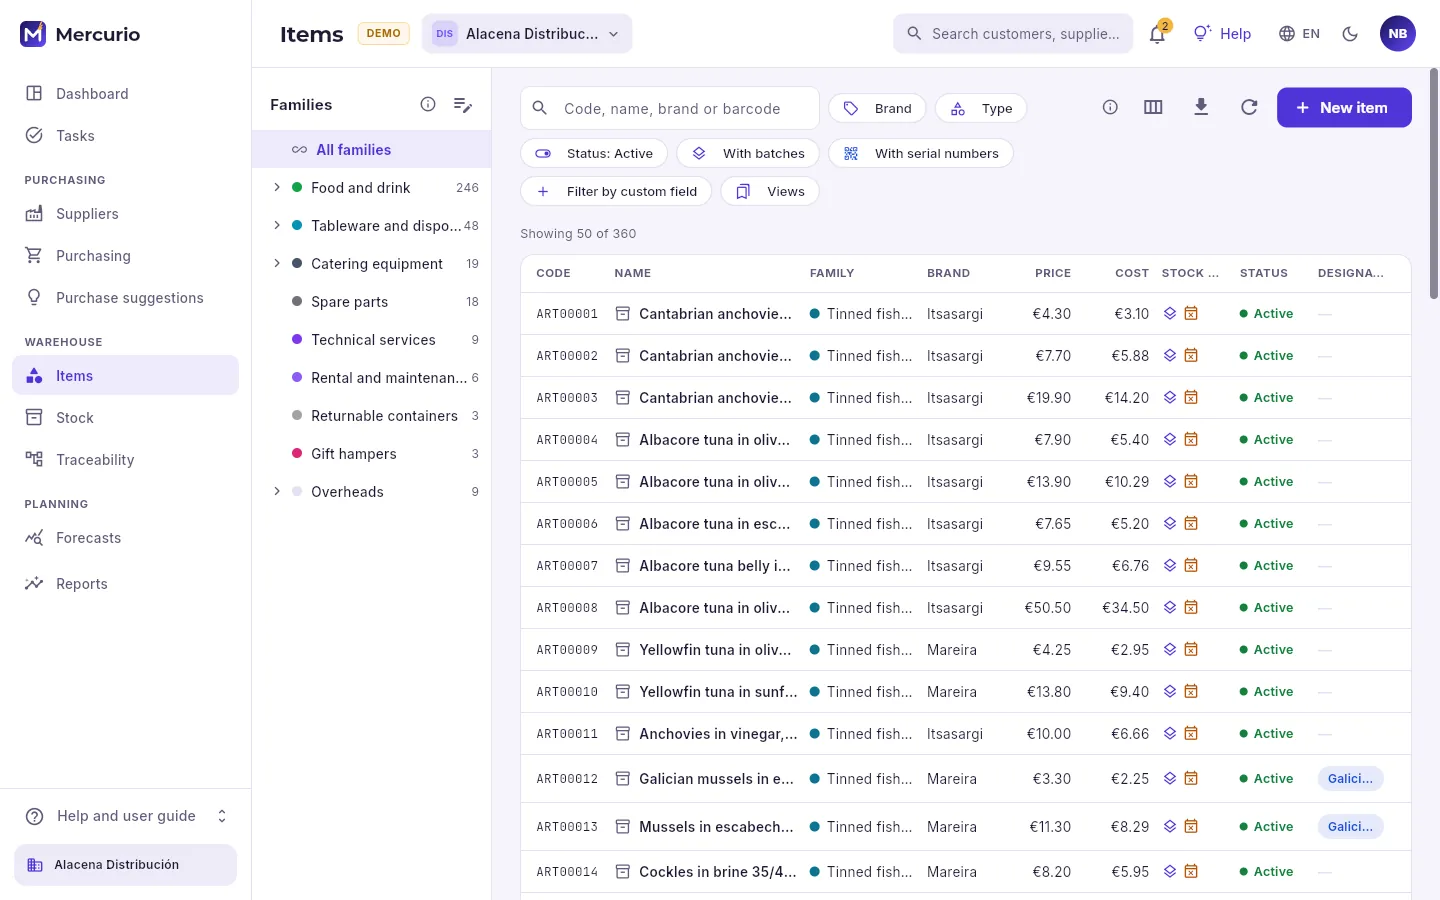 123456
- 1The family tree: click one to see its items and those of its sub-families. The number is how many it has.
- 2Add and change families and brands.
- 3The search box: by code, name (in any language), brand or barcode. With the scanner, just scan the code.
- 4The filters: brand, type, active or not, those with batches or serial numbers, and custom fields.
- 5Add an item.
- 6Code, name, family, brand, price in the default price list, cost, how its stock is controlled (the batch, expiry and serial number icons) and status.
The price in the list is the one in the selected company’s default price list, for one unit and for today; the cost is that of the last purchase or, if there is none, the standard cost (only with the “See costs” permission).
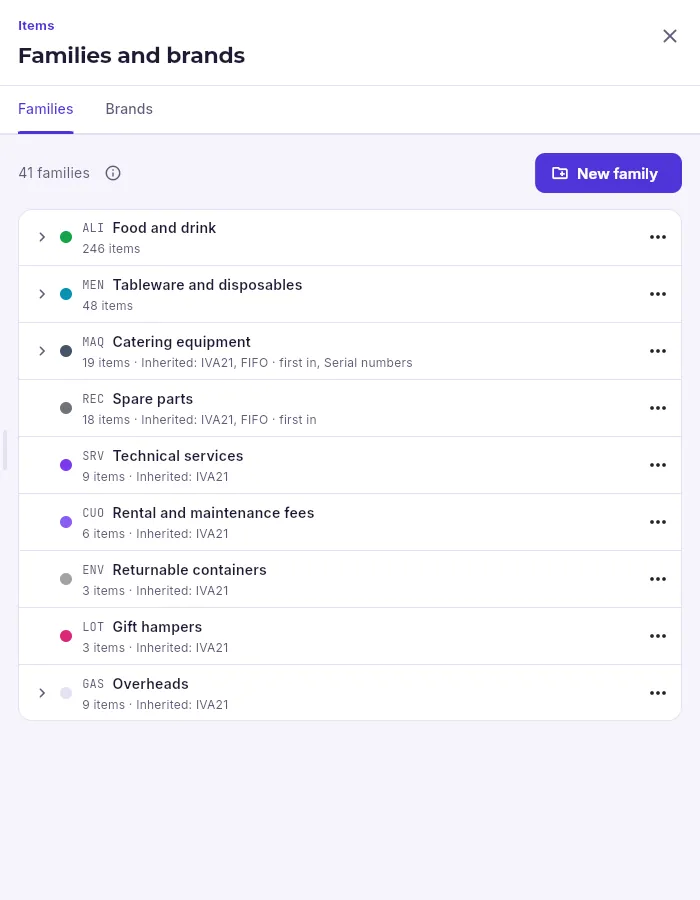 123
- 1The families (a tree) and the brands (a list).
- 2A new family; New sub-family, in each one’s menu.
- 3Each family with its short code, its colour and what its new items inherit: VAT, the picking policy and the controls (here, serial numbers).
#An item’s record
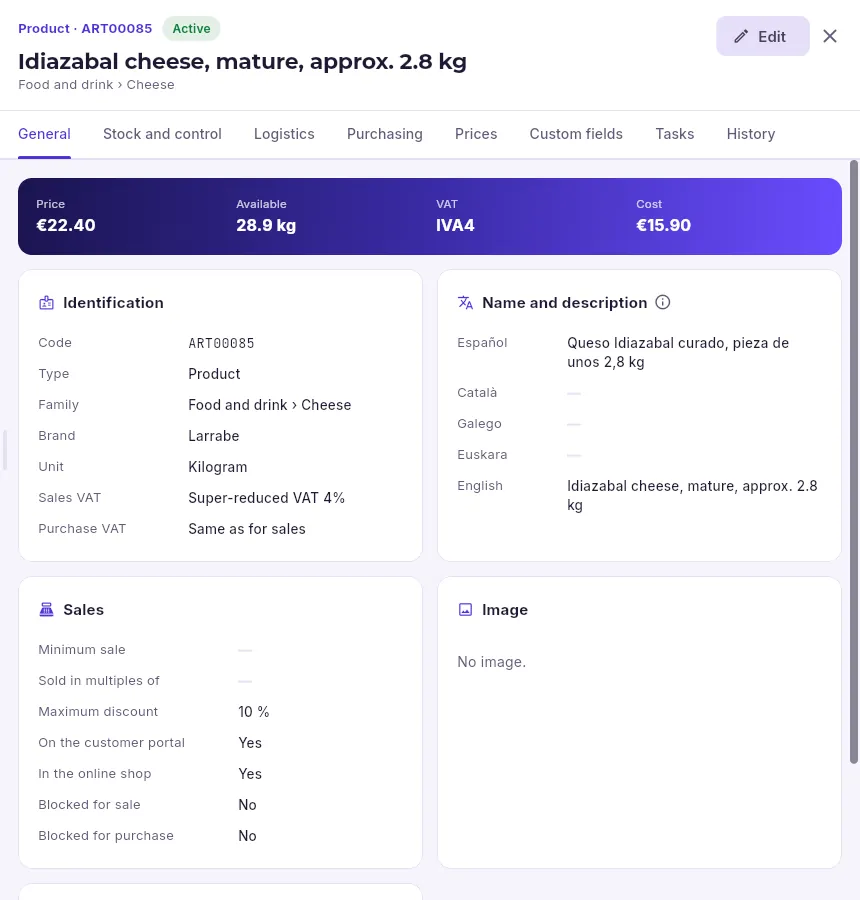 1234567
- 1The type, the code and the status.
- 2The record opens read-only: to change it, Edit.
- 3The tabs: general, stock and control, logistics, purchasing, prices, custom fields, tasks and history (and Kit if it is a kit).
- 4Sale price, what is available in the selected company, VAT and cost.
- 5Code, type, family, brand, the unit stock is counted in, and the sales and purchase VAT.
- 6The name in the five languages: each document goes out in the customer’s language (if it is missing, in Spanish).
- 7Minimum sale, multiple, maximum discount, whether it appears on the portal and in the online shop, and whether it is blocked for selling or buying.
The types: product (bought, stored and sold: it has stock), service (work or hours, no stock), kit, carriage, container (returnable, with its deposit) and fee (what is invoiced every month or every year on a contract). The unit is the one stock is counted in (unit, kilo, litre…) and cannot be changed once there are movements.
#Stock and control: batches, expiry, serial numbers and variable weight
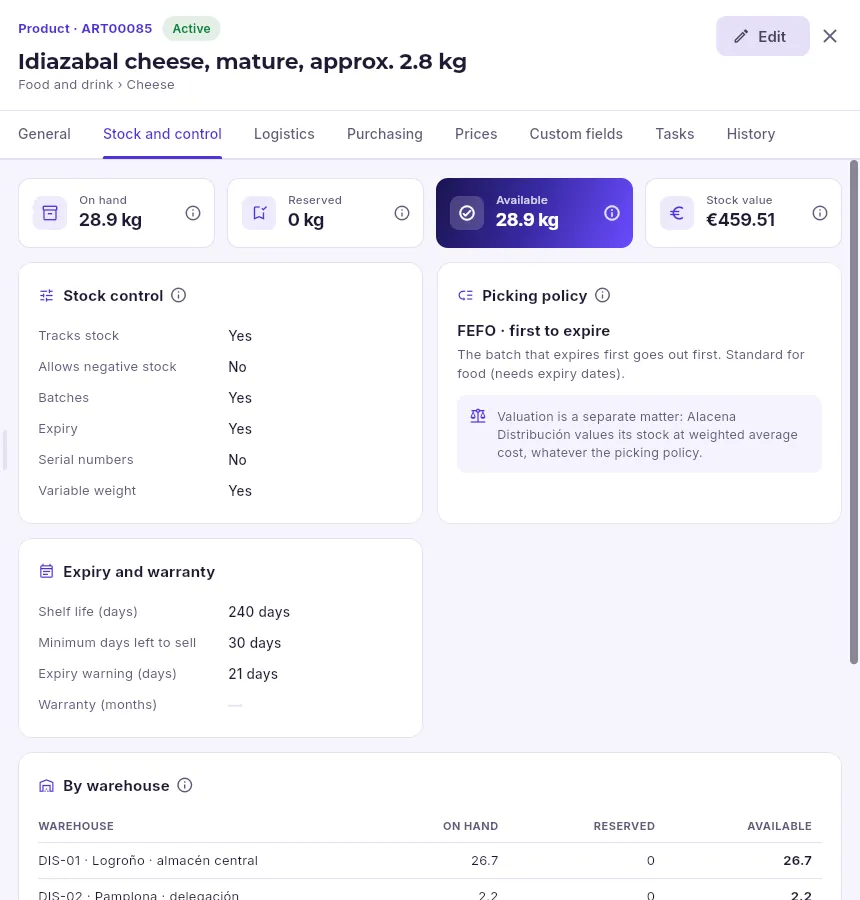 12345
- 1What the company has: on hand, reserved for orders, available (on hand − reserved) and its value.
- 2How it is controlled: whether it tracks stock, whether it can go negative, and whether it carries batches, expiry, serial numbers or variable weight.
- 3Which batch goes out first: here FEFO, the one that expires first. Underneath, how the company values its stock.
- 4Its shelf life (suggests the expiry date on receipt), the minimum days left to sell a batch, how far in advance it warns of what is expiring and, with serial numbers, the months of warranty.
- 5Further down, its stock in each warehouse and its batches with stock.
- Batches: every receipt carries its batch and every outgoing movement says which batch it comes from; that way you know who each one was sold to (Traceability).
- Expiry: each batch has its date; expired batches, or those with less life left than the minimum days left to sell, are not sold.
- Serial numbers: each unit has its own (machines, equipment); you know who it was sold to, where it is installed and until when it is under warranty, which starts when it is sold.
- Variable weight: sold by the piece with the actual weight of each one (cheeses, hams). Stock is kept in kilos and the piece is an alternative unit (“1 unit = 2.8 kg”, in Logistics), so each piece moves the kilos it really weighs. It cannot be combined with serial numbers.
These options appear if their feature is switched on (Settings → Features) and cannot be changed once the item has movements: they would change how existing stock has been counted.
#Logistics: units and barcodes
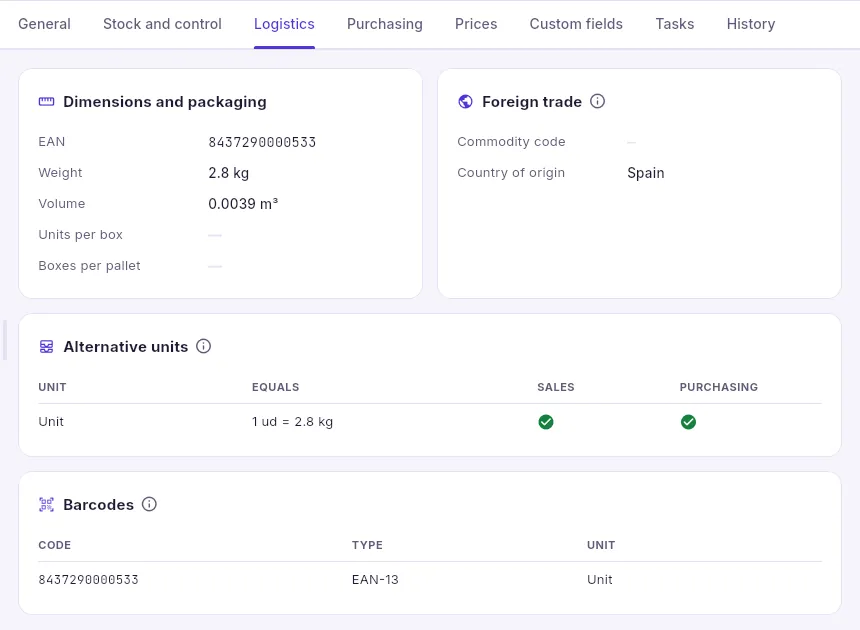 1234
- 1EAN, weight, volume, units per box and boxes per pallet.
- 2The commodity code and the country of origin, for exporting and for Intrastat.
- 3Other units it is bought or sold in (the box, the pallet, the piece) and how many stock units each is worth.
- 4The codes the scanner recognises: the unit’s EAN, the box’s DUN-14… Each one reads its own unit.
#Purchasing: costs and suppliers
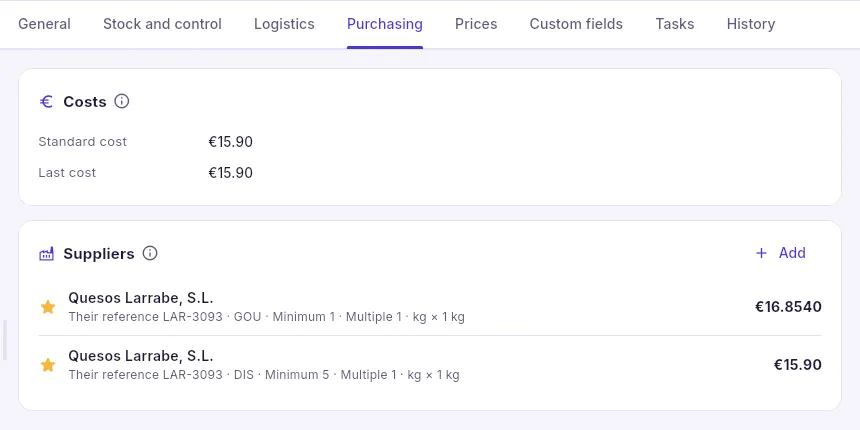 123
- 1The standard cost (you set it, for quoting) and the last cost (that of the last purchase received).
- 2Who it is bought from: their reference, the company, the minimum, the multiple, the purchase unit and the price. The ★ marks the preferred one.
- 3Add another supplier.
The preferred supplier is the one proposed by purchase orders and the purchase suggestions; their lead time, minimum and multiple are the ones the suggestions use to work out when and how much to order. Each supplier can apply to every company or to just one.
#Kits
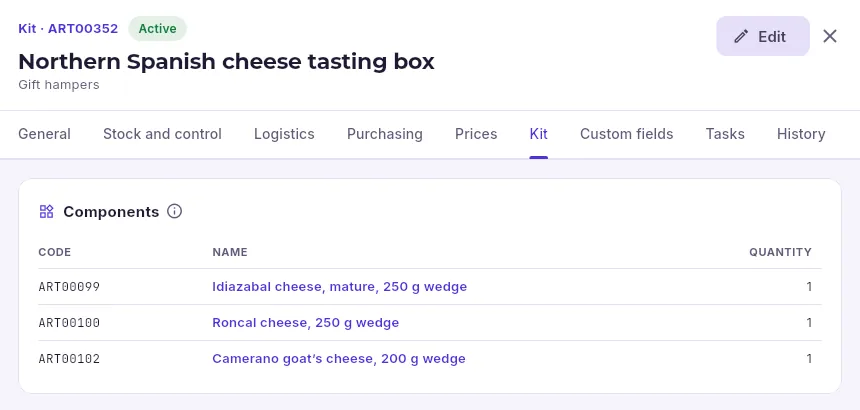 12
- 1An item of type kit.
- 2What each unit of the kit contains and how much of each component.
When you sell a kit, what each component contains comes out of stock. If you prefer to keep kits ready assembled (made-up Christmas hampers), they are assembled and disassembled in Stock: the components go out and the kit comes in, at the cost of what it contains.
#Capital goods and custom fields
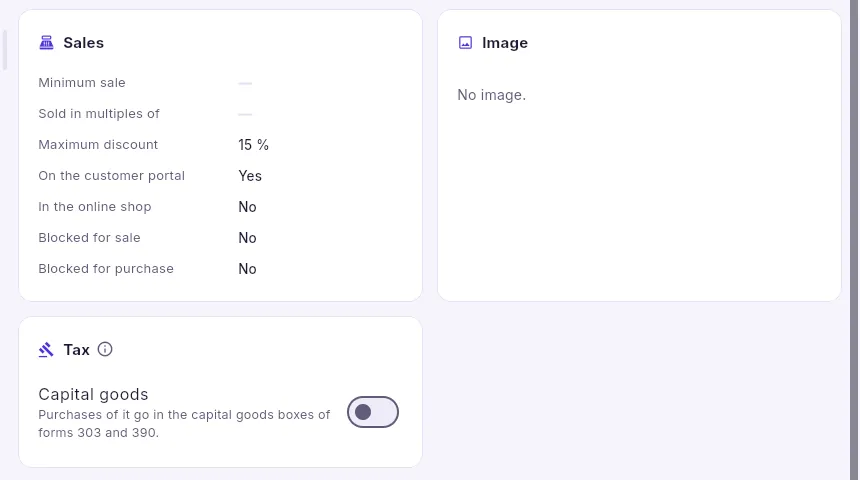 1
- 1The capital goods setting for VAT purposes. It is saved as soon as you change it, without going through Edit.
Mark as capital goods what you buy for your own company and will use for more than a year (machinery, vehicles, furniture): the VAT on purchases of it goes in the capital goods boxes of form 303 (VAT return) and form 390 (annual VAT summary), and it does not count as an expense in form 130. Do not mark it on what you buy to resell.
The Custom fields tab holds the data your company needs and Mercurio does not include (a designation of origin, a format, a season): they are defined in Settings → Custom fields and appear as columns and filters in the list.
In Items, choose its family in the tree (so it inherits its VAT and its controls) and click New item.
In General, type the name (at least in Spanish), the type and the unit; the series assigns the code when you create it.
In Stock and control, check the batches, expiry, serial numbers, variable weight and picking policy: once the first movements exist they can no longer be changed.
In Logistics, add the EAN, the boxes or pallets and their barcodes.
Click Create. Then, in Purchasing, add its supplier (including the preferred one) and, in Price lists, its sale price.
Warehouse
Stock
What there is in each warehouse, location, batch and serial number, what is reserved and what is available, the ledger of every movement, adjustments, and transfers between warehouses and vans.
Stock in Mercurio comes from a movements ledger: every goods receipt, delivery note, return, transfer, stocktake, kit assembly, service job or adjustment writes a line with what comes in or goes out, from which warehouse, location, batch or serial number, and at what cost. What there is is the sum of that ledger, so stock is never “touched” by hand without leaving a trace: it is corrected with another movement.
Three figures worth telling apart:
- On hand: what there is in the warehouses.
- Reserved: what is set aside for confirmed customer orders that have not gone out yet. It is still in the warehouse, but it already has an owner.
- Available = on hand − reserved: what you can really promise.
#Stock on hand
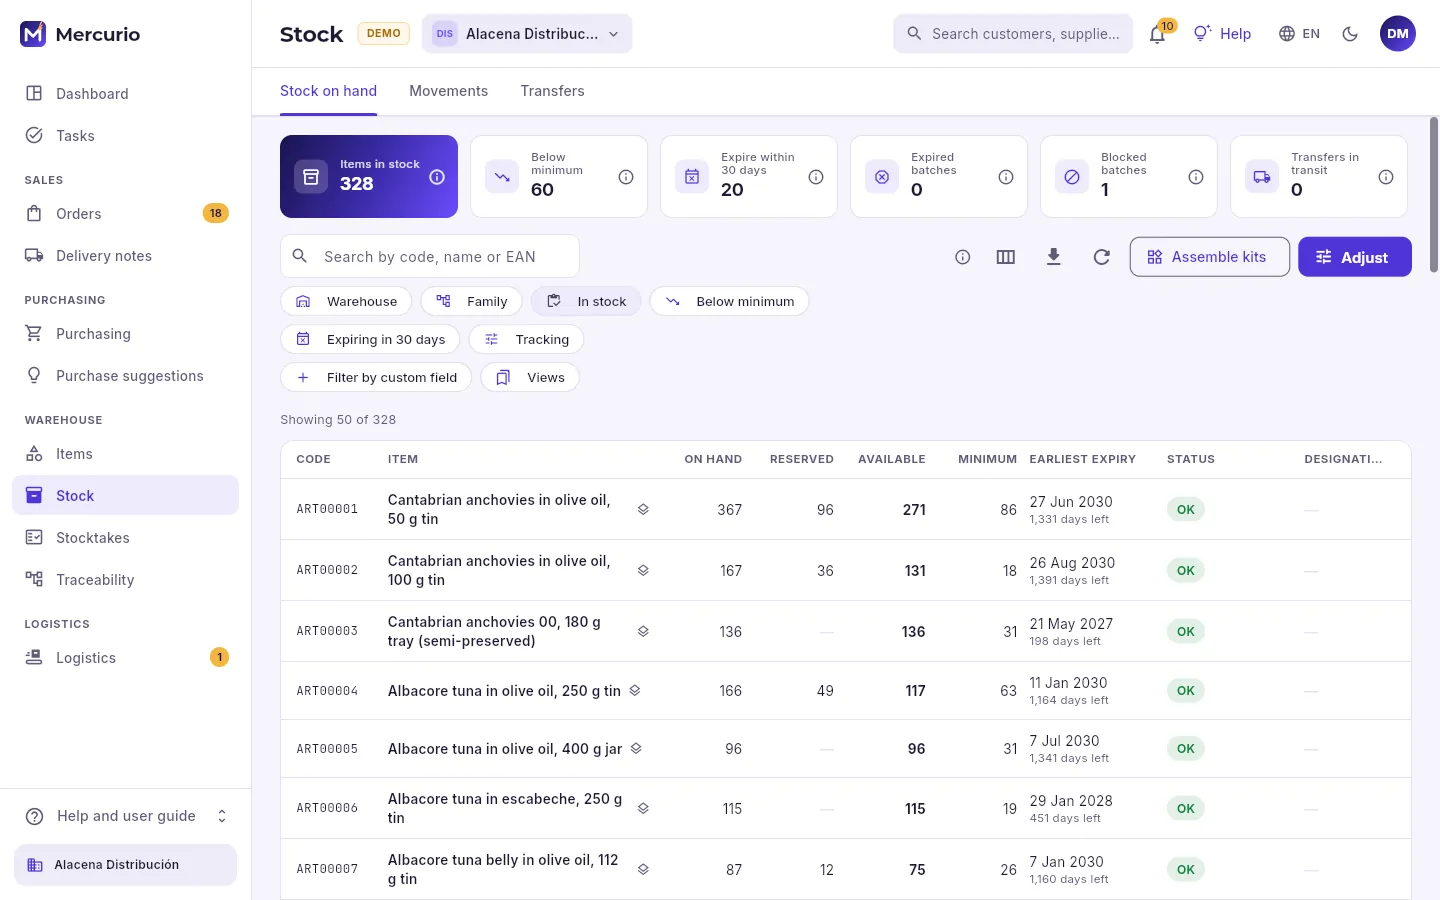 123456
- 1The tabs: stock on hand, movements and transfers.
- 2The indicators: items with stock, those below their minimum, batches expiring within 30 days, expired ones, blocked ones and transfers on the way. Click one to filter.
- 3Search for an item by code, name or EAN (also with the scanner).
- 4The filters: a warehouse (otherwise, all of the company’s), family, only with stock, below minimum, what is expiring and how it is controlled (batches, serial numbers).
- 5Assemble or disassemble kits and adjust stock (a breakage, a mistake, opening stock).
- 6Each item with its on hand, reserved, available, minimum, the earliest expiry of its batches and its status (OK, below minimum, out of stock). Click one to see its details.
With the “See costs” permission you also see the stock value: each item’s quantity times its cost according to the company’s valuation method. This is the book value of the stock; for its value on a past date, see Reports → Stock valuation.
#An item in the warehouse
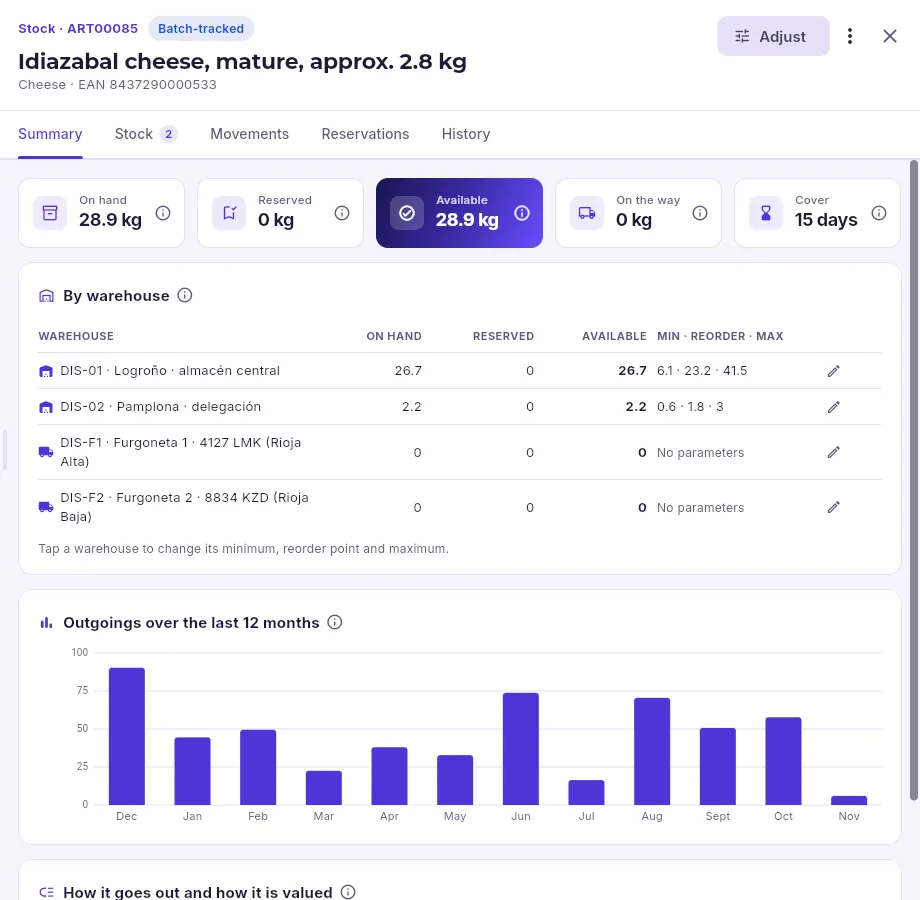 123456
- 1The item, with how it is controlled (with batches).
- 2Adjust it and, under ⋮, transfer it to another warehouse, assemble kits or go to its item record.
- 3Summary, stock by location and batch, its movements, the orders that have it reserved, and history.
- 4On hand, reserved, available, what is on the way in transfers, and cover: how many days it will last at the pace of the last 90.
- 5Each warehouse with its on hand, reserved and available, and its restocking parameters: minimum · reorder point · maximum. In amber, those below their minimum.
- 6What has gone out each month (sales, consumption and assembly): its seasonality and whether it is moving.
Click a warehouse in By warehouse to change its parameters (with “Move stock” or “Plan”):
- Minimum stock: below it, the item shows as below minimum.
- Reorder point: when it gets here, it is time to order. Safety stock: the buffer for the unexpected.
- Maximum stock: stock is replenished up to here (it is what the purchase suggestions propose).
- Picking location and reserve location: where goods are picked from and where the rest is kept.
Leave blank whatever you do not want to control: whatever you do not set, the suggestions work out from the sales forecast.
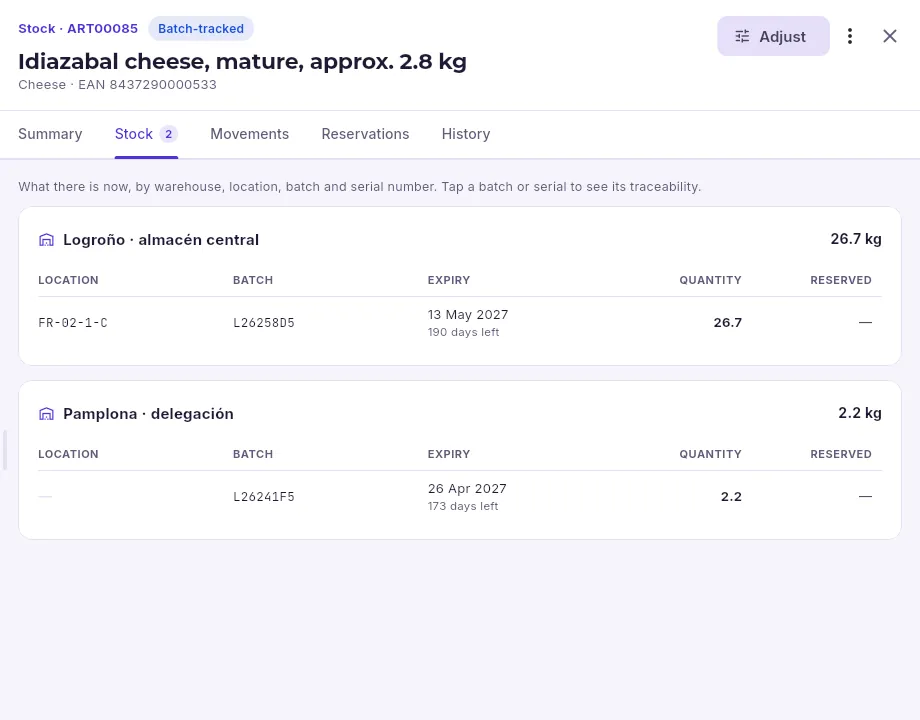 12
- 1What there is in each warehouse, line by line: the location (aisle, rack, level and bin), the batch with its expiry date, and the quantity.
- 2The branch does not use locations: each line is a batch with its expiry date and quantity. Van-sales vans are warehouses too: their load is your stock.
#How stock goes out: FIFO, LIFO and FEFO
When an order is picked or a delivery note is issued, Mercurio suggests which batch or serial number goes out according to the item’s (or its family’s) picking policy:
| Policy | What goes out first | What for |
|---|---|---|
| FIFO | What came in first | The usual choice for things that do not expire |
| LIFO | The last to come in | Stacked bulk materials |
| FEFO | What expires first | Food and anything that expires |
| Manual | Whatever the picker chooses | Parts picked one by one |
It never suggests a batch that is expired, quarantined, blocked or recalled, or one with fewer days left than the item’s minimum days left to sell, or stock reserved for another order. The picker can choose others by hand.
#Adjustments and write-offs
Adjust (in the Stock on hand bar or on the item’s record) is for anything that does not come from a document. Choose the type, the warehouse, the batch or serial number and the location if the item has them, the quantity and the reason (it stays in the ledger with who did it):
- Adjustment: corrects upwards or downwards (a mistake, something that turned up).
- Write-off: removes what has been broken, has expired or been lost. It always subtracts.
- Opening stock: what there is when you start using Mercurio, at its cost. It always adds.
To square up the stock of a whole warehouse, a stocktake is better: it counts, compares and adjusts in one go.
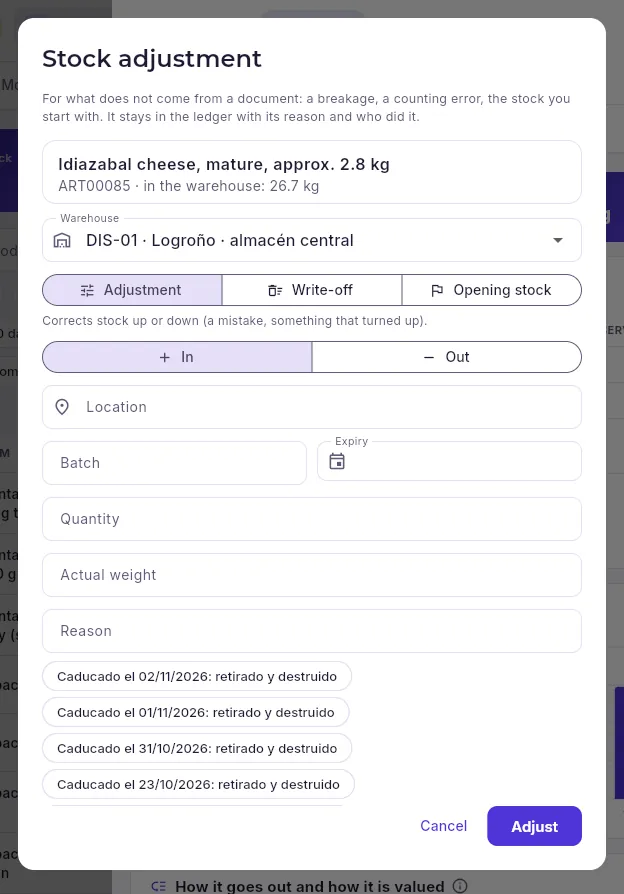 123456
- 1The warehouse; above it, the item and how much of it there is in that warehouse.
- 2The type: adjustment, write-off or opening stock.
- 3For an adjustment, whether stock comes in or goes out.
- 4The location, the batch (with its expiry date if it is new), the quantity and, with variable weight, the actual weight: whatever the item needs.
- 5The reason; below, those from the latest adjustments, to pick with one tap.
- 6Makes the adjustment: it goes into the movements ledger.
#The movements ledger
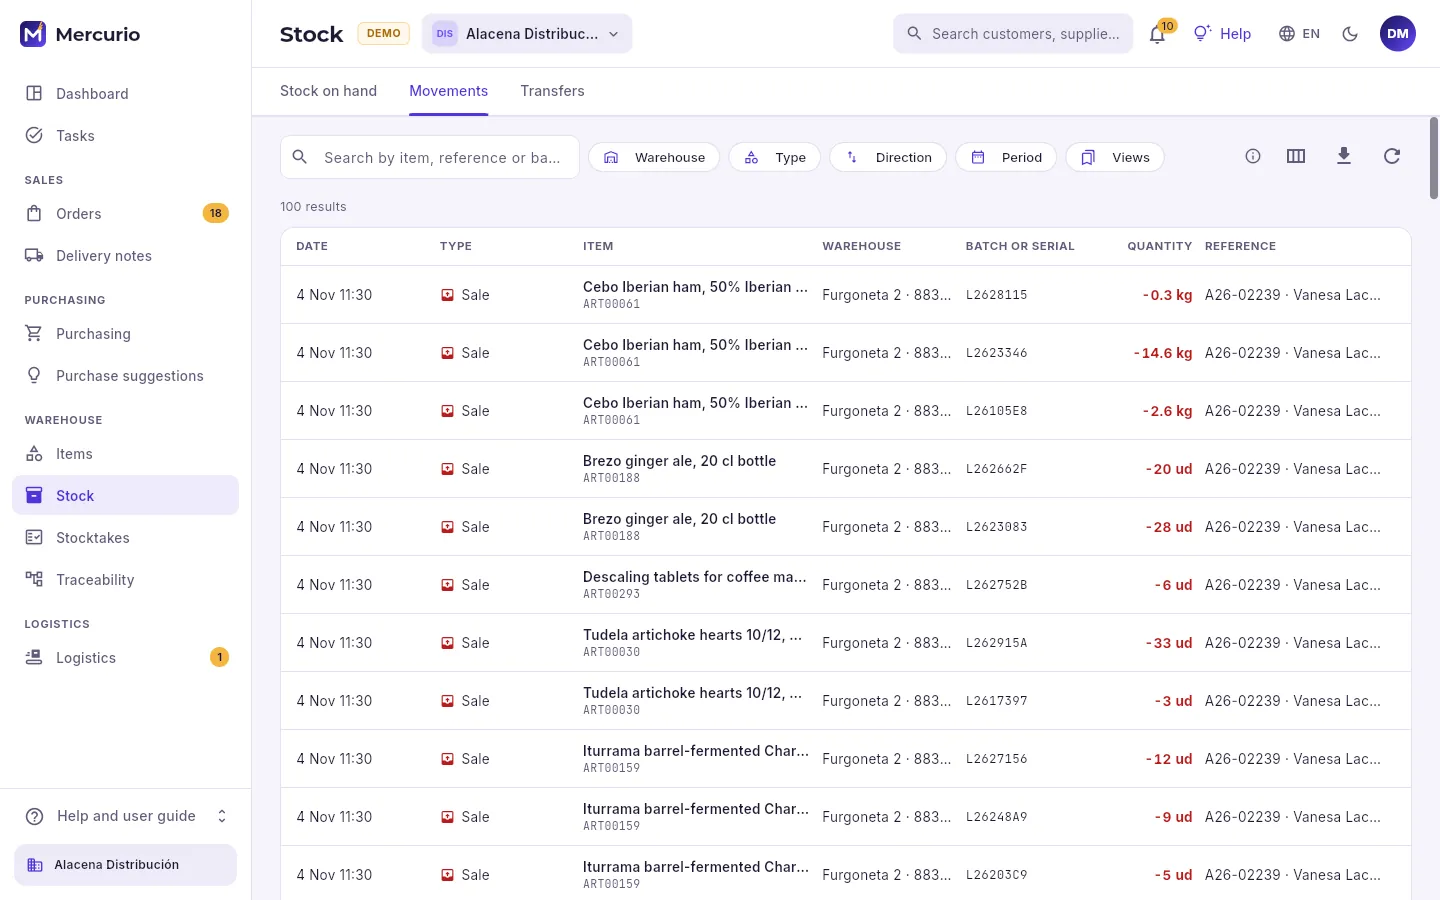 1234
- 1Search by item, by document (the reference) or by batch.
- 2Filter by warehouse, type (purchase, sale, transfer, adjustment, write-off, stocktake…), ins or outs, and dates.
- 3Export it to a spreadsheet (for the accountants or an audit).
- 4Each movement with its date, type, item, warehouse, batch or serial number, the quantity (outgoing ones in red) and the document that produced it, and for whom.
#Transfers between warehouses
- 1DraftSource, destination and items. It does not move anything yet.
- 2SentIt leaves the source, batch by batch according to the policy, and stays in transit.
- 3ReceivedIt enters the destination at the cost it left with; anything missing is lost.
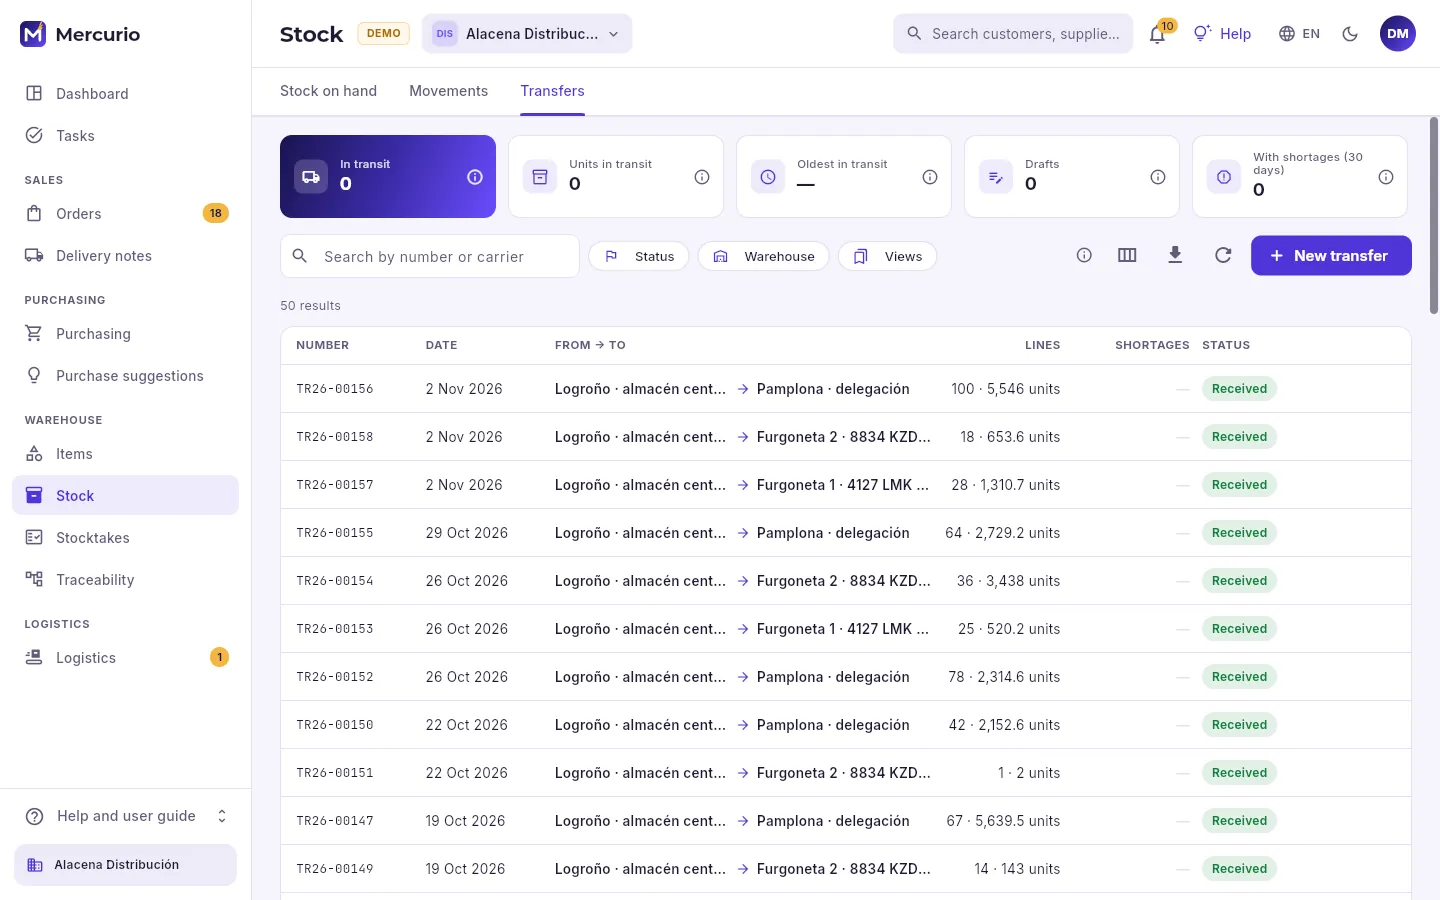 1234
- 1Transfers in transit, units on the way, the oldest not yet received, drafts and those that arrived short.
- 2Filter by status and by warehouse (sending or receiving).
- 3Prepare a transfer.
- 4Each transfer with its number, its date, from where to where, how many lines and units, shortages and its status.
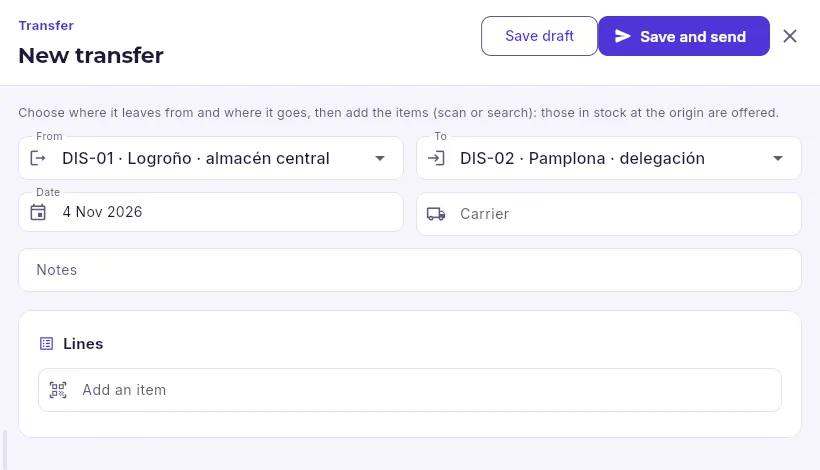 12345
- 1Where it leaves from.
- 2Where it is going: another warehouse, a shop or a van.
- 3Who is taking it (optional).
- 4The items, with the scanner or by searching: those with stock at the source are offered. Batches are chosen automatically when it is sent.
- 5Save it to send later, or save it and send it now: the goods leave the source.
In Stock → Transfers, click New transfer (or, from an item’s record, ⋮ → Transfer to another warehouse).
Choose the From and To warehouses, and add the items with their quantities.
Click Save and send when the goods leave: they go out of the source, with the batches suggested by each item’s policy, and stay in transit.
When they arrive, open the transfer at the destination, click Receive and count what has arrived: anything missing is recorded as a loss in transit.
#Warehouses, locations and vans
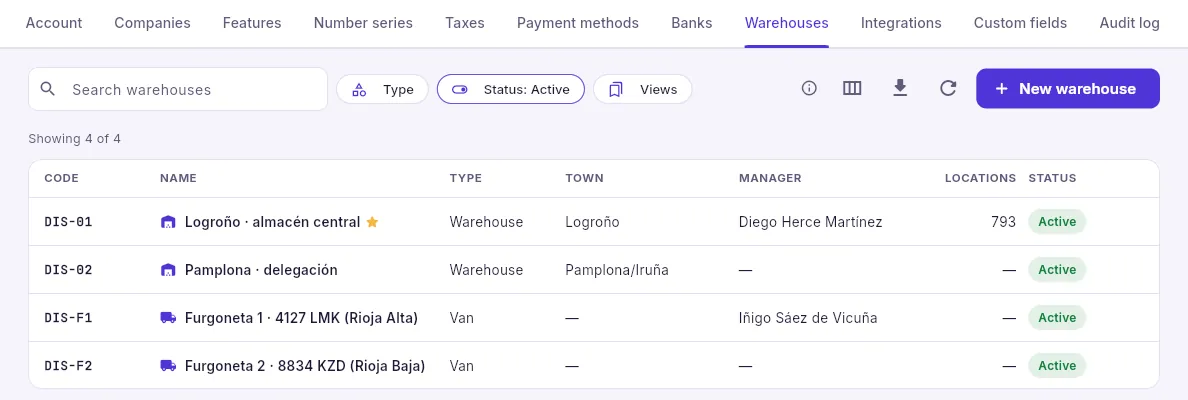 1234
- 1Warehouses are set up in Settings → Warehouses (by the administrator).
- 2Main sites and branches, each with its manager and its locations. The ★ marks the default one.
- 3The van-sales or service vans: mobile warehouses that load up at the central warehouse and sell or repair on the road.
- 4A warehouse, a shop, a van or consignment stock at a customer’s premises.
Each warehouse belongs to one company and has its own stock. The types: warehouse (receives, stores and dispatches), shop (sells over the counter), van (mobile warehouse) and consignment stock (your goods at a customer’s premises until they sell or use them). With the “Locations” feature, each warehouse has its locations with an aisle, rack, level and bin code (A-03-2-B), a type (picking, reserve, goods-in, dispatch, quarantine, cold storage, returns) and a walk sequence, the one picking follows; they are generated by ranges in one go. Without the “Multiple warehouses” feature, each company works with just one.
Warehouse
Stocktakes
Physical counts of the warehouses: full, partial or cycle counts by ABC class, blind or not, counted with the scanner, with their differences valued and the adjustment that corrects the stock.
A stocktake compares what Mercurio says with what is really on the shelves. When you open it, a snapshot is taken of what there is (the expected quantity), then it is counted (on the web, with the PDA or the mobile in the warehouse app, or on paper with the count sheet) and, when you adjust stock, each difference corrects the stock. Whatever moves while you count (a delivery note going out, a goods receipt coming in) is taken into account: there is no need to shut the warehouse.
- 1OpenFull, partial or cycle count; blind or not. The snapshot is taken.
- 2CountWith the scanner, on the web, the PDA or on paper.
- 3ReviewThe differences, from the highest value to the lowest.
- 4Adjust stockEach difference corrects the stock. The stocktake is closed.
#The list of stocktakes
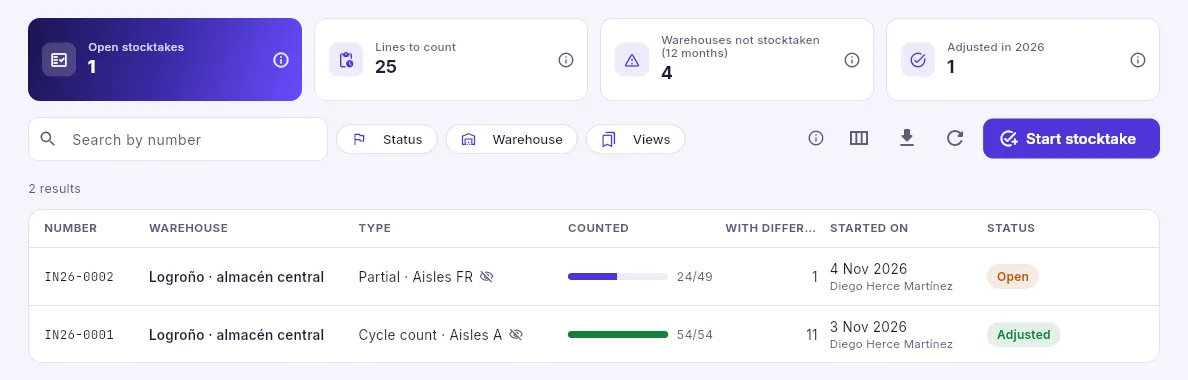 1234
- 1Counts in progress, lines still to be counted, warehouses that have gone more than a year without a full stocktake and those adjusted this year.
- 2Filter by status and warehouse.
- 3Start a count.
- 4Each stocktake with its warehouse, the type (and, if it is blind, the crossed-out eye), how much has been counted, the lines with differences, when it was opened and by whom, and its status.
#Opening a stocktake
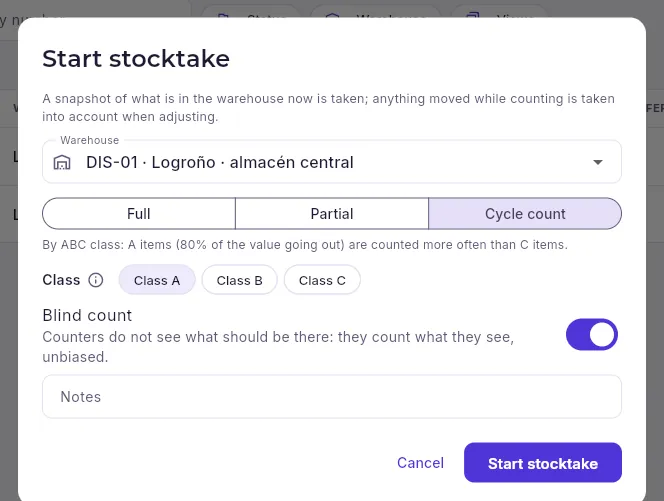 12345
- 1The warehouse being counted.
- 2Full (the whole warehouse), partial (some families, zones or aisles) or cycle count (by ABC class).
- 3In a cycle count, which classes are counted this time.
- 4Blind count: the person counting does not see what there should be, and counts what they see without being influenced.
- 5Opens the stocktake and takes the snapshot of what there is.
#Count
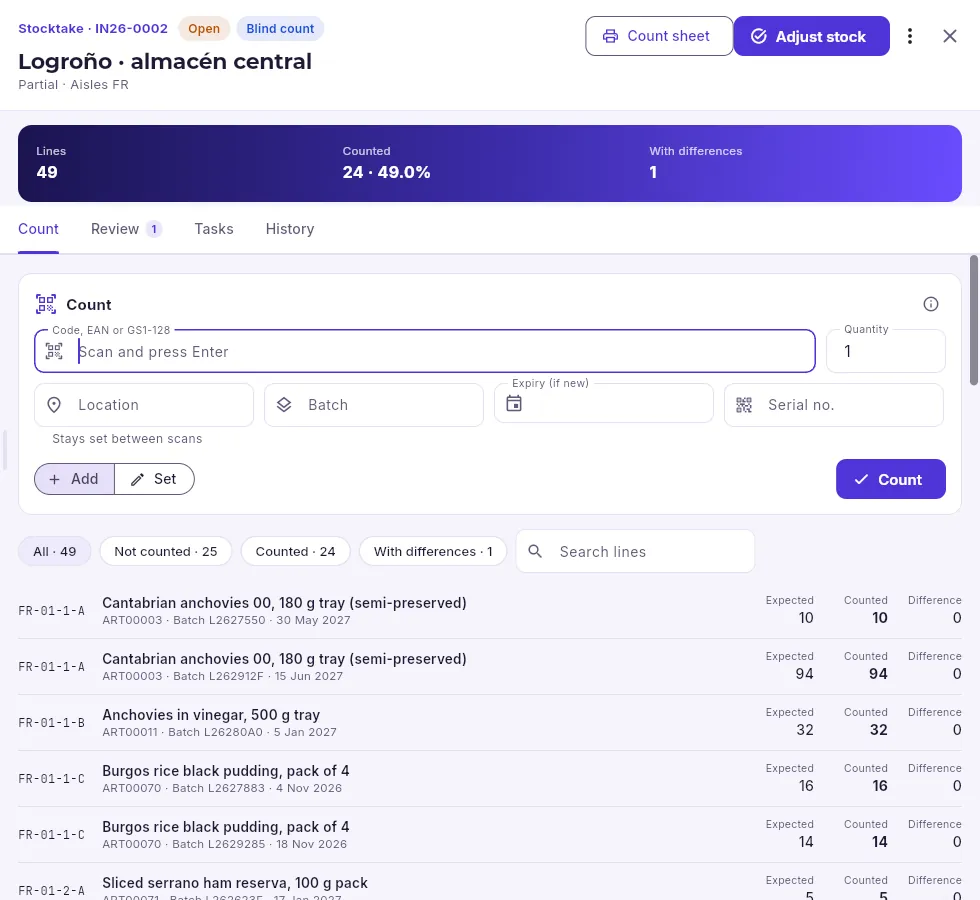 12345678
- 1The stocktake, its status and whether it is blind.
- 2The count sheet as a PDF, for counting on paper.
- 3When it has been counted: adjusts the stock and closes the stocktake.
- 4How many lines it has, how many have been counted and how many have differences.
- 5Scan the code (or type it) and press Enter. A GS1-128 code also carries the batch and the expiry date.
- 6The location (it stays set between scans), the batch, its expiry date if it is new, or the serial number.
- 7Add: each scan adds the quantity. Set: the quantity replaces what has been counted.
- 8The lines: all, not counted, counted or with differences, and a search box.
Each line is an item in a location, with its batch or serial number: the expected quantity (what there was in the snapshot), the counted quantity and the difference. To correct a count, click the line. In a blind stocktake, the expected quantity is only visible to those who can adjust stock.
In Stocktakes, open the stocktake (or open a new one with Start stocktake).
Go to the first location: type it in Location (it stays set) and choose Add.
Scan each item: each scan adds one unit (or the quantity you enter). If the item has batches, enter the Batch; with serial numbers, the Serial no..
If you are counting whole boxes, type the quantity, click Set and Count.
Move to the next location and carry on. The Not counted filter tells you what is left.
#Reviewing and adjusting
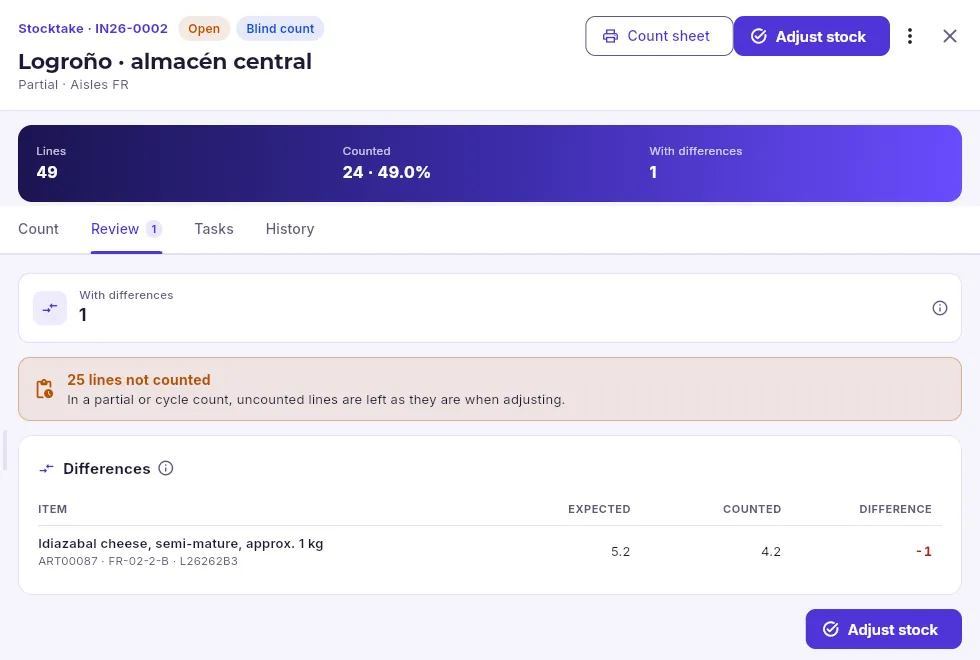 1234
- 1How many counted lines do not match. With “See costs”, also the value of the surplus, the shortfall and the net.
- 2What is left not counted and what will be done with it when you adjust.
- 3The lines with differences, from the highest value to the lowest: expected, counted and difference.
- 4Adjust stock once everything has been reviewed.
Check large differences before adjusting: they are usually a counting or location mistake (something counted in the next bin). When you click Adjust stock you choose what to do with what was not counted:
- Leave it as it is: the usual choice in a partial or cycle count; only what was counted is adjusted.
- Set it to zero: the usual choice in a full stocktake; if it was not counted, it was not there.
Each counted line adjusts the stock to what was counted, taking off what moved between the snapshot and the count. The stocktake is left adjusted and its adjustments go into the Stock ledger as stocktake movements. An open stocktake can be cancelled (under ⋮): what was counted is lost and nothing is adjusted.
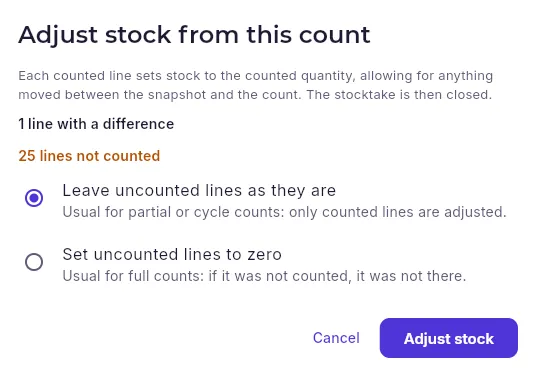 1234
- 1What it does: adjusts every counted line, allowing for what has moved since the snapshot, and closes the stocktake. Below, how many lines have a difference and how many are still uncounted.
- 2The usual choice for a partial or cyclical count: only what was counted is adjusted.
- 3The usual choice for a full count: anything not counted was not there.
- 4Adjusts the stock with the chosen option.
Warehouse
Traceability
Where each batch came from and which customers it reached, its expiry date and status, batch alerts to recall a product and notify whoever received it, and each serial-numbered unit with its customer and warranty.
A batch groups together the units of an item that were made together: they arrive with their code and expiry date and, since every receipt and every outgoing movement says which batch it belongs to, Mercurio always knows which supplier each batch came from, where it is now and which customers it was sold to. This is what you need if a manufacturer warns of a defect or a health authority orders a product to be recalled. The same applies, one by one, to units with a serial number (machines, equipment).
#Batches
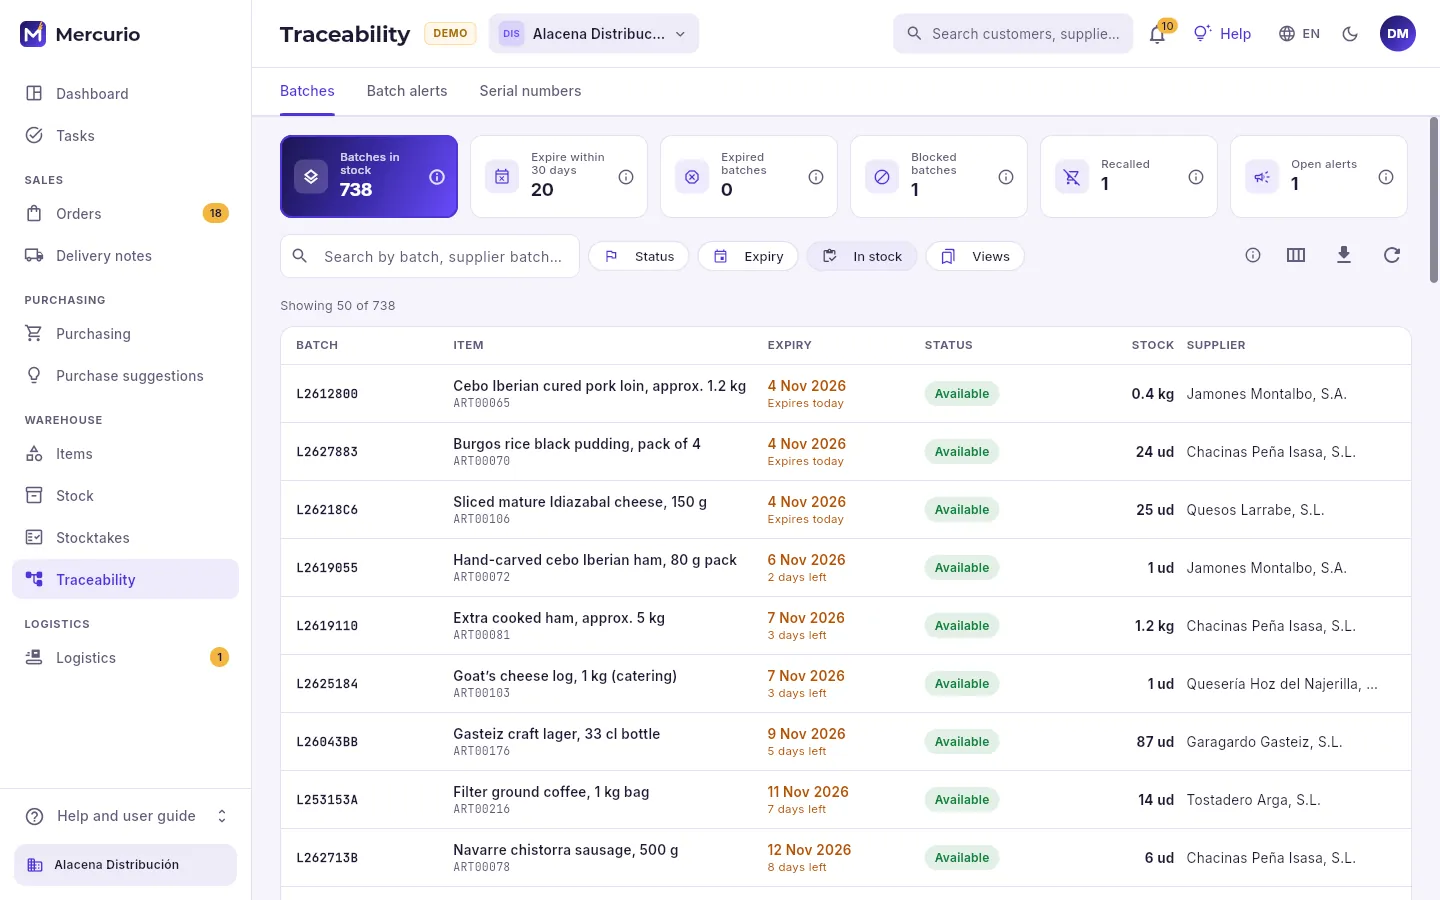 12345
- 1The tabs: batches, batch alerts and serial numbers.
- 2Batches with stock, those expiring within 30 days, expired ones with stock, blocked or quarantined ones, recalled ones and open alerts.
- 3Search by our batch, by the supplier’s batch or by item.
- 4Filter by status, by expiry (expired, 7, 30 or 90 days) and only with stock.
- 5From the earliest to expire to the latest: the item, the expiry date with the days left (in amber, those expiring soon), the status, the stock and the supplier.
A batch can be available, quarantined (while it is being checked: a lab test, a complaint), blocked (not sold or transferred until it is released) or recalled from the market. The last three still count as physical stock, but picking does not suggest them: they cannot be sold.
#A batch’s record
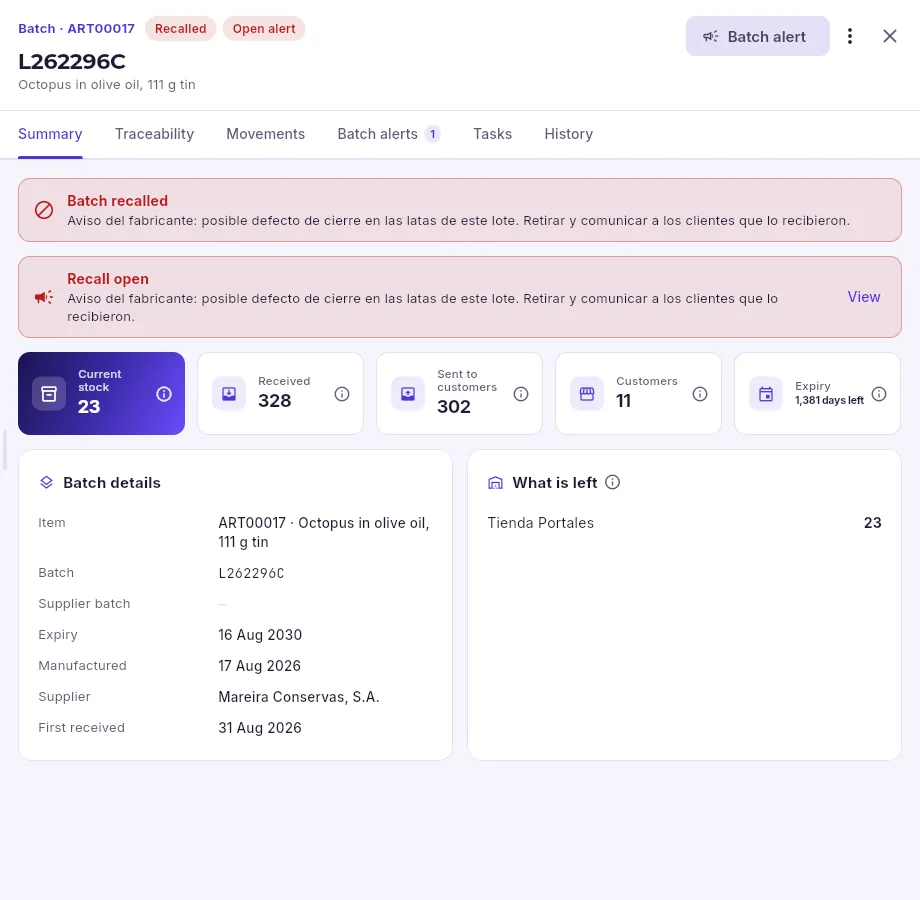 1234567
- 1The batch, its item and its status (here, recalled and with an open alert).
- 2Open a batch alert; under ⋮, release it, quarantine it, block it, correct its details or export who received it.
- 3Summary, traceability, movements, alerts, tasks and history.
- 4Why it is in this state and the alert in progress, with its reason.
- 5What is left, what was received, what was sent to customers, to how many customers, and the days until it expires.
- 6Item, supplier batch, expiry date, manufacturing date, supplier and first receipt.
- 7Where it is now: the first thing to set aside in a recall.
#Backwards and forwards
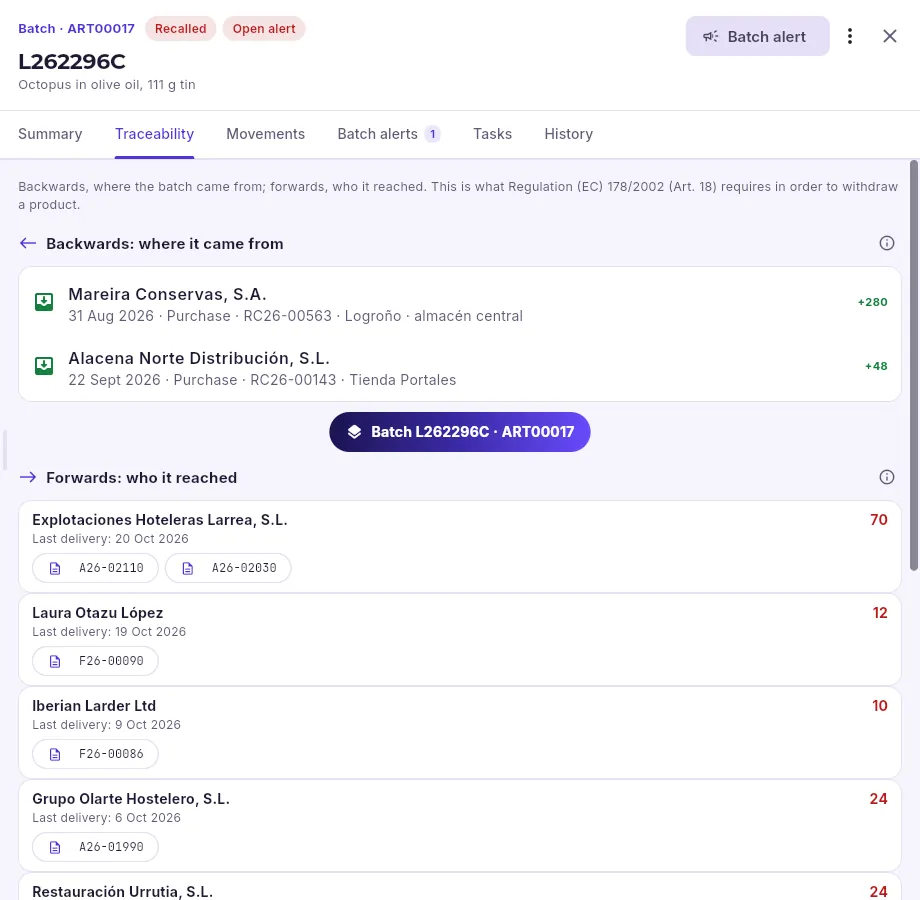 123
- 1Backwards: each receipt of the batch, with its date, the supplier, the document and the warehouse.
- 2Here, a purchase from its supplier: the goods receipt and the quantity received.
- 3Forwards: each customer who received it, with the net quantity delivered, their last delivery and their delivery notes or invoices (click one to open it).
Further down are the other outgoings (write-offs, consumption), the kits it was assembled into and what is left. With the “Contact details” permission, each customer shows their phone and email so you can notify them. Export who received it (under ⋮) downloads that list to a spreadsheet.
In Traceability → Batches, search for the batch by its code, by the supplier’s batch or by item.
Open it: in Summary you see how much was received, how much was sent to customers, to how many, and where the rest is.
Click the Traceability tab: at the top, which supplier it came from and with which document; below, which customers it reached and with which delivery notes or invoices.
If they need to be notified, open an alert with Batch alert.
#Quarantine and blocking
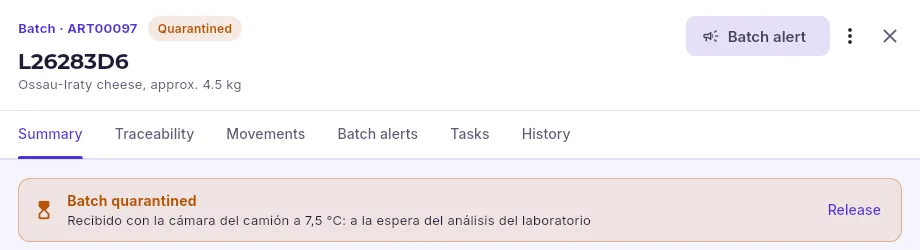 123
- 1The batch’s status.
- 2And its reason: here, received with the lorry’s cold chamber out of temperature range, waiting for the lab.
- 3Once it is resolved, Release makes it available for sale again.
From ⋮ on the batch’s record, each change of status asks for its reason and is kept in the history: quarantine (while it is checked), block (not sold or transferred), recall from the market and release. If you also need to notify the customers who received it, a batch alert is better: it recalls or blocks the batch and keeps track of the notifications.
#Batch alerts
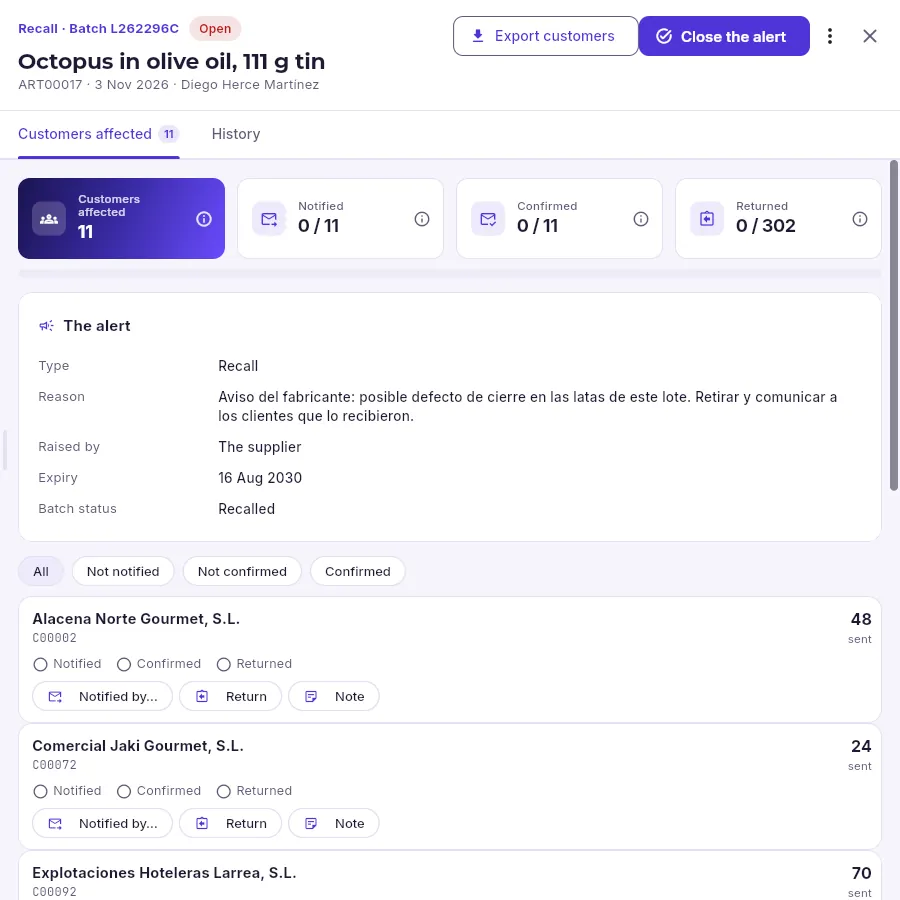 123456
- 1The type of alert (recall, notice or block), the batch and its status.
- 2The list of customers for the health authority and, once everything is resolved, closing the alert with its conclusion.
- 3The progress: customers affected, how many have been notified, how many have confirmed and how much of what was delivered has been returned.
- 4Type, reason (what customers are told), who raised it, the expiry date and the batch’s status.
- 5All, those still to be notified, those still to confirm and those confirmed.
- 6Each customer with what was delivered to them: record notified by… (email, phone or visit), acknowledged, the return and notes.
The types of alert:
- Recall: the batch is recalled and customers are asked to return it.
- Notice: customers are informed (a label change, a precaution); the batch is blocked in the meantime.
- Block: the batch is blocked while it is investigated; who it was delivered to is noted in case they need to be notified.
When you open it, the list of customers who received the batch is fixed, with what was delivered to each. Whatever they return comes in later with a customer return. Open alerts appear in the Batch alerts tab, with their progress.
Open the batch’s record and click Batch alert: choose Recall, type the reason (what you will tell customers) and who raised it (the supplier, the health authority, your own check or a customer complaint).
Set aside what is left in your warehouses (it appears under What is left).
Notify each customer, starting with those who received the most, and record Notified by… in the alert and, when they acknowledge it, Acknowledged.
Record what each one returns with Return.
When everyone has been notified and the goods recovered, click Close the alert with its conclusion (what was recovered, what was destroyed, what the authority said).
#Serial numbers
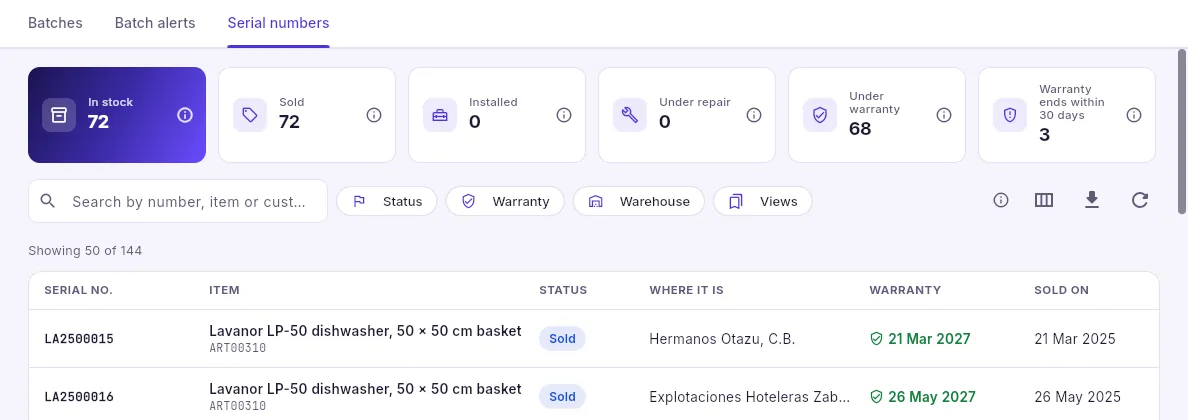 123
- 1Units in stock, sold, installed at customers’ premises, under repair, under warranty, and those whose warranty ends within 30 days.
- 2Search for a unit by its number, its item or its customer.
- 3Each unit with its item, its status, where it is (warehouse or customer) and its warranty.
A unit’s record says where it is (in a warehouse or at a customer’s premises), when it came in and was sold, and its warranty, which starts when it is sold, for the months set on the item. Its tabs show its movement history, the contracts it is installed under and the service jobs. A fault under warranty is not invoiced: Service checks this automatically.
Logistics
Logistics
From the order to the customer’s door: preparing orders in the warehouse (one by one or in waves), packing them into parcels with their labels, sending them with a carrier or delivering them with your own vans, with the recipient’s signature on the phone.
Logistics is the path an order takes from the moment it is confirmed until the customer signs for it. It is handled in four tabs —Picking, Packing, Shipments and Deliveries—, and each one appears when its feature is switched on (Settings → Features) and your profile is allowed to do it:
- 1PickingCollect in the warehouse what the orders ask for, in the order of the walk.
- 2Delivery noteWhen the picking is finished, one delivery note per order with what was picked and its batches.
- 3PackingThe parcels of each delivery note, with their weight and SSCC label.
- 4ShipmentWith a carrier: label, tracking number and where it is.
- 5DeliveriesOr with your own vans: routes, stops and the recipient’s signature.
The warehouse manager and the operatives prepare; whoever organises shipping decides whether each delivery note goes with a carrier or on one of your own routes; the driver delivers from the phone. Everything that happens in the warehouse can also be done with the Warehouse app, on a handheld terminal or a phone, by scanning codes.
#Picking: what has to be prepared
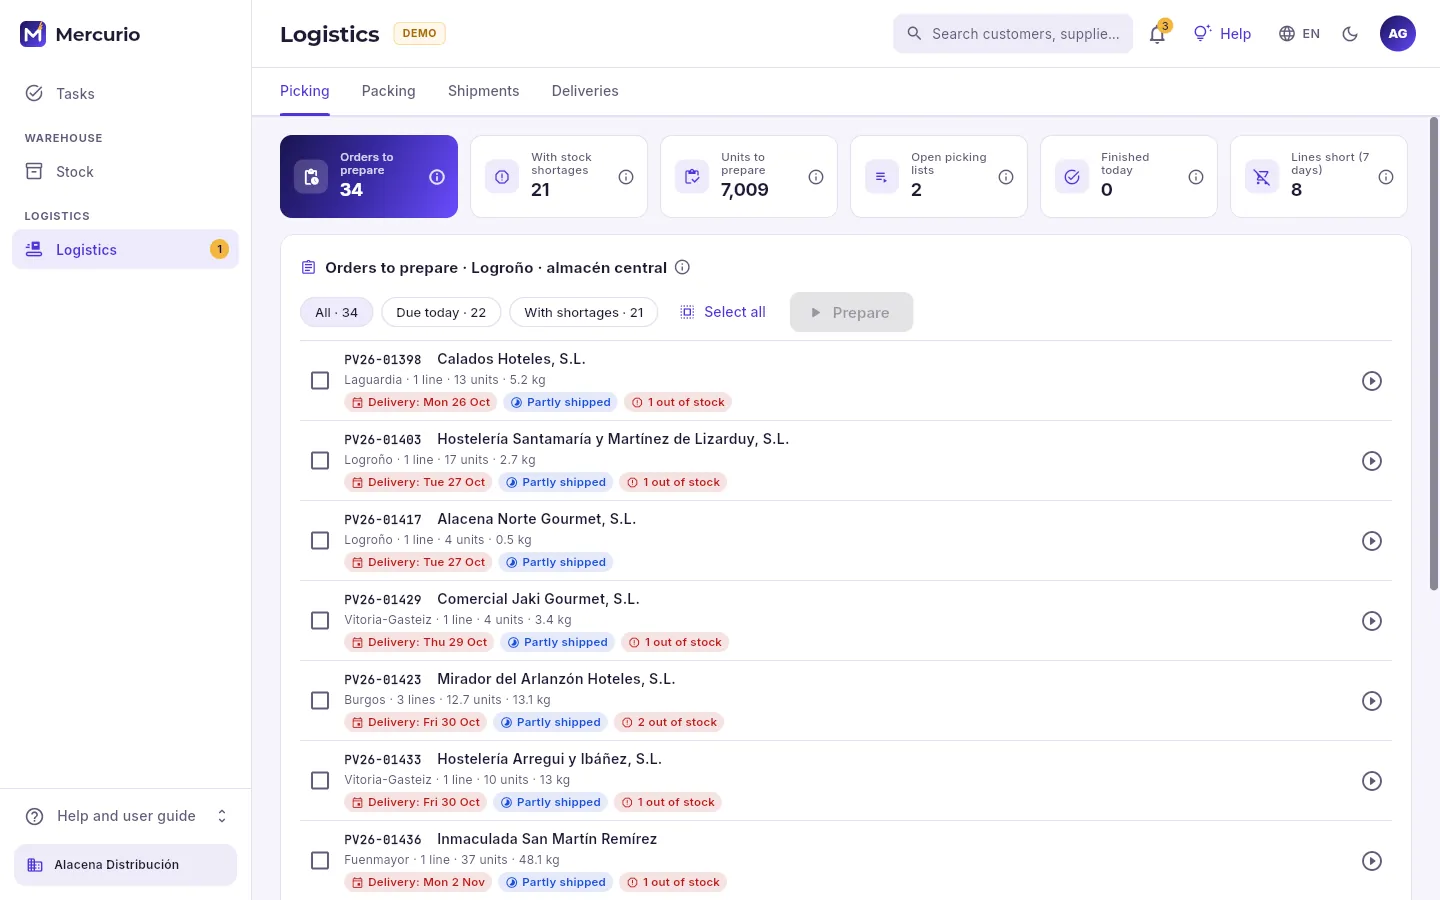 1234567
- 1The warehouse’s indicators: orders to prepare, how many have stock shortages, the units waiting, the open picking lists, those finished today and the lines picked short in the last week.
- 2The orders to prepare in this warehouse that are not yet in any picking list, by delivery date: today’s and the late ones first.
- 3All of them, only those due today (or that should already have gone out) or only those with shortages.
- 4Selects every order in the list at once.
- 5Creates the picking list for the selected orders: with one, a single order list; with several, a wave.
- 6The box to select the order and, on the row, the customer, the town, the lines, the units and the weight still to go, with its delivery date.
- 7Prepare just that order, without selecting it.
Each order carries its tags: the delivery date (in red if it should already have gone out), Partly shipped if something went out before and, in red, out of stock with the lines that have no stock in the warehouse (hover over it to see which items). An order with shortages can still be prepared: whatever there is gets picked and the rest stays pending on the order for the next picking list.
Below are the warehouse’s picking lists, open ones or all, with their progress (lines picked out of the total), their units, their shortages and who is preparing them; Mine leaves only yours.
#Preparing a wave
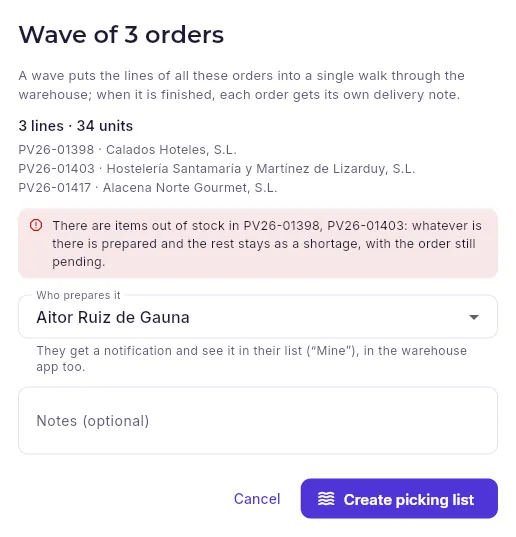 1234
- 1A wave puts the lines of several orders into a single walk through the warehouse; when it is finished, each order gets its own delivery note.
- 2If any order has shortages, it says so: whatever there is gets prepared and the rest stays pending.
- 3Who prepares it: they get a notification and see it under Mine and in the warehouse app. With nobody assigned, whoever opens it first takes it.
- 4Creates the picking list and opens it.
In Logistics → Picking, click Due today to see what has to go out today.
Tick the box of each order you want to prepare together (or Select all).
Click the button, which now reads Wave of N orders.
In Who prepares it, choose the operative who will do it (or leave it unassigned).
Click Create picking list: the pick list is created with the location and batch of each line, and it opens.
#The pick list
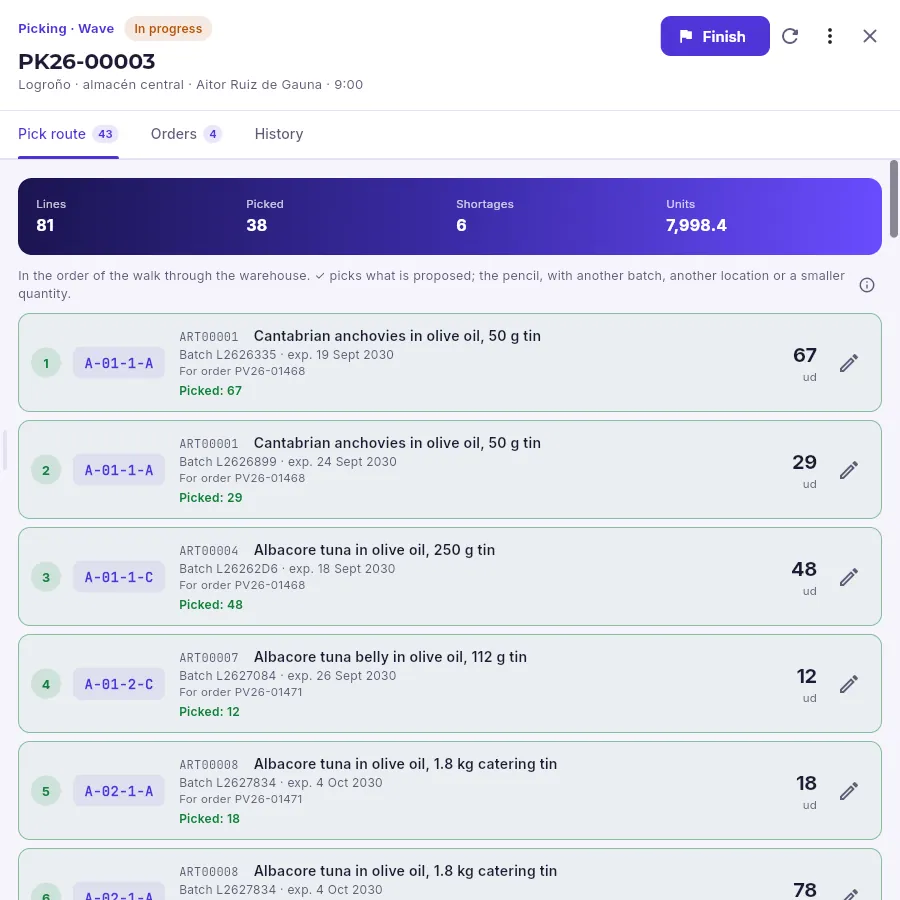 1234567
- 1The picking list number, whether it is a single order or a wave, its status, the warehouse and who is preparing it.
- 2Finish closes the picking list and creates one delivery note per order with what was picked.
- 3Pick everything proposed in one go, assign it to someone else, print the picking sheet or cancel it.
- 4The pick route (with the lines still to pick), the orders it carries and its history.
- 5The lines it has, those picked, the shortages and the units.
- 6Each line, in route order: the location, the item, the batch with its expiry date, the order it goes to and the quantity; in green, already picked.
- 7The pencil: pick from another batch, from another location or a smaller quantity (with the reason for the shortage).
The list follows the walking order through the warehouse (that of its locations, set under Settings → Warehouses) and, within each location, by item and by the batch that expires first. The batch is proposed by each item’s issue policy (FIFO, FEFO…): never a blocked or expired one, or one reserved for another order. A line in amber was picked short (and says why: breakage, not found, expired…); one in red had no stock when the picking list was created: if the goods turn up, pick it with the pencil.
Clicking Finish creates the delivery notes for its orders with what was picked, their batches and their locations; if you tick Issue the delivery notes, they are issued straight away with their number and the stock is taken out (if not, they stay as drafts so you can check them in Delivery notes). Whatever was not picked counts as a shortage and its order is still pending for the next picking list.
#Packing: parcels and labels
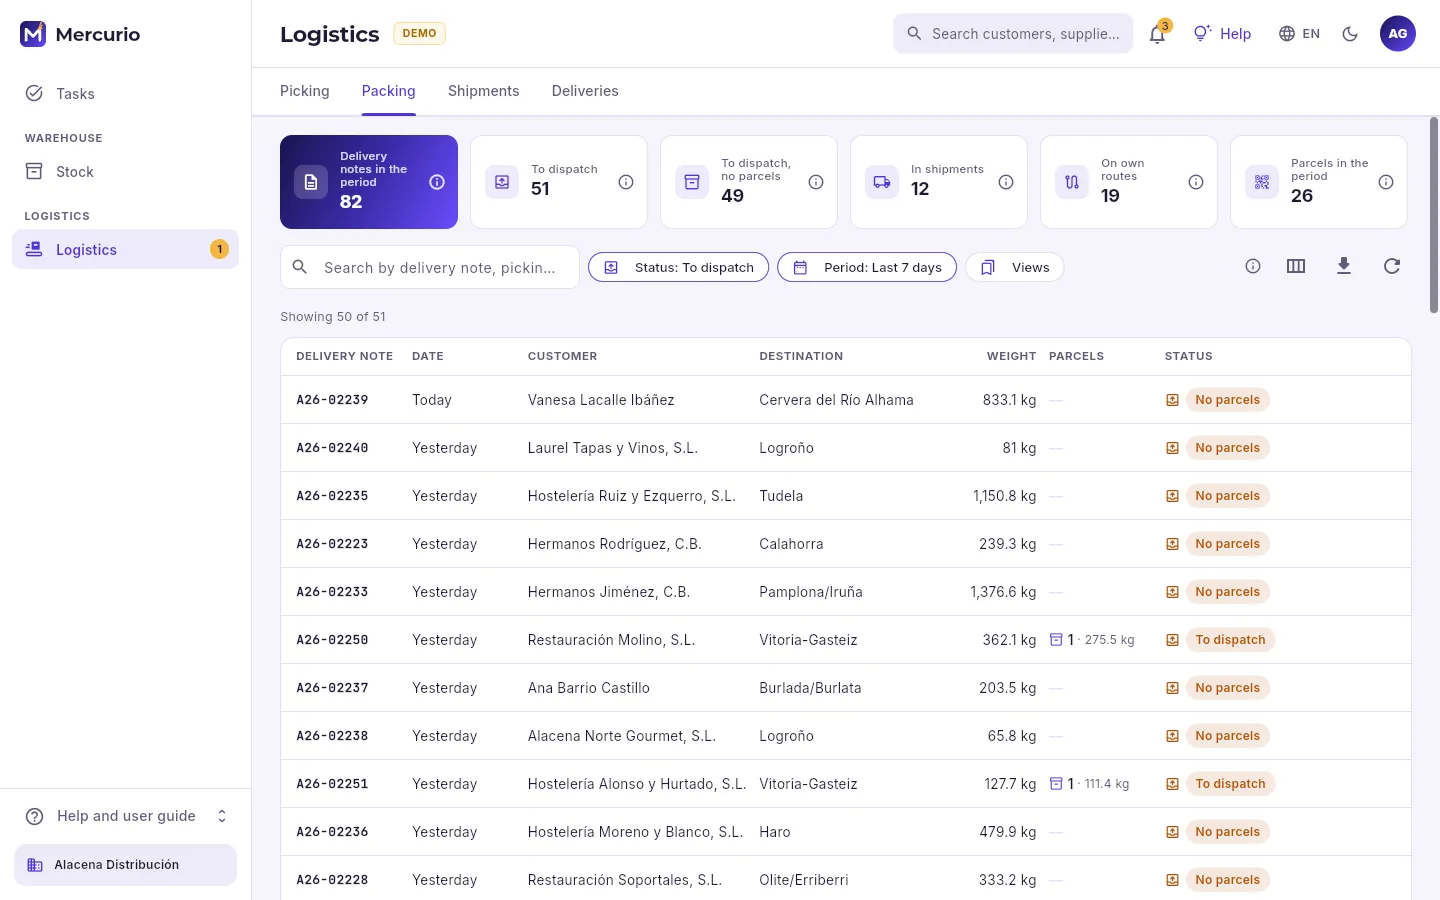 123
- 1The delivery notes in the period, how many are still to dispatch (and of those, how many have no parcels), how many go with a carrier or on one of your own routes, and the parcels.
- 2By default, the ones to dispatch from the last 7 days: what still has to go out.
- 3Each delivery note with its customer, the destination, the weight of its lines, its parcels and its situation: no parcels, to dispatch, in a shipment or on a route. Click one for its parcels.
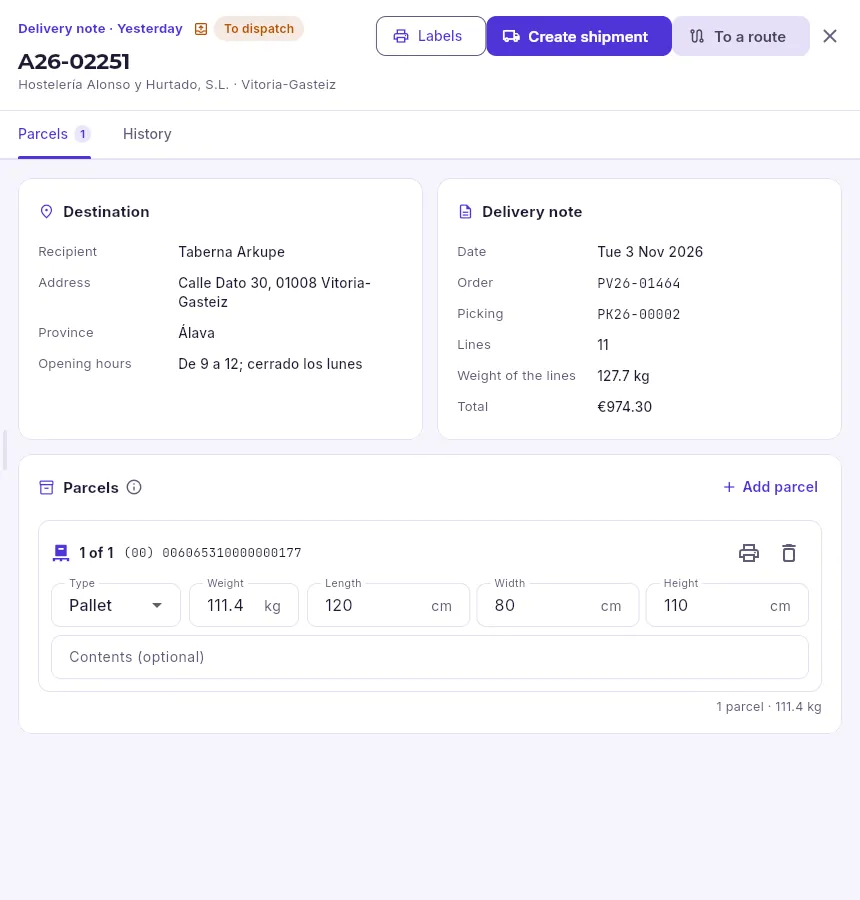 123456
- 1The labels of all its parcels as a PDF, to print them and stick them on.
- 2Send it out: with a carrier (Create shipment) or on one of your own delivery routes (To a route).
- 3Who it is going to: recipient, address and delivery hours.
- 4The delivery note: which order and which picking list it comes from, its lines, the weight of the lines and the total.
- 5Add another parcel: a box, a pallet, an envelope…
- 6Each parcel, with its SSCC at the top: the type, the real weight and, for a pallet, its dimensions.
Each parcel gets an SSCC (Serial Shipping Container Code) when it is saved: 18 digits that identify it all along the way and that its label carries as a GS1-128 barcode with application identifier (00). It is what the carrier scans on collection and the customer on receipt. Enter the real weight of each parcel (the carrier charges by it): with no parcels, a shipment creates one with the weight of the lines.
#Shipments with a carrier
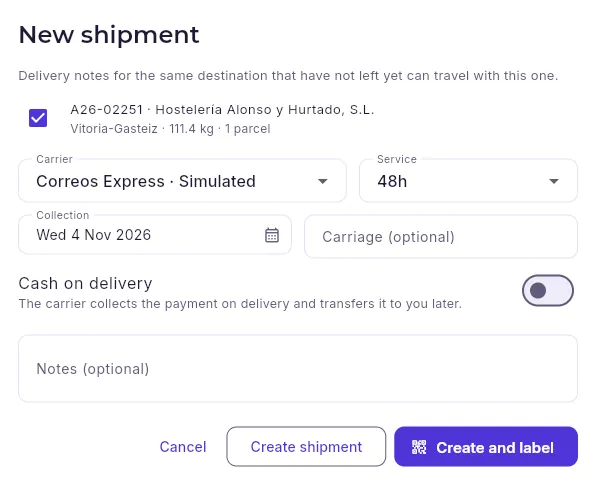 12345
- 1The carrier and its service (24 h, 48 h…).
- 2The delivery notes that travel together: the selected one and, if there are any, those for the same destination that have not left yet (tick them so they go in the same shipment).
- 3The day the carrier comes to collect it and what the carriage costs, if you know it.
- 4Whether the carrier collects payment on delivery (and transfers it to you later), with the amount.
- 5Create shipment leaves it ready; Create and label also requests the label and the tracking number from the carrier.
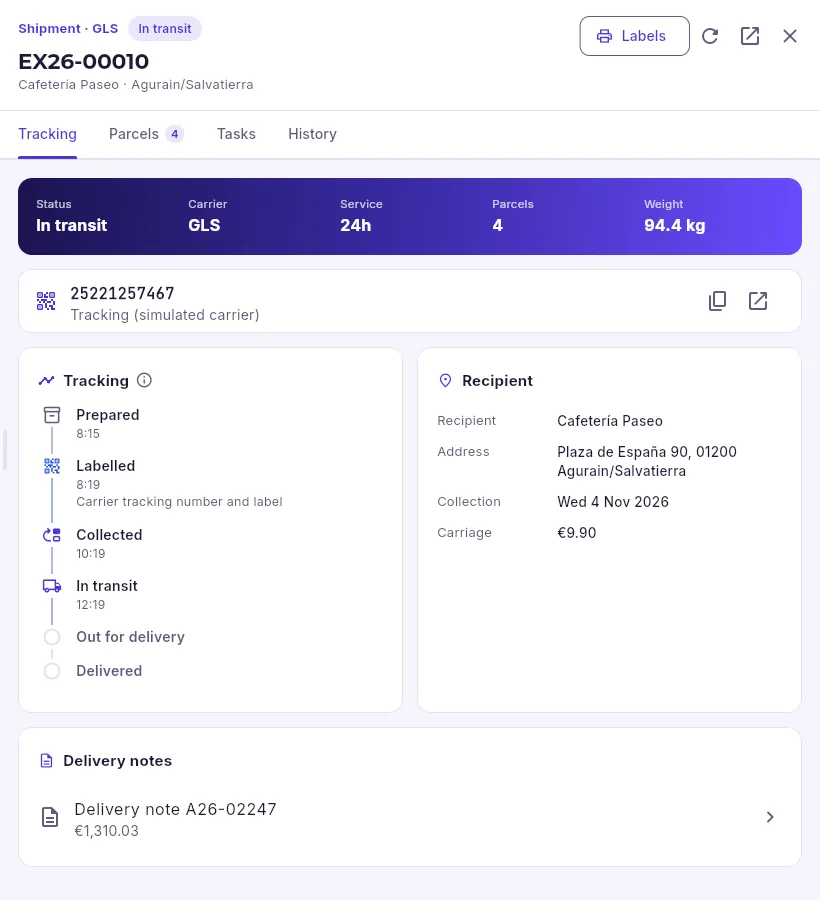 12345
- 1Its status, the carrier, the service, the parcels and the weight.
- 2The tracking number: copy it to give it to the customer or open the carrier’s website.
- 3Where it is: each step with its time; in grey, the ones that have not happened yet.
- 4Who it is going to, when it is collected and the carriage.
- 5Print its labels again.
The Shipments tab shows them all, with what is worth keeping an eye on at the top: those on the way, those not labelled (without a label the carrier will not take them), those awaiting collection, the delivered ones, the exceptions (recipient absent, wrong address, damage…), the average delivery time and what is still to be collected cash on delivery. A shipment can be cancelled until it has been collected: its delivery notes go back to waiting to be dispatched, with their parcels.
#Own delivery: the routes
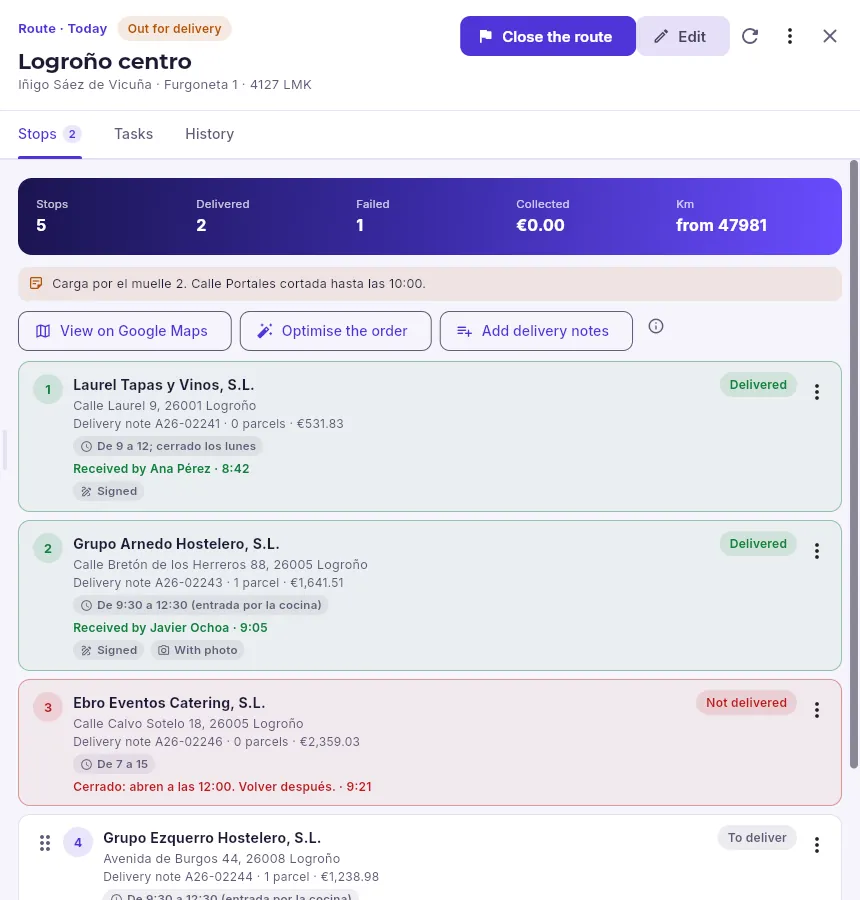 123456
- 1The route: its day, its status, the driver and the vehicle.
- 2When planned, Start the round; while out for delivery, Close the route on return (with the odometer reading). Edit changes the driver, the vehicle or the notes.
- 3The stops, the delivered ones, the failed ones, what was collected and the kilometres.
- 4See the route on Google Maps, optimise the order of the stops and add delivery notes waiting to be dispatched.
- 5Each stop’s menu: on a pending one, directions, move it up or down and remove it from the route; on one already done, view the proof of delivery.
- 6Each stop in order: the customer, the address, the delivery note with its parcels and amount, the delivery hours and, once delivered, who received it, at what time and whether there is a signature or photo; if it could not be delivered, the reason.
Deliveries shows the day’s routes (change the day with the arrows), with what has been delivered, what is pending, what could not be delivered, what was collected and the kilometres. A route is a day, a driver and a vehicle with the delivery notes they deliver, in order: it is created with New route and delivery notes are added to it from here or from each one’s parcels (To a route).
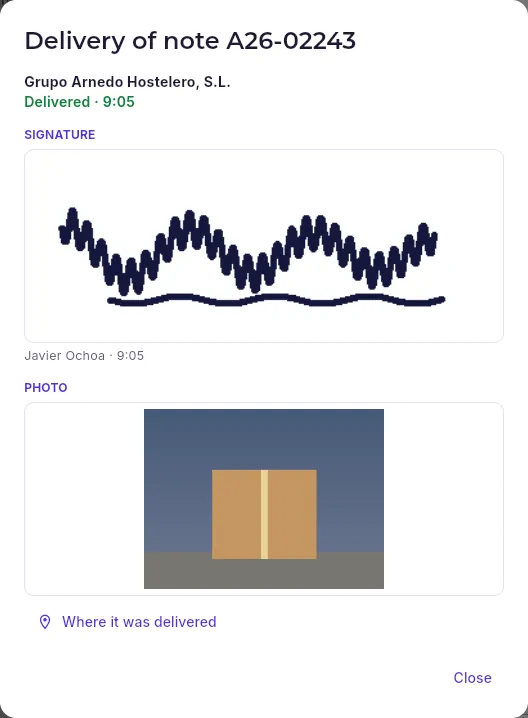 123
- 1The signature of whoever received it, with their name and the time.
- 2The photo of the delivery, if the driver took one.
- 3Where the driver was when delivering, on the map.
If a stop could not be delivered, its delivery note is free again: call the customer (the driver left the reason: nobody there, closed, refused…) and add it to the route of whichever day suits. When a route is closed with pending stops, they stay pending for another one.
#My deliveries: the driver’s phone
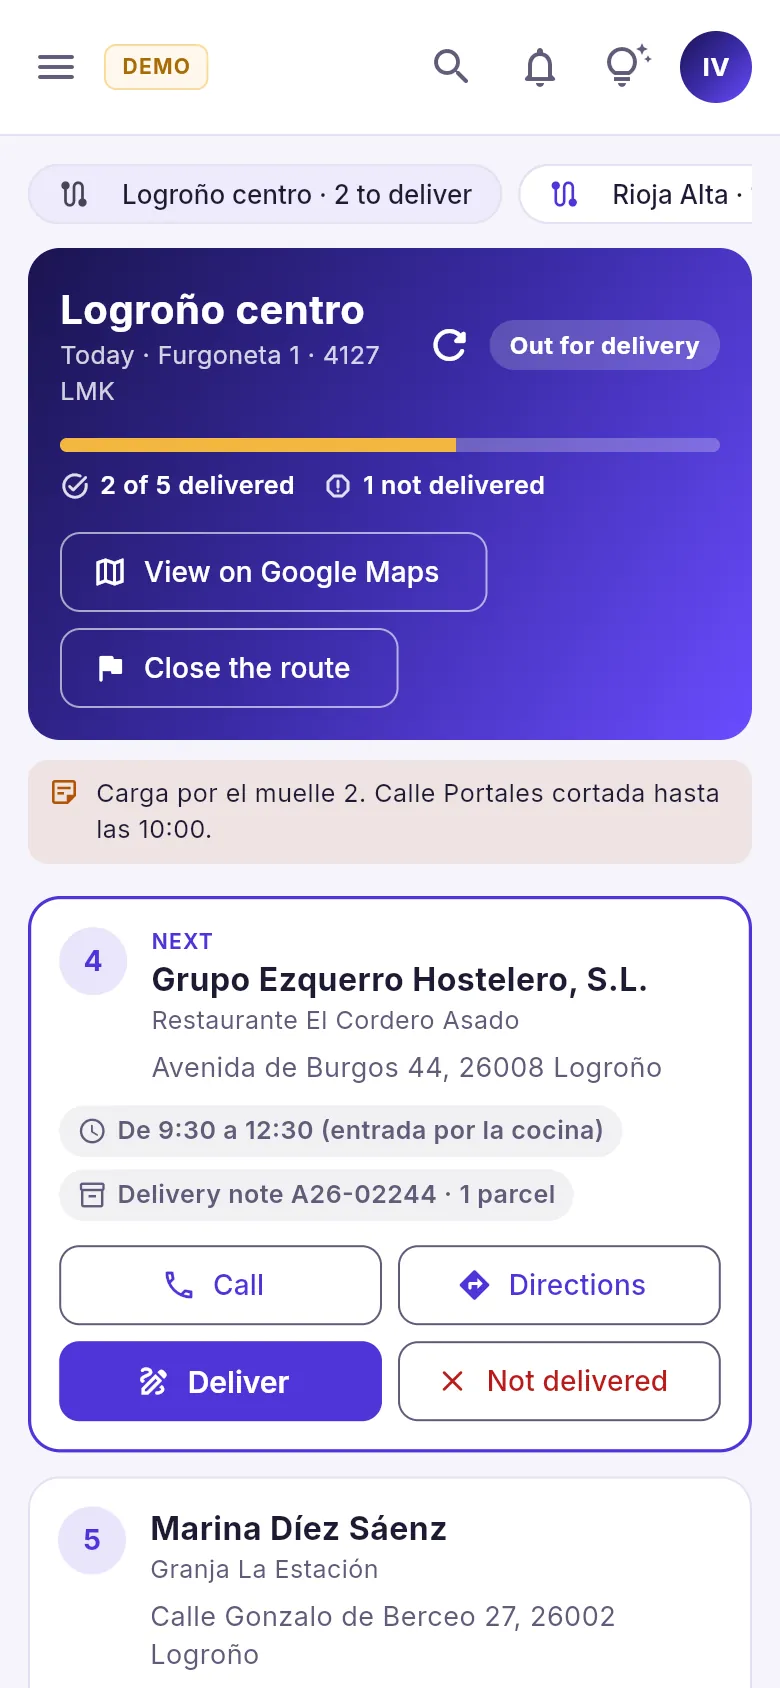 123
- 1Their routes for today, with what is still to be delivered on each: tap one to see it.
- 2The route for what is left, on the map, and Close the route on your return, with the odometer reading. Before setting off, Start the round appears in its place.
- 3The next stop: call the customer, get directions, deliver or record that it could not be delivered. The ones already done stay folded away at the end.
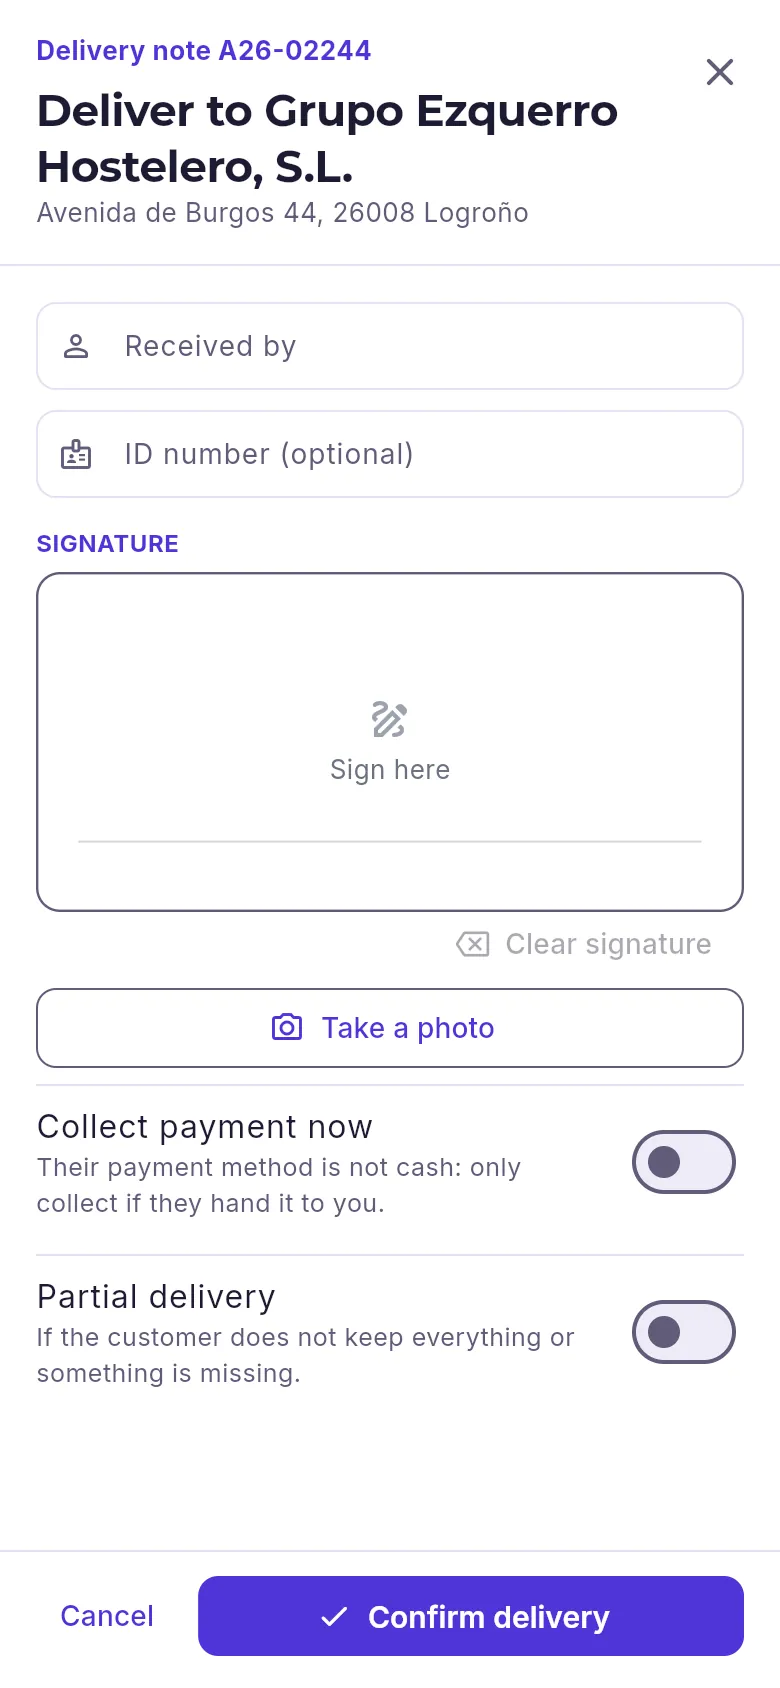 12345
- 1Who receives it (and their ID number, if needed).
- 2The signature, with a finger.
- 3A photo of the parcel delivered.
- 4Collecting payment in hand and whether it was a partial delivery.
- 5Confirms the delivery.
When setting off, in Logistics → My deliveries, tap Start the round and enter the odometer reading.
At each stop, Directions opens the map with the way to the customer; Call, their phone.
When delivering, tap Deliver, enter who receives it, have them sign with their finger and, if you like, take a photo.
If they pay cash, switch on Collect payment now with the amount and the method; if something is missing, Partial delivery and what was not delivered.
Tap Confirm delivery. If it cannot be delivered, Not delivered with the reason.
On return, Close the route with the odometer reading at the end.
#Carriers and GS1 codes
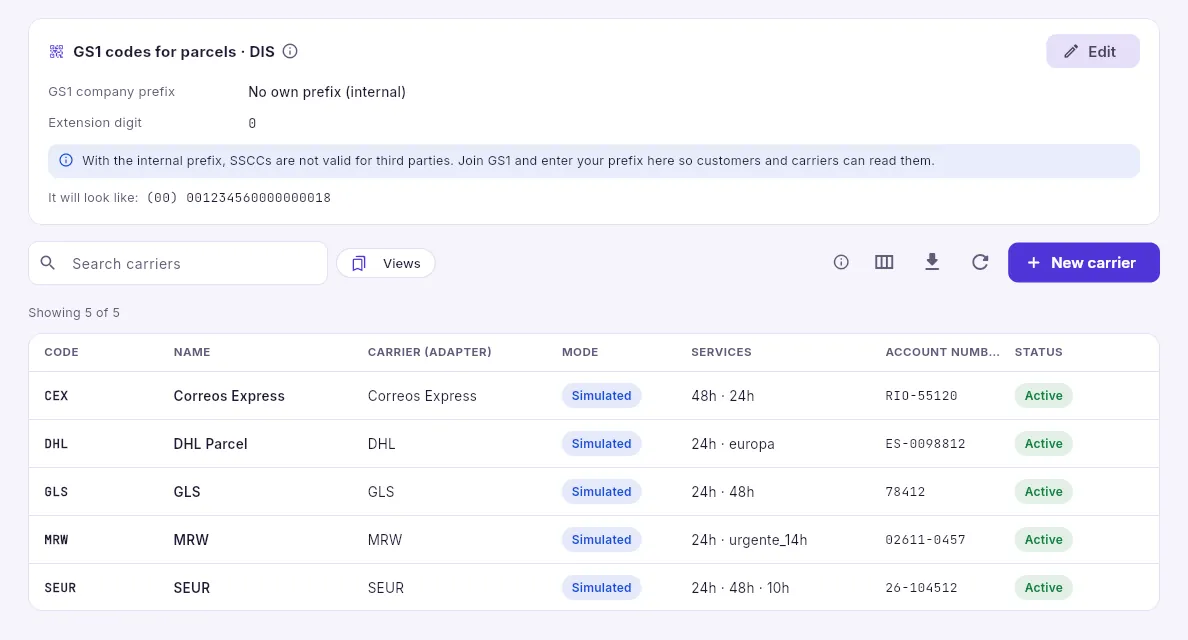 123
- 1How the company’s parcels are numbered: the GS1 prefix and the SSCC extension digit.
- 2Add another carrier.
- 3The carriers with their mode (simulated or live), their services (the first one is the default), your customer number and whether it is active.
In a carrier’s record you choose its adapter (SEUR, MRW, GLS, Correos Express, DHL…), the mode —simulated generates the tracking number and the events in that carrier’s real format; live talks to its API, with the credentials stored encrypted under Integrations—, its services, your customer number and the tracking link, with {seguimiento} where the number goes: that is how its website opens from each shipment.
Services
Contracts
The service contracts that are invoiced automatically every period (rentals, maintenance and usage), with collection by direct debit, price reviews and the billing of recurring fees.
A contract is what a customer is invoiced at regular intervals without anyone having to remember: the rental of a coffee machine, the maintenance of a glass washer, coffee supplied with a monthly minimum. Each contract states what is invoiced (its lines), how often (monthly, quarterly, yearly…), on what day and how it is collected, when the price goes up and what it covers if someone has to go and repair its machines. Contracts belong to the company selected at the top: in the demo, those of Alacena Servicios.
- 1Sign-upIt is created as a draft with its lines, frequency and payment method.
- 2ActivateIt gets its number and its machines are recorded as installed at the customer’s.
- 3InvoiceEach period is invoiced automatically, or from “Billing run”.
- 4CollectThe direct debit goes into the SEPA batch with its mandate.
- 5ReviewOnce a year the price goes up by the CPI or the agreed percentage.
- 6Renew or endWhen it reaches its end it renews itself or finishes.
#The list
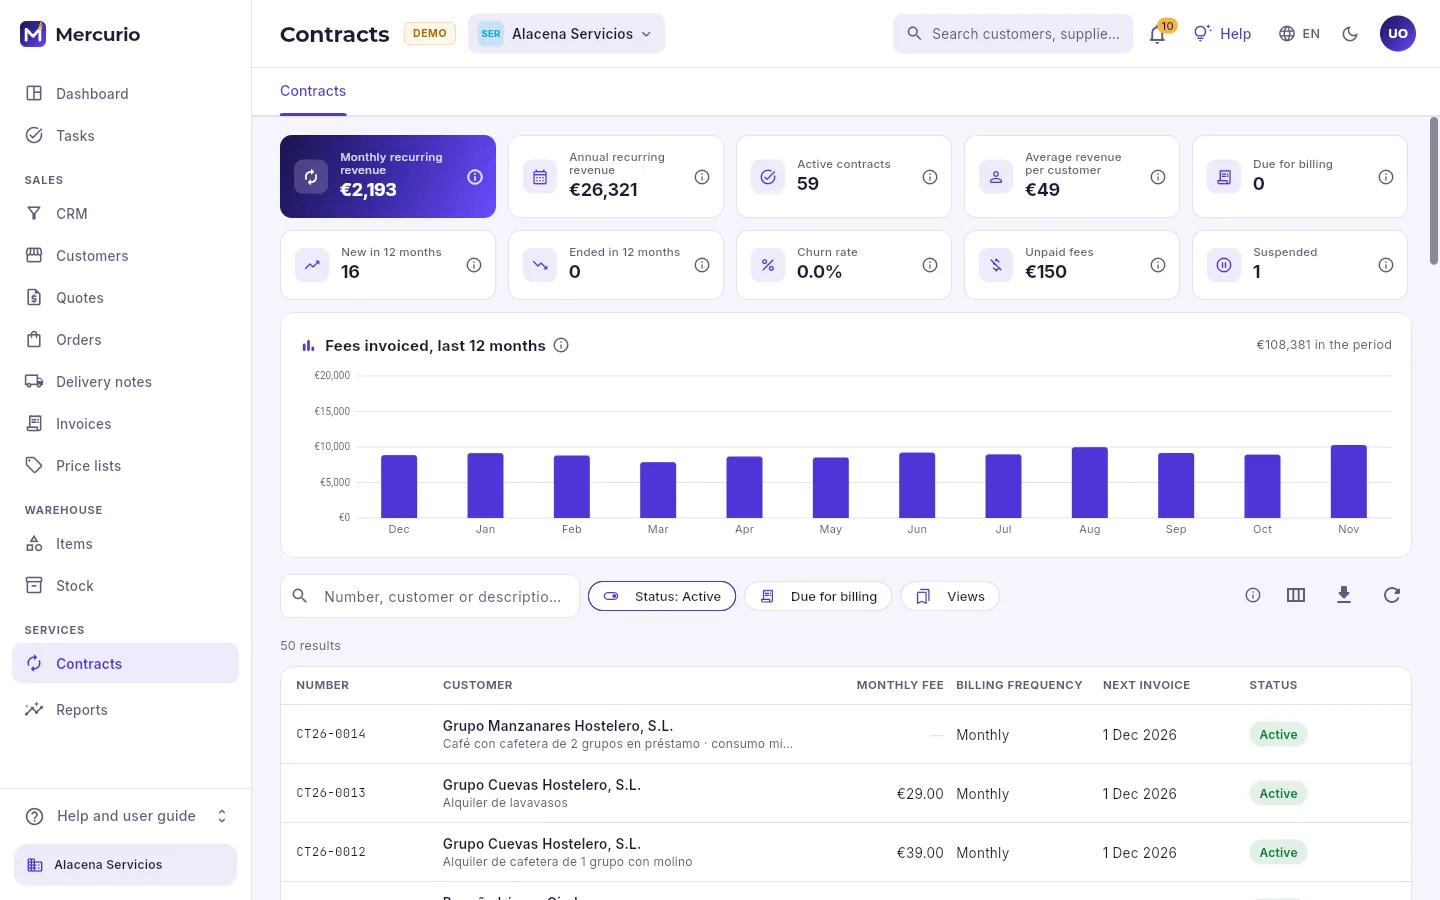 1234567
- 1The fees: what the active contracts invoice per month and per year, how many there are, what each customer pays on average and how many already have an invoice due.
- 2How the portfolio is moving: new contracts and cancellations over the last year, the churn rate, what customers owe for returned direct debits and the suspended contracts.
- 3What the contracts invoiced each month, with the current month on the right.
- 4The search box: by number, customer or description.
- 5The filters: the status (active ones by default), those that already have an invoice due and saved views.
- 6Which columns are shown, exporting what is filtered to a spreadsheet and reloading.
- 7The list, most recent first: number, customer and description, the monthly fee, the frequency, the next invoice and the status. Click a row to open its record.
The monthly fee is that of today’s fixed lines: a contract that only charges for usage (coffee by the kilo, copies on a photocopier) has no fixed fee and shows a dash. Whoever can create contracts also sees the New contract button.
#A contract’s record
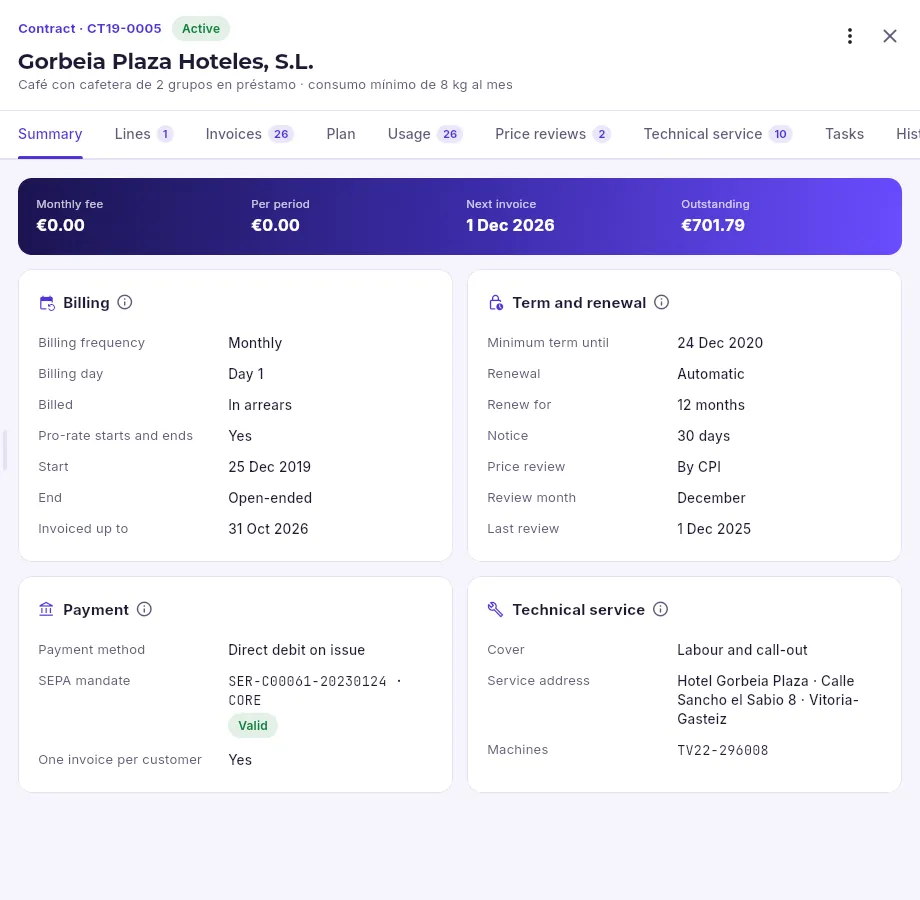 12345678
- 1Its number and status; below, the customer and the description.
- 2Depending on your profile and its status: activate it, invoice it now, record usage, suspend it, reactivate it, end it or go to the customer.
- 3The tabs: summary, lines, invoices, plan, usage, reviews, technical service, tasks and history.
- 4The monthly fee, what is invoiced each period, the next invoice and what the customer still owes on this contract.
- 5How and when it is invoiced: frequency, day, in advance or in arrears, pro-rating, start, end and how far it has been invoiced.
- 6The minimum term, what happens when it reaches the end (automatic renewal, manual or none) and the price review: by CPI, a fixed percentage or by hand.
- 7Payment: the payment method and, if it is a direct debit, the SEPA mandate it is collected under.
- 8What it covers when someone has to go and repair its machines, where the service is provided and which machines it has.
The record opens in the panel on the right, read-only: whoever has the «Edit contracts» permission also sees Edit. A contract invoiced in advance invoices each period on the day it starts (usual for a rental); one invoiced in arrears, on the day after it ends (typical of usage, which is not known until then). With pro-rating, the first and last periods are invoiced for the days actually used.
#Lines and usage
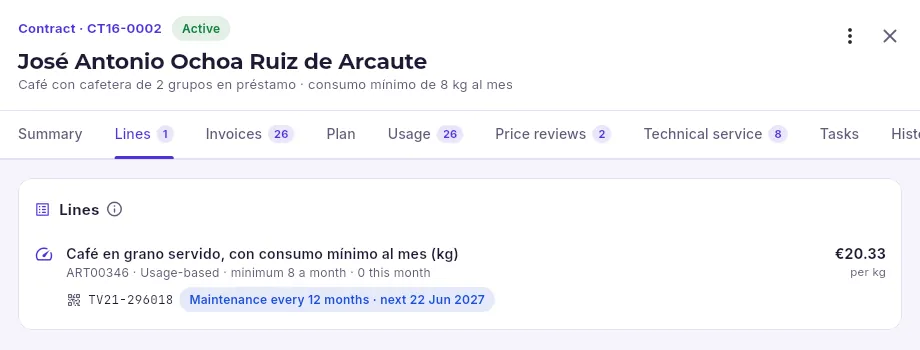 1
- 1Each line, fixed or usage-based, with its price, the monthly minimum, the installed machine (by its serial number) and its preventive maintenance.
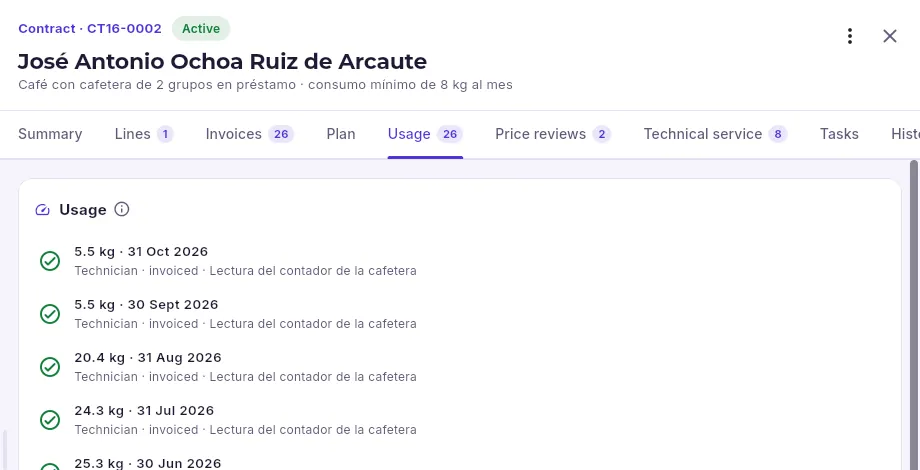 1
- 1Each reading: how much, on what day, who recorded it (the technician, the portal, the office) and whether it has been invoiced.
There are two kinds of line:
| Line | What is invoiced each period |
|---|---|
| Fixed fee | Its price, which is for one month, times the months in the period (a quarterly one, × 3). |
| Usage-based | What was used in the period minus what is included (already covered by another fee), and at least the guaranteed minimum. The price is per unit (kilo, copy, wash…). |
Usage readings are recorded by the technician on a visit, by the customer from the portal or by the office from More actions → Record usage. When a period is invoiced, what was recorded between its dates is added up; a reading that has not been invoiced yet can be deleted if it is wrong.
#Price reviews and billing plan
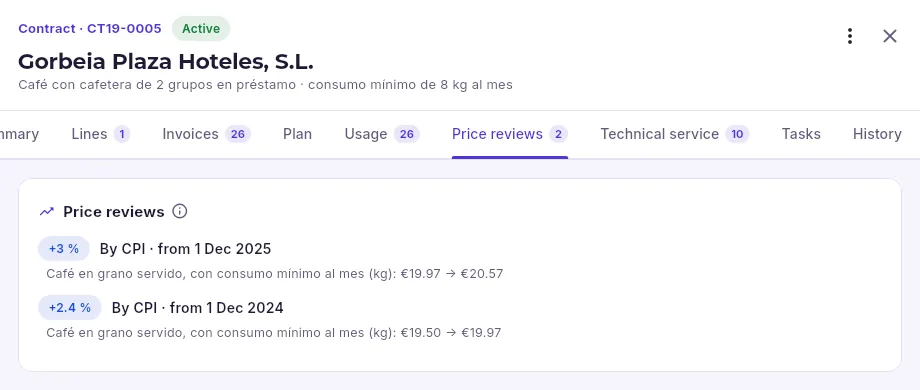 1
- 1Each review applied: the percentage, from when, and each line’s price before and after, so you can explain it to the customer.
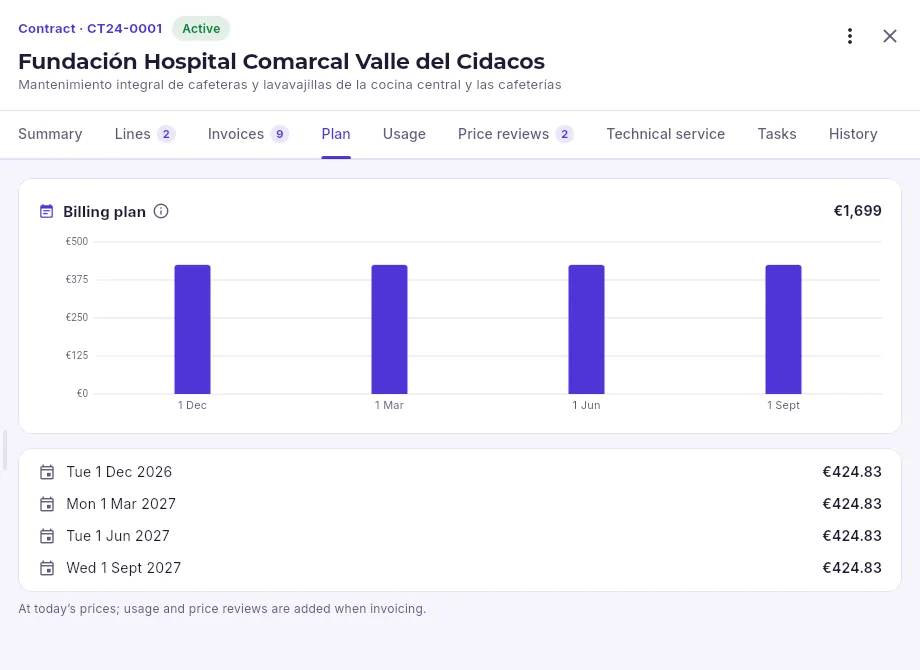 1
- 1What it will be invoiced over the next 12 months, invoice by invoice, at today’s prices.
The price review is applied automatically in the contract’s anniversary month: it raises the lines marked as reviewable by the year-on-year CPI published by the INE that month (simulated in the demo) or by the agreed percentage. The notice comes beforehand, with the days’ notice the contract states, so you can talk to the customer in good time. The plan is a forecast, not a commitment: usage and reviews are added when invoicing.
#Suspension for returned direct debits
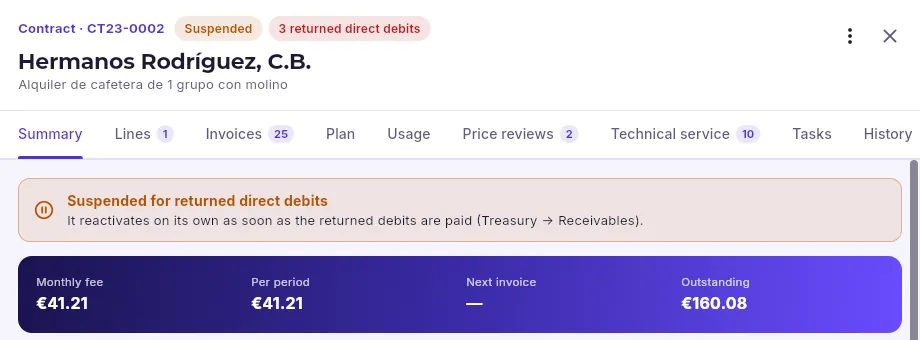 12
- 1The status and, in red, how many direct debits have been returned.
- 2Why it is suspended and how it comes out of it: automatically, as soon as what was returned is collected.
When the bank returns a direct debit on a contract, the due date becomes outstanding again with its charges. If the number of returned direct debits set in the settings is reached (three in the demo), the contract is suspended automatically: it stops being invoiced, although the machines stay at the customer’s. As soon as what was returned is collected (in Treasury → Receivables and payables), it is reactivated automatically and is invoiced again from the period that is due; the suspended periods are not invoiced. You can also suspend it by hand (a closure for building work, for example) and reactivate it later with Reactivate.
#Invoicing the recurring fees
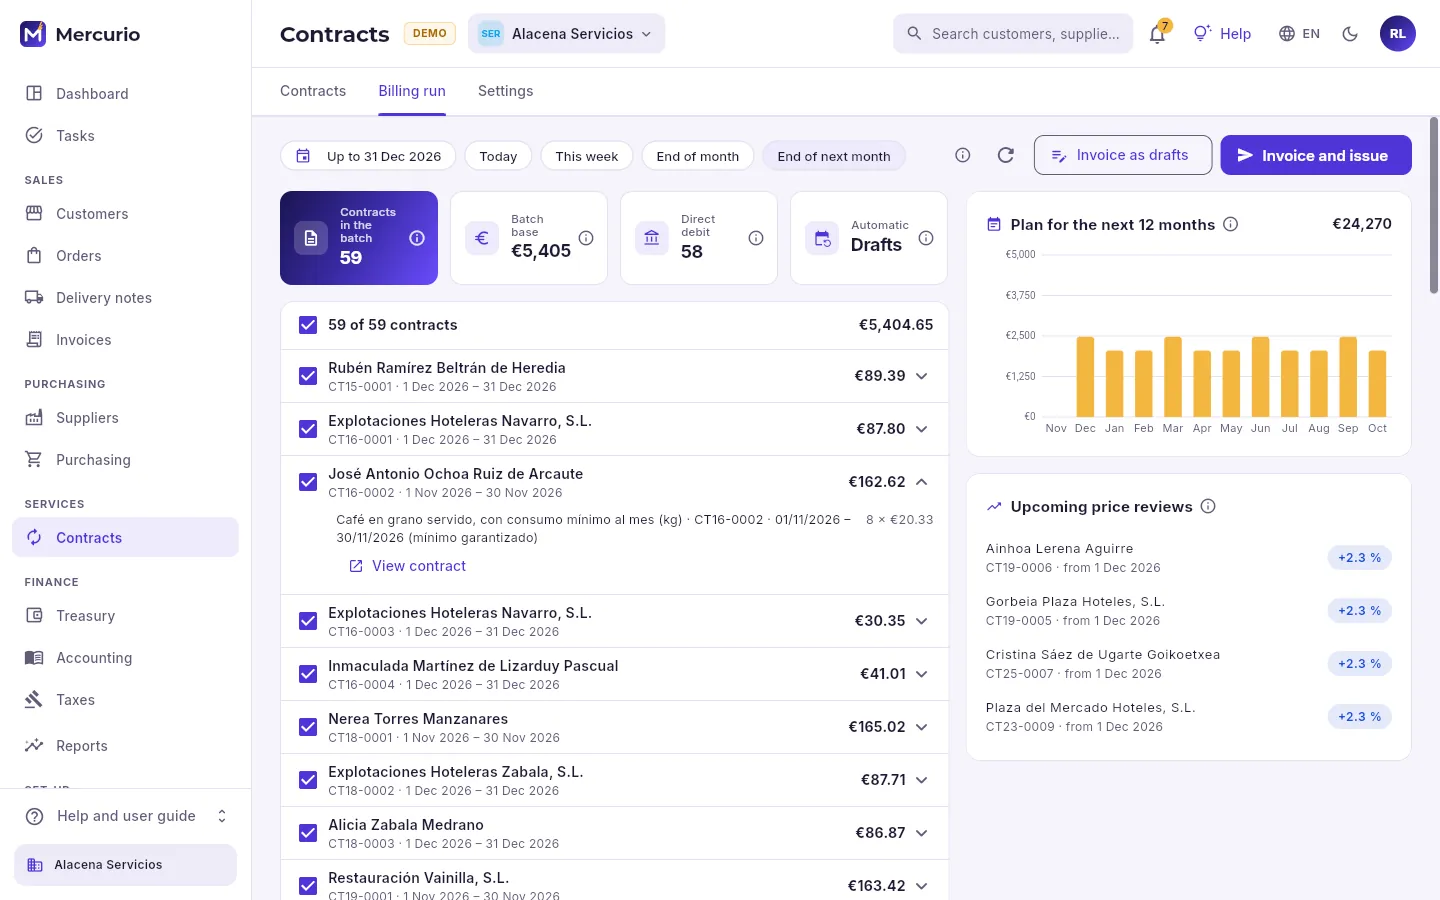 123456
- 1Up to what date to invoice: today, this week, end of month, end of next month or the day you choose on the calendar.
- 2The batch: how many contracts, their net amount, how many are collected by direct debit and whether automatic billing is switched on.
- 3Each contract with its period and net amount; clicking it shows its lines (fixed ones pro-rated if necessary and the recorded usage). Untick any you do not want to invoice yet.
- 4Invoice the batch as drafts, to check the invoices before issuing them, or issued straight away.
- 5What the active contracts will invoice each month of the coming year: to forecast cash flow.
- 6Price reviews in the next 31 days, so you can warn customers in time (shown when the “Price review” feature is on).
The Billing run tab is visible to whoever has the «Invoice recurring fees» permission. It is a preview: nothing is invoiced until you click Invoice as drafts or Invoice and issue and confirm. Invoices are grouped by customer when the contract says so (One invoice per customer); any invoice that cannot be issued (because some detail is missing, for example) stays as a draft with its reason, and the result is shown right here with a link to each one.
In Contracts, open the Billing run tab.
Choose up to what date: End of next month picks up the fees invoiced on the 1st.
Check the batch: click a contract to see its lines and untick any you do not want to invoice yet (it will stay in tomorrow’s batch).
Look out for the ⚠ warning on direct debits without a mandate: they cannot go into a batch until the customer signs one.
Click Invoice as drafts to check them in Invoices before issuing them, or Invoice and issue to issue them now, and confirm.
#Automatic billing
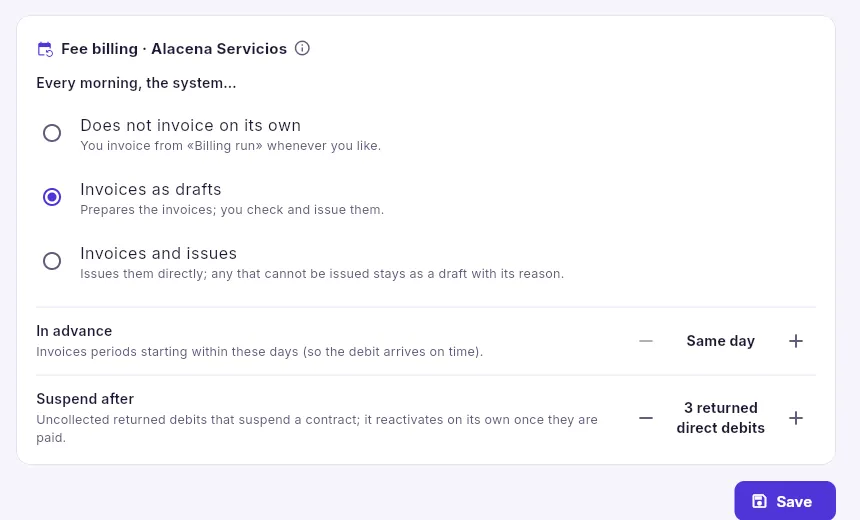 1234
- 1What the system does every morning: nothing (you invoice), prepare the invoices as drafts or issue them directly.
- 2How many days in advance it invoices the periods that start, so the direct debit arrives in time.
- 3How many unpaid returned direct debits suspend a contract (with «Never», none is suspended automatically).
- 4Saves the company’s settings.
Every morning the system invoices what is due, applies the price reviews on their anniversary and counts each contract’s returned direct debits. As drafts is the prudent choice to start with: you check the invoices and issue them yourself from Invoices or from the notice on this same tab (Issue them).
In Contracts, click New contract (with the «Edit contracts» permission).
Choose the customer and write a description to recognise it in lists (“Rented coffee machine”, “Annual maintenance”…).
Add its lines with Add line: a fixed fee or usage with its minimum, and the machine being installed with its preventive maintenance.
Set the billing (frequency, day, in advance or in arrears, start and end), the term and renewal, the price review and payment (payment method and SEPA mandate).
Click Save draft to review it later or Save and activate so it starts being invoiced.
Breakdowns of a contract’s machines are handled by Technical service with the contract’s cover: whatever is covered is not invoiced.
Services
Technical service
Breakdown call-outs, installations and maintenance of customers’ machines: who goes, when, what is done and what is charged, with the customer’s signature at the end.
A job is a technical service visit to a customer’s machine: a breakdown, an installation, a removal or maintenance. It starts from a call-out (by phone, email, from the customer portal or the one preventive maintenance creates automatically), is assigned to a technician with a day and time, the technician starts it on arrival, finishes it with the solution and the customer’s signature and, afterwards, it is closed to an invoice or delivery note with whatever the contract and the warranty do not cover.
- 1Call-outWhat is wrong, in the customer’s words, and with which machine.
- 2AssignTechnician, day and time; they get a notification.
- 3StartOn arrival at the customer’s: hours count from there.
- 4FinishSolution, hours, kilometres and the customer’s signature.
- 5CloseTo an invoice or delivery note, with whatever is not covered.
#Jobs
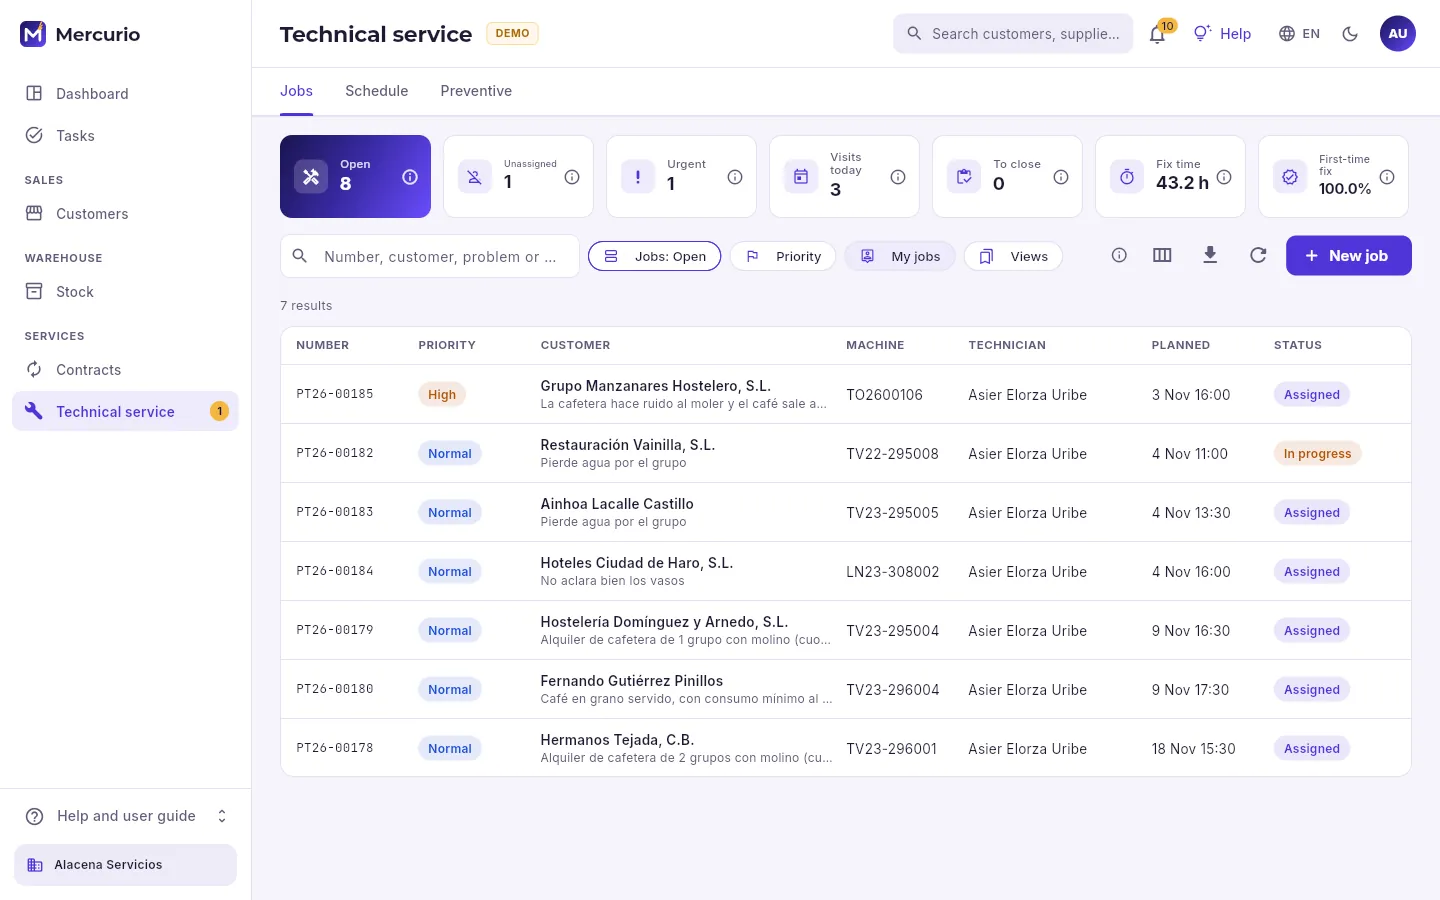 123456
- 1The indicators: open jobs, unassigned call-outs, urgent ones, today’s visits, finished jobs to close, how long it takes to fix a breakdown and how many are fixed first time.
- 2The search box: by number, customer, problem or the machine’s serial number.
- 3Which jobs: open, finished and to be closed, closed and invoiced, or cancelled; and the priority.
- 4My jobs: only yours. A technician has it ticked from the start.
- 5Add a call-out.
- 6The list: open jobs by urgency and planned date, with the priority, the customer and the problem, the machine, the technician, when and the status. Click one to open its record.
Open jobs are listed by urgency and, within each level, by planned date; closed ones, from newest to oldest. An overdue job (its planned date has passed and it is still not done) comes first among those of its urgency.
#A job’s record
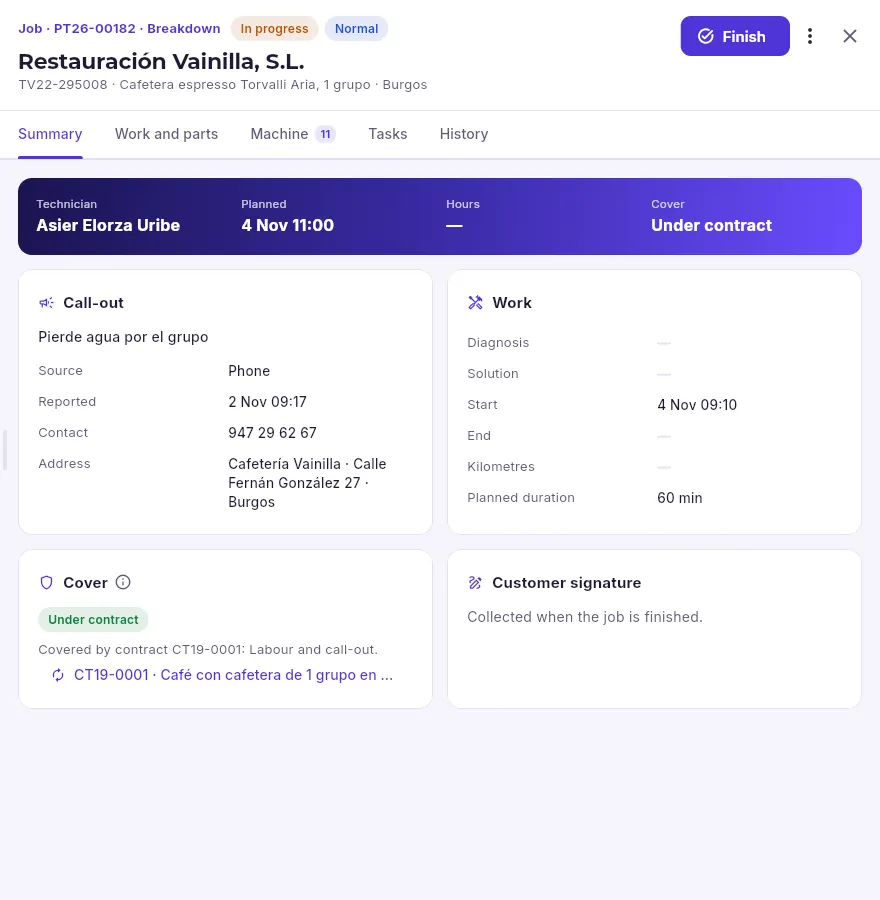 12345678
- 1The number and type, the status and priority; below, the customer and their machine.
- 2The action due now according to its status: Assign, Start, Finish or Close.
- 3Edit it, change the technician or date, put it back to assigned, cancel it with a reason, see its document or go to the customer.
- 4The tabs: summary, work and parts, the machine, tasks and history.
- 5Who goes, when, the hours and who pays (the cover).
- 6The call-out: what is wrong, how it came in, when, the contact and the address.
- 7The work: diagnosis, solution, when it started and ended, the kilometres and the planned duration.
- 8Why a contract or the warranty covers it (or not); and, alongside, the customer’s signature.
The cover is decided by the database when the job is created: if the machine is under an active contract, the contract’s; if not, whether it is under warranty; if not, it is chargeable. It can be changed by hand (and the record says so).
| Cover | What is invoiced on closing |
|---|---|
| Under contract | According to the contract: with «Labour and call-out», only the parts; with «Everything», nothing. |
| Under warranty | Nothing: the machine is under warranty. |
| Chargeable | Everything: neither contract nor warranty. |
| Free of charge | Nothing: it was decided not to charge. |
#Work, parts and machine
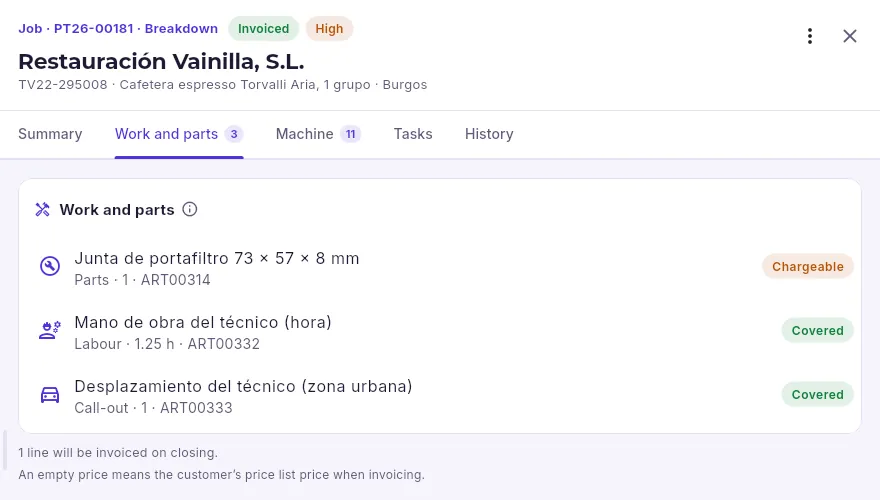 12
- 1The parts, the hours and the call-out, each covered or chargeable according to the job’s cover.
- 2How many lines will be invoiced on closing; an empty price is the customer’s price list price.
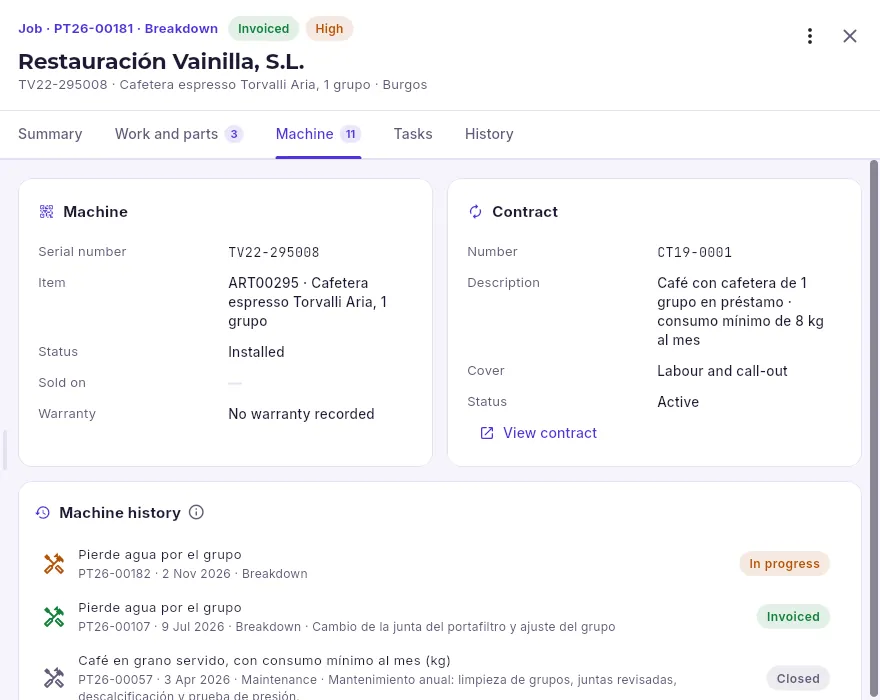 123
- 1The machine by its serial number: its status and warranty.
- 2The contract that covers it.
- 3Its previous jobs, with the problem and the solution: check what failed last time before you go.
In Work and parts the technician uses Add to add the parts they use (taken from their van, which is a warehouse holding what they carry), the hours, the call-out or other items. When the job is finished, labour and the call-out are added automatically if they are set up. Each line is covered or chargeable according to the job’s cover; clicking its label changes it by hand.
#Assigning a call-out
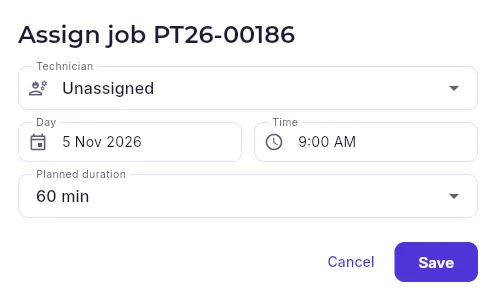 1234
- 1The technician, with their van: they get a notification and see it in their schedule.
- 2The day and time of the visit.
- 3How long it is expected to take.
- 4Leaves it assigned.
Open the job: from the list, from the No date card in the schedule or from the bell notification.
Click Assign (if it already had a technician, More actions → Change technician or date).
Choose the technician, the day and the time, and the planned duration.
Click Save.
#The schedule
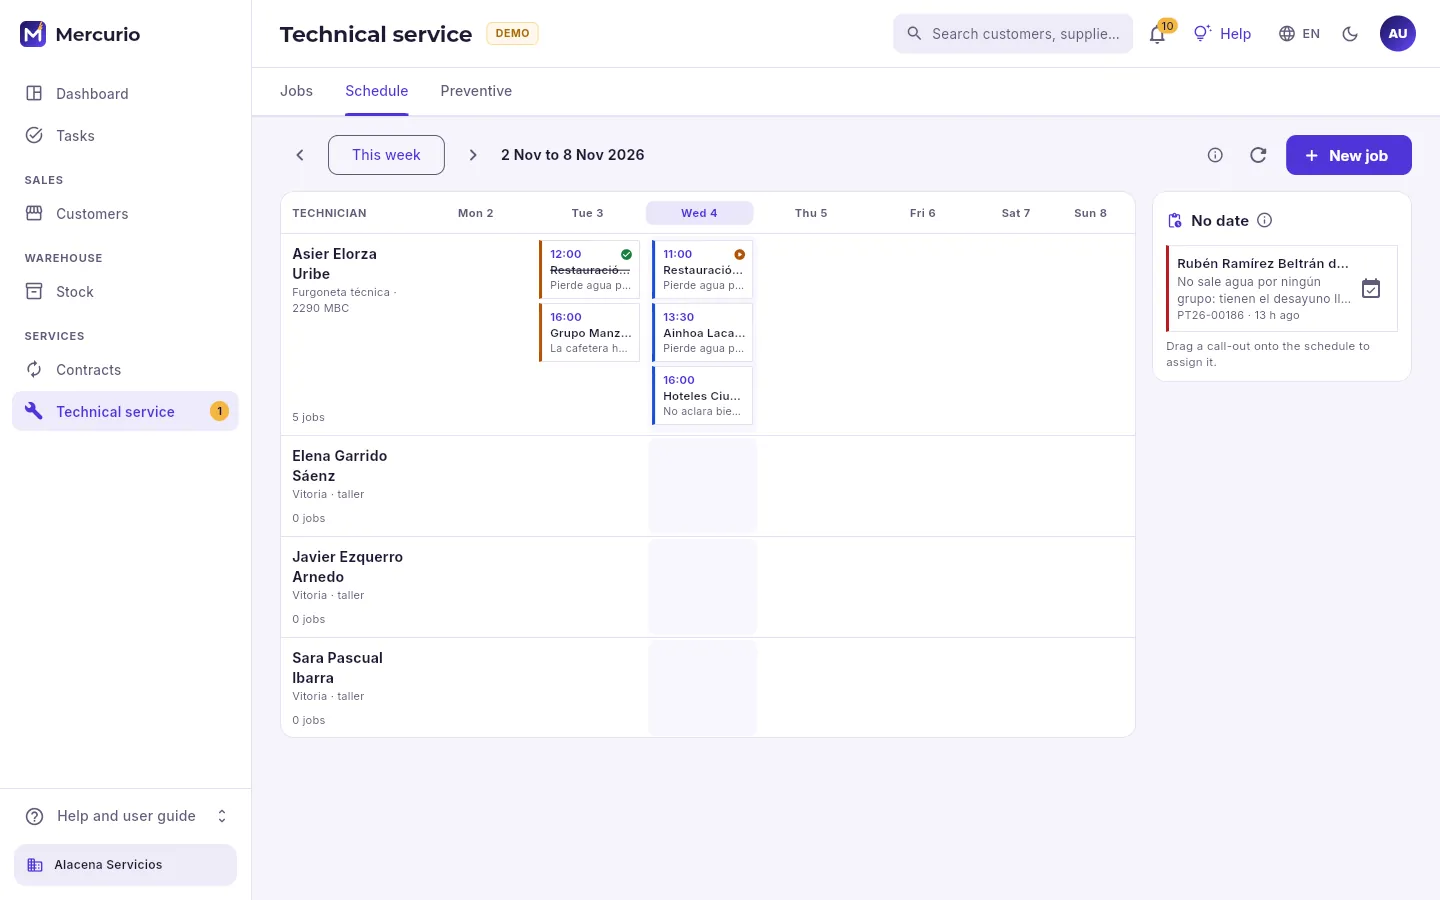 1234
- 1The week shown: the previous one, this one or the next.
- 2Each visit in its technician’s row and its day’s column, with the time, the customer and the problem. Click one to open its job.
- 3No date: the call-outs that have no day yet, urgent ones first.
- 4Add a call-out.
Each row is a person who can do jobs, with their van and how many jobs they have that week; today is highlighted. To share out the work, drag a call-out from “No date” (or a visit) to a technician’s cell on a day: it is assigned to them keeping its time (or at 9:00) and a message at the bottom confirms it. On a mobile, where you cannot drag, each job has its own Assign button.
#Preventive maintenance
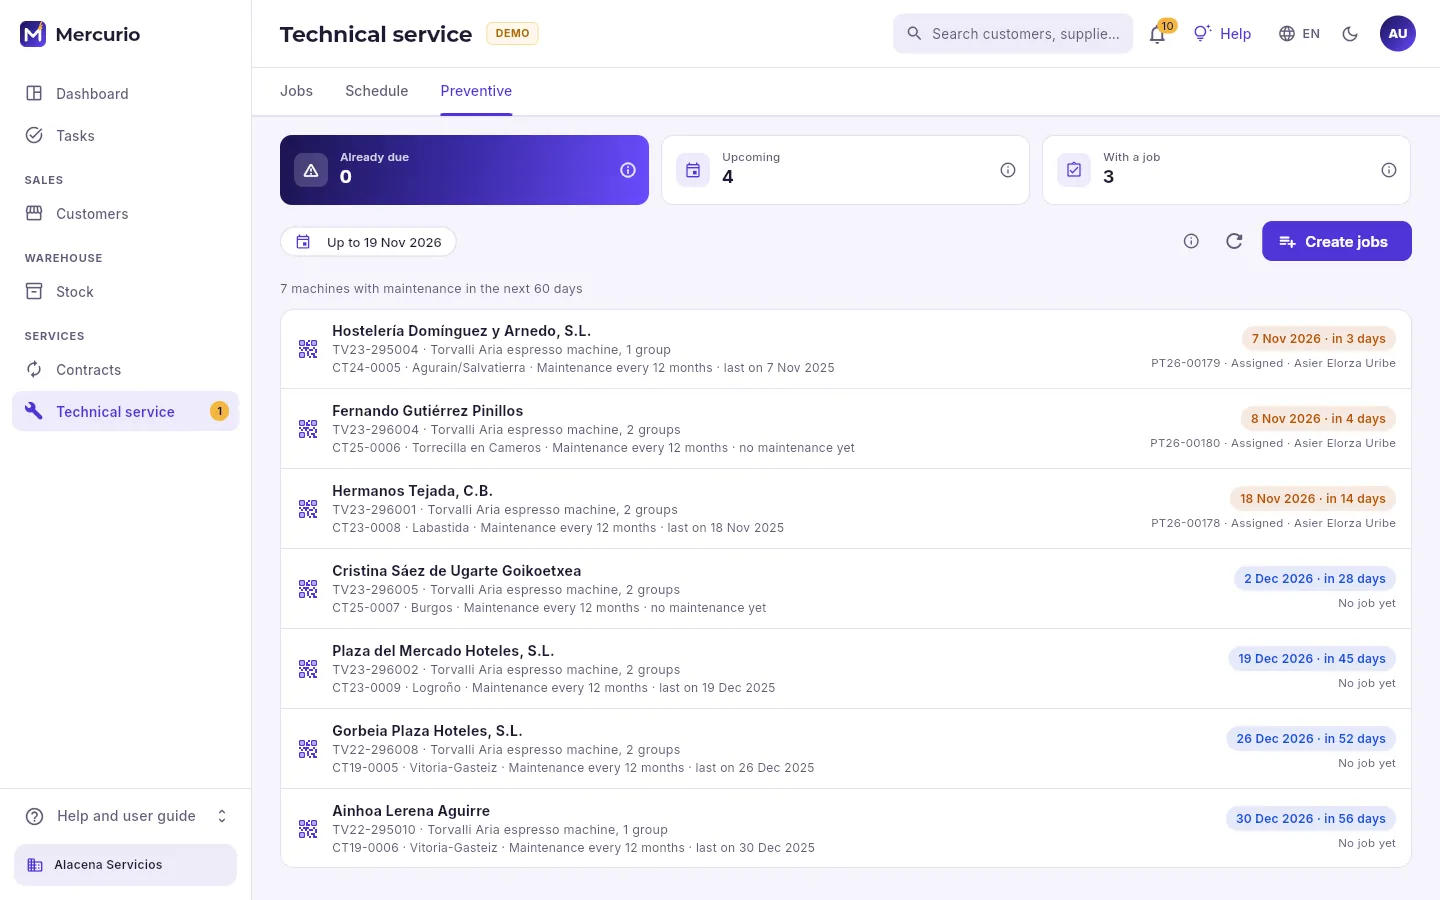 1234
- 1The machines whose maintenance is already due without a job, those due in the next 60 days and those that already have an open job.
- 2The date up to which jobs are created.
- 3Creates the maintenance jobs for the machines due up to that date, with no technician: they are then shared out in the schedule.
- 4Each machine with its customer, its contract and how often it is serviced, when it is due and its job, if it already has one.
A machine on a contract with preventive maintenance every N months has to be serviced when those months have passed since the last maintenance (or since the contract started). The system creates those jobs automatically every morning; here you can bring them forward to any date you like, for example if the technician is going to be nearby. When a maintenance job is finished, it counts as done.
#Adding a call-out
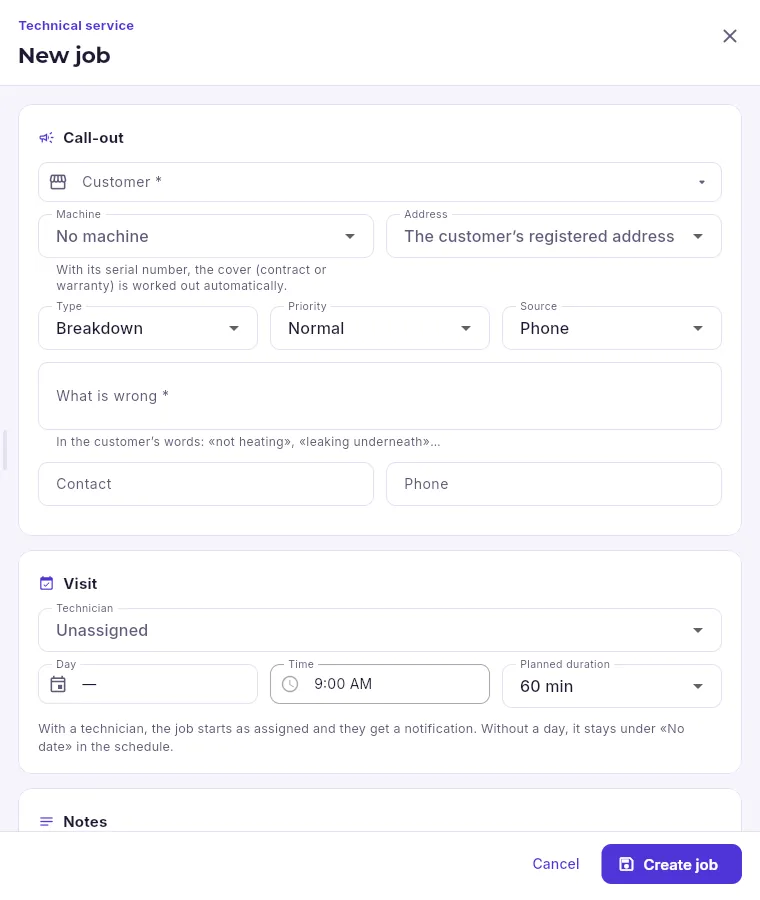 123456
- 1The customer (required).
- 2The machine by its serial number (with it, the cover is filled in automatically) and the address where it is.
- 3The type (breakdown, maintenance, installation, removal, inspection), the priority and how the call-out came in.
- 4What is wrong, in the customer’s words (required).
- 5With a technician and a day, the job is created already assigned; with no day, it stays under “No date” in the schedule.
- 6Creates the job.
#Finishing with the customer’s signature
When the technician is done, they click Finish on the job (on a mobile or tablet). A form opens alongside with what was done and the customer’s signature:
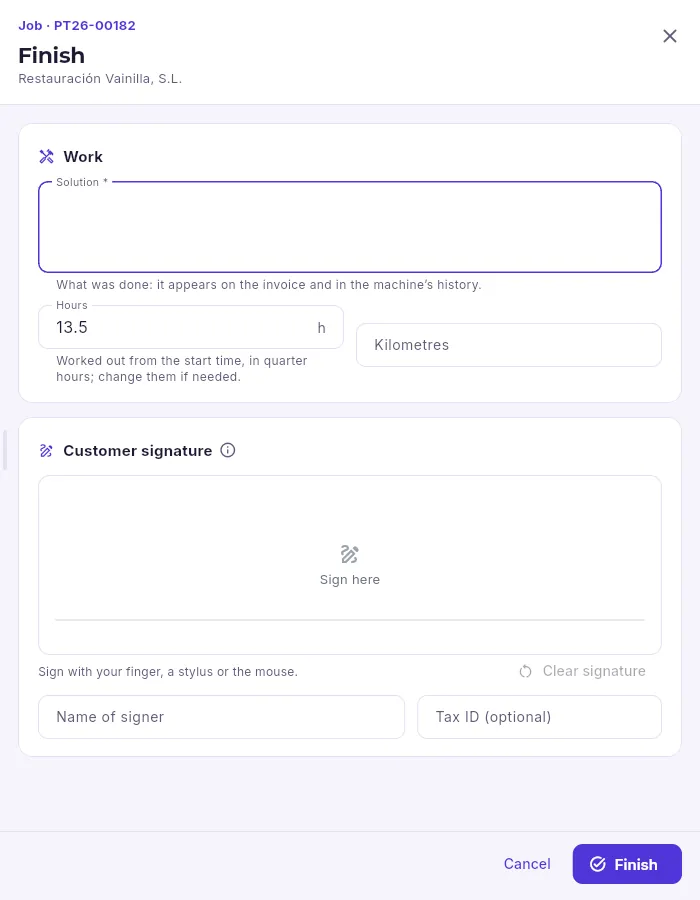 12345
- 1The solution (required): what was done, which appears on the invoice and in the machine’s history.
- 2The hours, calculated in quarter hours since it started (they can be changed), and the kilometres.
- 3The customer’s signature, with a finger, a stylus or the mouse; Clear signature blanks it so it can be done again.
- 4The name of the person signing (required if there is a signature) and, if given, their tax ID.
- 5Leaves the job finished, with the signature.
When you click the Finish button at the bottom, the job is finished and labour and the call-out are added automatically if they are set up. It can also be finished without a signature (if the customer was not there, for example), but then there is no proof of the visit.
#Closing to an invoice or delivery note
A finished job is closed to invoice what is due and take the parts out of the van: from its record with Close or, several at once, in the list with the Finished, to close filter, selecting them and closing them in one go. You choose whether it goes to an invoice or a delivery note per customer and whether it is issued now or left as a draft to check.
- Whatever the contract and the warranty do not cover goes on the document, at the customer’s price list prices.
- Covered parts leave the van as consumption, without an invoice.
- If everything was covered, the job is closed free of charge; if not, invoiced, with a link to its document.
The contracts that cover the machines, with their fees and cover, are in Contracts.
Finance
Treasury
The company’s money: what is in the banks, what you are owed and what you owe, bank statements and their reconciliation, the forecast for the coming weeks, direct debit batches, payments by bank transfer and chasing those who do not pay.
Treasury is the day-to-day handling of the money of the company selected at the top. Each invoice issued or received creates its due dates (the dates on which it is collected or paid, according to its payment method); here you see all of them, collect and pay them, reconcile them with what the bank says and look ahead to know whether there will be enough money. The tabs go from the general to the specific:
| Tab | What for |
|---|---|
| Banks | The front page: balances, what is owed and what needs doing today. |
| Receivables and payables | Receivable and payable due dates, with their age; collect or pay several at once. |
| Statements and reconciliation | The bank’s transactions (Norma 43 or camt.053) and what each one matches. |
| Forecast | The forecast balance week by week or month by month. |
| SEPA batches | Collecting direct debits with a file for the bank, and their returns. |
| Payment runs | Paying suppliers by bank transfer with a file for the bank. |
| Dunning | Reminders and notices to customers who do not pay, by level. |
#Banks: the front page
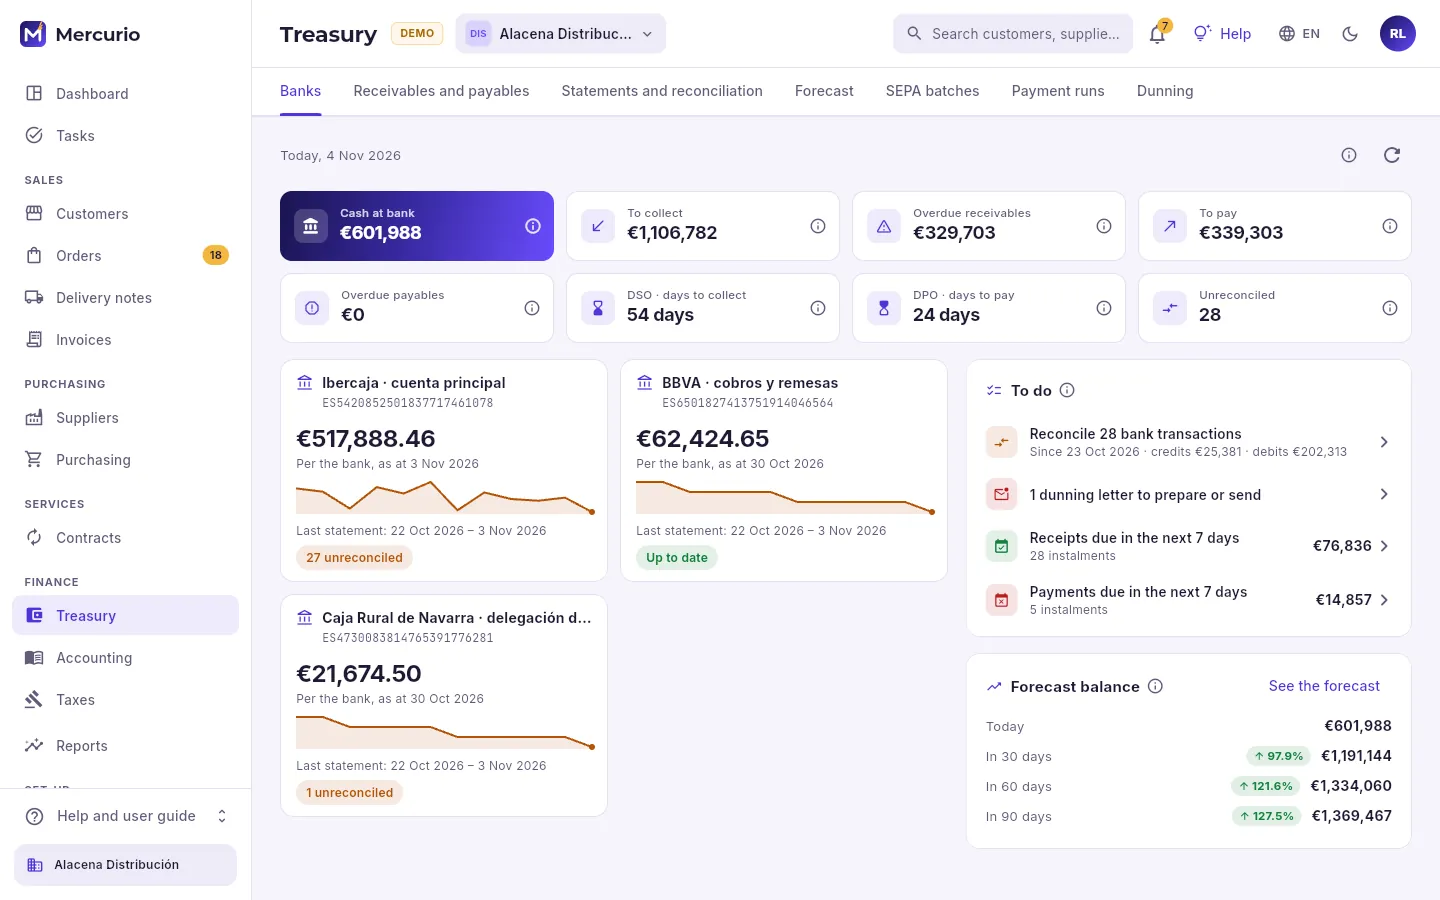 12345
- 1The Treasury tabs.
- 2The indicators: cash at bank, what is to be collected and to be paid (and what is overdue), the days customers take to pay you (DSO) and you take to pay (DPO), and unreconciled bank transactions. Click one to go to its detail.
- 3Each account: its balance according to the bank (with the date of the last statement), its trend and what is still to be reconciled.
- 4To do today: reconciling, the week’s receipts and payments, dunning letters and the runs still to be closed. Each line takes you to where it is done.
- 5The forecast balance in 30, 60 and 90 days, and the link to the full forecast.
Each account’s balance is the bank’s: the opening balance plus the transactions in the imported statements. If an account has no statements yet, it is calculated from the receipts and payments recorded against it; that is why it is best to upload statements every day.
#Receivables and payables
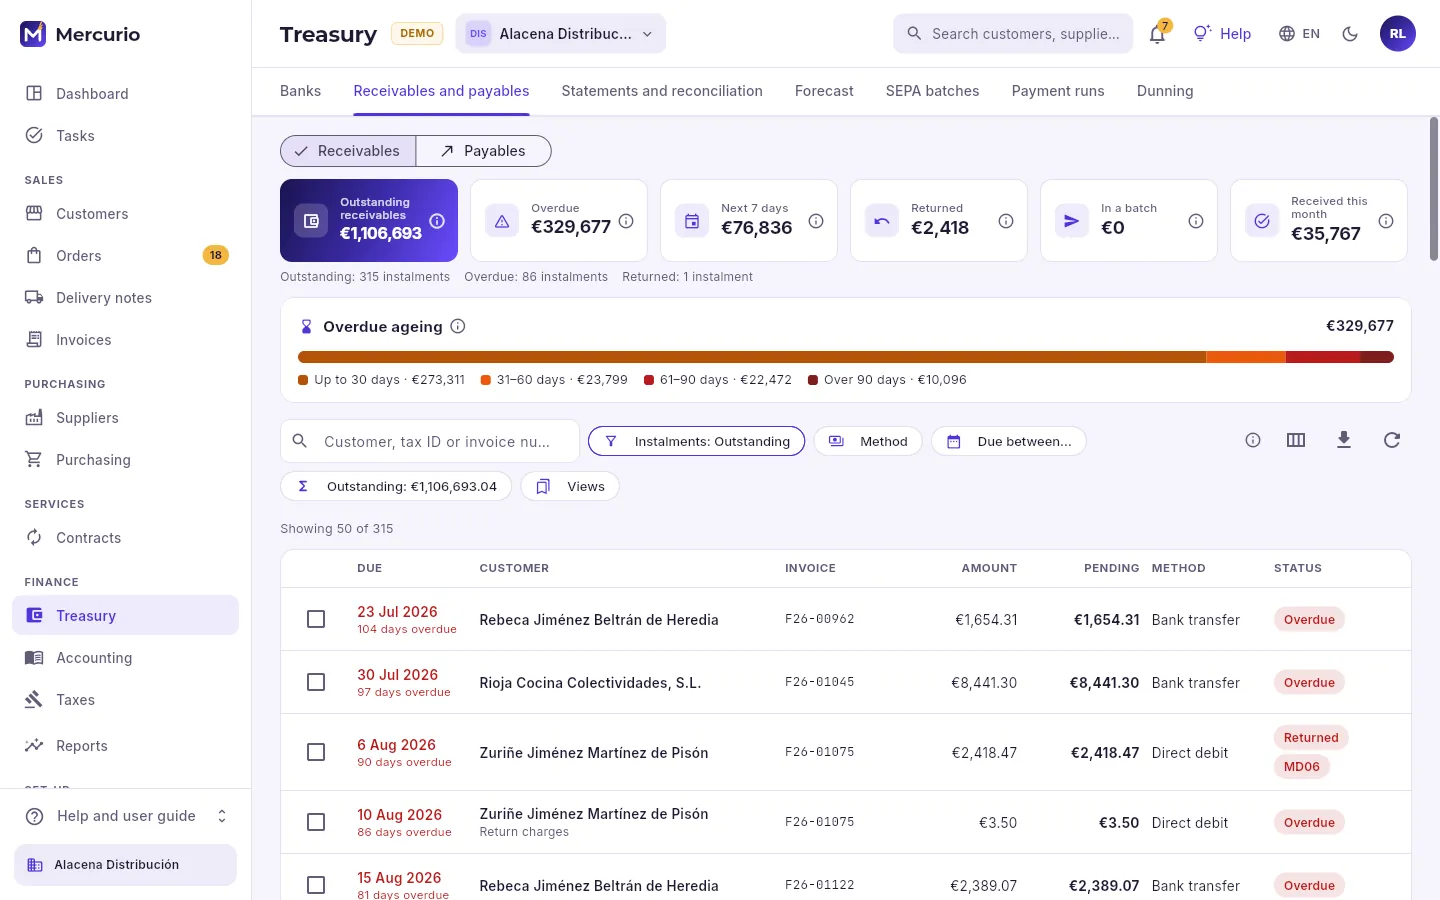 123456
- 1Receivables (what customers owe you) or Payables (what you owe suppliers and creditors).
- 2Outstanding, overdue, due within 7 days, returned by the bank, in a batch and received this month. Click one to filter the list.
- 3The overdue ageing in four bands: up to 30 days, 31 to 60, 61 to 90 and over 90.
- 4Search by customer, tax ID or invoice, and filter by status, payment method and dates.
- 5The total outstanding for everything filtered, not just what has loaded.
- 6One due date per row. Tick several boxes to collect (or pay) them in one go; click the row to open its record.
Each due date shows when it falls due, whose it is, which invoice it belongs to, its amount, what is still outstanding, the payment method and its status: outstanding, part-paid, in a batch, returned (the bank returned the debit; it shows the reason code, such as MD06) or received. When you tick several boxes, the Receive button appears with the number and the total: one receipt can settle invoices from several customers, and a partial one leaves the rest outstanding.
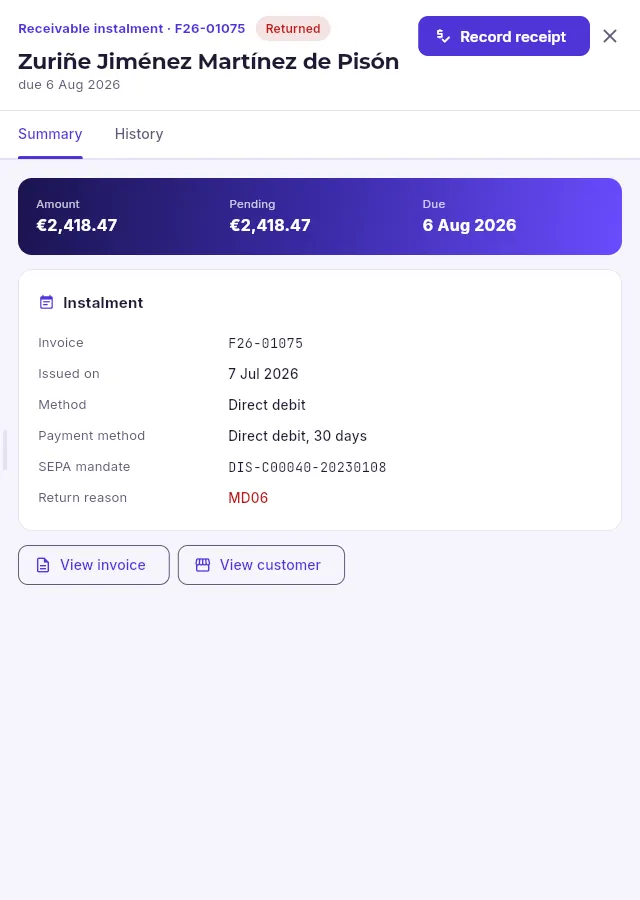 1234
- 1Amount, what is still outstanding and the due date.
- 2Which invoice it belongs to, the payment means and terms, the SEPA mandate it was charged under and the return reason (MD06: refund requested by the debtor).
- 3Record the receipt, in full or in part, when the customer pays some other way.
- 4Go to the invoice or the customer (to call them or check their mandate).
A credit note (the negative due item of a corrective invoice) is money you owe the customer. If you are not going to deduct it from another invoice, open it and press Refund the amount: you choose the date, the bank account you make the transfer from and the reference and, once you confirm, the payment is recorded and the credit note settled. With a supplier’s credit note it works the other way round: Collect the refund records what they pay you back. It needs the “Make payments” permission (or “Collect payments”, for a supplier’s).
#Statements and reconciliation
Reconciling means matching each bank transaction with what it is in Mercurio: an invoice being paid, a payment to a supplier, a bank fee, a salary. Statements are uploaded in the format your online banking provides: Norma 43 (the Spanish banks’ text file, “cuaderno 43”) or camt.053 (the European XML). When you upload one, the database suggests what each transaction could be, with a score from 0 to 100.
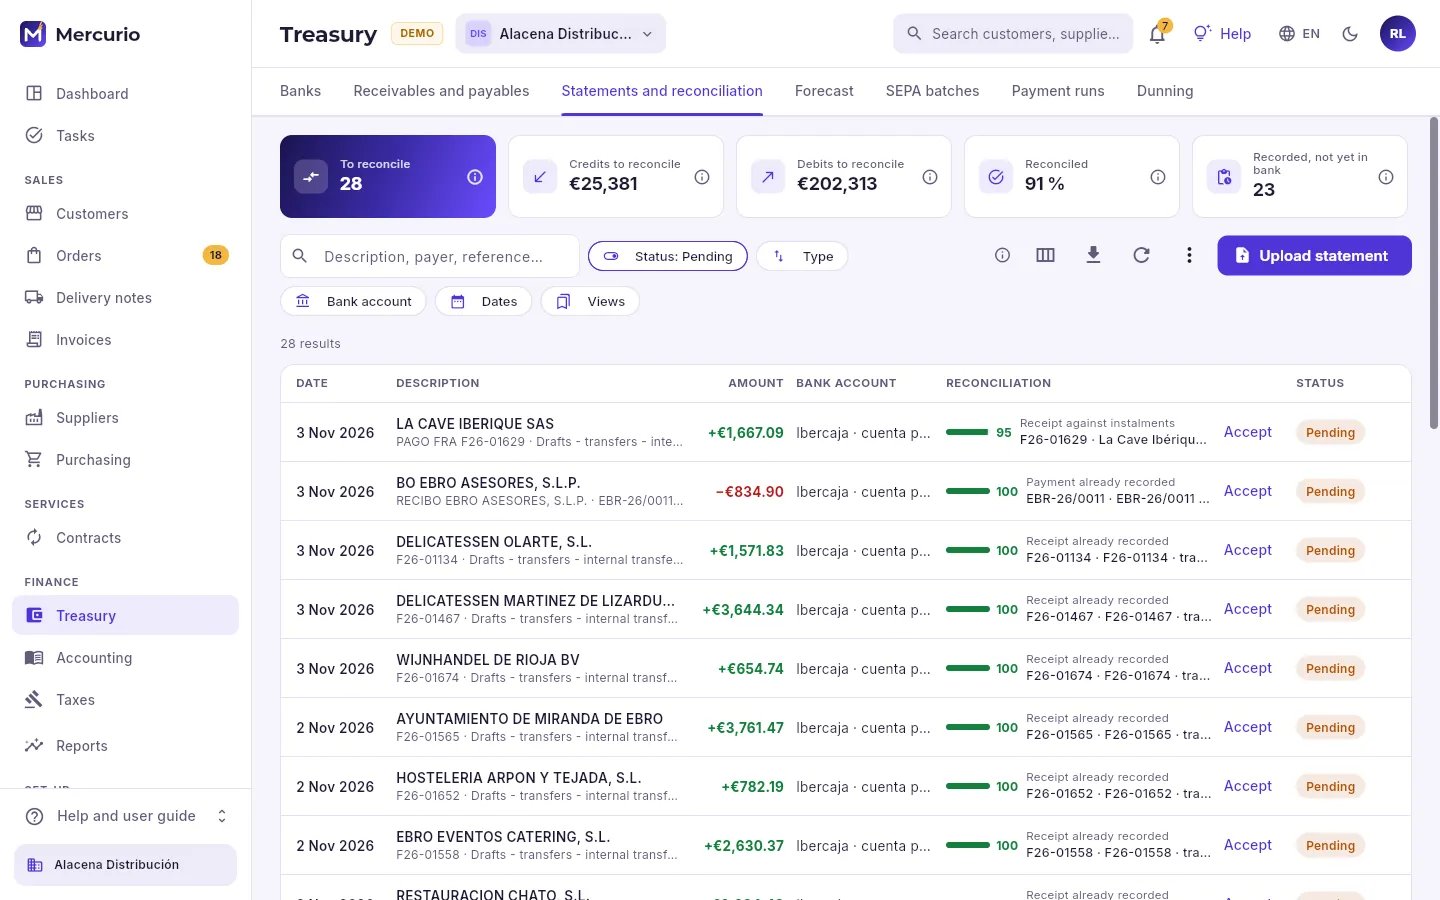 12345
- 1What is still to be reconciled (count, credits and debits), the percentage reconciled and what is recorded, not yet in bank: receipts and payments entered that the bank does not show yet.
- 2Search by description, payer or reference, and filter by status, type, account and dates.
- 3Auto-reconcile, the reconciliation rules and the statements already imported.
- 4Upload a statement: Norma 43 or camt.053.
- 5The best suggestion for each transaction with its score, and Accept to reconcile it with that suggestion without opening it.
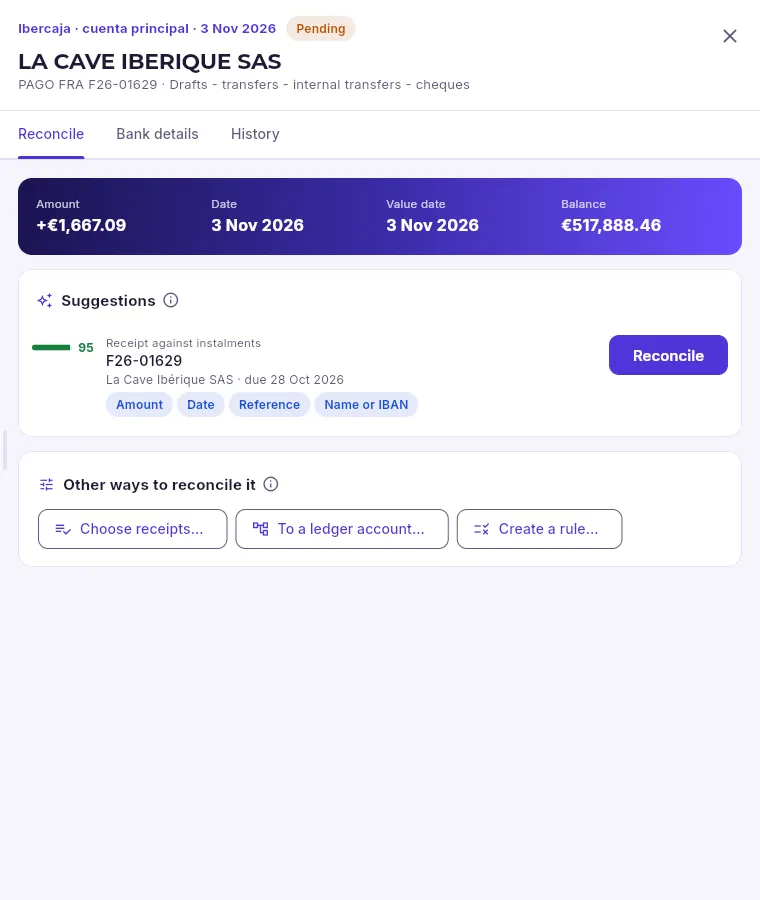 1234
- 1Reconcile it, what the bank says about the transaction exactly as it arrived, and its history.
- 2The suggestions, from most to least likely, with their score and what matches: amount, date, reference, name or IBAN.
- 3Reconcile with that suggestion: if they are due dates, the receipt is recorded and their invoices are marked as collected.
- 4If none is right: choose the due dates or the receipts already recorded by hand, post it to a ledger account or create a rule.
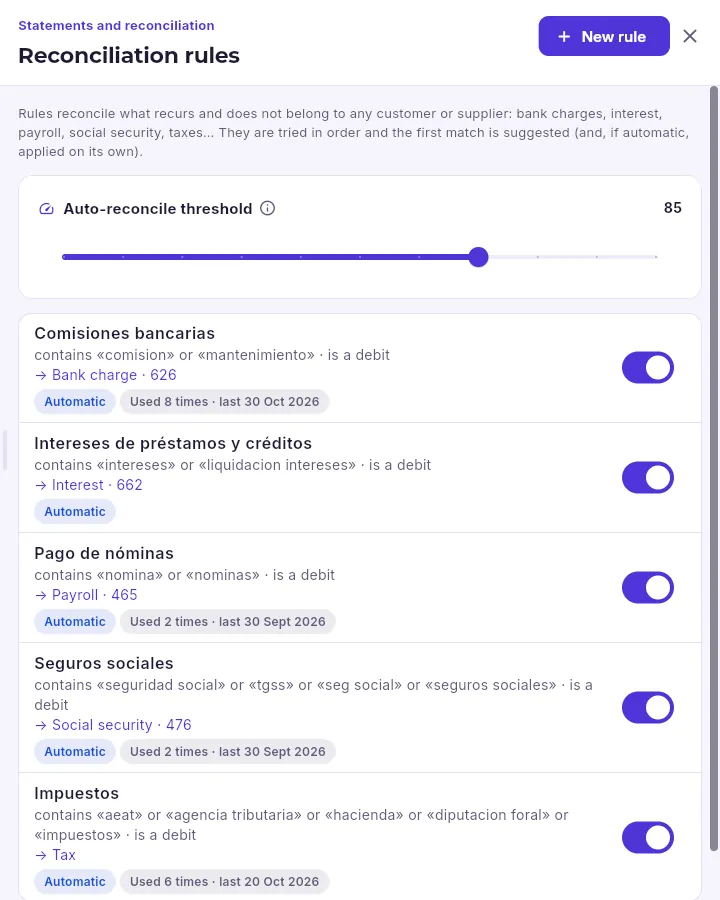 123
- 1The threshold: the points a suggestion needs to be accepted automatically.
- 2Each rule: what it looks for in the description, whether it is a debit or a credit, which account it posts to, whether it applies automatically and how many times it has been used. The switch turns it on or off; click it to change it.
- 3Create another rule.
Rules are for things that recur and do not belong to any customer or supplier: bank fees, interest, payroll, social security, taxes. They are tried in order and the first one that matches is suggested; if it is automatic, it is applied on its own when the statement is uploaded.
Download yesterday’s statement from your online banking (Norma 43 or camt.053) and upload it with Upload statement: the summary says how many transactions it has read and how many have been reconciled automatically.
In the list, those still pending show their best suggestion: if it is the right one, click Accept.
If it is not, open the transaction: choose another suggestion, or under Other ways to reconcile it look for the due dates by hand or post it to an account (a bank fee, a transfer between accounts).
If something recurs every month, create a rule from the transaction itself so that next time it is reconciled automatically.
#Forecast
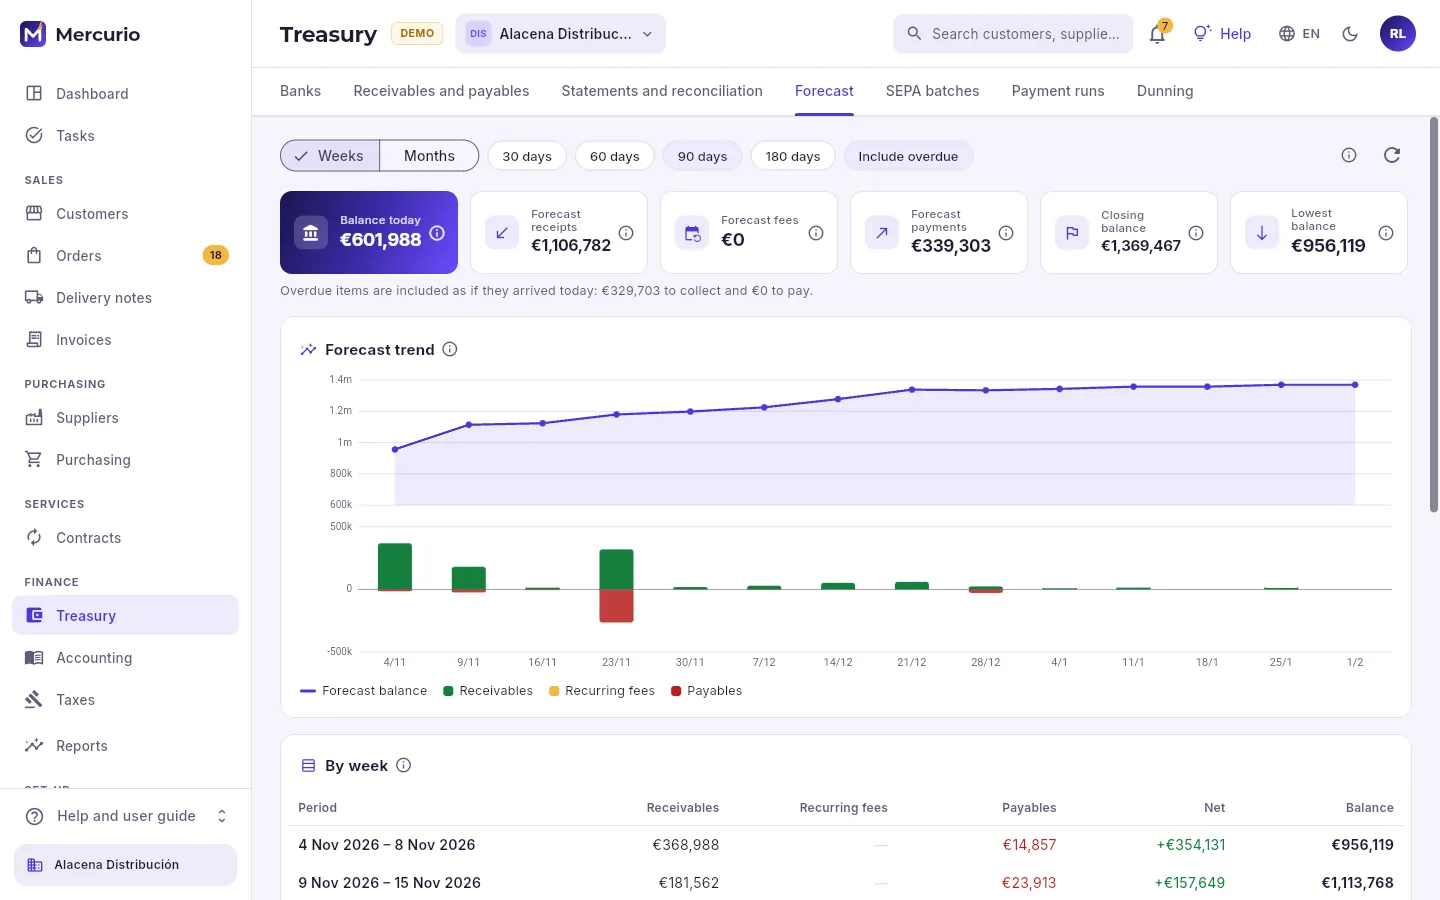 123
- 1By week or by month, the horizon (30 to 180 days) and whether overdue items count as if they arrived today.
- 2Today’s balance, forecast receipts, recurring fees and payments, the closing balance and the lowest balance: the figure that matters most.
- 3At the top, the balance at the end of each period; below, what comes in (receipts and recurring fees) and what goes out (payments). Click a bar to see what makes it up.
#Direct debits: collecting from customers’ accounts
A batch gathers the direct debits falling due (SEPA direct debits) into a pain.008 file for the bank: the bank charges each customer’s account and credits the total to the company. For a debit to be included, the customer must have a signed mandate (the authorisation to charge them) under the chosen scheme: CORE works for private individuals and businesses; B2B, only between businesses, and the account holder cannot ask for a refund.
- 1CreateThe debits falling due up to a date, with their mandate.
- 2FileThe pain.008 is downloaded and uploaded to online banking.
- 3SentIt is marked as sent: its debits move to “in a batch”.
- 4CollectedWhen the bank credits it, it is marked as collected: they are all received.
- 5ReturnsThose that come back, one by one or with the bank’s file.
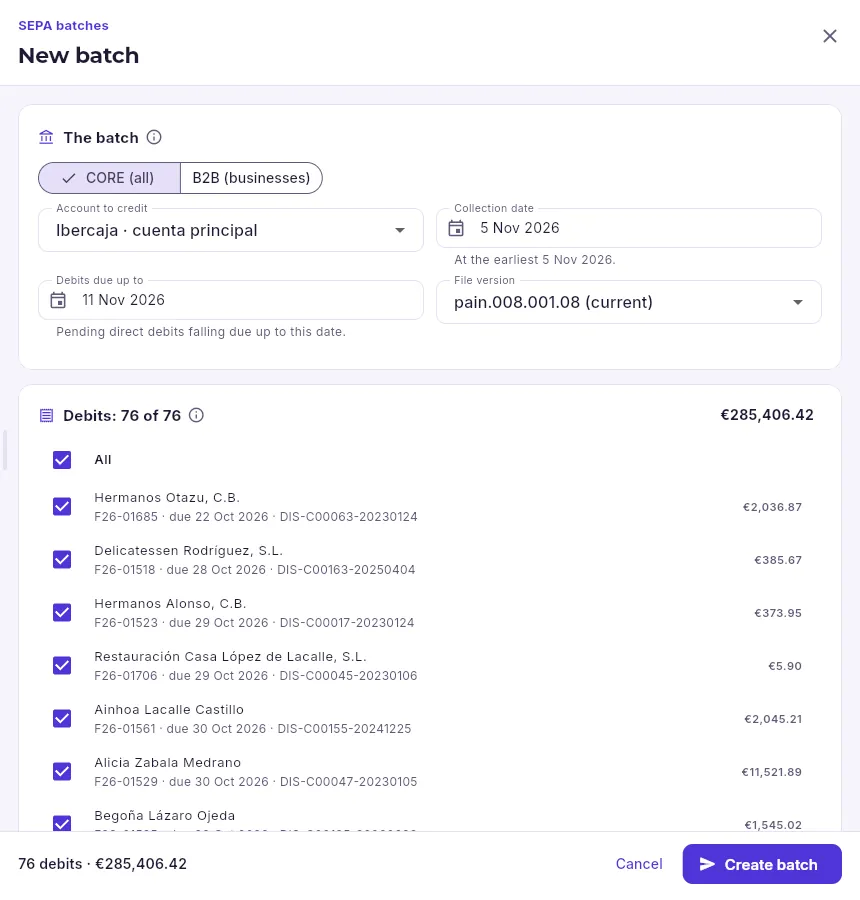 123456
- 1The scheme: CORE or B2B. Only debits with a mandate under that scheme are included.
- 2The account the bank will credit with the total.
- 3The day customers will be charged: the next working day at the earliest.
- 4The due date up to which outstanding debits are included.
- 5The debits that will be included: remove any you do not want to present yet.
- 6Create the batch (not clicked here).
Further down, the form warns about debits that cannot go and why: no mandate, an expired (36 months unused) or revoked mandate, a mandate under the other scheme, or returned for a reason that does not allow presenting them again. From there you can open the customer to sort it out.
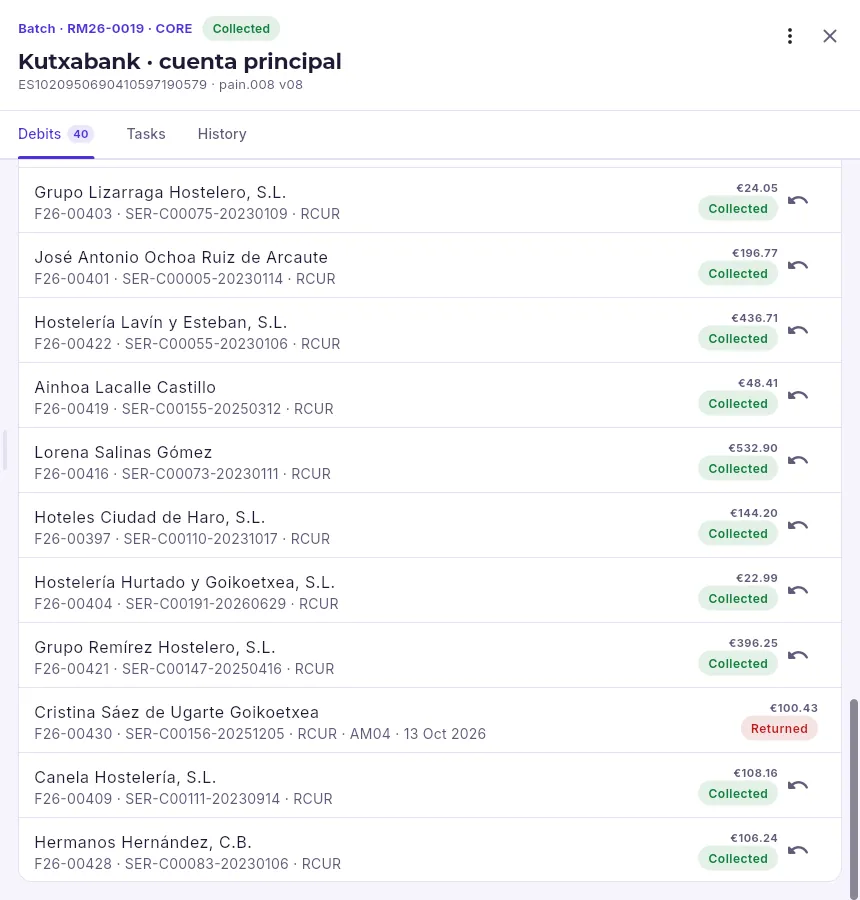 1234
- 1The batch: number, scheme, status and the account to credit, with the file version.
- 2Download the file, mark it as sent or collected, load the returns or cancel it, depending on its status.
- 3Record the return of a collected debit that the bank has sent back, with its reason and charges.
- 4A returned debit, with the reason (AM04: insufficient funds) and the date.
In SEPA batches, click New batch.
Choose the scheme (CORE unless all your customers sign B2B), the account to credit and the collection date.
Adjust Debits due up to: the list is rebuilt with the debits included; remove any you do not want to present.
Check the warnings about debits that cannot go and click Create batch.
In the batch, download the file and upload it to your online banking; then mark it as sent and, when the bank credits it, as collected.
#Payment runs: paying by bank transfer
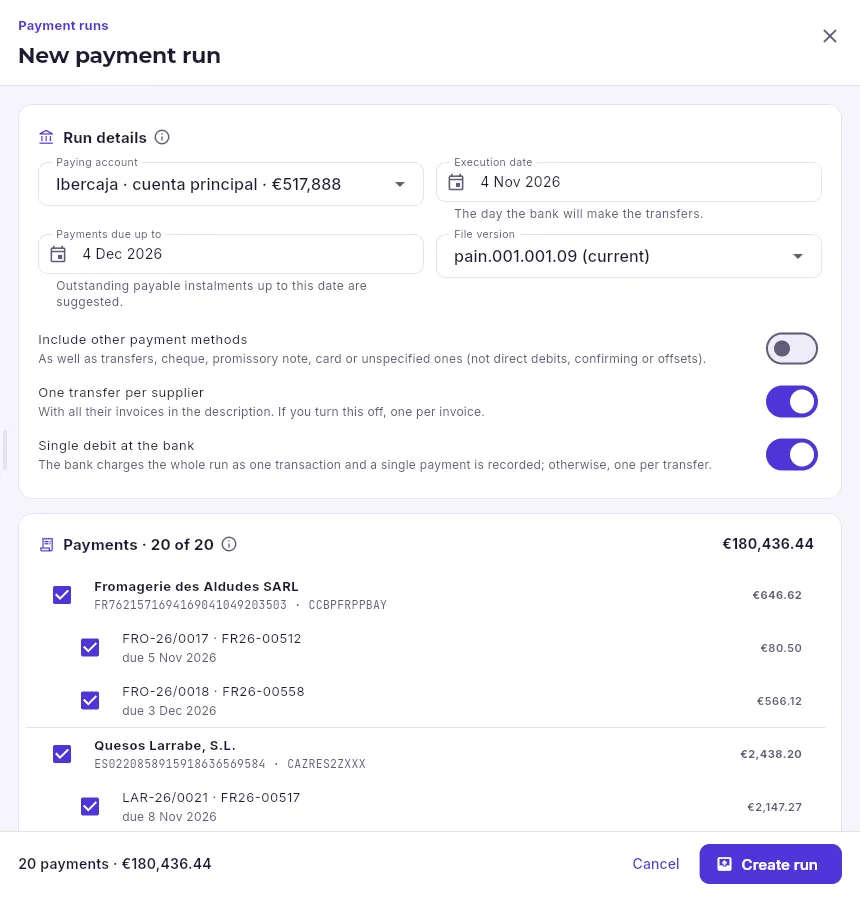 123456
- 1The paying account, with its balance alongside.
- 2The day the bank will make the transfers.
- 3Outstanding payable due dates up to that date are suggested.
- 4Include other payment methods, one transfer per supplier (or one per invoice) and a single debit at the bank for the whole run.
- 5The payments grouped by supplier, with their IBAN; untick anything you do not want to pay now.
- 6Create the run (not clicked here).
A payment run is the opposite of a batch: a pain.001 file with a transfer to each supplier, which is uploaded to online banking and pays them all at once. You prepare it, download the file, mark it as sent and, when the bank carries it out, confirm it: the payment is then recorded and the invoices are marked as paid. Suppliers without a valid IBAN are listed separately, so you can sort them out.
#Chasing those who do not pay
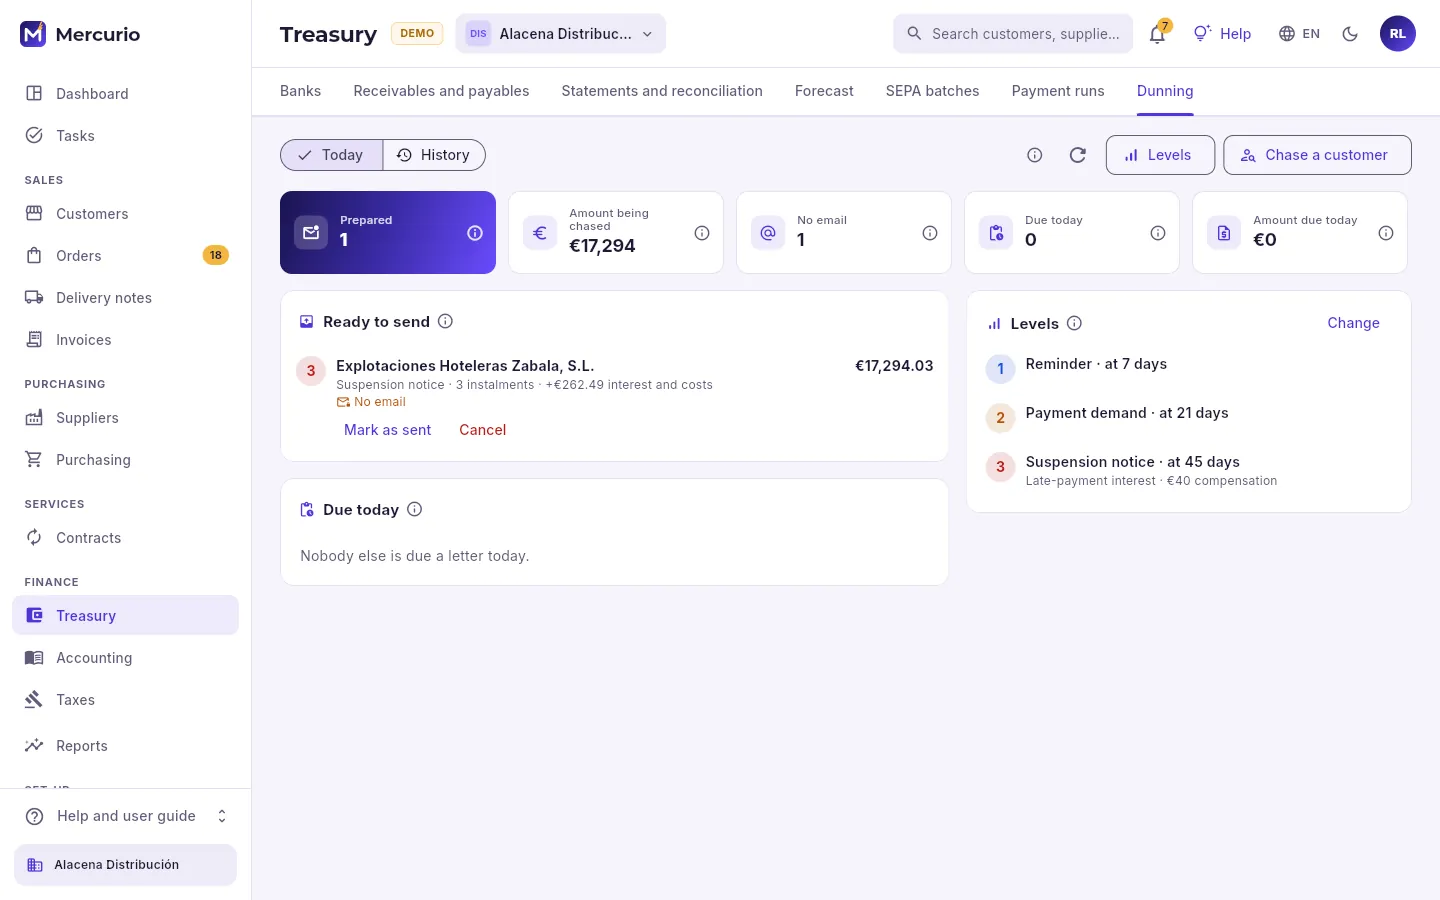 123456
- 1Today (what needs doing) or the history of all dunning letters.
- 2Those prepared but not sent, the amount being chased, those with no email and those due today.
- 3The prepared ones: email them, mark them if you did them by letter or phone, or cancel them.
- 4The customers due to move up a level today, not yet prepared.
- 5The levels: what is sent and after how many days.
- 6Prepare a customer’s dunning letter by hand.
Every morning each customer’s overdue due dates are checked: if any has reached the days of a new level, the letter for the highest level is prepared with everything overdue for that customer. Those with an email address are sent automatically; the rest wait here. Prepared letters that nobody sends are cancelled the next morning (what is owed may have changed) and prepared again.
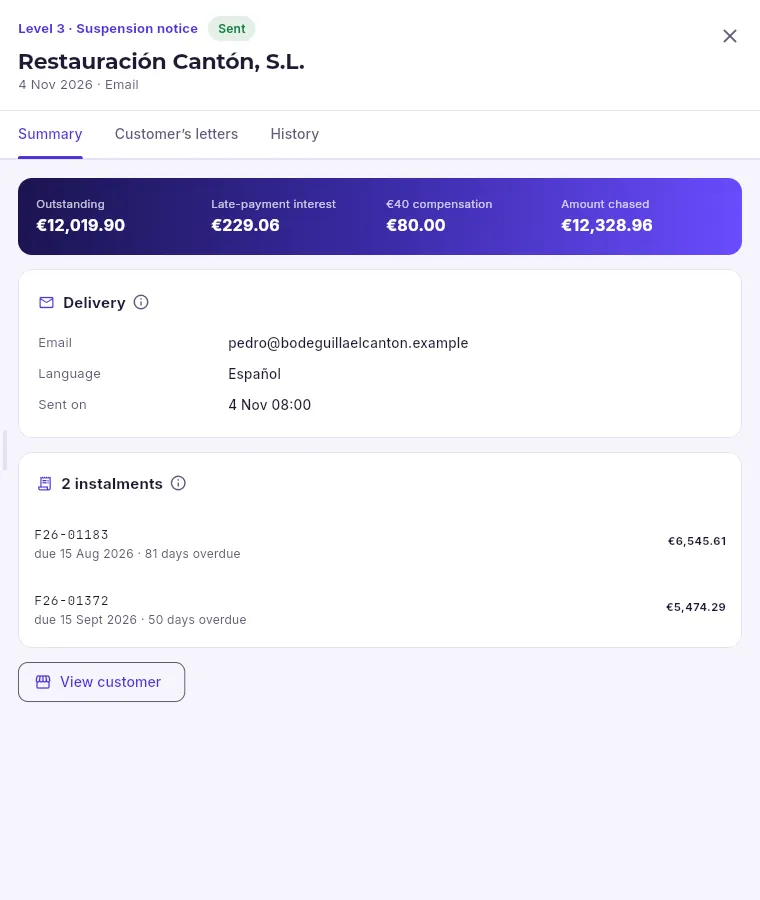 1234
- 1The level, the type, the status, the customer, the date and the channel.
- 2What is outstanding, the late-payment interest, the €40 compensation per invoice and the total being claimed.
- 3Which email address and language it was sent in, and when.
- 4The invoices claimed, with how many days overdue they were.
Finance
Accounting
Each company’s full accounts under the Spanish General Accounting Plan (PGC): journal entries (almost all automatic), chart of accounts, ledger, books, official balance sheet and profit and loss account, VAT books and year-end closing; and, if switched on, fixed assets, cost accounting, budgets, group consolidation and export to your accountant.
Mercurio’s accounting mostly keeps itself: every invoice issued or received, every receipt, payment, direct debit batch, return, depreciation charge or tax settlement makes its journal entry straight away. What is left to do by hand are the entries that do not come from a document (payroll, accruals, loans), and for those there are the keyboard editor and the template entries. Each company in the group keeps its own accounts, under the 2007 Spanish General Accounting Plan (PGC), in its full or SME version.
| Tab | What for |
|---|---|
| Overview | The financial year at a glance and what is left to bring it up to date. |
| Journal entries | All entries, automatic and manual; create one with the keyboard. |
| Chart of accounts | Groups, accounts and sub-accounts with their balance; the ledger of each one. |
| Ledgers | Journal, ledger and trial balance, to print or export. |
| Balance sheet and P&L | Balance sheet and profit and loss in the official format. |
| VAT books | Invoices issued and received with their VAT. |
| Financial years and closing | The financial years, their months and the closing. |
| Fixed assets, Cost centres, Budgets, Consolidation | Advanced accounting, depending on the features switched on. |
| Template entries | Templates for entries that repeat, and recurring entries. |
| Export to accountant | The file for your accountant’s software. |
#The overview
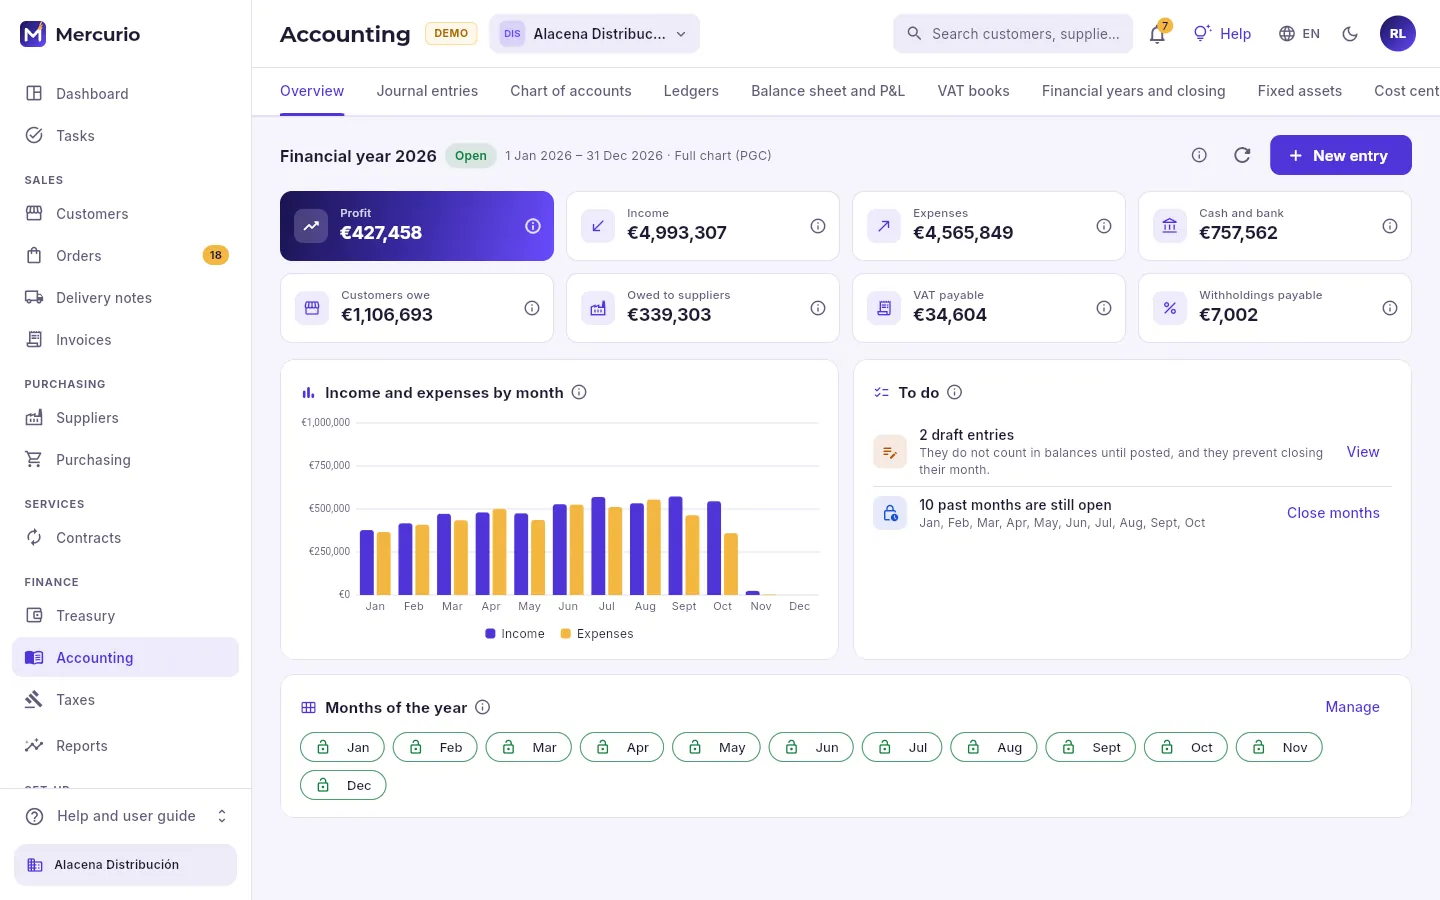 123456
- 1Today’s financial year, its status, its dates and the chart of accounts.
- 2Profit, income and expenses for the year, cash and bank, customers, suppliers, VAT payable and withholdings payable. Click one to see its detail.
- 3Income and expenses for each month.
- 4To do to keep the accounts up to date: draft entries, invoices and receipts with no entry, past months still open.
- 5The status of each month: open, closed or locked.
- 6Make an entry by hand.
#Journal entries
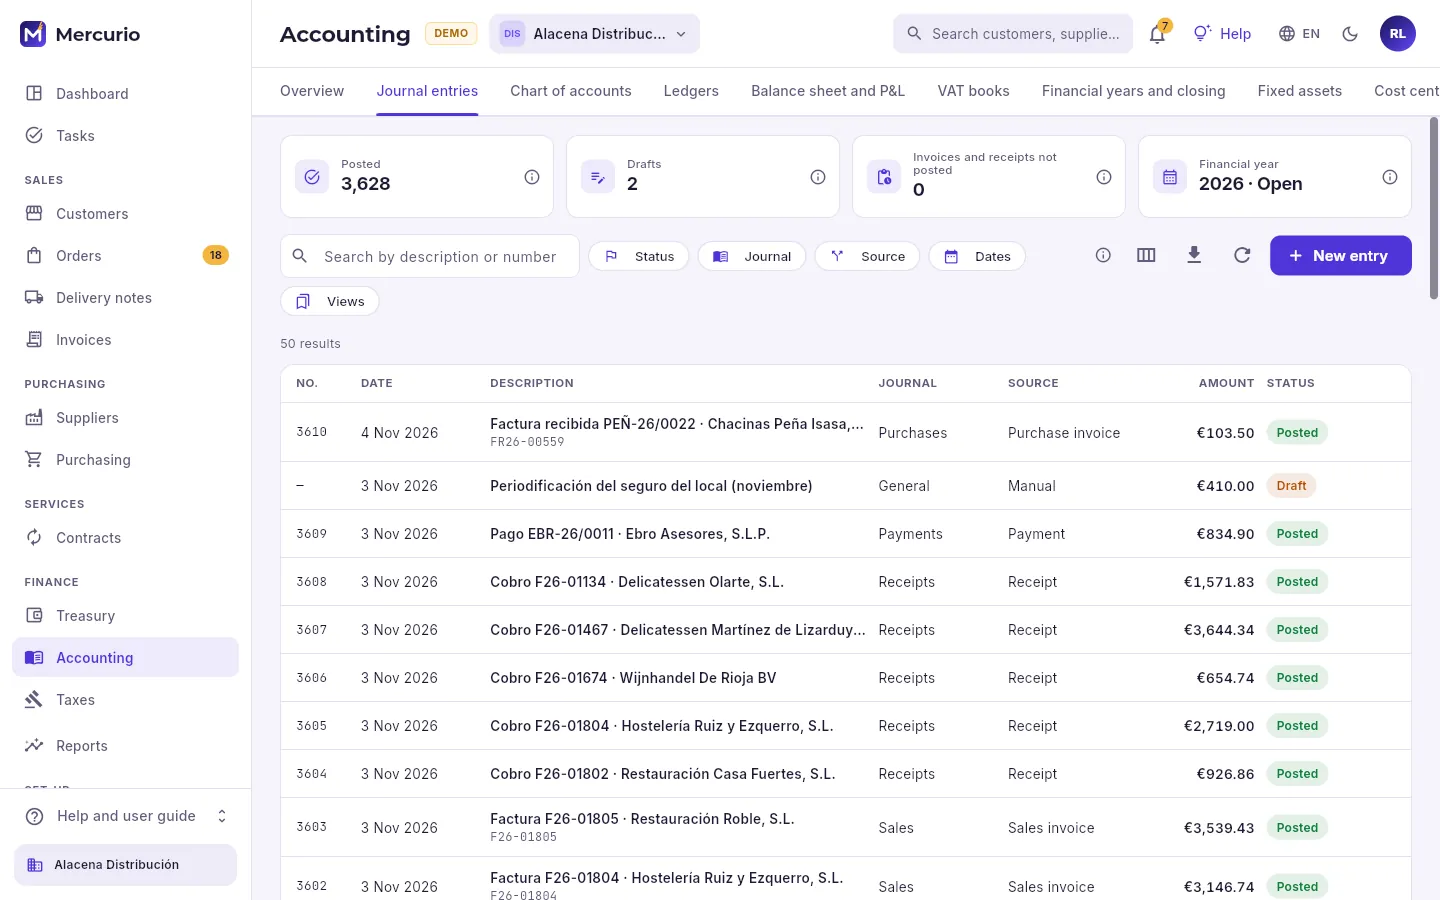 12345
- 1Posted, draft, invoices and receipts that do not have an entry yet, and today’s financial year.
- 2Search and filter by status, journal (sales, purchases, receipts, payroll…), source and dates.
- 3Make an entry by hand.
- 4One entry per row: number, date, description, journal, source (an invoice, a receipt, manual…), amount and status.
- 5A draft: it has no number yet and does not count in the balances.
Entries are numbered by financial year with no gaps and always balance (debits equal credits): the database enforces it. An automatic entry is corrected by correcting its document: if it is deleted, the document is left pending posting.
 1234
- 1Post the draft: it takes the next number in the financial year.
- 2Change it in the editor.
- 3The lines: each one a sub-account with its amount as a debit or a credit. Click an account to see its ledger.
- 4Where it comes from (manual, an invoice, a receipt…), who created it and its notes.
#Making an entry with the keyboard
 123456
- 1The shortcuts: Enter moves to the next field, Ctrl+Enter posts and Ctrl+S saves as a draft.
- 2The date and the journal (general, payroll, bank…).
- 3The account: type the code (“430.1” fills in the zeros) or part of the name, then Enter. Its name appears underneath.
- 4The amount as a debit or a credit. When you choose the account on the last line, it suggests what is missing to balance.
- 5The totals and the balance check, live (if it does not balance, the difference and Balance it): it can only be posted when debits and credits match.
- 6Save it as a draft or post it (not clicked here).
In Journal entries, click New entry: the cursor is in the description.
Type the description and press Enter.
Type the account (626, or “servicios bancarios”) and press Enter to choose the suggestion: the cursor jumps to Debit.
Type the amount and press Enter: if it is a credit, Enter with the debit empty takes you to the credit; with an amount, to the next line.
On the last line, type the account (572 to see the banks) and press Enter: it suggests the amount that balances.
With Balanced showing at the bottom, Ctrl+Enter posts it (or Ctrl+S leaves it as a draft).
#Chart of accounts and ledger
 12345
- 1Accounts and sub-accounts in the chart, the locked ones and the company’s sub-account length (8 to 12 digits).
- 2Search by code or name, the financial year for the balances and locked only.
- 3An account groups its sub-accounts; it shows with its balance (Dr, debit; Cr, credit).
- 4Each customer has their own 430… sub-account, created automatically when their first invoice is posted (and each supplier, their 400…).
- 5Create a sub-account by hand.
 12345
- 1Where the account sits in the chart (4 › 43 › 430 › 4300), its code and its name.
- 2The overview (each month’s movement and its details), the ledger and the history.
- 3Opening balance, total debits and credits for the period and closing balance.
- 4All lines, only unmatched ones or only matched ones.
- 5Each line with its entry, its contra account and the running balance. Tick those that add up to zero (an invoice and its receipt) and click Match to pair them.
Matching means marking as paired the lines that cancel each other out: a customer’s invoice with its receipt, a bank charge with its payment. With Unmatched, the account shows only what is still open: what the customer really owes, invoice by invoice.
#Books and financial statements
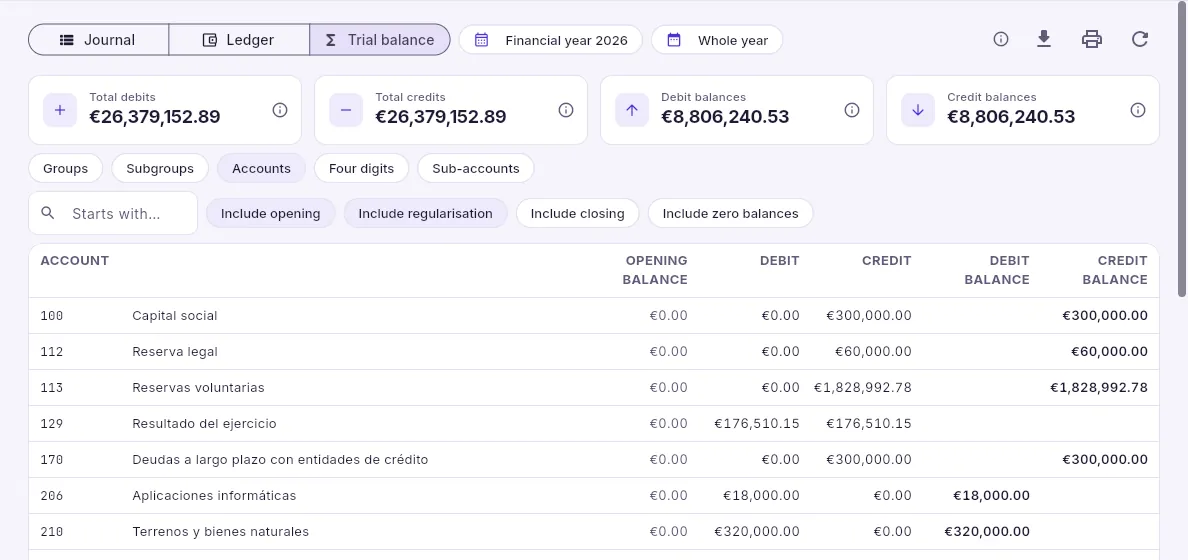 12345
- 1The journal (entries in order), the ledger of any account and the trial balance.
- 2The financial year and the dates.
- 3Export it to a spreadsheet or print it to PDF, for legalisation or for your accountant.
- 4The totals of debits and credits and the debit and credit balances: each pair must match.
- 5The level (groups, subgroups, accounts, four digits or sub-accounts), searching by the start of the code and what is included: the opening, the regularisation, the closing and accounts with a zero balance.
The trial balance shows, for each account, the opening balance, the debits and credits added in the period and the closing balance. Its totals must balance: the sum of the debit balances equals the sum of the credit balances. Click a row to go down a level or, on an account, to see its ledger.
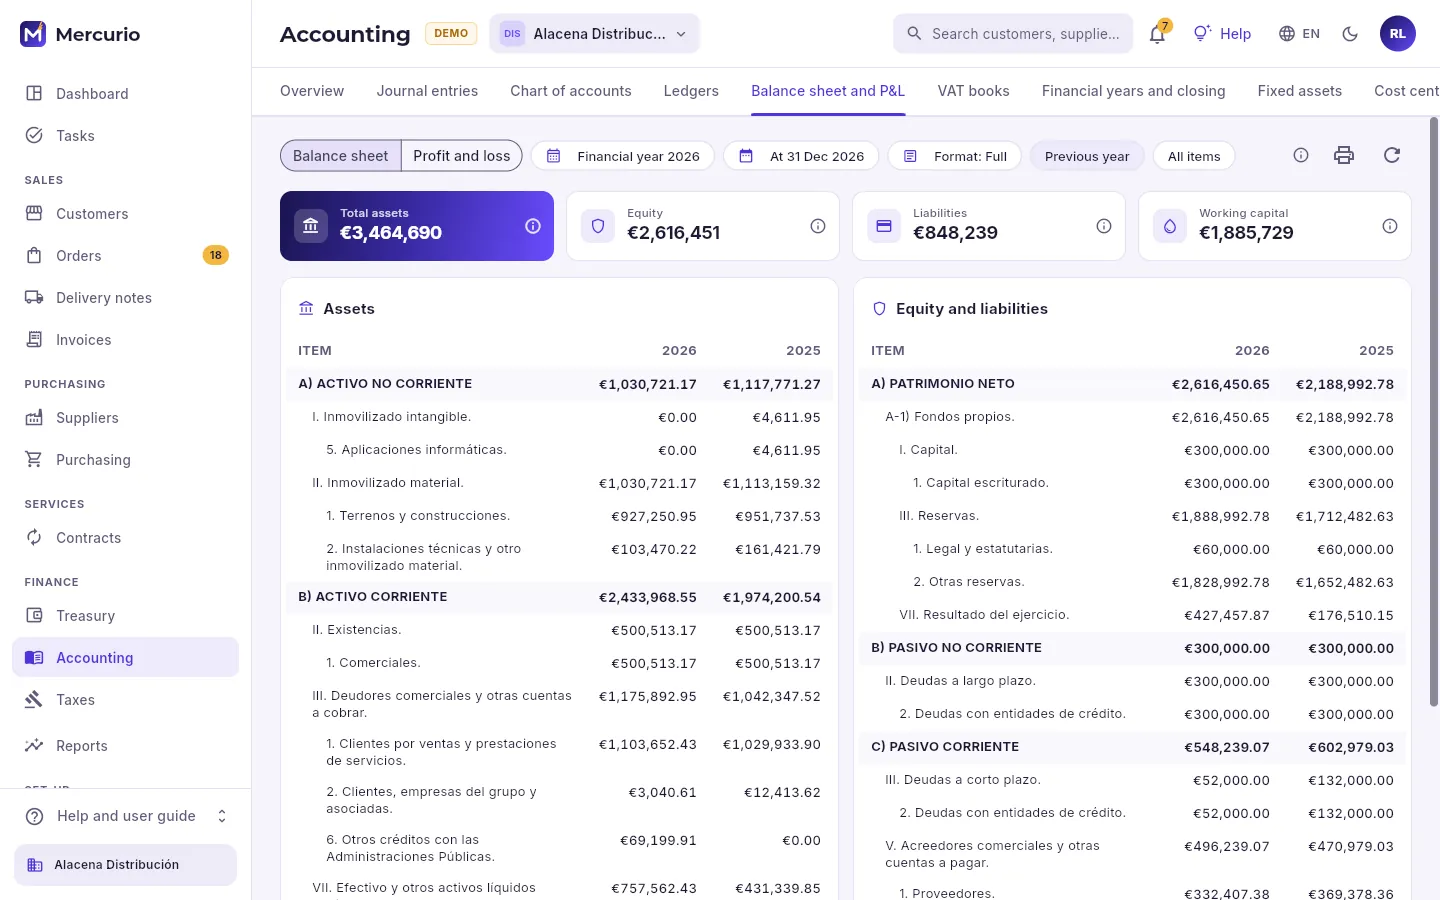 12345
- 1Balance sheet or profit and loss.
- 2The financial year, the date, the official format (full, abridged or SME) and the previous-year column.
- 3Print it in the annual accounts format.
- 4Total assets, equity, liabilities and working capital.
- 5Each item in the format, with this year and last year. Click one to see the accounts that make it up.
#VAT books
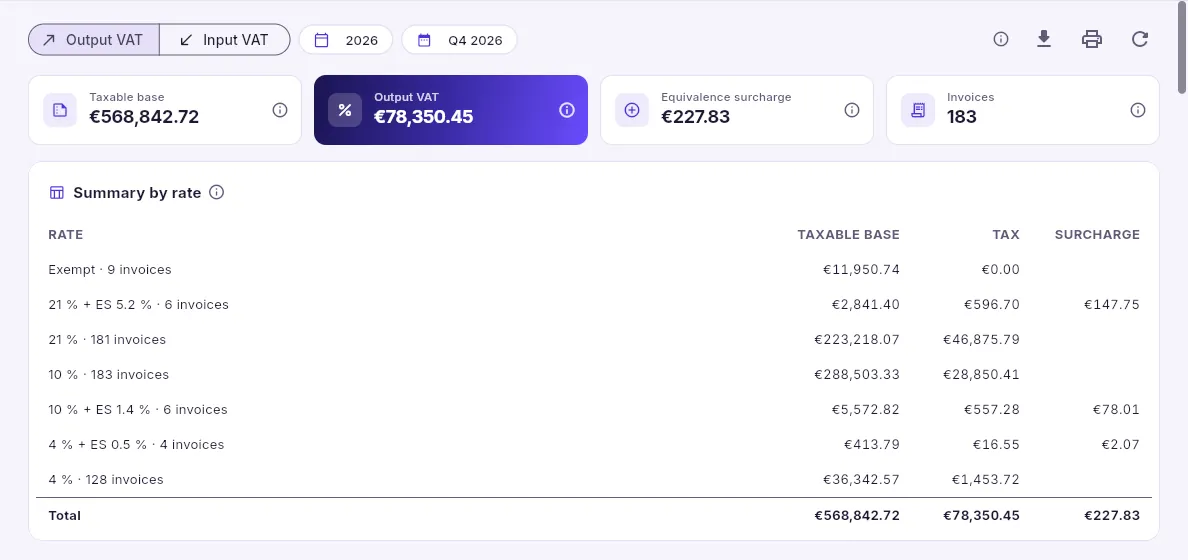 1234
- 1Invoices issued (output VAT) or received (input VAT).
- 2The year and the period (quarter or month).
- 3Taxable base, VAT amount, equivalence surcharge and number of invoices.
- 4The summary by rate (exempt, 4%, 10%, 21%, with surcharge…): these are the boxes of form 303.
#Financial years and closing
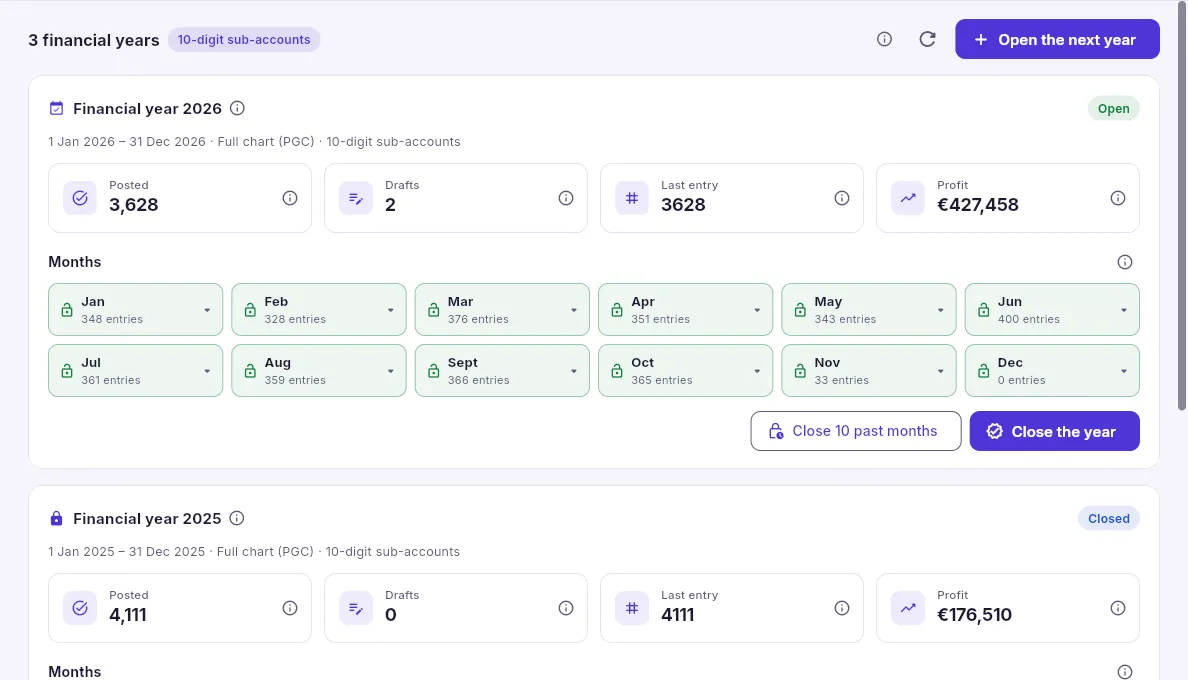 123456
- 1Open the next financial year before it starts.
- 2Posted and draft entries, the last number and the profit or loss for the year.
- 3The months: open (green) accepts entries; closed (blue) does not; locked (grey), never again. Click one to change it.
- 4Close all past months at once.
- 5Close the year (not clicked here): it checks first and then closes.
- 6The previous financial year, closed.
Closing is done in two steps. When you click Close the year, Mercurio first checks what would prevent it and tells you how to fix it: the previous year is still open, there are draft entries, invoices or receipts not posted, or inventory has not been adjusted. When everything is fine, it closes:
- 1RegularisationExpenses and income (groups 6 and 7) against 129, “Resultado del ejercicio” (profit or loss for the year).
- 2Closing entryEvery account with a balance, to zero.
- 3OpeningEntry 1 of the next financial year, with the same balances.
- 4RenumberingThe entries, by date; and the months are closed.
Before closing, the external adviser posts the year’s corporate tax with a manual entry: the expense to 6300 (“Current tax”), what has already been paid on account with the 202 forms to 473, and what is still to pay to 4752, which is paid in July with form 200. That way the result that the regularisation takes to 129 is the after-tax one.
#Fixed assets
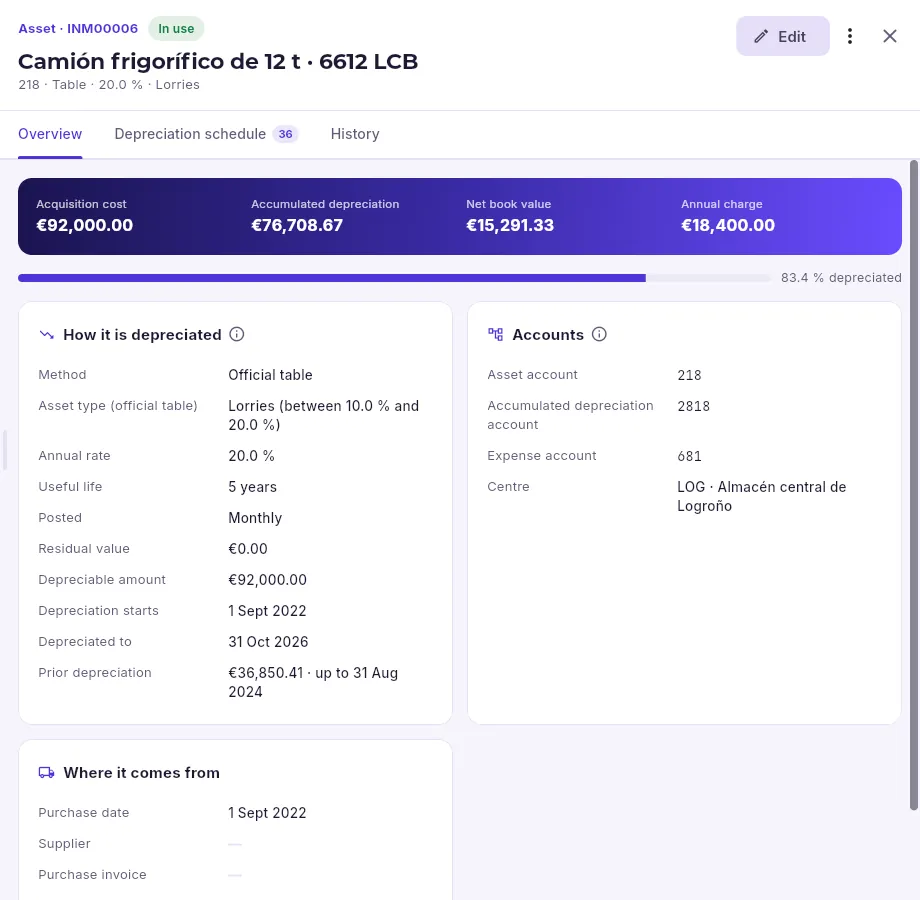 1234
- 1The overview, the depreciation schedule (period by period, with its entry) and the history.
- 2What it cost, what has been depreciated, its book value today and each year’s charge.
- 3The method (straight-line or by the official tax tables), the rate, the useful life, how often it is posted and from when.
- 4The asset, accumulated depreciation and expense accounts, and its cost centre.
Each asset (premises, a machine, a vehicle, a computer) has its record with its depreciation schedule. Depreciation is posted automatically every month (or every year): the system makes the entry for each completed period. When an asset is written off or sold, its result (gain or loss) is calculated and its entry is made.
#Cost accounting and budgets
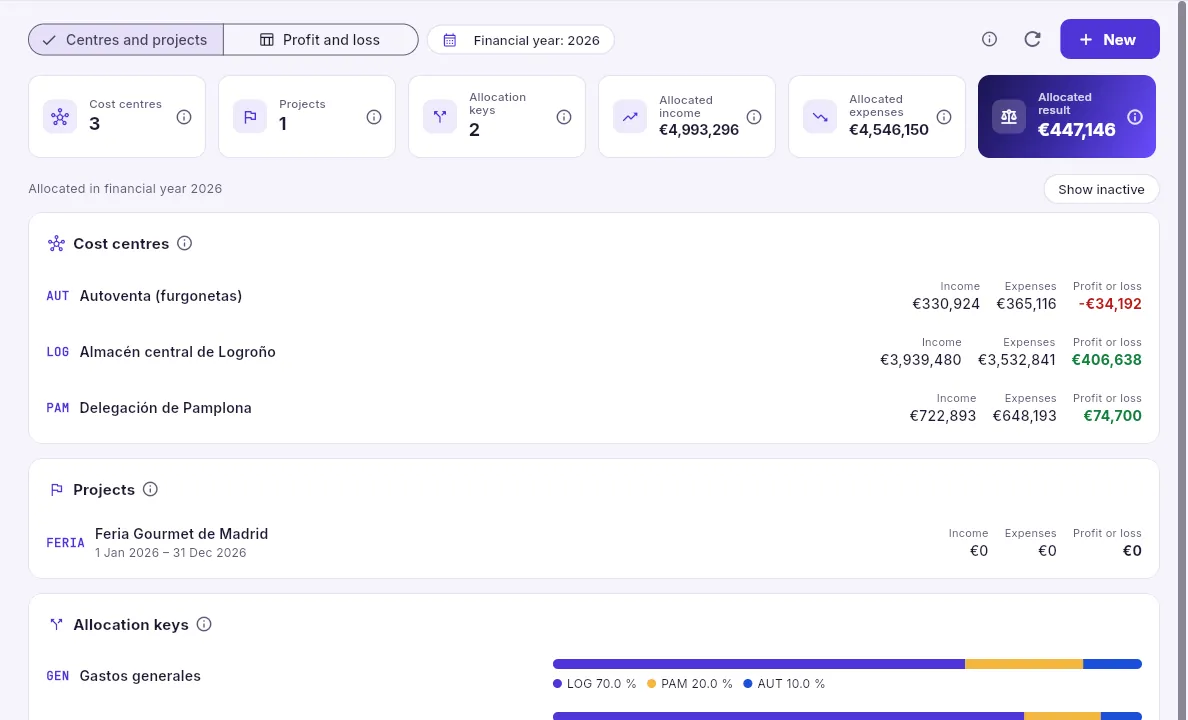 1234
- 1The centres and projects or their profit and loss, account by account.
- 2How many centres, projects and allocation keys there are, and what has been allocated: income, expenses and result.
- 3Each cost centre (a warehouse, a branch, van sales) with its income, expenses and result.
- 4An allocation key splits a shared expense between centres by percentage.
The centre reaches each line from the invoice lines (a sale goes to the centre of the warehouse that ships it), from assets (their depreciation) and from entry templates; what belongs to everyone (the central warehouse’s purchases, payroll, overheads) is split between the centres with an allocation key. That way each centre has its own income and expenses, and its result shows where money is made and where it is lost: here, van sales do not cover their costs.
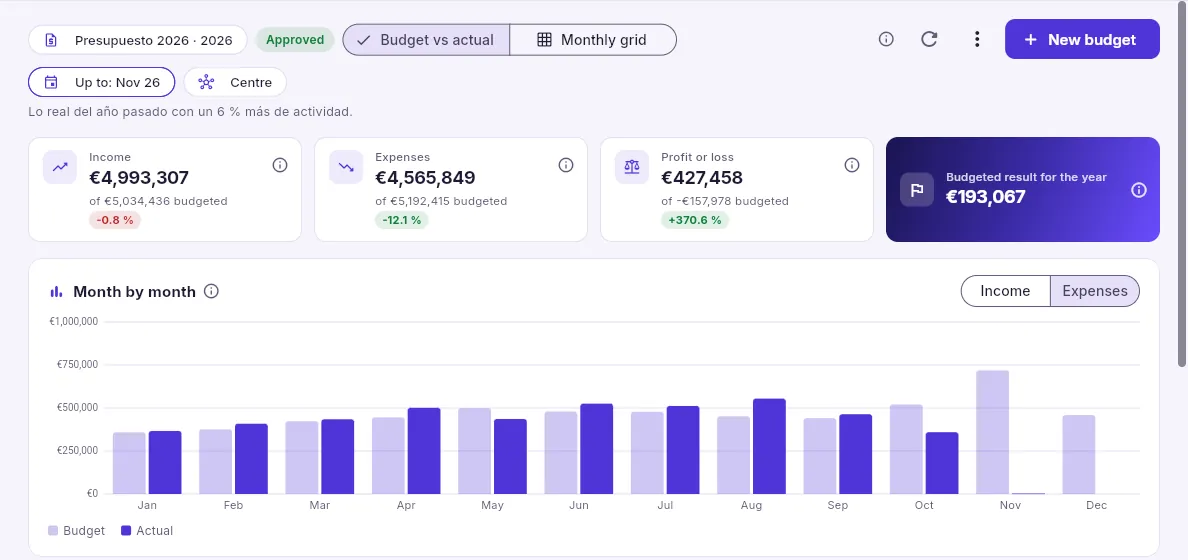 1234
- 1The budget (for one financial year) and its status.
- 2Budget vs actual or the grid to enter it month by month.
- 3Actual income, expenses and result up to the chosen month, against the budget and its variance.
- 4Budget and actual for each month.
#Template and recurring entries
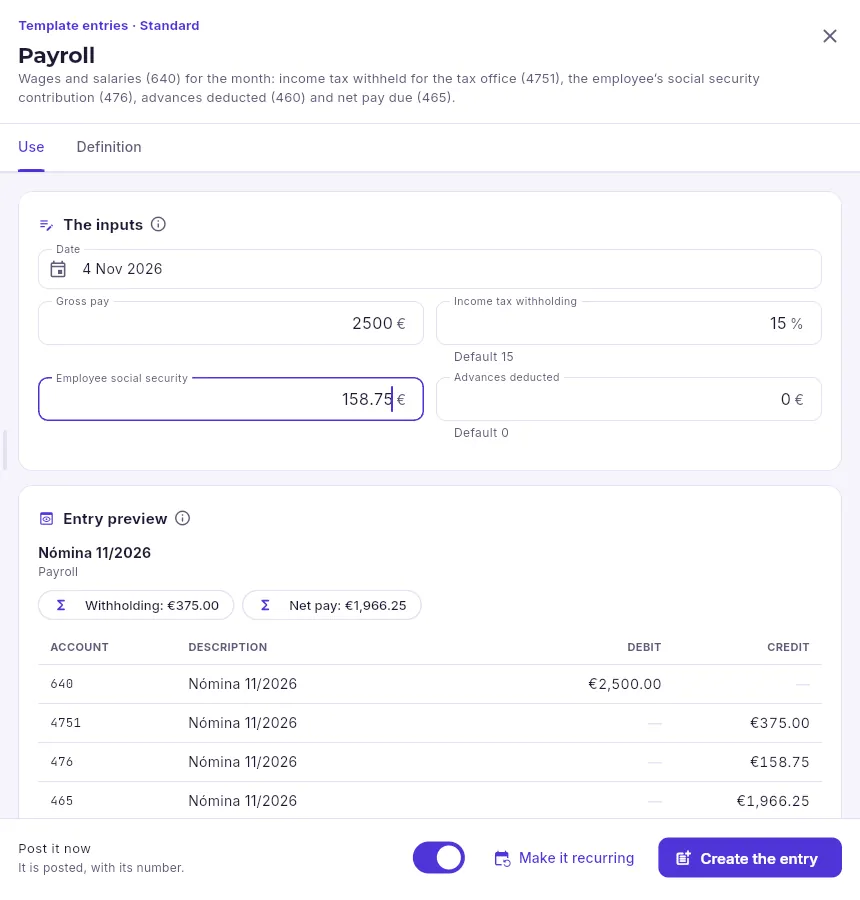 1234
- 1The inputs the template asks for (the others have a default value).
- 2The preview: what is calculated (the withholding, the net pay) and the lines, already balanced.
- 3Turn it into a recurring entry: it will be posted automatically every month.
- 4Create the entry (not clicked here), posted or as a draft.
A template is a recurring entry written once: it has inputs (what you type), formulas (what is calculated, such as the withholding) and its lines. Payroll, social security and rent with withholding come as standard; copy them to adapt them or create others with New template. A recurring entry uses a template with its values and is posted automatically every N months (rent, a loan instalment); if a date fails (a closed month), it stops there with the reason.
#Group consolidation
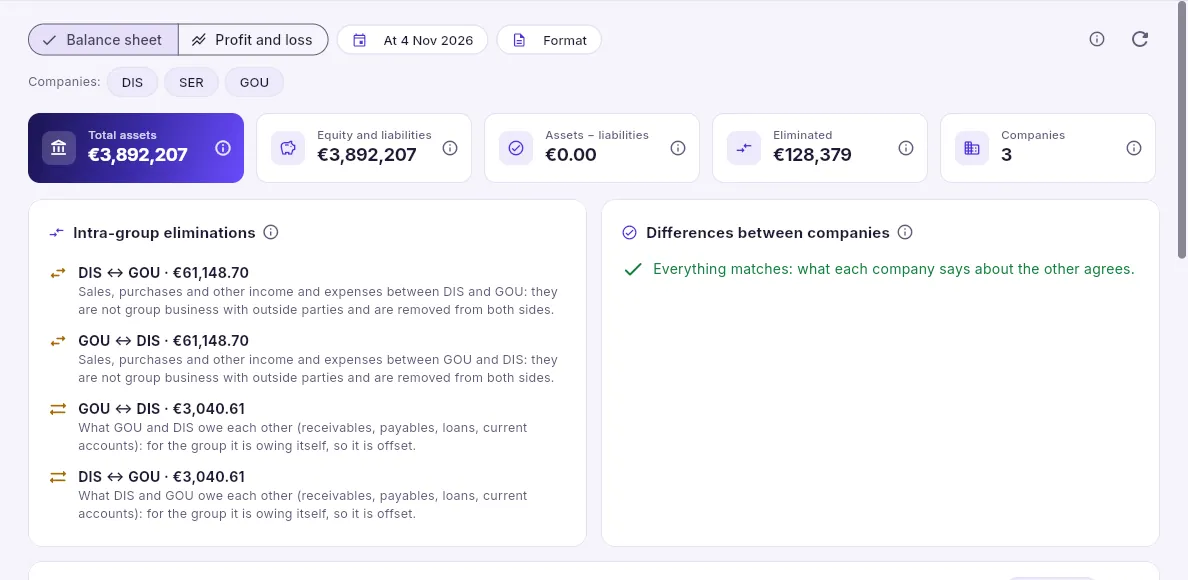 1234
- 1The companies included.
- 2The group’s assets and liabilities, what has been eliminated and the difference, which should be zero.
- 3The eliminations: what the companies sell to and owe each other, which does not count for the group.
- 4The differences: what one company has and the other does not (an unrecorded invoice, a receipt in transit). Correct them in the company where it is missing.
Below are the balance sheet or the profit and loss account with a column per company, the aggregate, the eliminations and the consolidated figures. While there are differences between companies, the consolidated figures are out of balance by that amount: that is the first thing to fix.
#Export to accountant
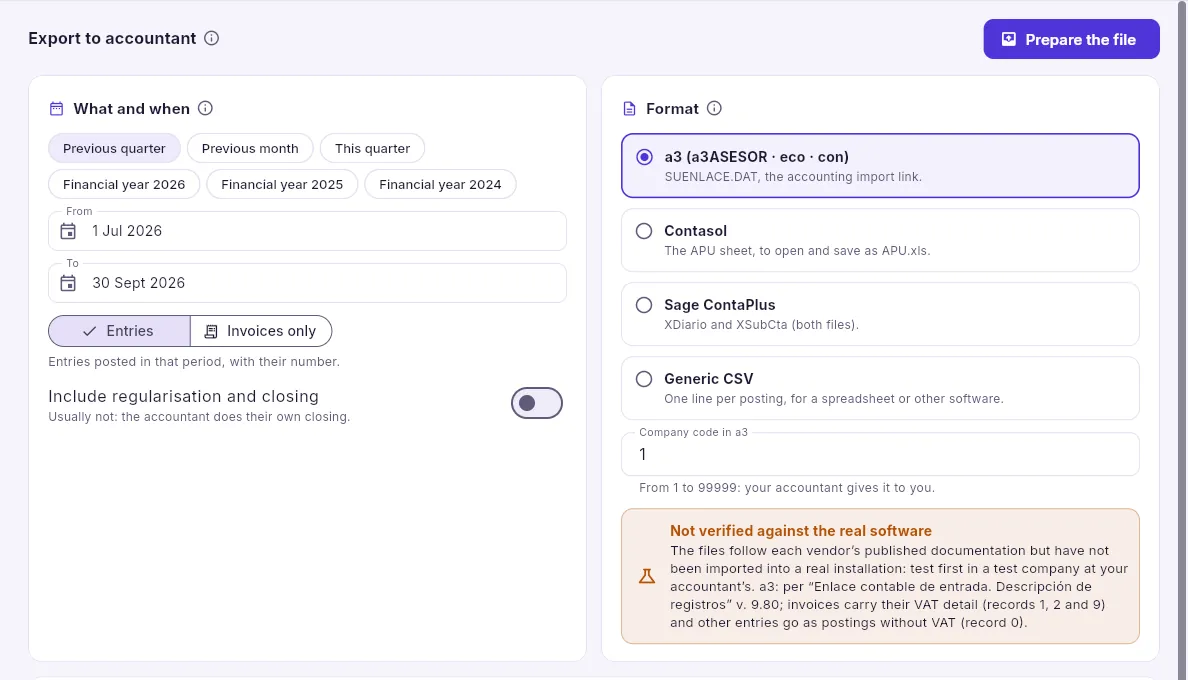 123
- 1Which period, and whether to send the entries or invoices only; regularisation and closing, normally not.
- 2The format of your accountant’s software (a3, Contasol, Sage ContaPlus or a CSV) and the company code in it.
- 3Prepare the file: before you download it, it shows whether debits and credits balance and its first lines.
Finance
Taxes
What the company has to declare and when: the tax calendar, the returns (303, 111, 130, 202, 347, 390…) calculated from the invoices, reviewed and filed with their receipt, and the record of each invoice in VeriFactu, the SII or TicketBAI with its chain checked.
Taxes brings together the tax obligations of the company selected at the top. Returns are calculated automatically from the invoices issued and received, box by box; the external adviser (or whoever handles them) reviews them, files them and keeps the receipt. In addition, every invoice issued has its tax record: the one the law requires depending on where and how the company is taxed. This chapter explains the rules just enough to understand the screen; it is not tax advice.
| Tab | What for |
|---|---|
| Tax calendar | The year’s obligations, with their deadline and status. |
| Returns | Each return, with its boxes, its adjustments and its filing. |
| Records (VeriFactu, SII or TicketBAI) | The record of each invoice, its submission and the chain. |
| Settings | The company’s tax details that decide its obligations. |
#What each thing is
| Term | What it is |
|---|---|
| VeriFactu | The Spanish Tax Agency’s system for invoicing software (Royal Decree 1007/2023): each invoice generates a record with a fingerprint (an encrypted summary) that includes the previous record’s fingerprint, forming a chain that cannot be altered without it showing; the records are sent to the tax authority and the invoice carries a QR code to check it. |
| SII | The Immediate Supply of Information (Suministro Inmediato de Información): large companies (turnover over 6 million), those on the REDEME and VAT groups send their VAT books to the tax authority invoice by invoice, within four working days. In return, they file VAT every month. |
| TicketBAI | The system of the Basque Country’s provincial tax authorities (Álava, Bizkaia and Gipuzkoa): each invoice generates a signed file, chained to the previous one, with its identifier and its QR code. |
| Return (form) | The official form for a tax and a period: the 303 for VAT, the 111 for withholding… |
| Box | Each number on the official form, with its amount. |
| Receipt and CSV | The number the tax authority’s online office gives you when you file, and the code to check it. |
The forms Mercurio calculates, depending on the company:
| Form | What it declares | How often |
|---|---|---|
| 303 | VAT: output VAT on sales minus deductible input VAT on purchases. | Quarterly; monthly under the SII and the REDEME. |
| 390 | The annual VAT summary. | Annual, in January. |
| 111 | IRPF withholding on payroll and professionals. | Quarterly; monthly for large companies. |
| 190 | The annual summary of the 111. | Annual, in January. |
| 115 and 180 | Withholding on rents and its annual summary. | Quarterly and annual. |
| 130 | The sole trader’s IRPF instalment payment under direct assessment. | Quarterly. |
| 202 | Corporate tax payments on account. | April, October and December. |
| 347 | Transactions of more than €3,005.06 with the same person in the year. | Annual, in February. |
| 349 | Transactions with businesses in other EU countries. | Monthly or quarterly. |
Form 200, the annual corporate tax return (in July), is not calculated here: the external adviser prepares it from the year’s accounts, and its entry and payment are kept in Accounting.
#The tax calendar
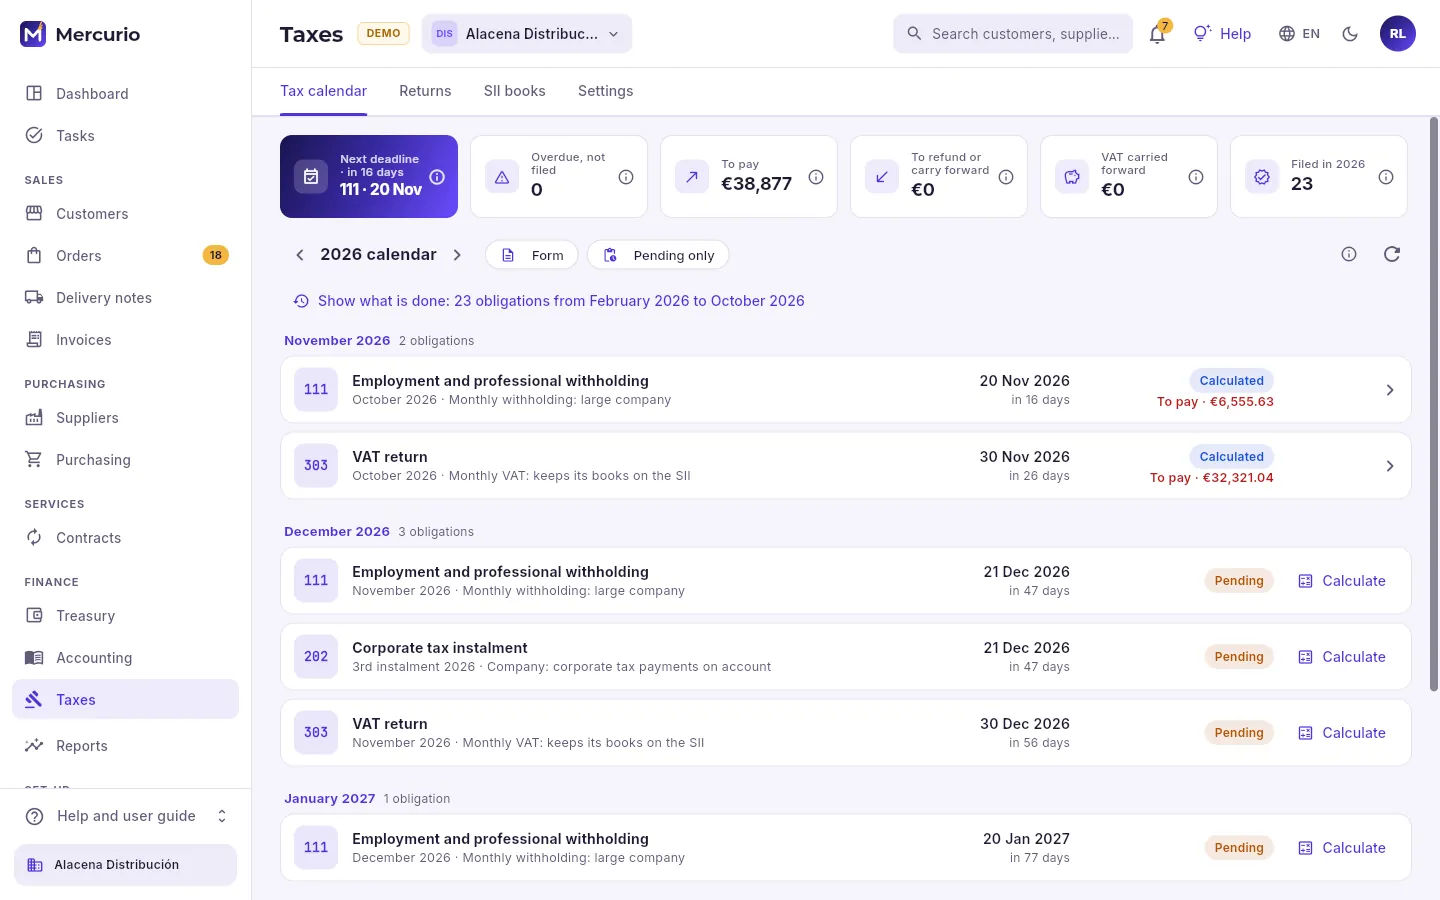 123456
- 1The tabs; the records tab is named after the company’s system (here, SII books).
- 2The next deadline, what is overdue, not filed (it should be zero), what will be payable or refundable, the VAT to carry forward and what has been filed this year.
- 3The year, a specific form and pending only.
- 4What has already been filed this year, collapsed.
- 5A calculated obligation: form, period, why it applies, deadline, status and result. Click it to open its return.
- 6A pending one: Calculate works it out from the period’s invoices.
#Returns: calculate, review and file
- 1CalculatedThe boxes come from the period’s invoices.
- 2ReviewedSomeone checks the boxes and the warnings and approves it.
- 3FiledIt is filed from here or at the online office; the receipt is kept.
- 4PostedThe settlement entry and its payment entry, made automatically.
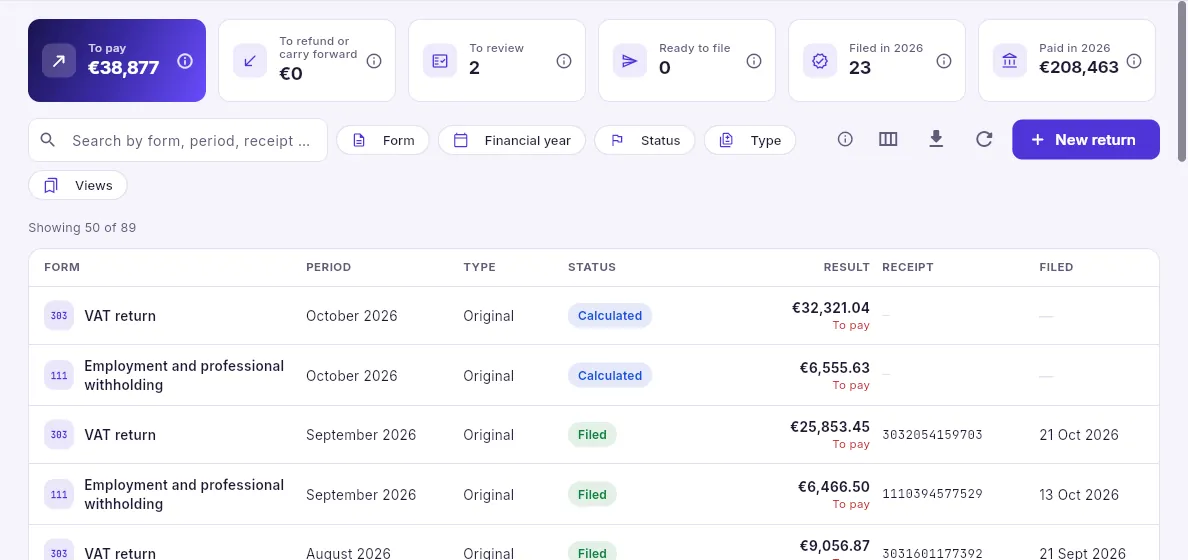 12345
- 1To pay and to refund, those to review, those ready to file, those filed and what has been paid this year.
- 2Search and filter by form, financial year, status and type (original, supplementary, replacement).
- 3A return outside the calendar (a supplementary one, for example).
- 4A calculated one, with its result: to pay, to refund, to carry forward or information return.
- 5A filed one, with its receipt number and the date.
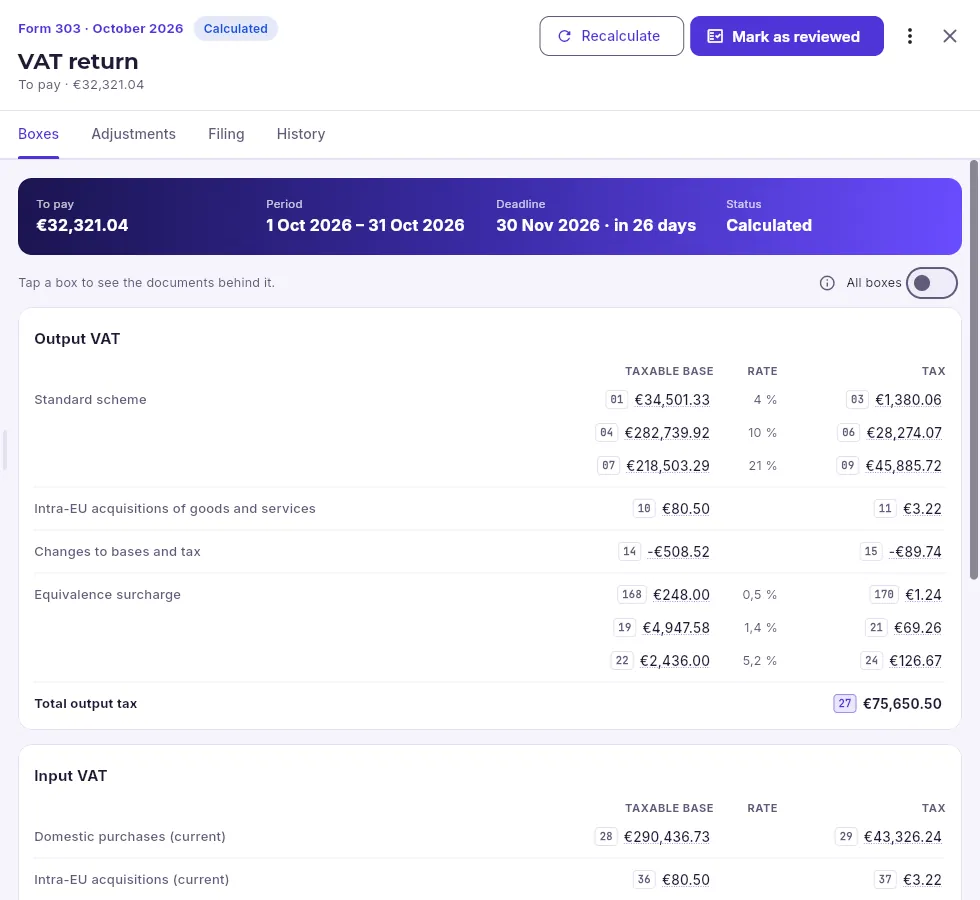 123456
- 1The form, the period, the status and the result.
- 2Recalculate with today’s invoices (it keeps manual adjustments) and mark it as reviewed.
- 3The boxes, the manual adjustments, the filing and the history.
- 4The result, the period, the time left before the deadline and the status.
- 5Show the empty boxes too.
- 6Each box with its official number. The underlined ones have documents behind them: click one to see them.
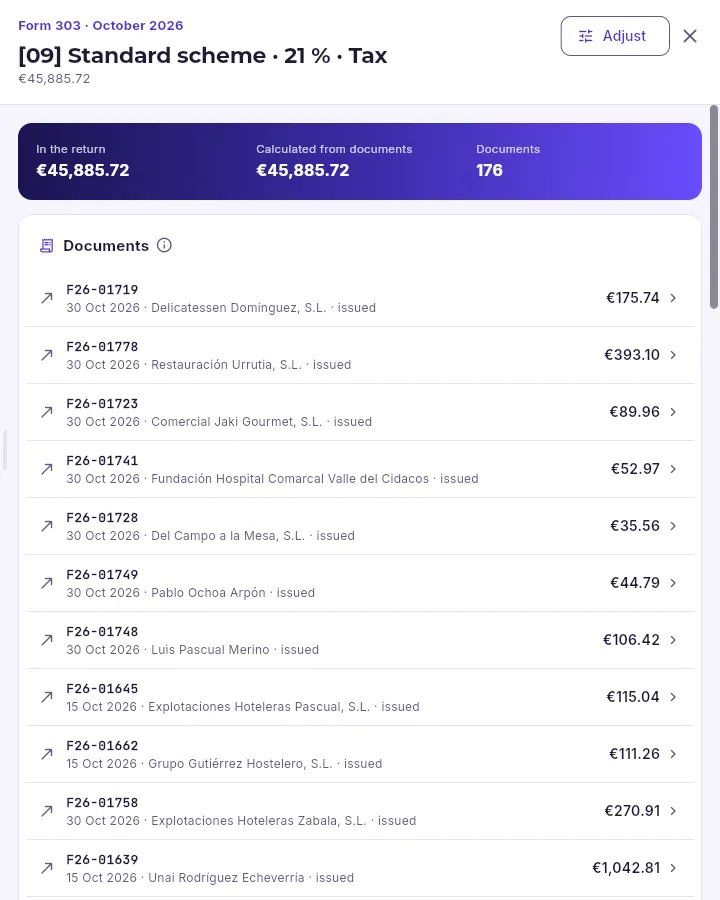 1234
- 1The box: its number, what it is and its amount.
- 2What the return carries against what is calculated from the documents: if they differ, there is an adjustment.
- 3The invoices that make it up, each with its amount in this box. Click one to open it.
- 4Adjust the box by hand, with its reason (a regularisation, a pro rata…).
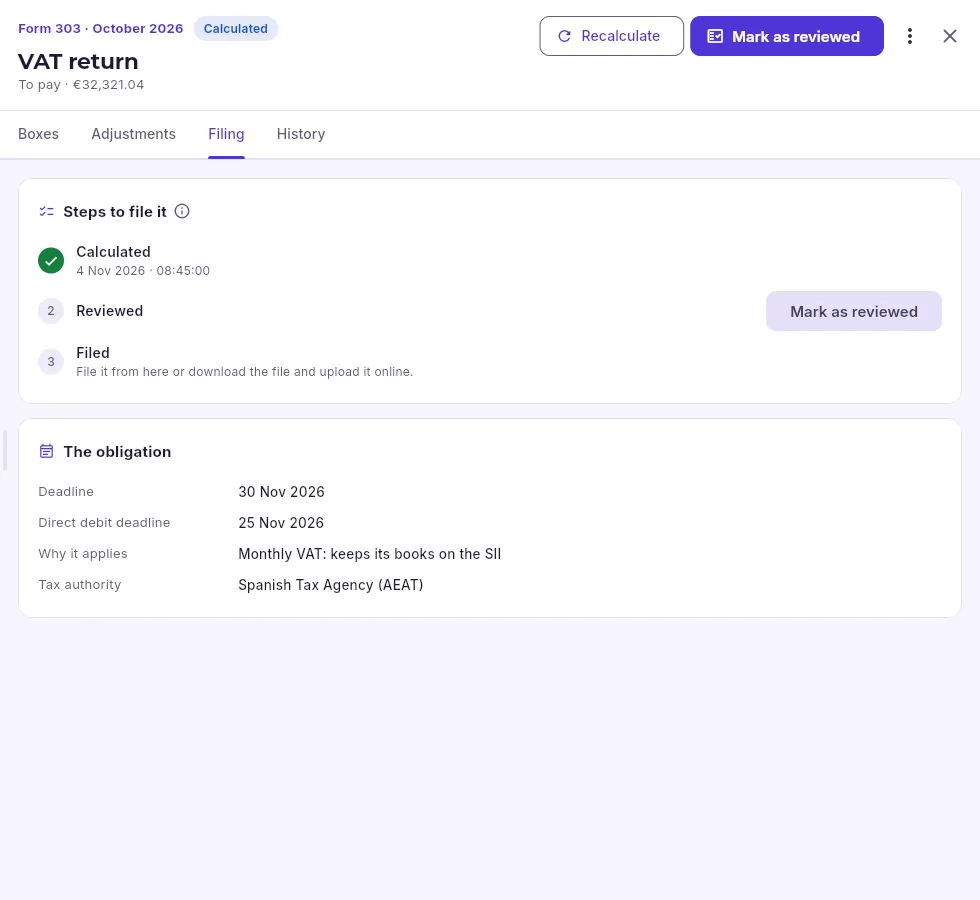 12
- 1The steps: calculated (with the date), reviewed and filed. The button for the current step.
- 2The deadline, the deadline for paying by direct debit (a few days earlier), why it applies and which tax authority it goes to.
Once it is reviewed, the “Filed” step offers to file it from here (in the demo, to a simulator of the online office) or to download the official file to upload it to the online office and record its receipt afterwards. When filing, you choose the payment method (direct debit, charge to account, acknowledgement of debt…).
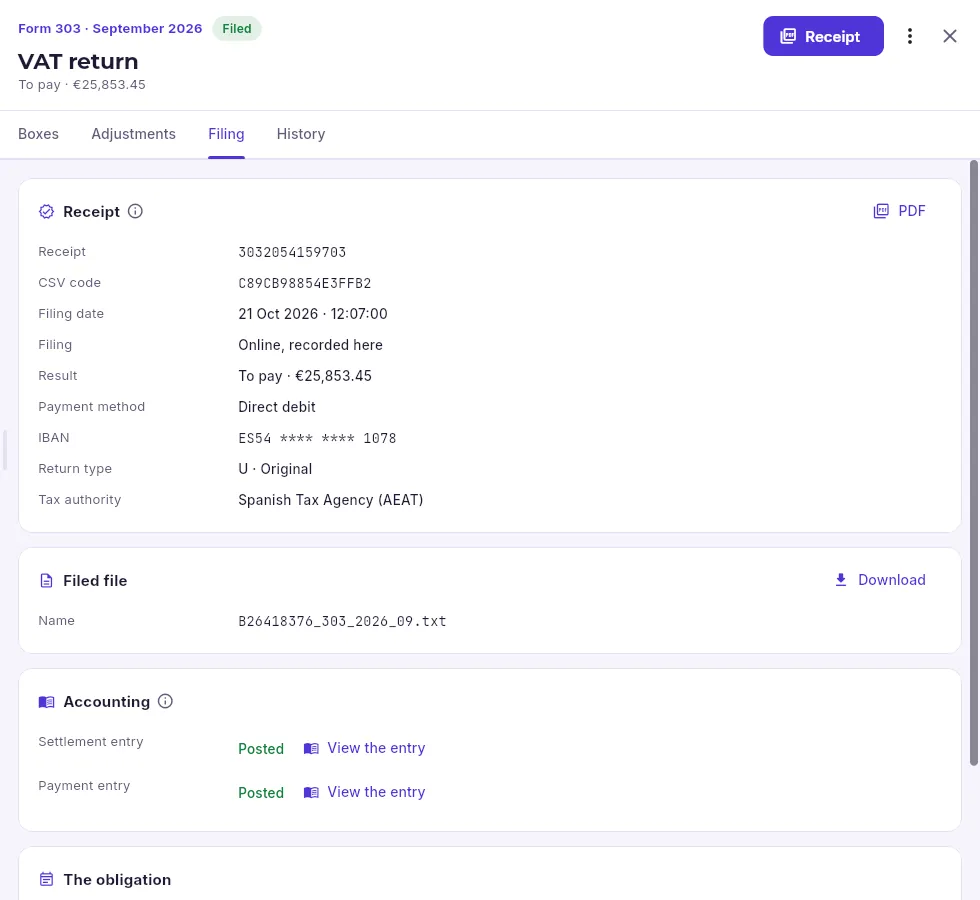 1234
- 1The receipt as a PDF.
- 2The receipt: its number, the CSV, the date, how it was filed, the result and the payment method.
- 3The official file that was filed, to download.
- 4The settlement and payment entries, made automatically.
In the Tax calendar, click the calculated obligation (or find it in Returns).
Check the result and the deadline. If you have recorded invoices for the period after calculating it, click Recalculate.
Go through the boxes: click the underlined ones to see their invoices and open any that does not add up.
Look at the Adjustments tab in case something is missing that does not come from the invoices (an amount carried forward, the pro rata).
If everything is right, Mark as reviewed; in Filing, file it or download the file.
#Tax records: VeriFactu, SII and TicketBAI
Every invoice issued (and, under the SII, every invoice received as well) has its tax record, which Mercurio sends automatically every few minutes. The tab is named after the company’s system: VeriFactu records (La Alacena Gourmet), SII books (Alacena Distribución) or TicketBAI records (Alacena Servicios and the sole trader, in Álava).
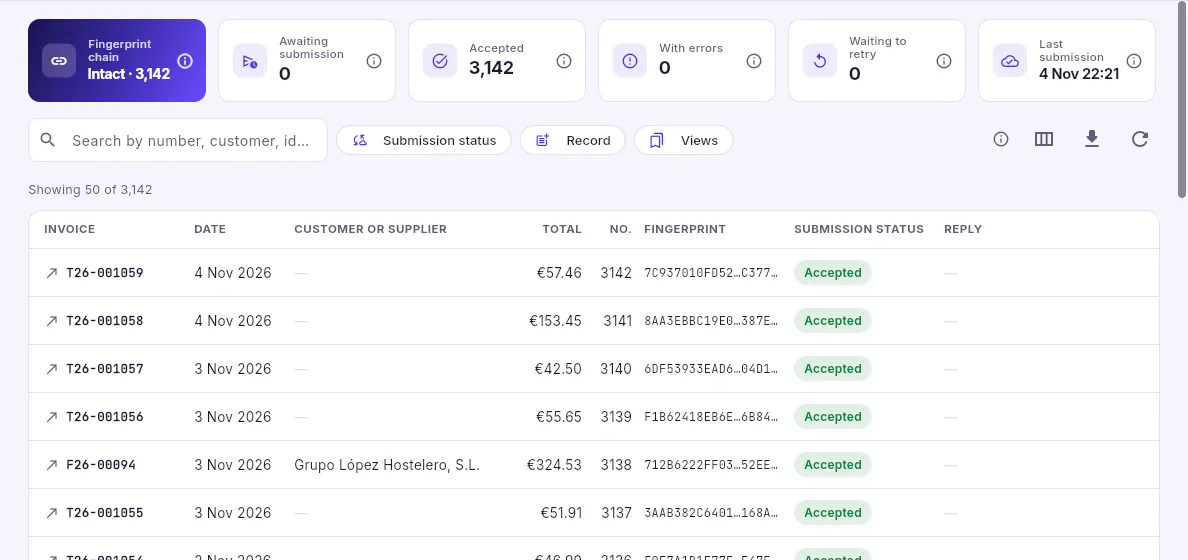 1234
- 1The fingerprint chain, checked just now: “Intact” and how many records it links.
- 2Awaiting submission, accepted, with errors, waiting to retry and the tax authority’s last reply.
- 3Search by invoice, customer or identifier, and filter by submission status and record type.
- 4Each record: the invoice, its date, the total, its position in the chain, its fingerprint and its submission status.
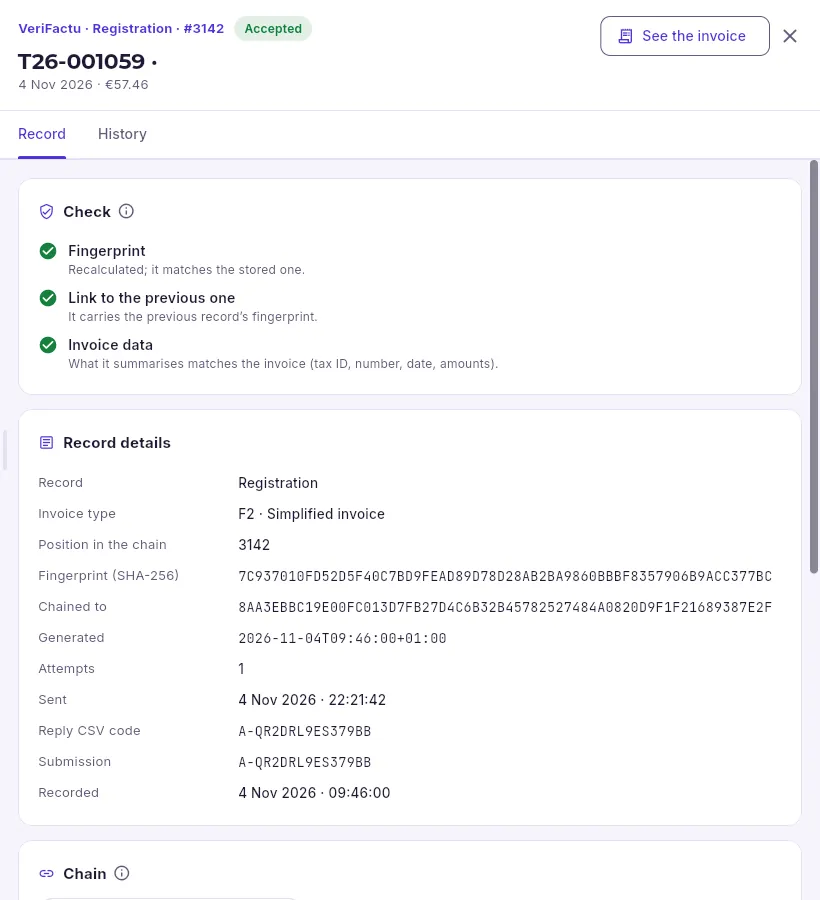 1234
- 1The system, the type (registration or cancellation), its number in the chain and the status.
- 2Open the invoice.
- 3The check, done just now: the recalculated fingerprint matches, it links to the previous one and it summarises the invoice data.
- 4Its position, its fingerprint (SHA-256), the previous fingerprint it is chained to, the submission and the CSV from the reply.
In Taxes, open the records tab (VeriFactu records).
Look at the Fingerprint chain indicator: “Intact” and the number of records chained.
Open a record: under Check, the three ticks in green (fingerprint, link to the previous one and invoice data).
Further down, under Chain, click the previous or the next record to move along it.
#Tax settings
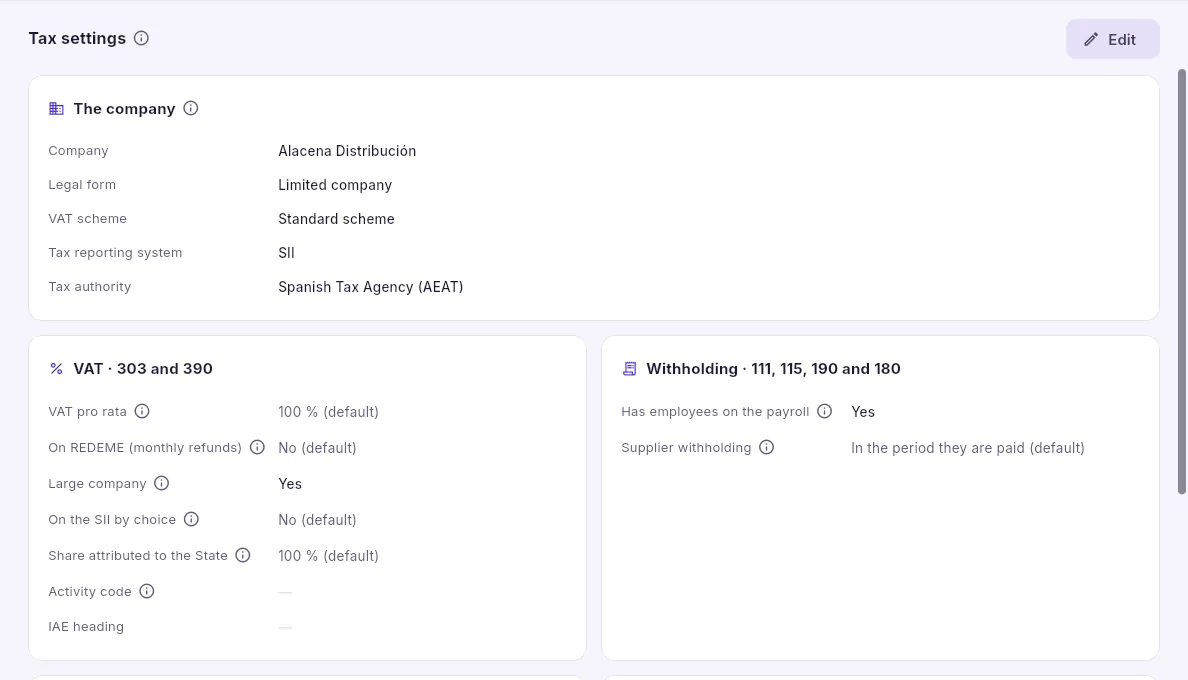 1234
- 1The legal form, the VAT scheme, the tax system and the tax authority (the AEAT or a provincial treasury).
- 2What affects VAT: pro rata, REDEME, large company, SII by choice, share attributed to the State, activity code and IAE heading.
- 3Whether it has employees and when it declares the withholding on suppliers.
- 4Change them (with the “File taxes” permission).
Further down are Corporate tax (the instalment method for the 202) and Intrastat (the thresholds for purchases and sales with the EU). Each item has its ⓘ with what it changes in the returns. Anything that has not been touched shows “(default)”.
#The sole trader
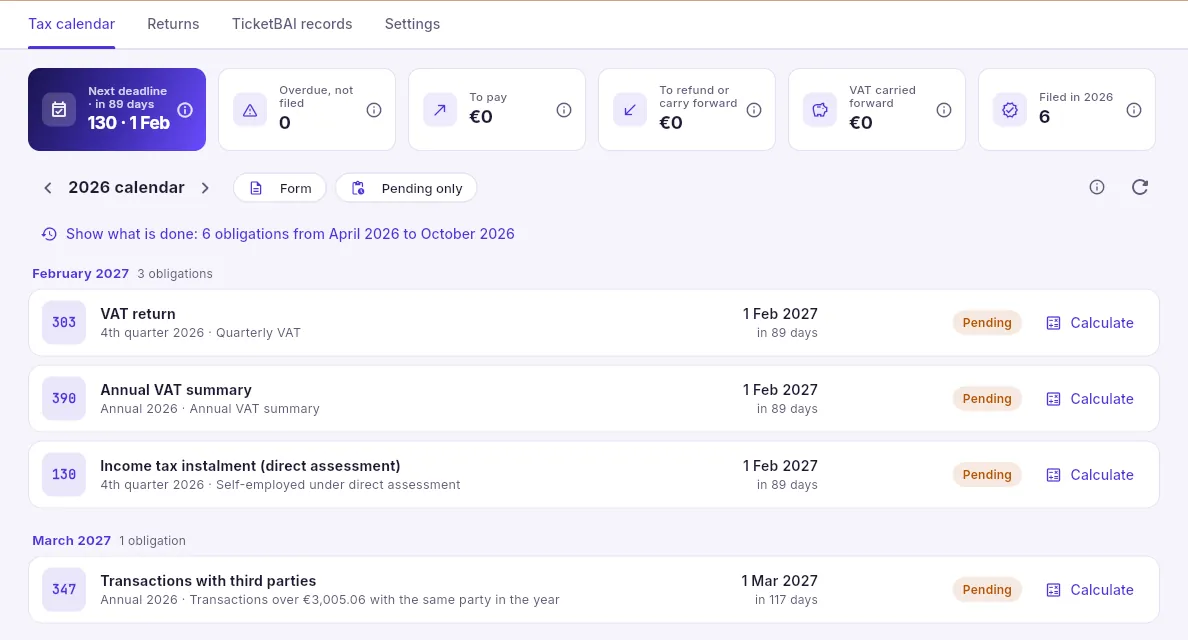 12345
- 1In Álava, their system is TicketBAI.
- 2Their next deadline: the quarter’s 130.
- 3VAT, quarterly, and its annual summary (390).
- 4The 130: the IRPF payment on account, 20% of the year’s net income minus what has already been paid and the withholdings.
- 5The 347 for third-party transactions.
Planning
Forecasts
What each item is expected to sell in each warehouse, week by week over the next six months, how far off it is and why; and the regular customers who are overdue to order.
A sales forecast says how much of an item a warehouse will sell each week (Monday to Sunday) over the next 26 weeks. Mercurio works it out every night from up to three years of sales (sales minus returns), for every item that has sold something in that warehouse in the last year: an item sold from two warehouses has two forecasts.
You do not need to know any statistics to use it. For each item, five ways of forecasting are tried, the one that would have been most accurate over the last few weeks is picked and that is the one used; every figure has its ⓘ explaining what it means. Forecasts drive the purchase suggestions (what to order from each supplier and when), so a good forecast means just the right stock: no stock-outs and no overflowing warehouse.
#Accuracy and the list
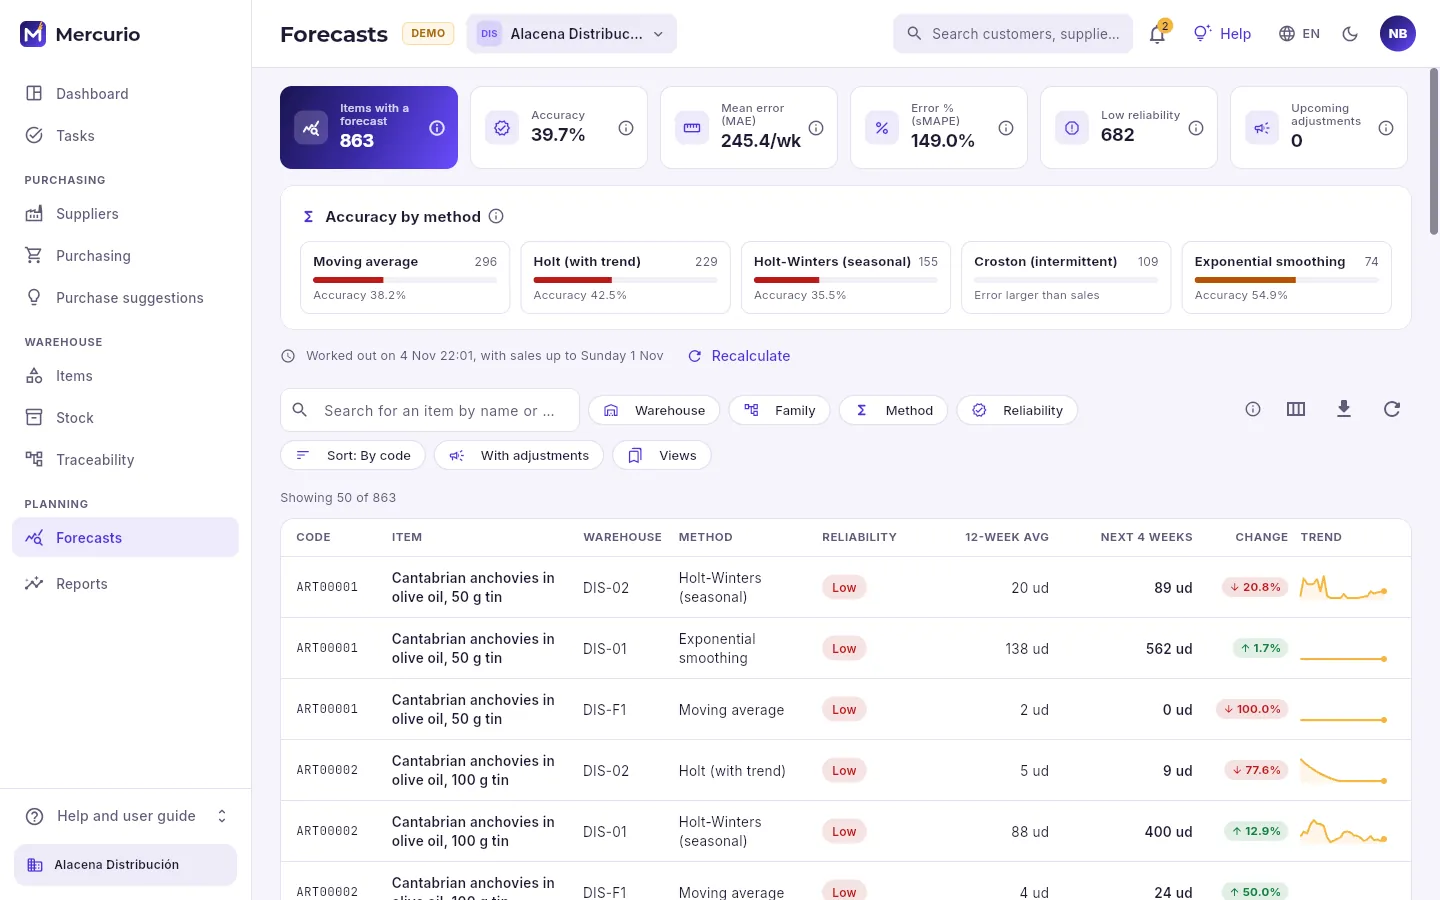 1234567
- 1The indicators: how many forecasts there are, how accurate they are on average (accuracy, mean error and error %), how many have low reliability and how many adjustments are coming up. Clicking the last two filters the list.
- 2Accuracy by method: how many items use each method and how accurate they are. Click one to see only its items.
- 3When they were worked out and up to which Sunday’s sales. Recalculate redoes them now (with the “Plan” permission).
- 4The search box, by item name or code.
- 5The filters: warehouse, family, method and reliability. Below, the sort order (by code, best sellers first or least accurate first) and only those with adjustments.
- 6Which columns are shown (also the 13- and 26-week forecast, MAE, sMAPE and adjustments), export what is filtered and reload.
- 7One row per item and warehouse: the method, the reliability, the average of the last 12 weeks, the forecast for the next 4, the change and the trend over the 26. Click one to open its record.
The list arrives 50 at a time, by item code: at the bottom, Load more brings the next ones. The change compares the weekly forecast over the next 13 weeks with the average of the last 12: green if more sales are expected, red if fewer. The trend is the line of the 26 forecast weeks, so you can see at a glance whether it rises, falls or has a peak.
| Indicator | What it counts |
|---|---|
| Items with a forecast | The company’s forecasts: one per item and warehouse with sales in the last year. |
| Accuracy | 100% minus the mean error of one week divided by what is sold in an average week, weighted towards what sells most. |
| Mean error (MAE) | How many units the forecast is off by in a week, on average (in each item’s own units). |
| Error % (sMAPE) | Each week’s error as a percentage, from 0% (perfect) to 200% (nothing like it). |
| Low reliability | Items whose forecast is off by more than half of what they sell. |
| Upcoming adjustments | Weeks corrected by hand from the current week onwards (promotions, events…). |
#An item’s record
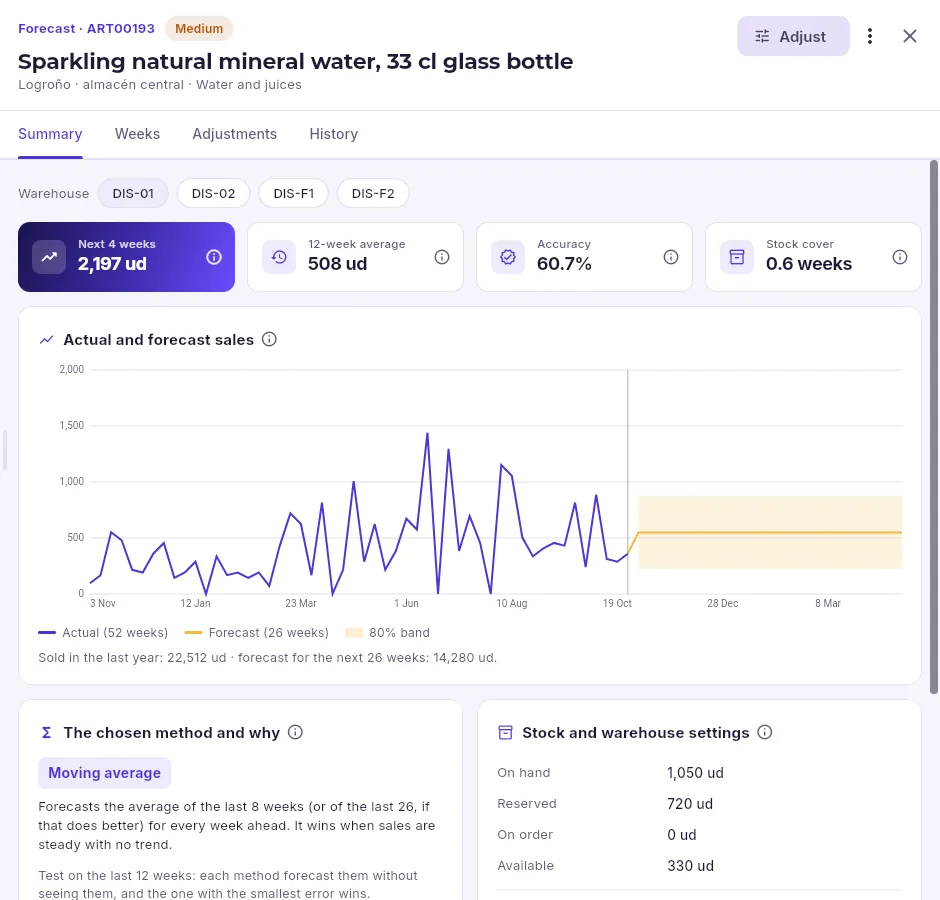 1234567
- 1The item, the warehouse and the family, with the reliability of its forecast (high, medium or low).
- 2Correct a particular week: a promotion, an event… (with the “Plan” permission).
- 3Recalculate just this item, open its item record or see its purchase suggestions.
- 4The tabs: summary, the 26 weeks one by one, the adjustments and the history of the adjustments.
- 5Each warehouse has its own forecast: switch between them here.
- 6The forecast for the next 4 weeks (including the current one), the average of the last 12, this item’s accuracy and how many weeks its stock will last.
- 7The chart: what sold over the last year and the forecast for the next six months.
The record opens in the panel on the right, from the list or from the purchase suggestions. Stock cover divides what is available (on hand, minus what is reserved for customer orders, plus what is on order) by the average forecast over the next 4 weeks: if it is less than the time a supplier order takes to arrive, you will be late.
#How to read the chart
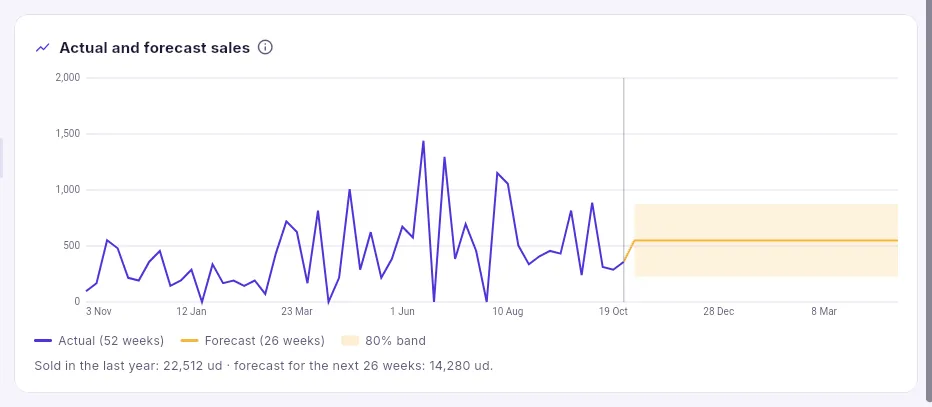 12345
- 1In violet, what sold each week over the last 52 full weeks (sales minus returns).
- 2The vertical line is today: it separates actual from forecast.
- 3In gold, the forecast for the next 26 weeks, and the golden band, its margin of error: actual sales will fall within it 8 weeks out of 10.
- 4The key (if any weeks have been adjusted, it also says how many).
- 5Total sold over the last year and the total forecast for the next six months.
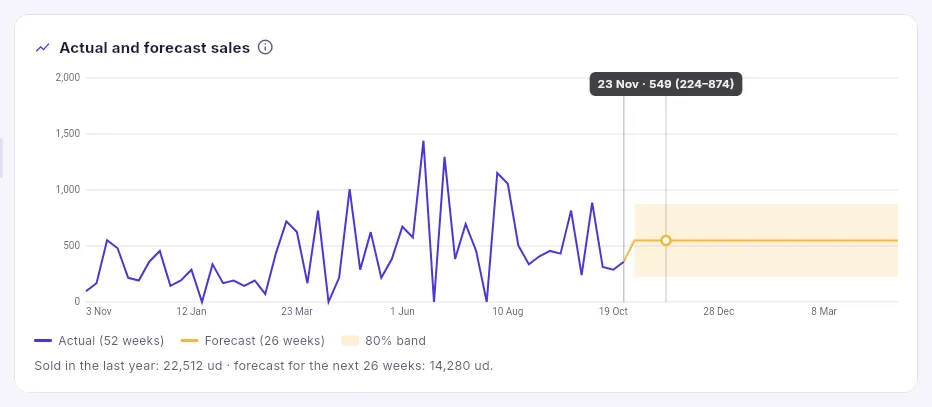 12
- 1The figure for the week you point at: its Monday, the forecast and, in brackets, the band (the two figures that sales will fall between 8 weeks out of 10). For a past week, what was sold.
- 2The week pointed at, with its dot on the line.
Hover over the chart (on a mobile, tap it) to see the figure for a week; all of them, one by one, are on the Weeks tab. If the band is wide, the forecast is uncertain: the item sells very differently from one week to the next. If the gold forecast has a peak that does not follow the shape of the past, it is usually an adjustment (a promotion or an event).
#The chosen method and why
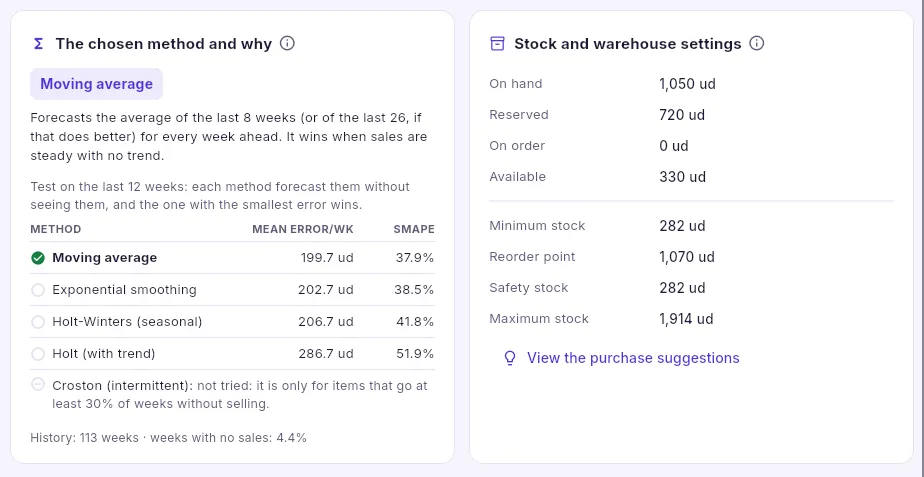 12345
- 1The method that won the test, with its mean error per week and its sMAPE: it is the one used for this item. Above, in a few words, how it forecasts.
- 2The ones that were not tested and why: here, Croston, which is only for items that go many weeks without selling. With less than 90 weeks of history, Holt-Winters is not tested either.
- 3The stock in this warehouse: on hand, reserved for customer orders, on order and available.
- 4The limits used to restock (from the item record); those left unset are worked out by the purchase suggestions from this forecast.
- 5What they suggest ordering of this item.
The five methods, without formulas:
| Method | How it forecasts | Wins with… |
|---|---|---|
| Moving average | The average of the last 8 weeks (or of the last 26, if that does better), for all the weeks ahead. | Steady sales with no trend. |
| Exponential smoothing | An average that gives more weight to recent weeks: it adapts to changes without being thrown by a single odd week. | Steady sales that change gradually. |
| Holt (with trend) | Follows the trend: if sales rise or fall week after week, it carries that on, more cautiously each time. | Items that are growing or fading. |
| Holt-Winters (seasonal) | Follows the trend and repeats the shape of each year: summer, Christmas, back to school. | Seasonal items, with a year and a half of history. |
| Croston (intermittent) | Forecasts separately how often it sells and how much, and gives the weekly average. | Spare parts, machinery and anything that sells intermittently. |
#The weeks
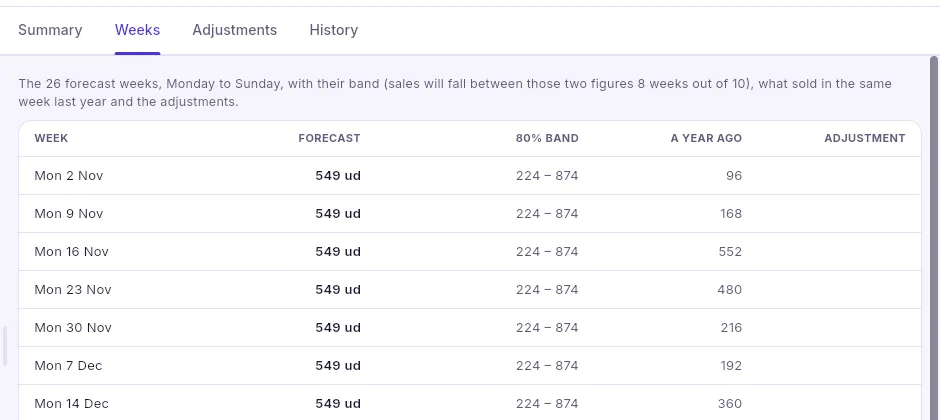 12345
- 1Each forecast week, by its Monday; the first is the current week.
- 2What is expected to sell that week, including its adjustment if it has one.
- 3The two figures sales will fall between 8 weeks out of 10.
- 4What sold in the same week last year, for comparison.
- 5Whether the week has an adjustment: promotion, event or other.
#Adjusting a week
The forecast only knows what has happened. If you know something the history does not (a promotion, a trade fair, roadworks outside, a new customer starting to buy), correct that week with an adjustment: a percentage on the forecast or a fixed number of units.
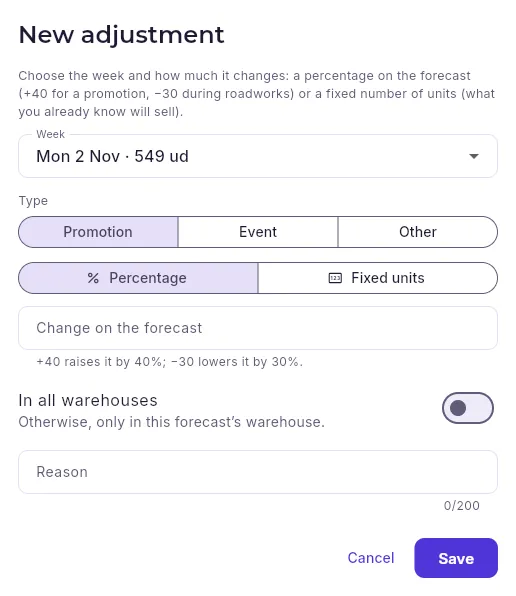 1234567
- 1The week being adjusted (with its forecast).
- 2What it is: a promotion, an event or another reason.
- 3How it changes: a percentage on the forecast or fixed units that replace the forecast.
- 4+40 raises it by 40%; −30 lowers it by 30%. Below, you can see how the week ends up.
- 5For all warehouses or just this one.
- 6The reason, required: whoever reviews the forecast will see it.
- 7Saves the adjustment and the forecast is recalculated straight away.
In Forecasts, search for the item and click its row (the one for the warehouse you want).
In its record, click Adjust (or, on the Adjustments tab, New adjustment).
Choose the week, the type (promotion, event or other) and whether you change a percentage or set fixed units.
Type the change (+40, −30…) or the units, decide whether it applies to all warehouses and type the reason.
Click Save: the forecast is recalculated and the week shows as adjusted on the chart, in Weeks and in the list.
#Customers overdue to order
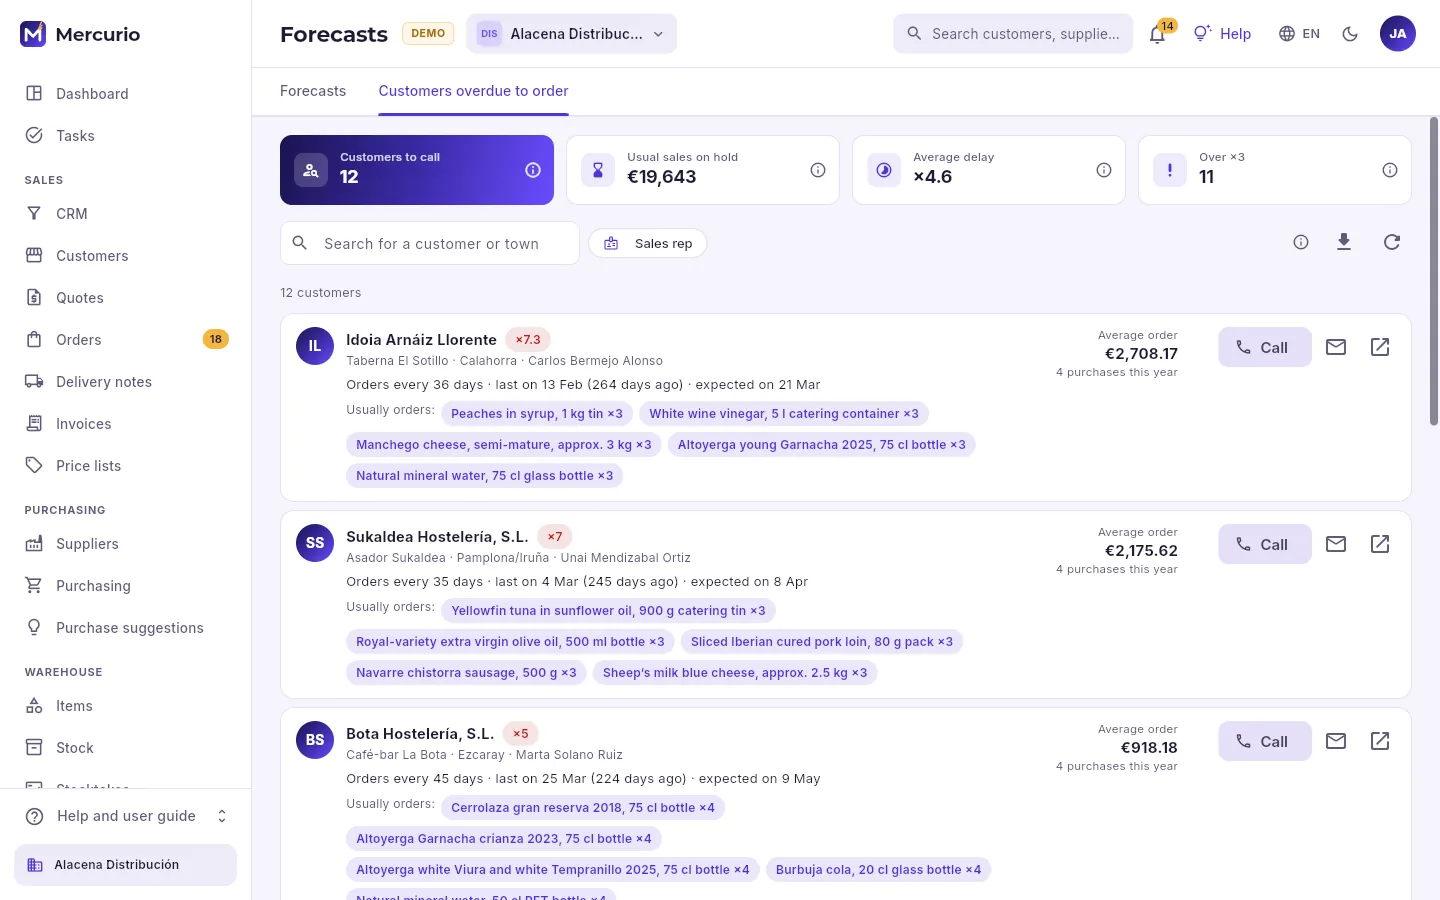 1234567
- 1The second tab, for those who can also see customers.
- 2How many regular customers are late, what they usually buy between them, their average delay and how many have gone over three times their normal interval without ordering.
- 3Search by customer or town and keep only one sales rep’s customers.
- 4The customer and their delay (amber from double, red from triple): how often they usually order, when their last order was and when the next one was expected.
- 5Usually orders: the five items they have bought most often in the year.
- 6What they spend on average each time and how many orders they have placed in the year.
- 7Call them, email them or open their record.
It is the list of calls to make today: customers who buy regularly and have now gone longer than usual without doing so, the latest first. When you call, offer what they usually order; as soon as they order, they drop off the list on their own.
In Forecasts, filter by Reliability “Low” or click the Low reliability indicator: these are the ones worth checking by hand.
Open the item and look at the chart: is the band narrow? Does the forecast follow last year’s shape?
Look at The chosen method and why: if all the methods are far off, raise its safety stock.
In Weeks, compare the forecast with what sold a year ago.
If you know something the history does not, add an adjustment to that week.
B2B
B2B channels
The sales that come in from outside the office: EDI from large retailers, online shops, marketplaces, e-invoicing and the B2B portal where your customers order by themselves.
B2B channels brings together everything the selected company sells without typing in the order: what comes in by EDI from large retailers, from its online shops (Shopify, WooCommerce, PrestaShop) and from marketplaces (Amazon, Ankorstore, Faire), the e-invoices that go out to public administrations (FACe) and to European customers (Peppol), and the B2B portal, the website where your customers see their catalogue with their prices and place orders. Each incoming order becomes a normal sales order, with its prices, its credit risk and its stock, and is fulfilled like any other.
- 1ArrivesThe order arrives through the channel (or the customer places it on the portal).
- 2Sales orderIt is converted automatically, with the usual rules.
- 3Delivery noteWhen it is fulfilled, the channel receives the shipping notice.
- 4InvoiceIt goes out in the channel’s format: EDI, Facturae or UBL.
#The channels
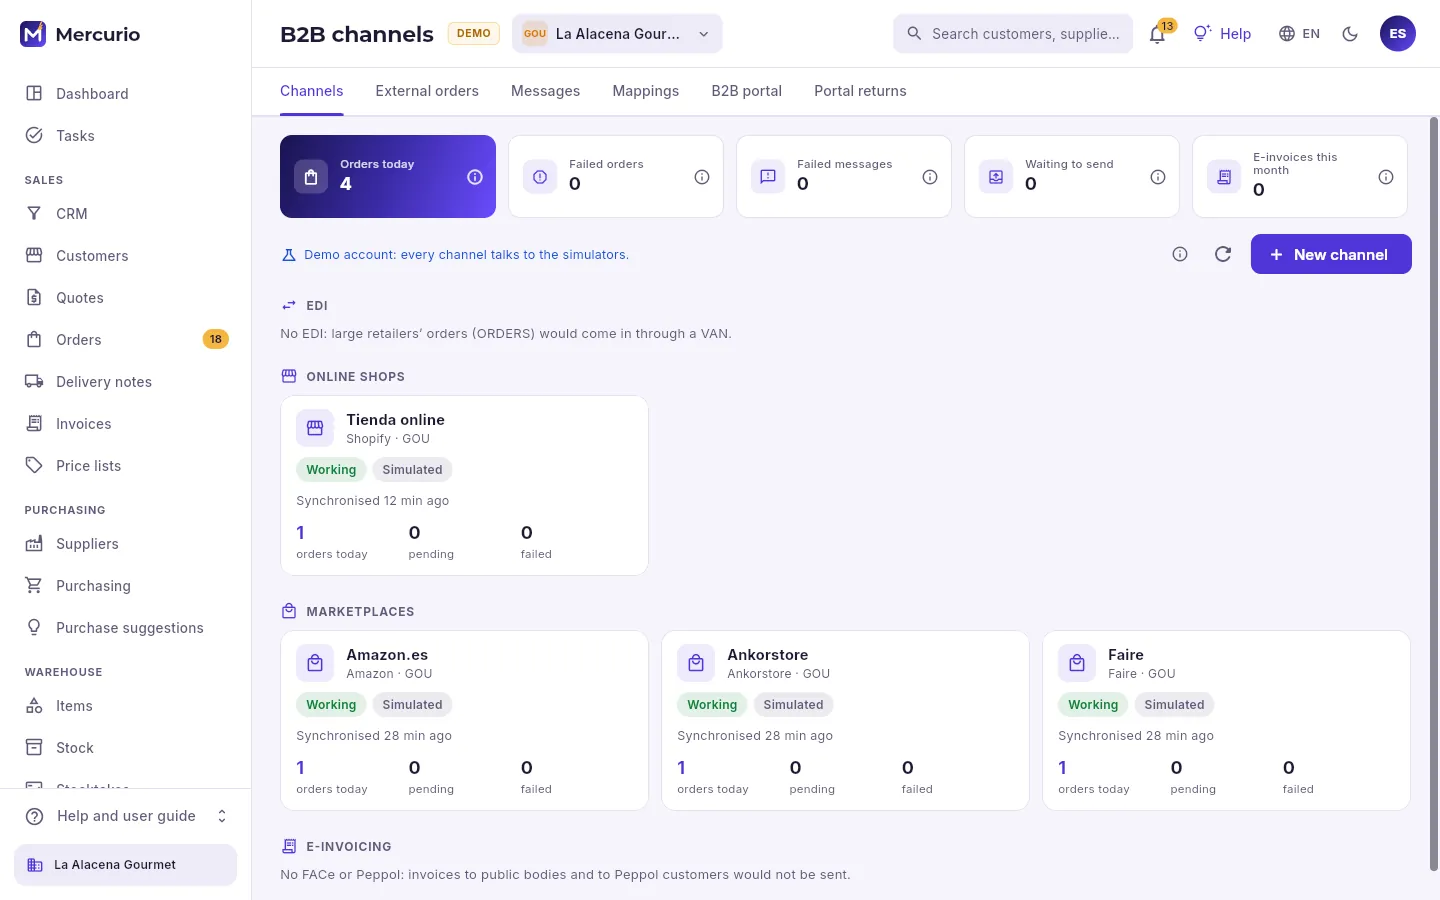 12345
- 1The tabs: channels, external orders, messages, mappings, the B2B portal and its returns (depending on the features switched on).
- 2Today’s orders, those with an error, messages with an error, what is waiting to send and this month’s e-invoices. Click one to see that list.
- 3Add a channel: the type is chosen from those of the features switched on.
- 4Channels are grouped: EDI, online shops, marketplaces and e-invoicing.
- 5Each channel on its card: its status (that of the last connection), its mode (simulated or live), when it was last synchronised and its orders today, pending and with errors. Click it to open its record.
The server synchronises each channel every few minutes: it brings in new orders and sends whatever is pending (confirmations, shipping notices, published stock and prices). FACe and Peppol only check how each invoice sent is getting on.
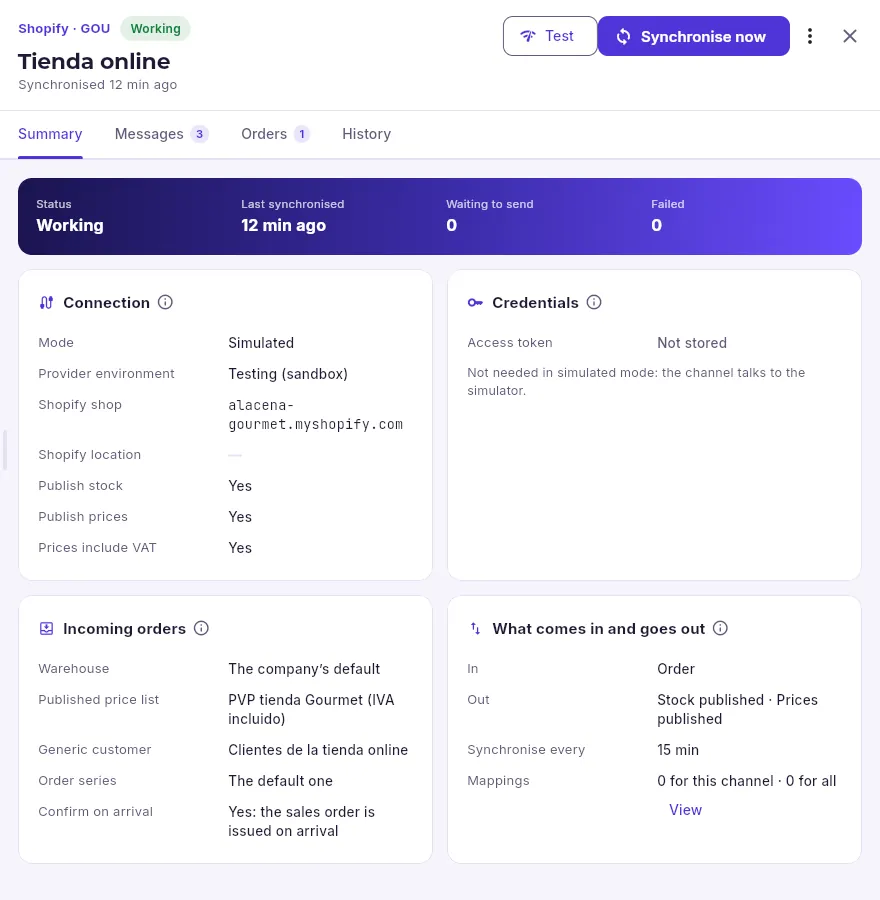 1234567
- 1Test connects and says whether everything is fine, without bringing in or sending anything.
- 2Synchronise now does not wait for the next run: it brings in and sends what is pending. The record waits for the result and summarises it.
- 3Its summary, its messages, its orders and its history.
- 4Who it talks to and how: the mode, the provider’s environment and what this type of channel needs (here, the Shopify shop).
- 5Whether its credentials are stored (they are never shown). In simulated mode they are not needed.
- 6What is done with each order: which warehouse it ships from, which generic customer it goes to if the buyer is not a customer, with which series and whether it is confirmed automatically.
- 7What the channel exchanges and how often, and its mappings.
What each type of channel exchanges:
| Channel | In | Out |
|---|---|---|
| EDI (via a VAN) | Orders (ORDERS), receiving advice (RECADV) | Order response (ORDRSP), despatch advice (DESADV), invoice (INVOIC) |
| Online shop | Orders | Confirmation and shipment with tracking, stock and prices |
| Marketplace | Orders | Confirmation and shipment, stock |
| FACe | Its processing status (registered, paid, rejected) | Signed Facturae, for public administrations |
| Peppol | Whether it was delivered | UBL invoice to European customers |
In B2B channels → Channels, click the channel’s card.
Check its connection: the mode (simulated or live), the environment and its details (a mistyped GLN, the shop address or the Peppol participant are the most common errors).
Click Test and wait for the result.
#External orders
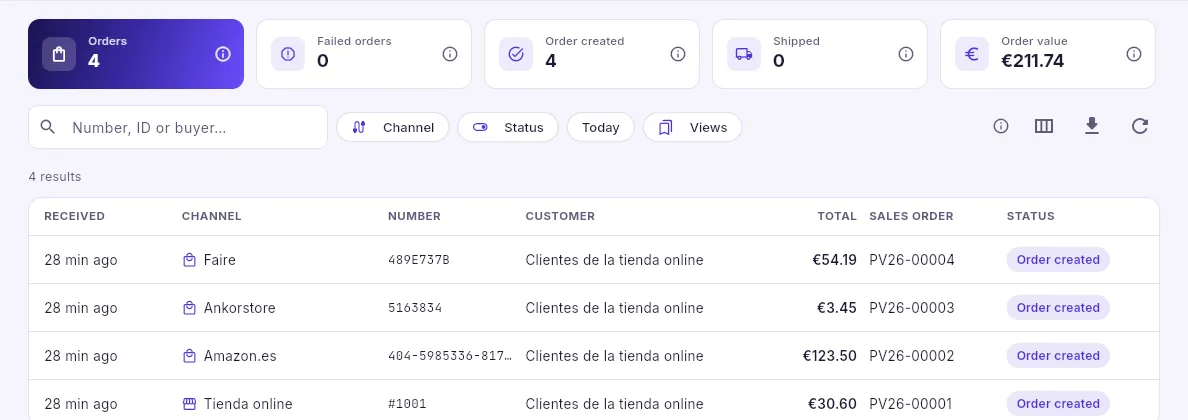 123
- 1How many orders have come in, those with errors, those that are already sales orders, those shipped and their total value.
- 2Search by number or buyer, and filter by channel, status and today’s orders.
- 3Each order with its channel, its number, the customer, the total, the sales order it created and its status. Click it to open its record.
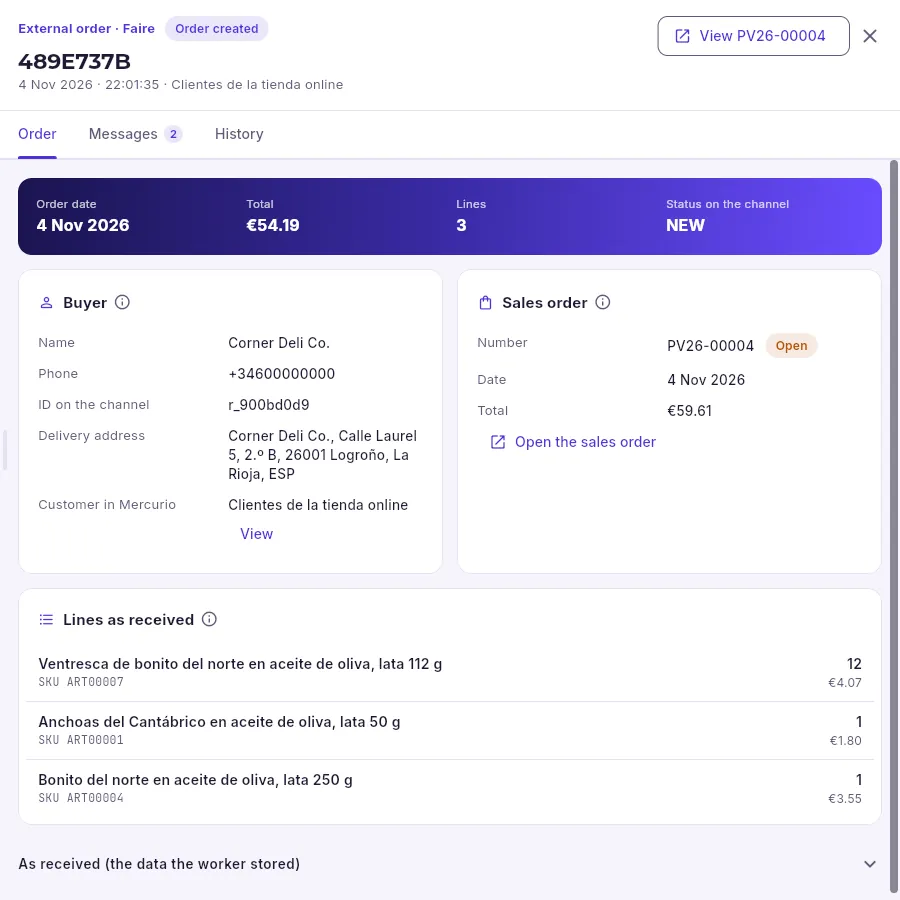 12345
- 1Opens the sales order it created.
- 2The order, the messages it has generated (the order that came in and the confirmation that went out) and its history.
- 3Who ordered it, as the channel sends it, and the Mercurio customer it has been assigned to: here, the generic customer for the online shop and the marketplaces.
- 4The sales order that was created, with its number, its status and its total.
- 5The lines as the channel sent them: their description, their codes (SKU, EAN or ASIN), the quantity and the price.
If the order could not be converted, it is left failed: its record says in red what is missing (almost always an EAN, a SKU or a GLN that Mercurio does not recognise), highlights the line whose item cannot be found and offers Create the mapping with the code already filled in. Once the cause is fixed, Reprocess tries again; if it is not going to be fulfilled, Discard records it with its reason.
In External orders, open the order with an error and read what is missing.
If it is a code that Mercurio does not recognise, click Create the mapping and choose the item (or the customer) it corresponds to; or add that EAN to the item’s record.
Click Reprocess.
#Messages
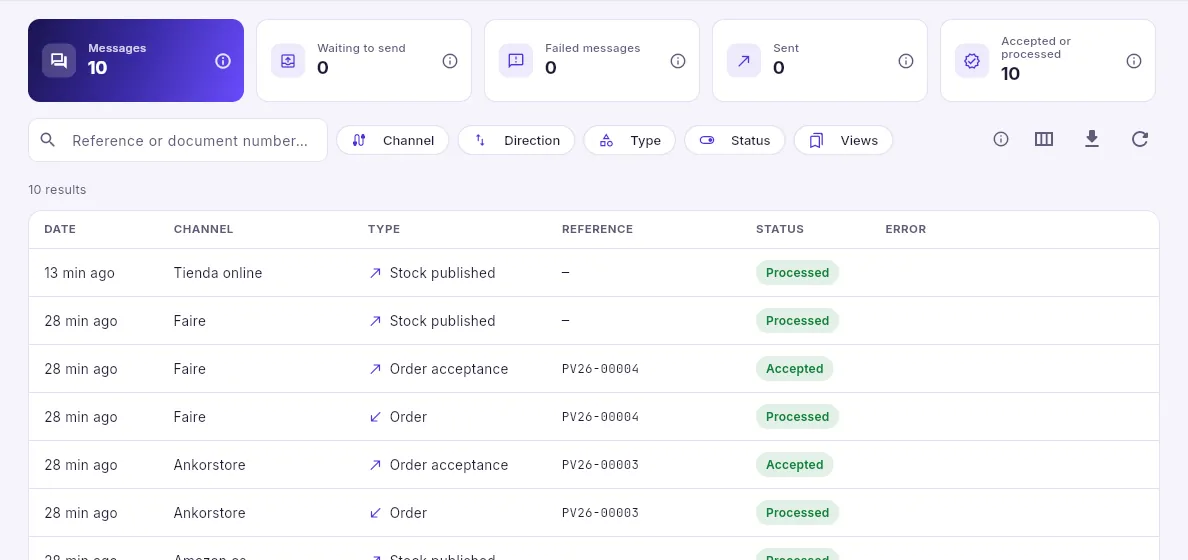 1234
- 1The messages, those waiting to send, those with an error, those sent and those accepted or processed.
- 2Filter by channel, direction (in or out), type and status.
- 3Everything that comes in and goes out: orders, confirmations, shipping notices, published stock and prices, EDI invoices, Facturae and UBL. A failed message gives the reason: open it to see its exact content, fix the cause and Try again, or Discard it with the reason.
- 4An order confirmation, which goes out when its sales order is issued and which the channel has accepted.
Outgoing messages are created when a document is issued (the confirmation when the order is issued, the shipping notice when the delivery note is issued, the e-invoice when the invoice is issued) and the server queue sends them. Anything that fails temporarily (the other side does not respond) is retried automatically, with longer and longer waits; anything that does not improve by repeating stays with an error and alerts whoever manages B2B in the bell. In each message’s record you can see and download its exact content (the EDIFACT, the signed Facturae, the UBL or the provider’s JSON), to validate it or send it to their support.
#Mappings
A mapping translates a code from the other side into a Mercurio one: an item’s EAN, SKU or ASIN, a buyer’s GLN or ID, a delivery point’s GLN or a customer’s Peppol participant. They are only needed for what does not match your master data: when an order comes in, each code is looked up first in its channel’s mappings, then in those for all channels and, finally, in the master data (the GLN of the customer and its addresses, the barcodes and the item code). A channel’s mappings take precedence over those for all channels.
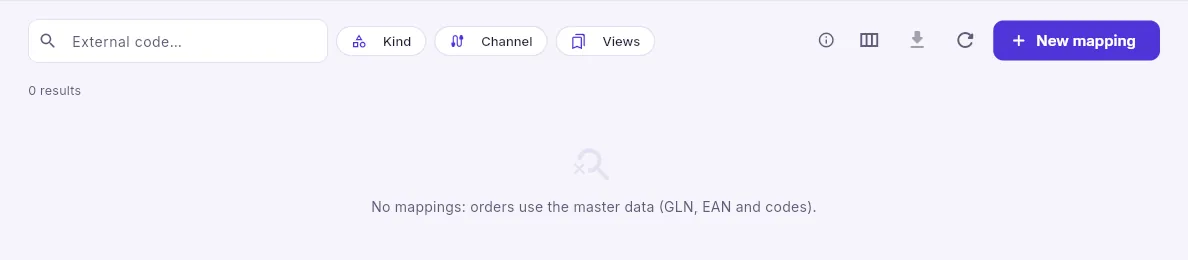 1234
- 1Search by the code from the other side.
- 2Filter by class (item, buyer, delivery point, participant) and by channel.
- 3Create one by hand.
- 4With none, orders use the master data: the norm if your EANs and GLNs are set up correctly.
#The B2B portal
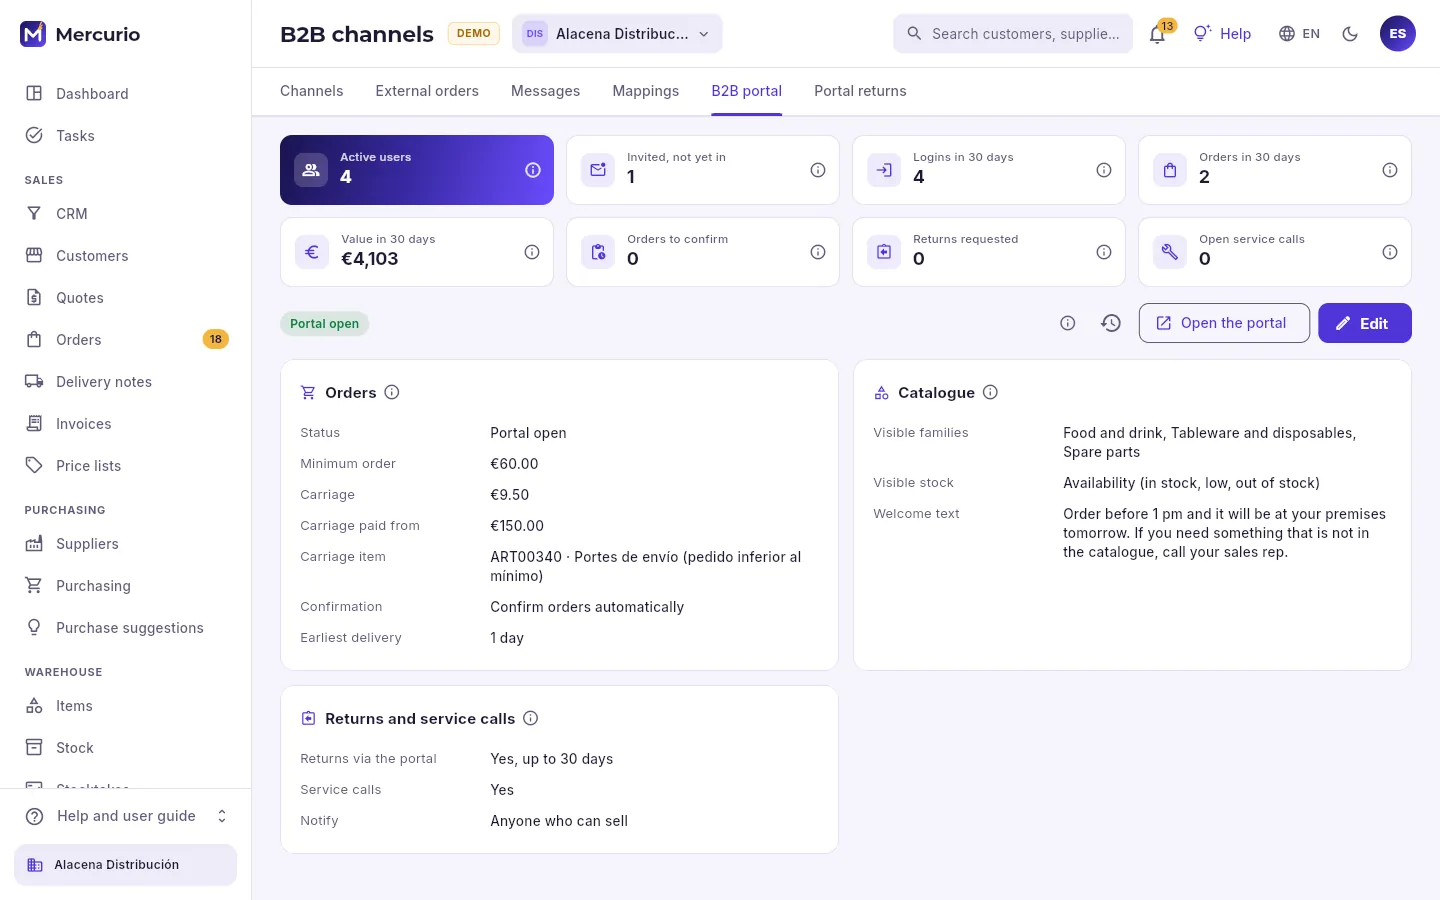 12345678
- 1How the portal is doing: the people who sign in, those invited who have not signed in yet, sign-ins and orders over the last month.
- 2What those orders add up to and what is waiting for the office: orders to confirm, returns requested and open service calls. Click one to go to it.
- 3Who has changed the settings and when.
- 4Opens the portal as your customers see it.
- 5Edit changes the settings.
- 6Whether it is open, the minimum order, the carriage (and the amount from which it is free), whether orders are confirmed automatically and the earliest delivery date that can be requested.
- 7Which families are shown, how stock is displayed and the welcome text.
- 8Whether customers can request returns (and within what period) and open service calls with the technical service, and who is notified.
The settings apply to all customers of the selected company; each customer can also have their own shipping and pricing terms on their record, which take precedence. The catalogue only shows the items marked shown on the portal from the chosen families, each with that customer’s price (their price list and their terms). With Confirm orders automatically, the order is issued as soon as it is placed (with the credit check: it may be held); otherwise, it waits to be confirmed in Orders until the office reviews it. What the customer sees is in the chapter The customer portal.
#Inviting a customer’s people
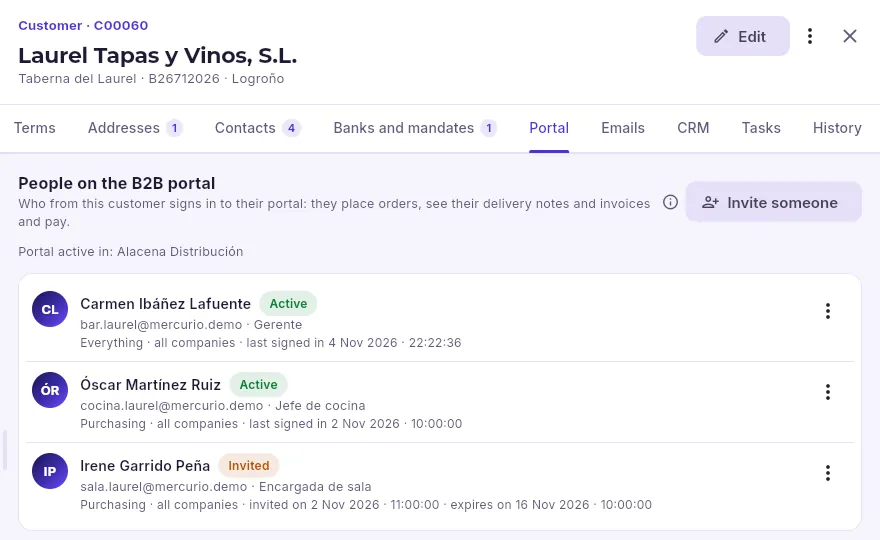 1234
- 1The Portal tab of the customer’s record.
- 2Invite another person from the customer.
- 3The group companies with the portal open for this customer.
- 4Each person with their role, the companies they see, their status (invited, active, suspended) and their last sign-in. Their menu: change them, resend the invitation, suspend them or remove the invitation.
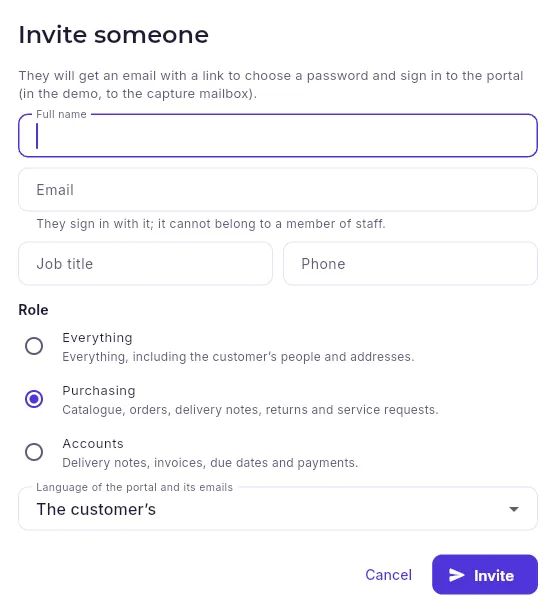 12345
- 1Their name…
- 2…and their email: they sign in to the portal with it (it cannot belong to anyone on the staff).
- 3Their role: everything (including the customer’s people and addresses), purchasing (catalogue, orders, delivery notes, returns and service calls) or accounts (delivery notes, invoices, due dates and payments).
- 4The language they see the portal in and receive emails in (by default, the customer’s).
- 5Sends them the email with the link to choose their password.
Open the customer’s record and its Portal tab.
Click Invite someone.
Type their name and their email, and their job title and phone number if you like.
Choose their role and, if the customer works with several companies in the group, which ones they see (none ticked: all).
Click Invite.
#Portal returns
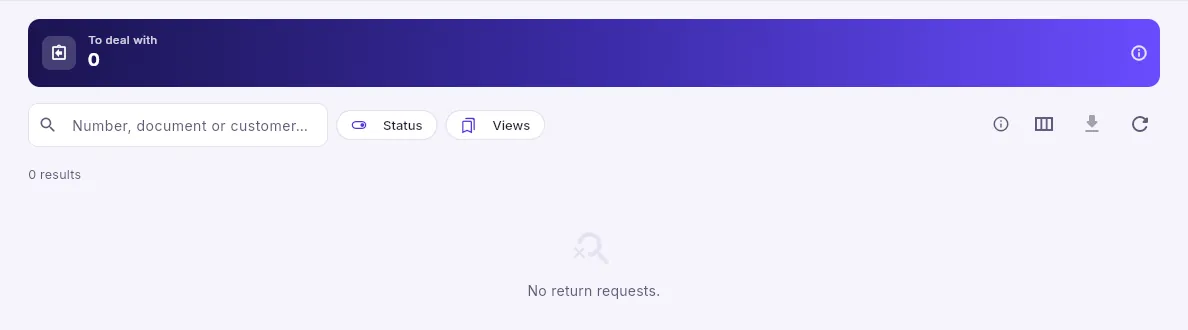 123
- 1The requests waiting for an answer from the office: this should drop to zero every day.
- 2Search by number, document or customer, and filter by status.
- 3Each request with its document, its lines and its reason. Today there are none.
A customer requests a return from the portal, from one of their delivery notes or invoices and within the company’s return period: which lines, how much and why. On its record, Accept creates the draft return with those lines and opens it (it is issued when the goods are received, and the credit note comes from it); Reject asks for your reply, which the customer reads on the portal. The bell notification opens the request directly.
Analysis
Reports
Business figures in detail: sales by customer, item, family, month or sales rep, ABC, order book, uninvoiced delivery notes, purchases, stock valuation, turnover, expiry dates, aged debt and commissions, with their period, their filters and the comparison with the previous year.
The Dashboard is the company at a glance; reports are for going into detail: who buys most, what sells, what is still to be delivered or invoiced, what stock there is and what it is worth, what is owed and since when. They all belong to the company selected at the top, the database calculates them on the spot with today’s data, and every figure has its ⓘ explaining what it shows, how it is calculated and how to read it.
#The report screen
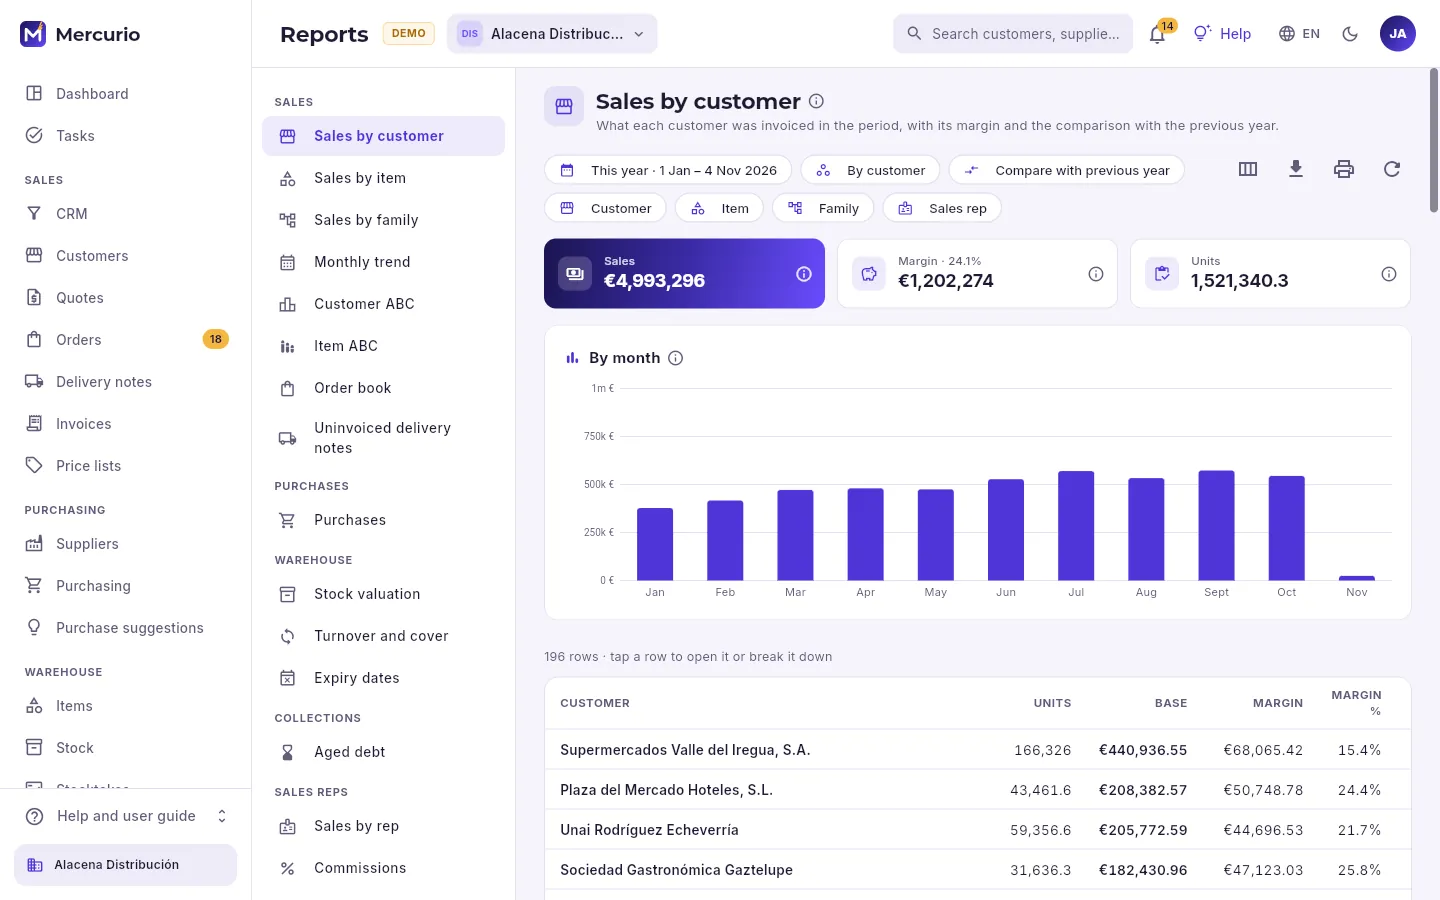 12345678
- 1The catalogue of reports, by group: sales, purchases, warehouse, collections and sales reps. Only those your profile can see are shown.
- 2The chosen report, what it counts and its ⓘ.
- 3The period, how to group (by customer, item, family, sales rep, area, province, channel, month or week) and compare with the previous year.
- 4The filters: a customer, an item, a family or a sales rep.
- 5Choose columns, export to CSV, print or save as PDF and recalculate.
- 6The report’s totals: sales, margin and units (or whatever each report counts).
- 7The month-by-month chart; with “Compare”, the light bar is the previous year.
- 8The table: click a column to sort and a row to open it or drill down.
The reports available, by group:
| Group | Report | What it answers |
|---|---|---|
| Sales | Sales by customer, Sales by item, Sales by family | What was invoiced in the period, with margin and against the previous year. |
| Sales | Monthly trend | Each month’s sales against the same month of the previous year. |
| Sales | Customer ABC, Item ABC | Who or what makes up 80 % of sales (A), the next 15 % (B) and the rest (C). |
| Sales | Order book | What has been ordered and is still to be delivered, with its delay and the stock available. |
| Sales | Uninvoiced delivery notes | What has been delivered and not yet invoiced, oldest first. |
| Purchases | Purchases | What was bought by supplier, item, family or month. |
| Warehouse | Stock valuation | The stock of each item and warehouse at a date, with its value. |
| Warehouse | Turnover and cover | How many times the stock is sold and how many days it lasts. |
| Warehouse | Expiry dates | Batches expiring soon or already expired, with their value. |
| Collections | Aged debt | What customers owe, by bands of days overdue. |
| Sales reps | Sales by rep | What each sales rep’s portfolio invoices, and its margin. |
| Sales reps | Commissions | Each sales rep’s commission on what was invoiced. |
#Period, grouping and comparison
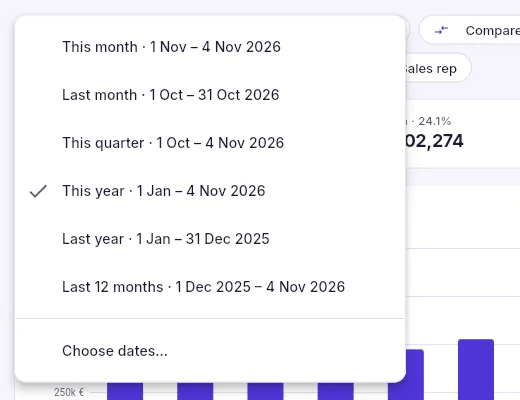 1
- 1One-click periods (this month, last month, the quarter, this year, last year, the last 12 months) or Choose dates…
Group by changes what each row is without changing report: sales by customer can be seen by item, by family, by sales rep, by area, by province, by channel (office, B2B portal, EDI, online shop, marketplace, contracts…), by month or by week. Stock valuation asks for a date (for the year-end close, 31 December) and expiry dates, how many days ahead.
#Drilling down and going back
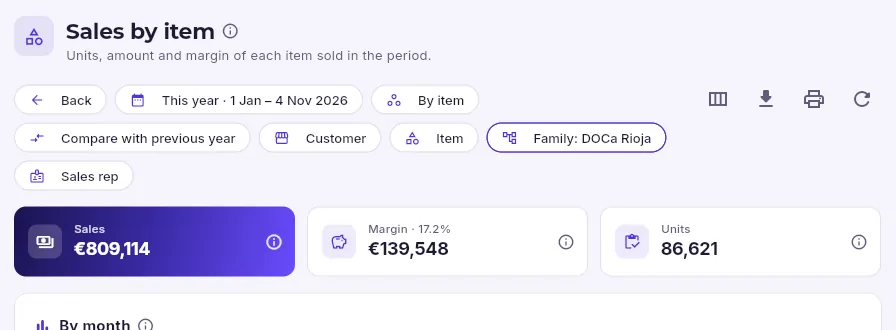 123
- 1When you click a family, the report switches to its items.
- 2Back undoes the drill-down and leaves the report as it was.
- 3The drill-down is just another filter: you can remove it or combine it with others.
Clicking a row does whatever makes sense in each report: a customer, an item or a supplier opens its record; a family, a month or a sales rep drills down (its items, that month’s customers, that sales rep’s customers). Back undoes it step by step.
#Customer ABC
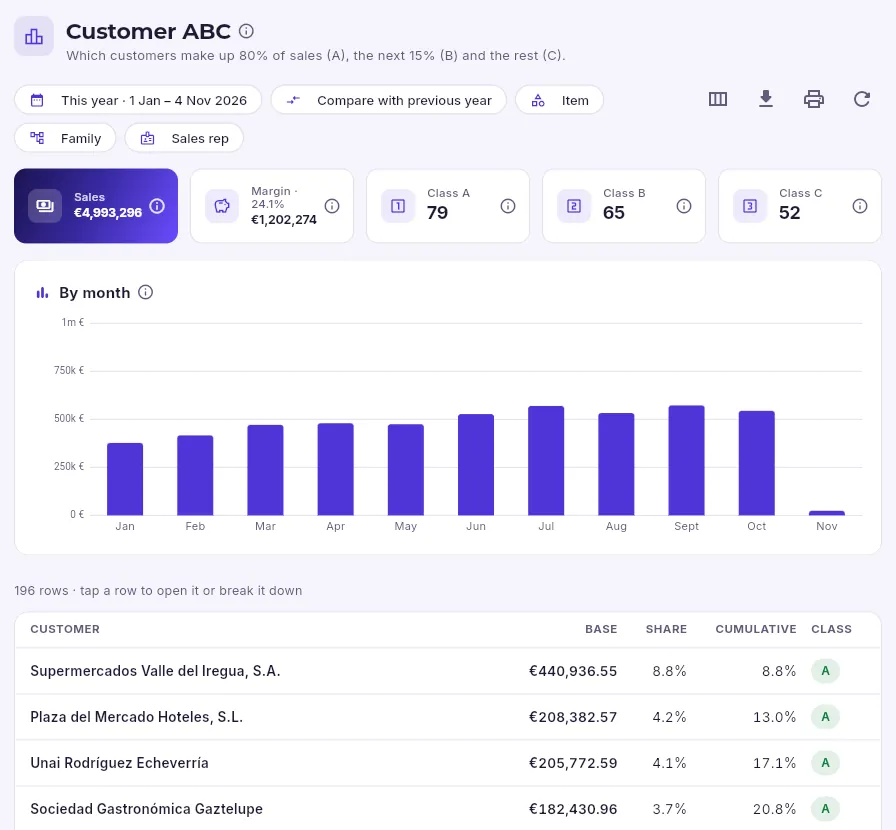 12
- 1How many customers make up 80 % of sales (A), the next 15 % (B) and the last 5 % (C).
- 2Customers from biggest to smallest buyer, with their share, the cumulative total and their class.
#Aged debt
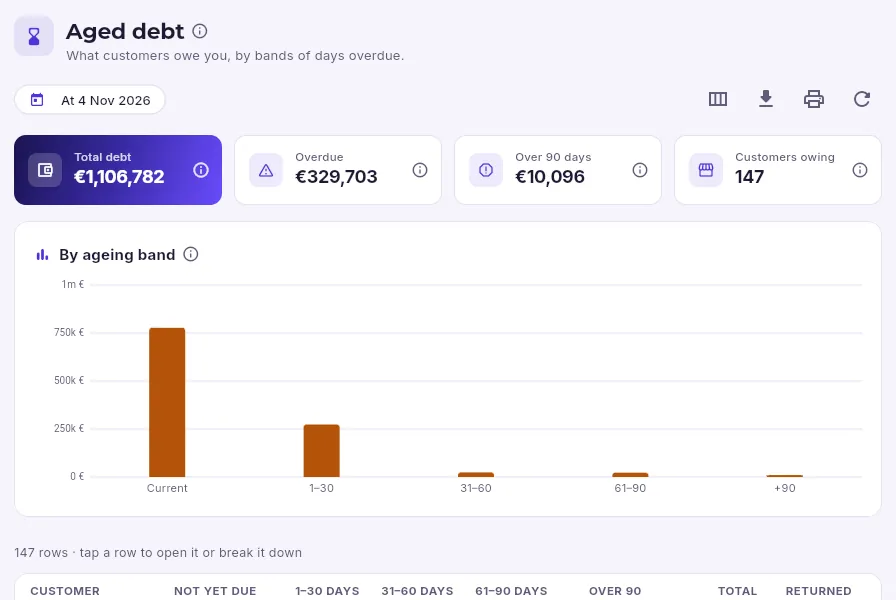 12
- 1Everything customers owe, what is overdue, what is over 90 days and how many customers owe something.
- 2Debt by band: current (not yet due), 1–30, 31–60, 61–90 and over 90 days overdue. The heavier the bars on the right, the worse.
#Exporting and printing
In Reports, choose Sales by customer in the list on the left.
Choose the period (this year, the quarter, specific dates…) and, if you like, tick Compare with previous year.
Filter if needed: a sales rep, a family, an item.
Sort the table by clicking the column (net amount, margin, change).
Click Export to CSV to open it in a spreadsheet or Print or save as PDF to save or send it.
#Depending on your profile
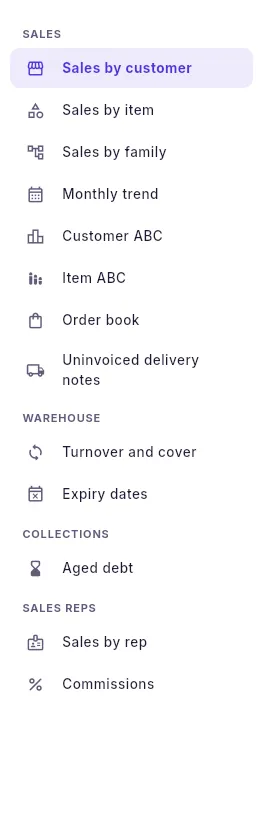 1
- 1A sales rep sees sales, turnover and expiry dates, customers’ debt and the sales rep reports; they do not see purchases or stock valuation (which needs permission to see costs).
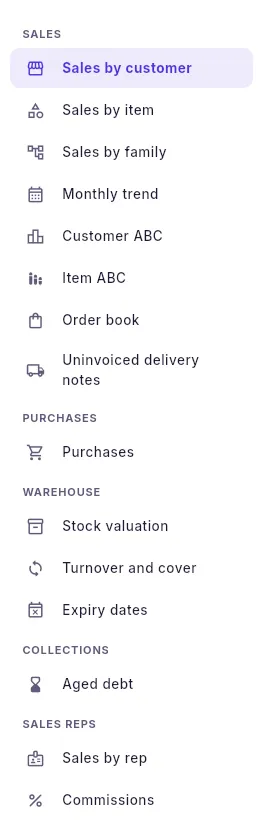 1
- 1Management also sees purchases and stock valuation.
Set-up
Automations
Rules that do repetitive work on their own: when something happens (or every morning) and some conditions are met, they create tasks, send notices and emails, change data or create documents. With a gallery of ready-to-use rules.
An automation is a rule of the kind “when this happens, if this other thing is true, do that”. For example: every morning, for each overdue unpaid invoice, if it has been overdue for at least 3 days, send the customer the “Payment reminder” email with the invoice attached. Mercurio reads each rule like that, as a sentence, so it can be understood without knowing how it is built.
- 1WhenWhat triggers it: something that happens (an invoice is issued, an order comes in) or the review every morning.
- 2If…The conditions on the record’s data: amount, customer, days overdue, status…
- 3ThenThe steps, in order: create a task, notify, send an email, change a field, wait…
#Rules
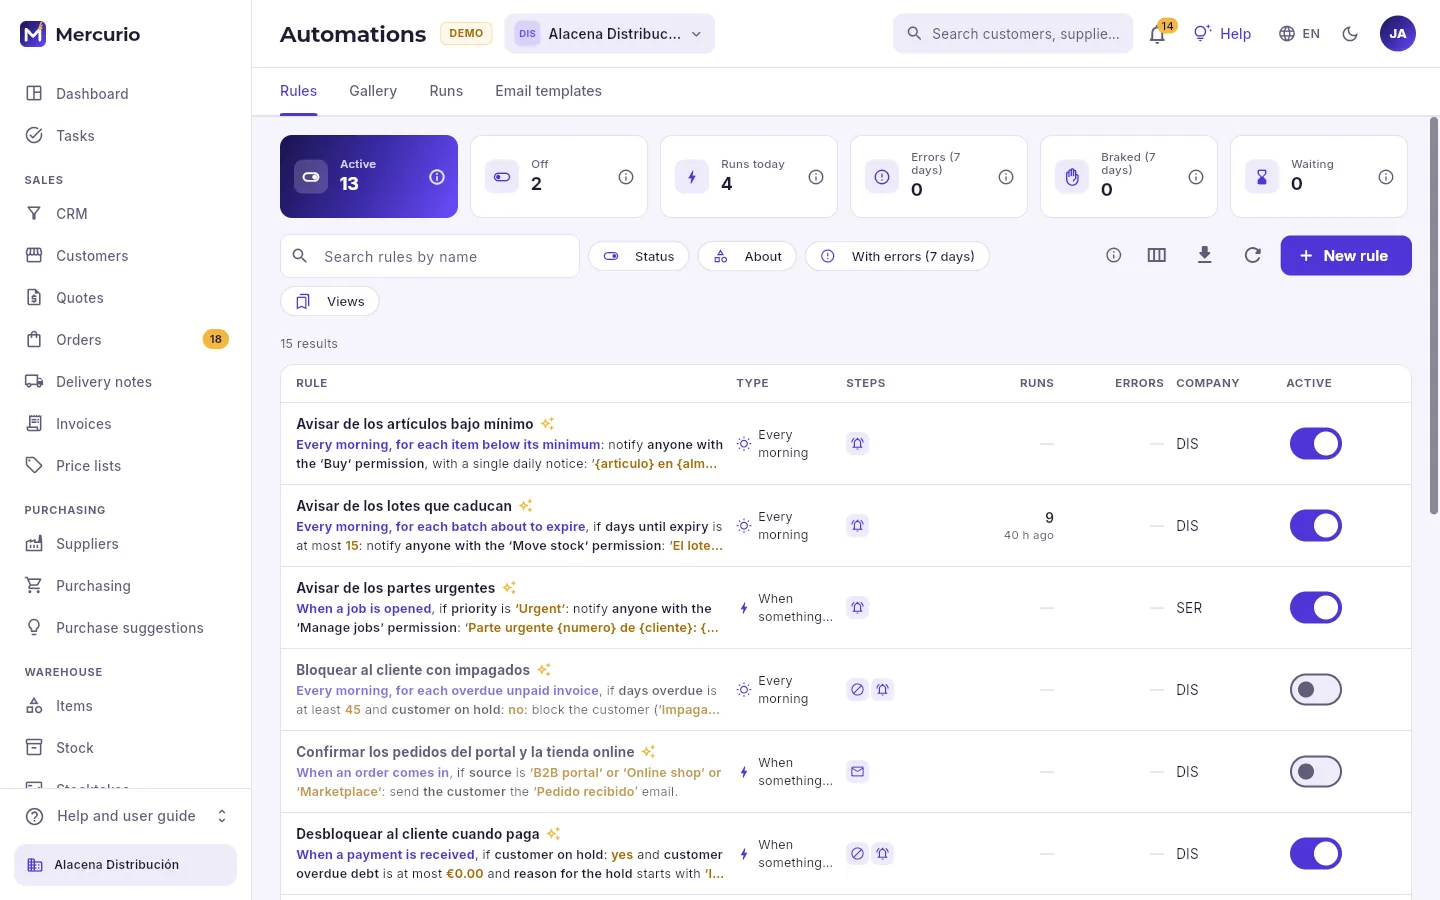 12345
- 1Active and switched-off rules, today’s runs, this week’s errors and brakes, and the steps waiting for their time.
- 2Search for a rule and filter by status, by what it watches (invoices, orders, customers…) or those that have had errors.
- 3Write a rule from scratch (or install one from the gallery).
- 4Each rule read as a sentence, with its type (when something happens or every morning), the icons of its steps, its runs and errors and its company. The gold ✦: it comes from the gallery.
- 5The switch turns it on or off.
#Inside a rule
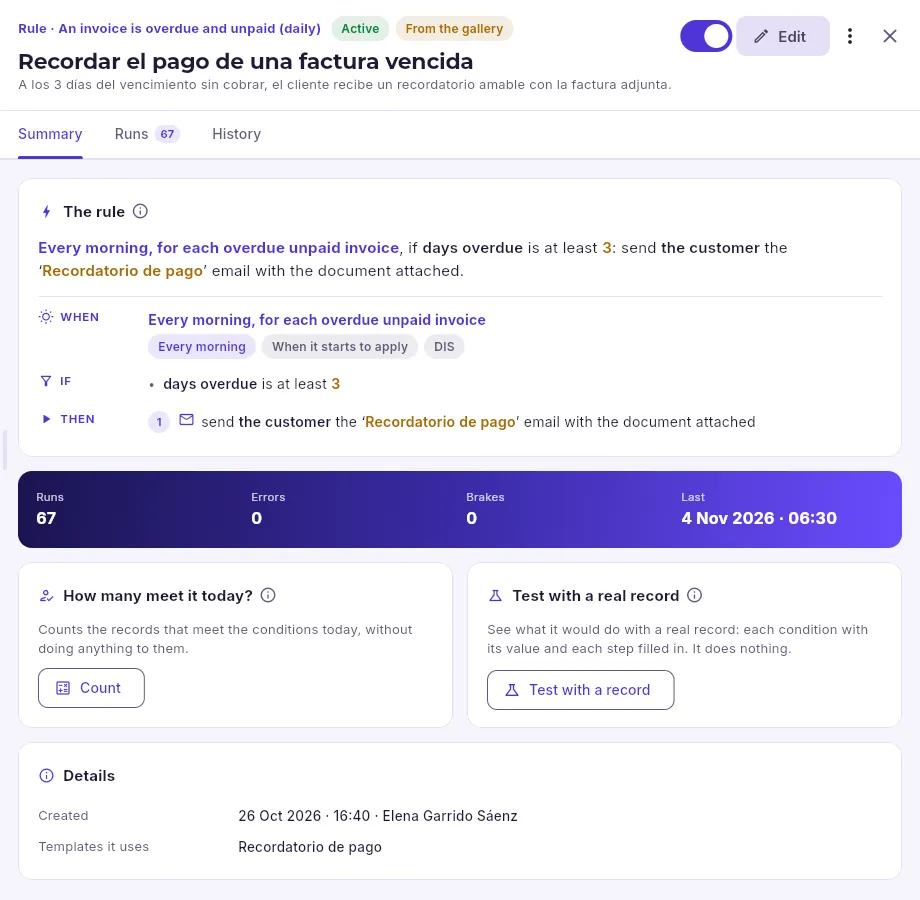 1234567
- 1What triggers it, whether it is active and whether it comes from the gallery; below, its name and description.
- 2Switch it on or off, Edit and, in the menu, duplicate, test or delete it.
- 3Its runs (what it has done, step by step) and the history of changes.
- 4The rule as a sentence and, below, its three parts: when, if and then.
- 5How many times it has acted, its errors, its brakes and the last one.
- 6How many meet it today? counts the records that meet the conditions today, without doing anything with them.
- 7Test with a real record: what it would do with a real one, without doing it.
#The editor
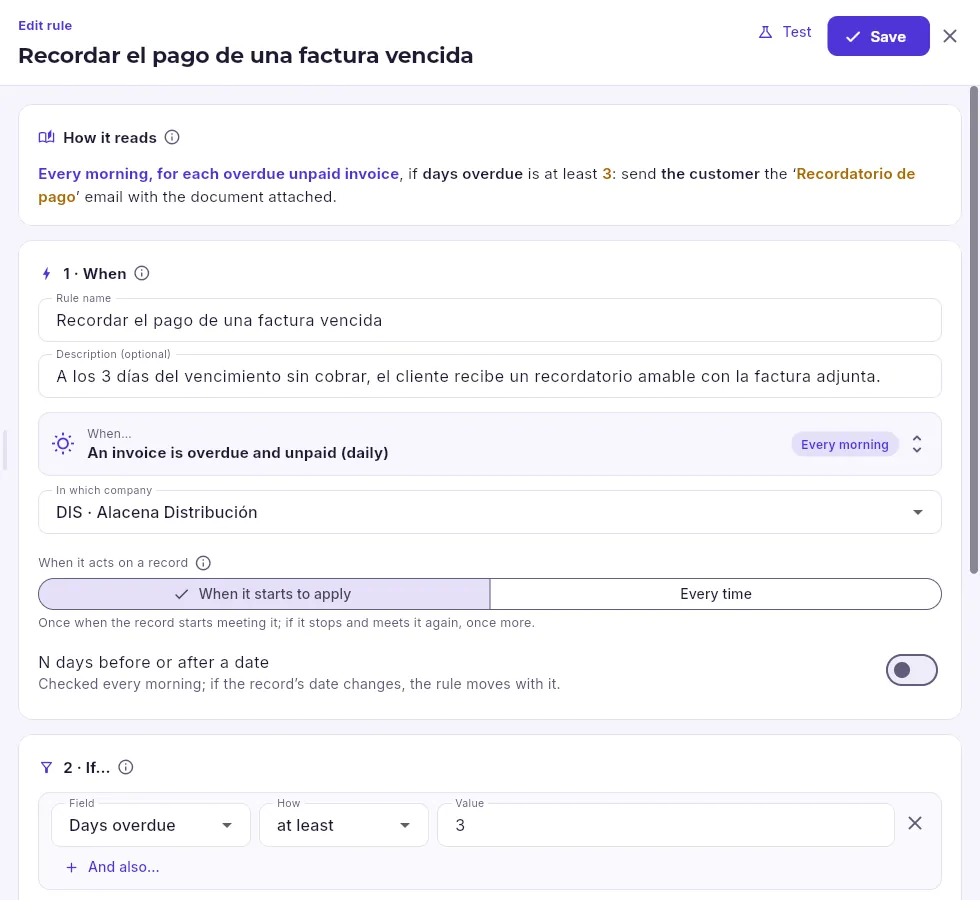 1234567
- 1How it reads: the rule’s sentence, which changes as you edit it.
- 2Its name and, if you like, what it is for.
- 3When: the event that triggers it, from a catalogue (with its type: when something happens or every morning).
- 4The company (or all of the account’s companies).
- 5Whether it acts when it starts being met or every time.
- 6Act some days before or after a date on the record.
- 7Save the changes.
 123456
- 1Each condition: a field of the record, how it is compared (is, contains, greater than, between, empty, changes, changes to…) and the value.
- 2And… adds another condition that must also be met.
- 3Or else… opens another block: it is enough for one of the blocks to be met.
- 4Each step, read as a sentence; the pencil changes it and you drag steps to reorder them.
- 5Add a step: choose what it does.
- 6Whether it is saved switched on or off.
 1
- 1The step types the rule’s event allows.
Steps are carried out in order, and each one can use placeholders with the record’s data (“{numero}”, “{cliente}”, “{total}”…), with their formatting (dates, amounts, options by name):
| Step | What it does |
|---|---|
| Create a task | A task linked to the record, with an owner (a person, a team, the record’s owner, the customer’s sales rep) and a deadline. |
| Apply a task template | Several tasks from a template, with their deadlines. |
| Notify | A notice in the bell of whoever you say. |
| Send an email | An email with a template and the record’s data (and the document attached, if you want). |
| Change a field | Change a field on the record (those that allow it). |
| Tag the customer | Add or remove a tag on the customer. |
| Put the customer on hold or release them | Block or unblock the customer for sales. |
| Create a document | Accepted quote → order, order → delivery note, recurring fee → invoice. |
| Call a webhook | Notify another system with the data. |
| Wait | Wait hours or days before carrying on. |
| Continue only if… | Carry on only if something is met; otherwise, stop. |
| Post to a channel | A message in a Google Chat space or a Teams channel. |
Only those that make sense for its event appear: “Tag the customer” needs a customer; “Create a document”, a document to convert.
#Signed webhooks
The Call a webhook step notifies another system (your website, your business software, a shop) with the record’s data: Mercurio makes a POST (or a PUT) to the address you type, with a JSON body (if you leave it empty, all the record’s data; otherwise, the text you write, with placeholders). It only calls over https to a public server, waits 10 seconds for the answer and, if it fails, tries again from the queue. In a demo account nothing is sent: it is simulated.
Every call is signed, so the receiver knows it comes from Mercurio and that nobody has changed it. The signature uses a secret: the rule’s, if it has its own, or the account’s. Without either, the webhook is not sent, and the run says so.
Open the rule and press Edit.
Expand its Call a webhook step: at the bottom, under Call signature, you can see which secret signs it and its fingerprint (12 characters that identify the secret without showing it).
Press Set its own secret (or Change the secret). Type one of 16 to 200 characters or press Generate one, then Copy to take it to the system that receives the webhooks.
Press Save. From then on the secret is never shown again: only its fingerprint.
#Testing a rule
Before switching a rule on (or after changing it), it is worth testing it. There are two tests, on the record and in the editor:
- How many meet it today? → Count: how many records meet the conditions today, with a sample.
- Test with a real record: you choose a real record and see whether it meets each condition, with its value, and what each step would do (the task with its owner and deadline, the notice, the email already filled in…). Mercurio does it all and undoes it at the end: nothing is left done. In the editor it works with the rule as it stands, without saving it.
 1234
- 1Which record?: those in today’s review (or the most recent ones), those that meet it first, with a search box.
- 2Whether the chosen record meets the conditions.
- 3And whether it has already acted on it: acting when it starts being met, it would not repeat.
- 4Below, each condition with its actual value and what each step would do.
Open the rule in Automations → Rules.
In How many meet it today?, click Count to see how many records it would affect today.
Click Test with a record and choose one from the list (or search for it).
Check each condition with its value and what each step would do: the email exactly as it would go out, the task with its owner and deadline.
#Switching a rule on
 123
- 1Only from now on: it will act on whatever happens from this moment.
- 2Or also apply it to the records that already meet it today (once per record; at most 200 at a time).
- 3Switch it on.
#Runs
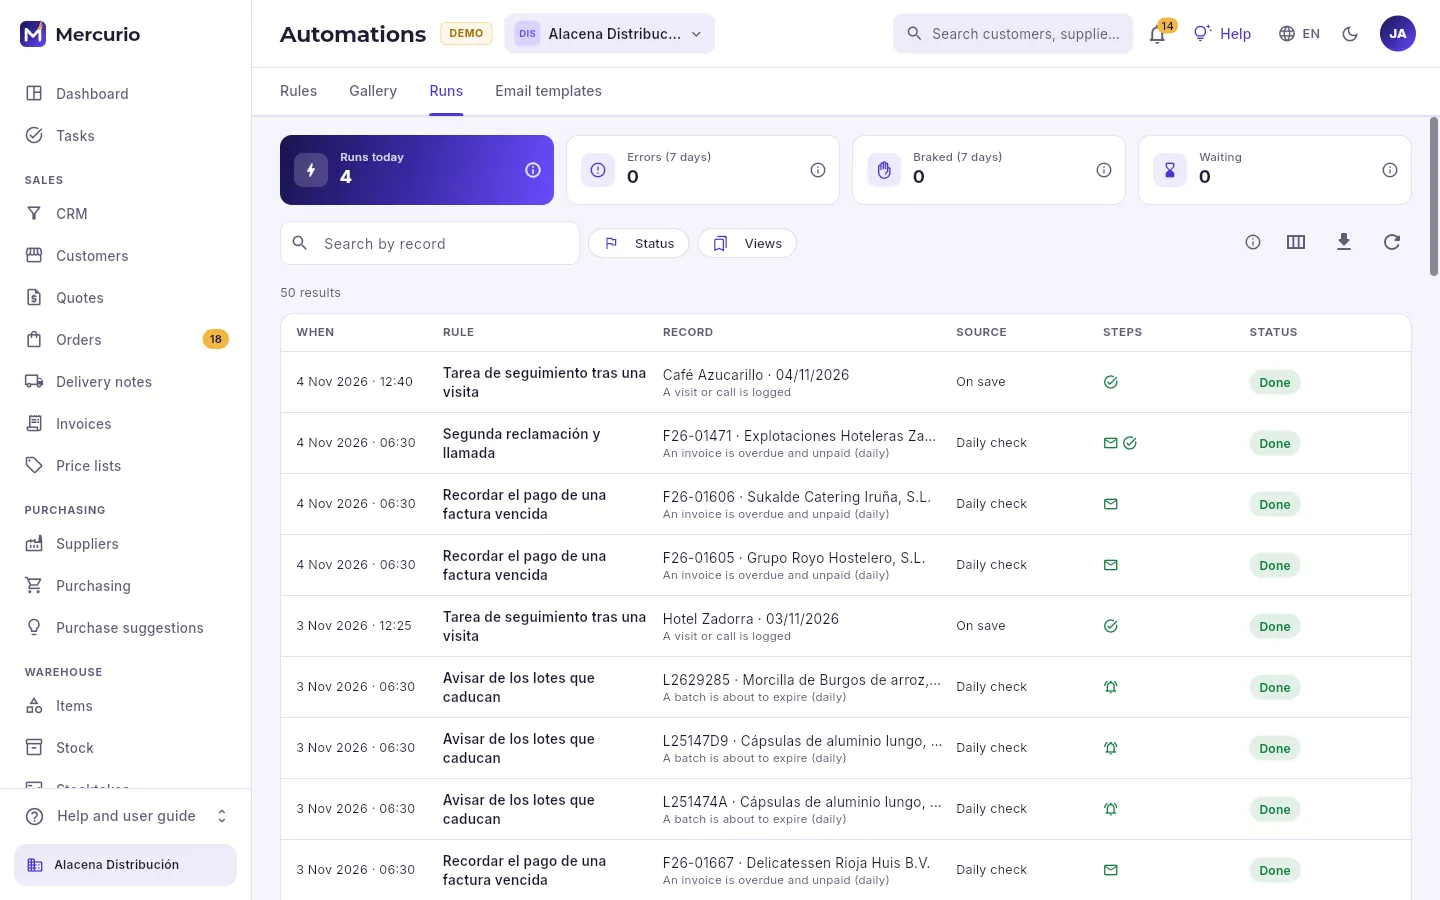 123
- 1Today’s runs, this week’s errors and brakes and the steps that are waiting.
- 2Search by record (the invoice, the customer…) and filter by status.
- 3Each run: when, which rule, on which record, why (on saving, the daily review, when applied to existing records…), the icons of its steps and how it ended.
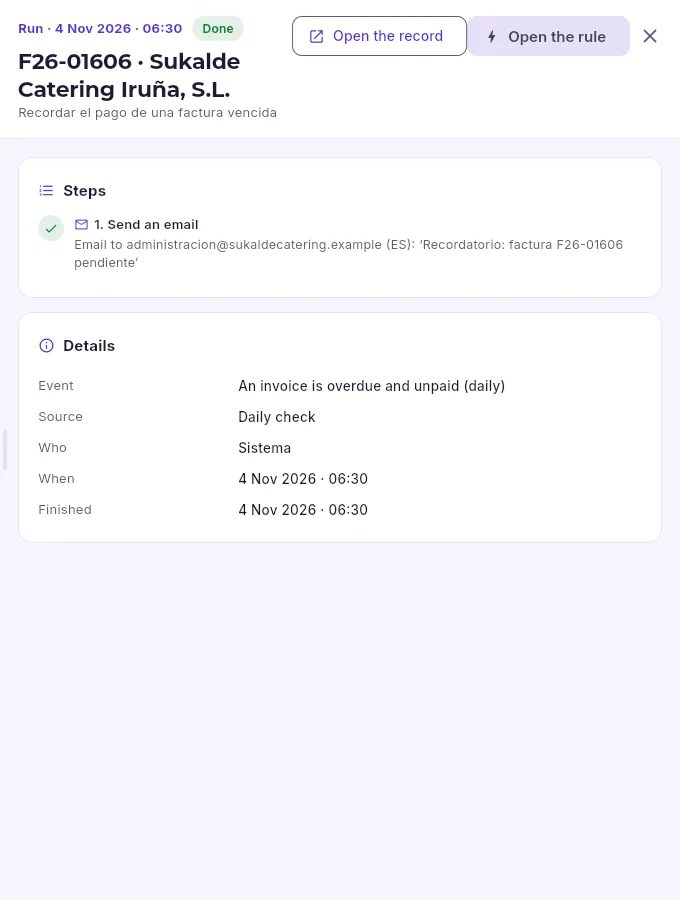 1234
- 1When it happened, how it ended, on which record and which rule.
- 2Go to the record or to the rule.
- 3Each step with its result: here, the email, who to and with which subject.
- 4The event, the source, who caused it and when it started and finished.
#The gallery
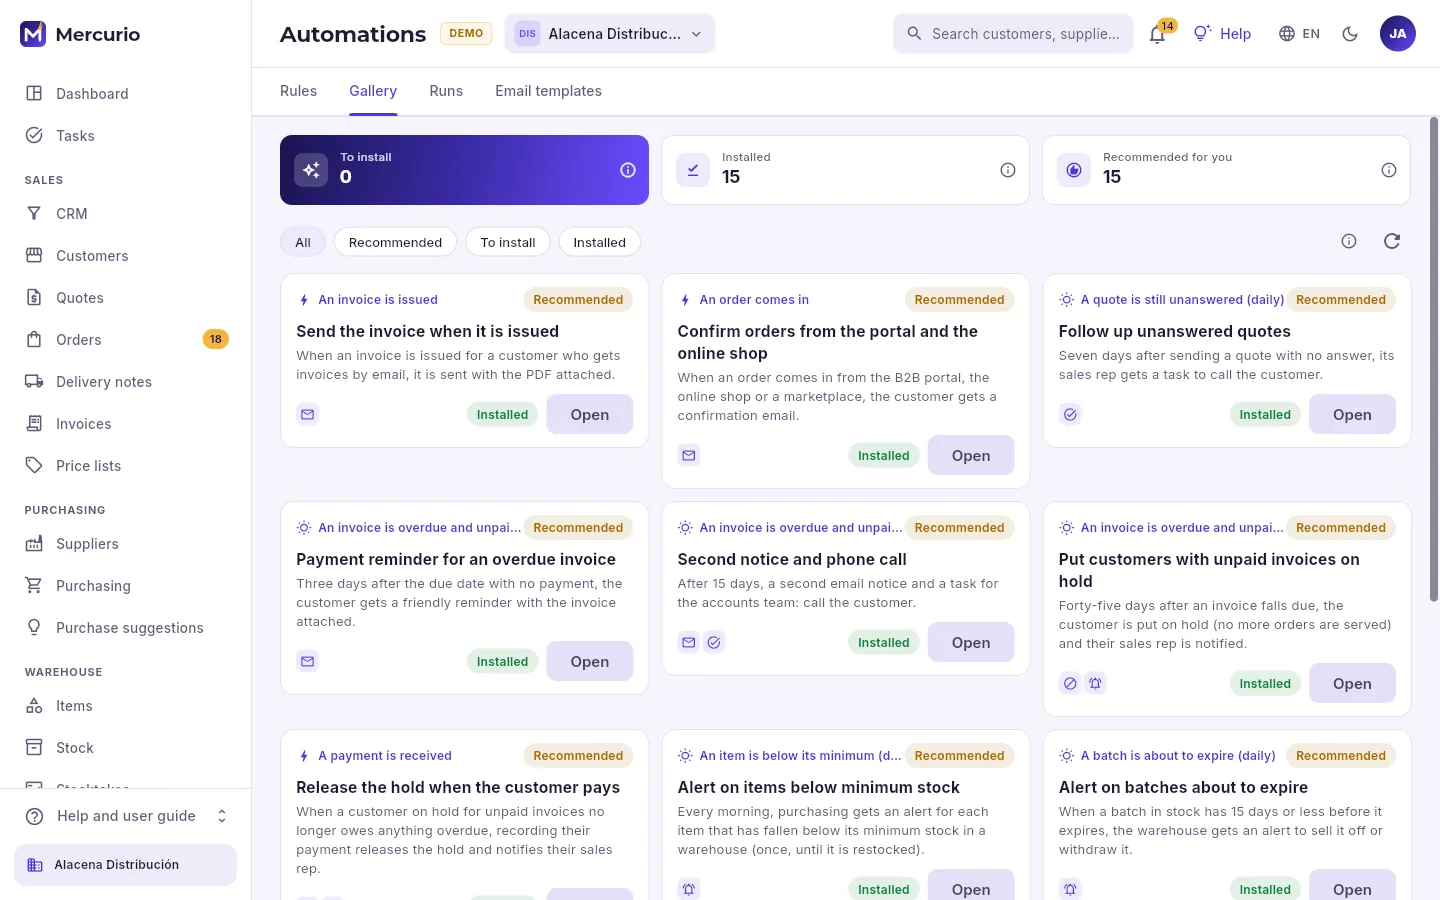 123
- 1How many are left to install, how many are installed and how many are recommended for your type of business.
- 2See all, the recommended ones, those still to install or the installed ones.
- 3Each standard rule: its event, its name, what it does and its steps. Install creates it switched off; Open, the one you already have.
The gallery brings rules designed for a distributor and a services company: send the invoice when it is issued, confirm orders from the portal and the online shop, chase quotes with no reply, chase overdue invoices in stages (reminder, second reminder with a call, and putting the customer on hold), release them when they pay, warn about items below minimum and batches about to expire, renew contracts that are ending, call customers who have not ordered when they usually do, send the proof of delivery and a follow-up task after each sales visit. Those that need a feature that is switched off say so on their card.
In Automations → Gallery, filter by Recommended or To install.
Read its card: what triggers it, what it does and its steps.
Click Install: it is created switched off (with its email template, if it uses one) and its record opens.
Test it with a real record and adjust whatever you like with Edit.
Switch it on with its switch and choose whether it also applies to what already meets it.
#Email templates
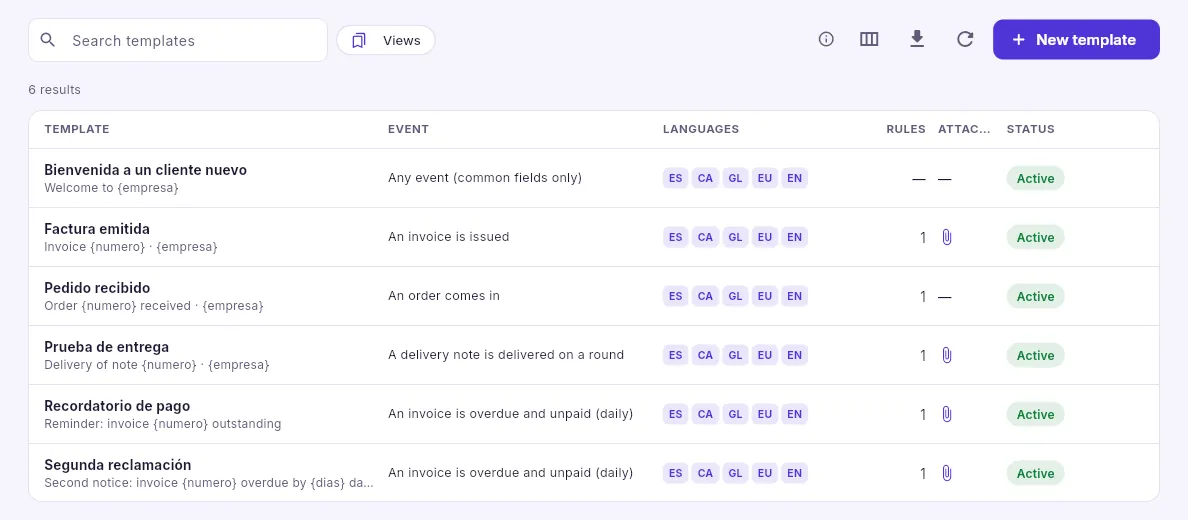 123
- 1Search for a template.
- 2Create an email template.
- 3Each template: its name and subject, the event it is for, the languages it is written in, how many rules use it, whether it attaches the document and whether it is active.
Each template is written in whichever languages you like: the email goes out in the recipient’s language (the one set for the customer’s documents). The subject and the body carry placeholders with the record’s data, and it can attach the document’s PDF.
Set-up
Set-up
The assistant that gets the account ready to work: what is missing, in order of importance, the features that suit your business and importing your data from other software.
Getting started is the assistant for starting to work with Mercurio. It is not a fixed list that you tick off by hand: what is missing is worked out by the database by looking at the account (whether the company has a tax ID, whether there is an invoice series, whether the payment methods are set up…), so a step counts as done as soon as it is done, whether from here or from anywhere else.
A new account comes straight here. After that you can come back whenever you like, from Getting started in the sidebar (only the administrator sees it) or from the notice bar.
- 1Sign-up30-day trial account with its administrator.
- 2Your businessThe type of business suggests the features.
- 3The stepsEssential, legal, for your features and optional.
- 4Your dataCustomers, suppliers, items, stock and prices from a CSV or an Excel file.
- 5Off you goThe account is ready; the optional parts, bit by bit.
#The steps
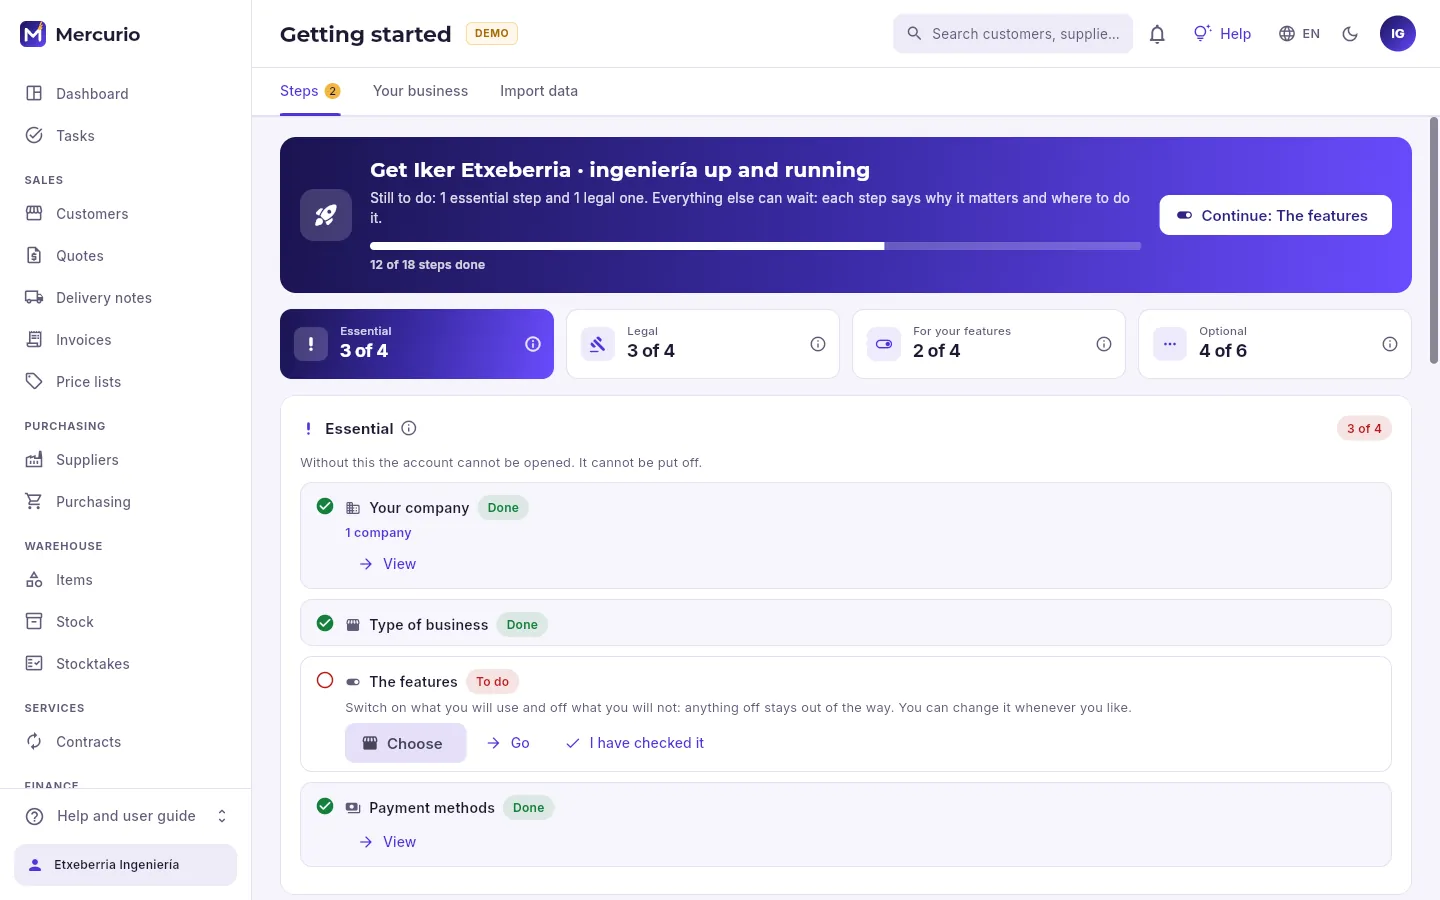 123456
- 1What is still to do among the essential and legal items, and the steps done out of the total.
- 2Takes you to the next step that is missing.
- 3The four levels, with what is done in each: essential, legal, for your features and optional.
- 4The essential items: without them the account cannot be opened, and they cannot be put off.
- 5A pending step: it says what is needed and takes you to where it is done. If checking it is enough, I have checked it.
- 6A step that is done, with what there is (View takes you to it).
The steps come in four levels, in order of importance:
| Level | What it is | Examples |
|---|---|---|
| Essential | Without it you cannot work. It cannot be put off. | Your company, the type of business, the features, the payment methods. |
| Legal | What the law requires in order to invoice. | The data processing agreement, each company’s tax system, the companies register, the invoice series. |
| For your features | Only appears if you have switched on the feature that needs it. | Bank accounts (for SEPA batches), the financial year (for accounting), Google Workspace or Microsoft 365. |
| Optional | Your starting data and the finishing touches: it can be done bit by bit. | Customers, suppliers, items, opening stock, your team, the logo. |
 123
- 1A pending legal step: check the tax system of each company (VeriFactu, SII or TicketBAI) and mark it as checked.
- 2Later puts it off until a date, with its reason.
- 3The steps for your features: “For: SEPA batches” says which feature requires it.
 12
- 1Until when: a week, a month, three months or the date you choose.
- 2Why it is waiting, so that anyone on the team knows.
A postponed step stops showing in the bar until that date and stays on the list with its reason. Essential items cannot be put off: the database will not let the account be opened without them. Legal items can be left until later, but a record is kept of what was missing, who left it and when.
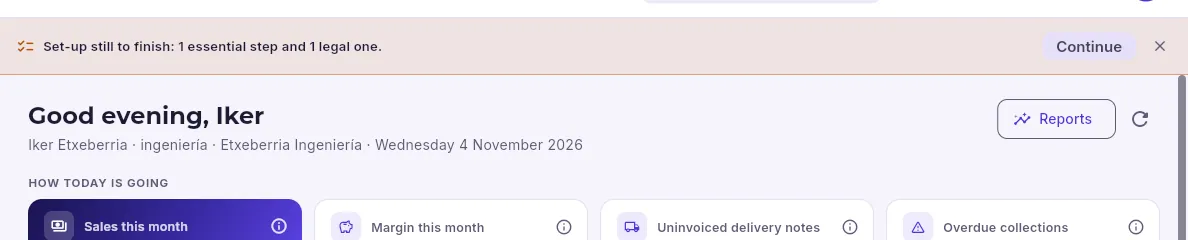 12
- 1The notice bar: the essential and legal items that are missing, in any section. Only the administrator sees it.
- 2Goes back to the assistant. The cross closes it until the next time you sign in.
#Your business and your features
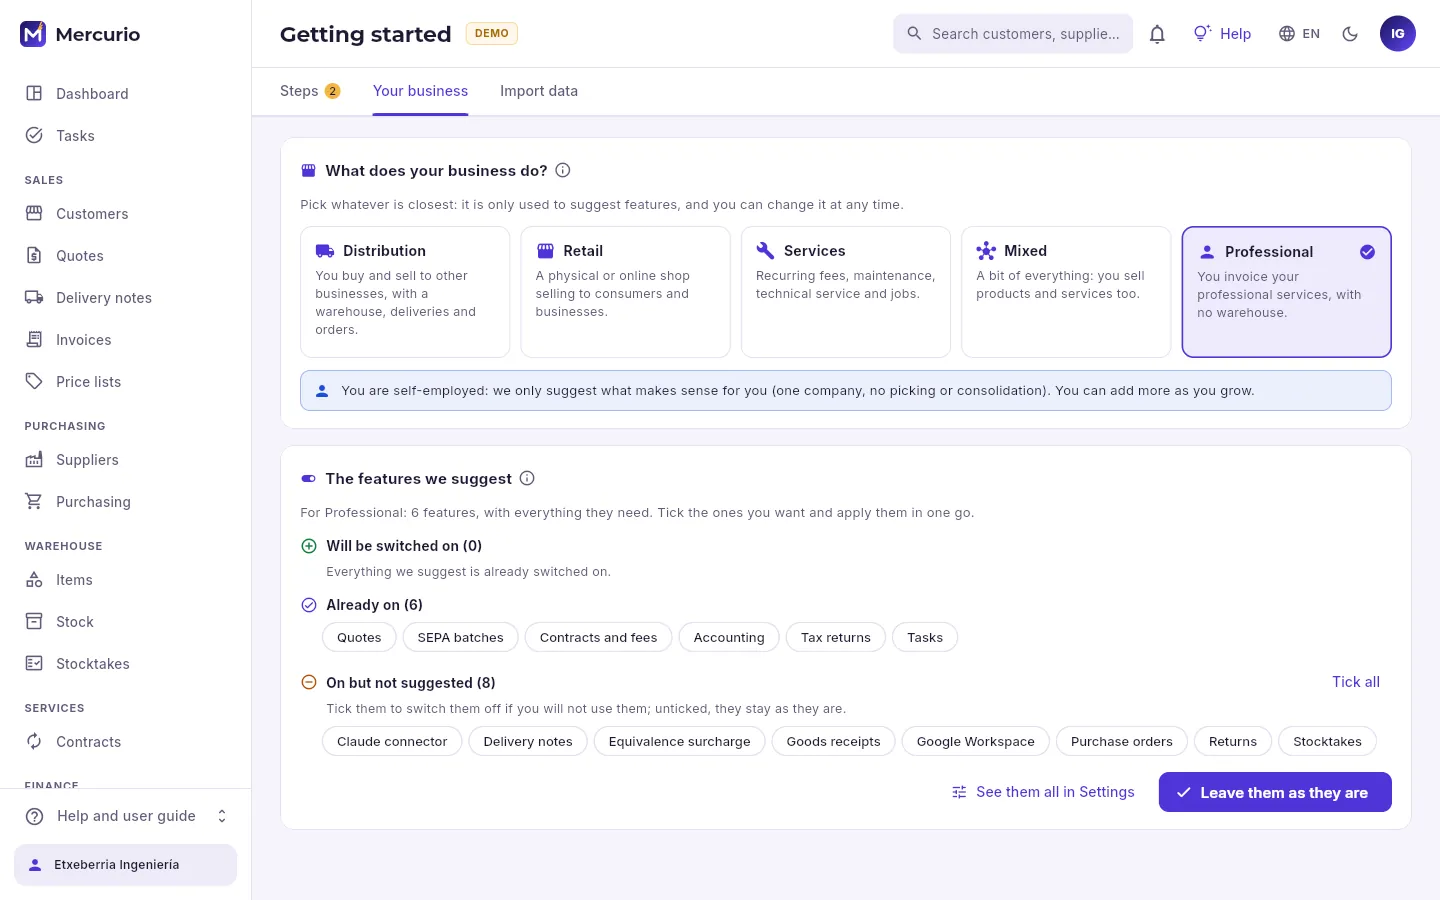 123456
- 1What your business does: distribution, retail, services, mixed or professional. It is only used to suggest features to you.
- 2With your legal form: as a sole trader, only what makes sense for you is suggested (one company, no picking or consolidation).
- 3What will be switched on when you apply the suggestion…
- 4…what you already have switched on…
- 5…and what is switched on but does not fit: tick it to switch it off if you are not going to use it.
- 6Applies the suggestion (or leaves things as they are) and marks the “The features” step as checked.
The suggestion comes from the type of business, your company’s legal form and what your plan allows. Changing the type does not switch anything on or off: it only changes the suggestion, which you apply yourself, in one go. Applying it follows the same rules as in Settings → Features: whatever is switched on brings along what it needs, and whatever cannot be switched off because it already has data stays on, with the reason.
#Importing your data
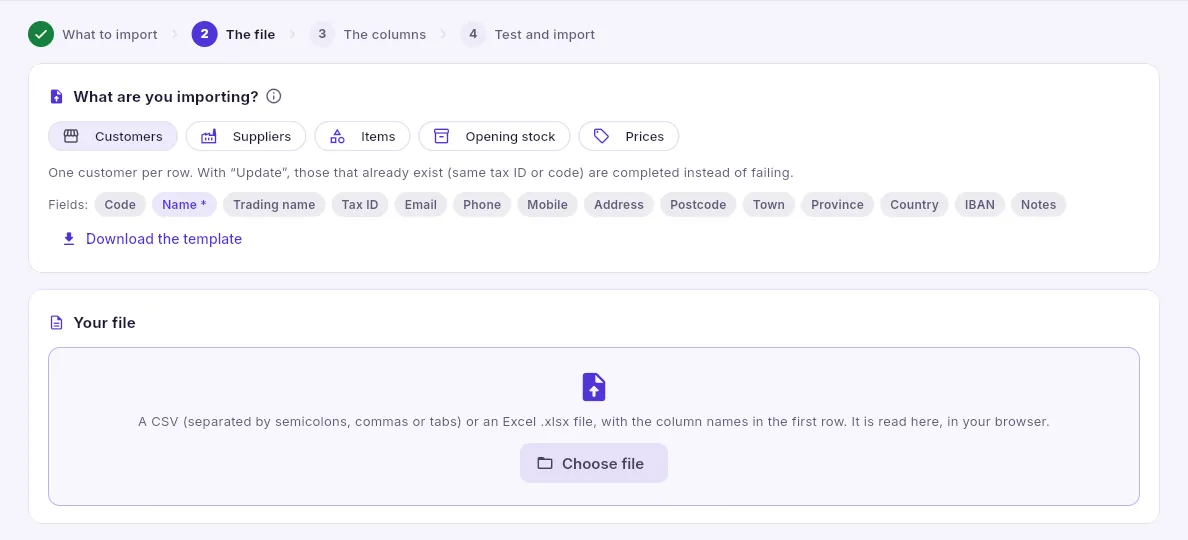 1234
- 1Four steps: what to import, the file, the columns and test and import.
- 2Customers, suppliers, items, opening stock or prices.
- 3The fields it accepts (those with an asterisk are required) and a template to fill in.
- 4A CSV or an Excel .xlsx file with the column names in the first row. It is read in your browser.
In Getting started → Import data, choose what you are importing (start with customers and items; stock and prices afterwards).
Choose your file (or download the template and fill it in).
In The columns, check which column in your file goes to each field: it is suggested automatically from its name, and below you see the first rows as they will be saved.
Click Test run: each row goes through the same checks as if you typed it in by hand (tax ID, IBAN, VAT, duplicates…), without saving anything.
Fix whatever fails in your file (you can download the errors) and run the test again; when it is as you want it, Import.
#Self-service sign-up
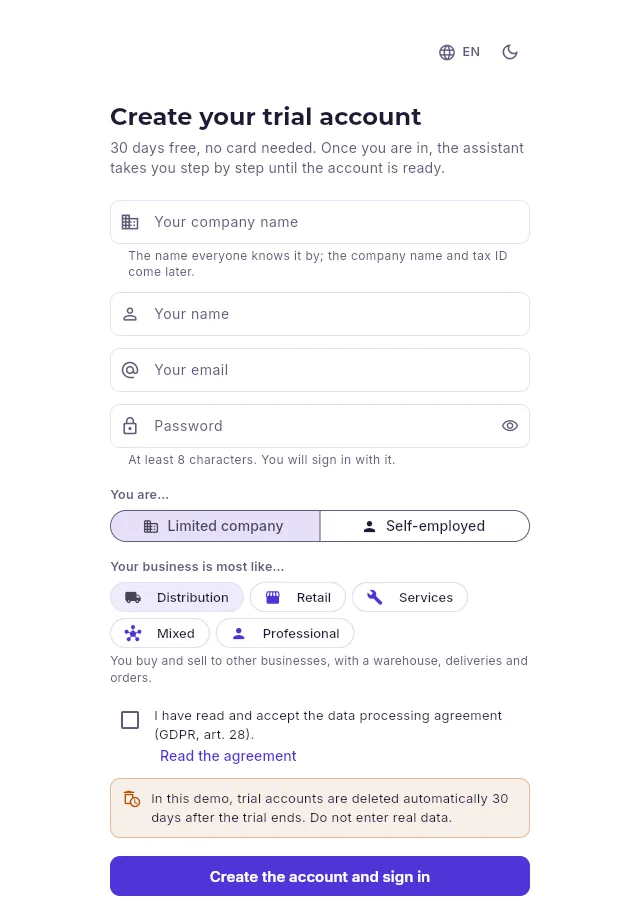 123456
- 1Your company’s name (the company name and tax ID come later, in the assistant).
- 2Your name, your email and your password: you will be the account administrator.
- 3Whether you are a company or a sole trader…
- 4…and what your business is most like: this is used to suggest the features.
- 5The data processing agreement (GDPR), which must be accepted.
- 6Creates the trial account and takes you into the assistant.
From the sign-in screen, Create your trial account sets up a 30-day trial account, with no card needed and everything in its plan. Whoever creates it is its administrator and goes straight to Getting started. When the trial ends, the plan that fits best is suggested; nothing is charged unless you ask for it.
Set-up
Settings
What shapes the account: its companies, the features switched on, how each document is numbered, taxes, payment methods, banks, warehouses, external connections, custom fields and the change log.
Settings is Mercurio’s back office: this is where you decide which companies the account handles, which parts of the program are used, how each document is numbered and which taxes, payment methods and banks you work with. Only the account administrator sees it, and they have no profiles: they see everything. It is organised in tabs, from the most general (the account) to the most specific (custom fields and the audit log).
Whatever belongs to the whole account (features, taxes, payment methods, custom fields) applies to every company; whatever belongs to one company (its series, its banks, its warehouses) is seen and changed with that company selected at the top, and the screen reminds you of this with a notice strip.
#The account
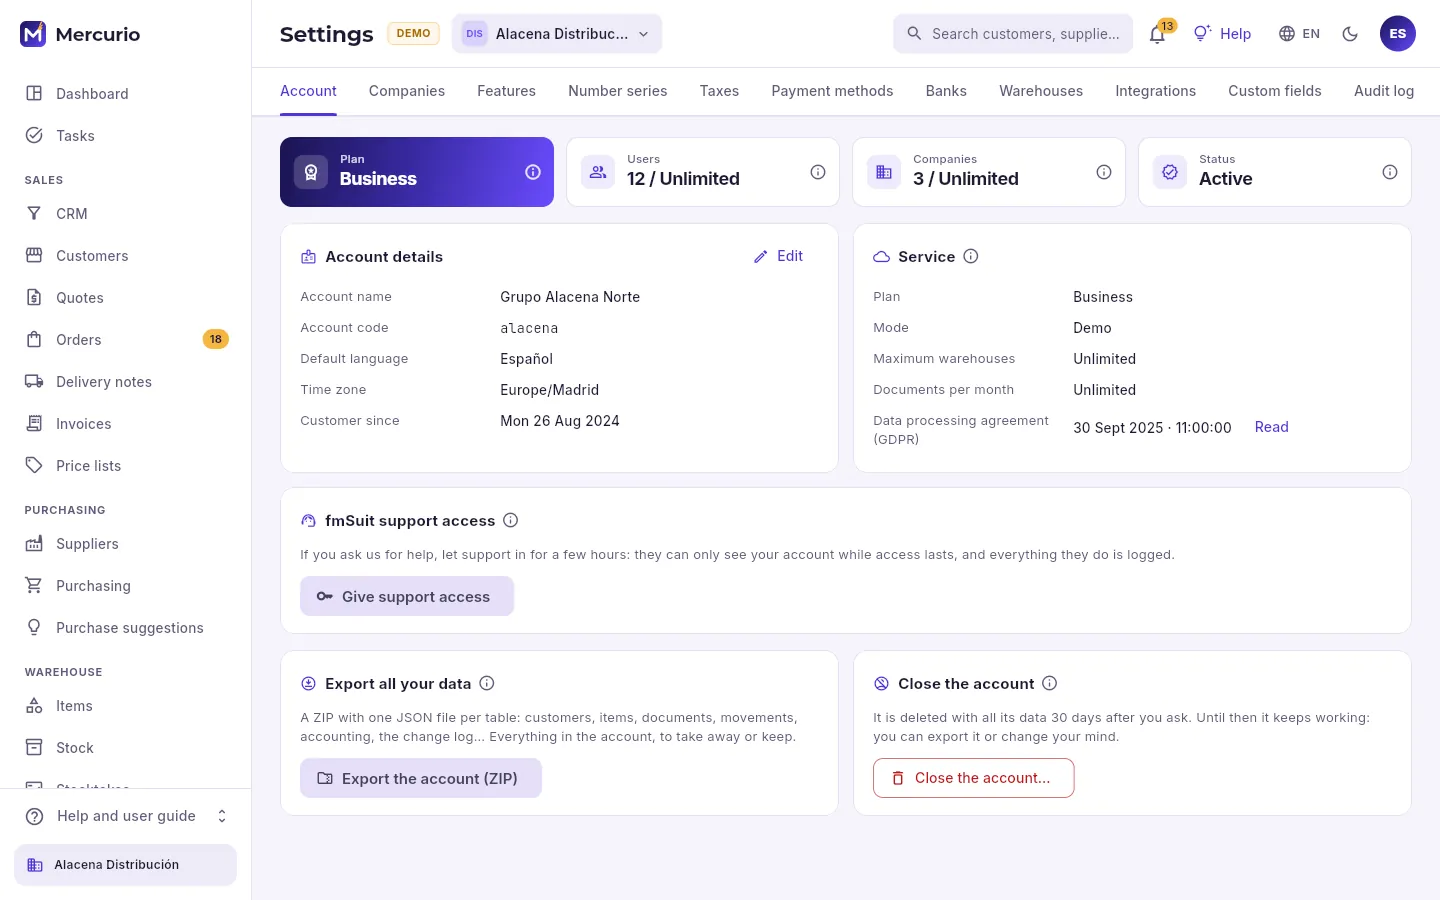 123456
- 1The plan you have signed up for, the users and companies you have against what it allows, and the account status (on trial, active, suspended or closed).
- 2The account name, its code (used to sign in by anyone without their own email), the default language and the time zone. Edit changes them.
- 3The service terms: plan, mode, limits and the date the data processing agreement (GDPR) was accepted.
- 4Lets support in for a few hours to help you. Without this permission they cannot see anything in your account.
- 5All your data in a ZIP, one table per file: to take it with you or keep it safe.
- 6Request closure: everything is deleted 30 days later and, until then, it can be cancelled.
#The companies
An account can handle several companies: they share customers, suppliers and items, and each one has its own warehouses, series, documents, treasury, accounting and taxes. The one you choose at the top is the one you are working with: what you see and what you create belongs to it.
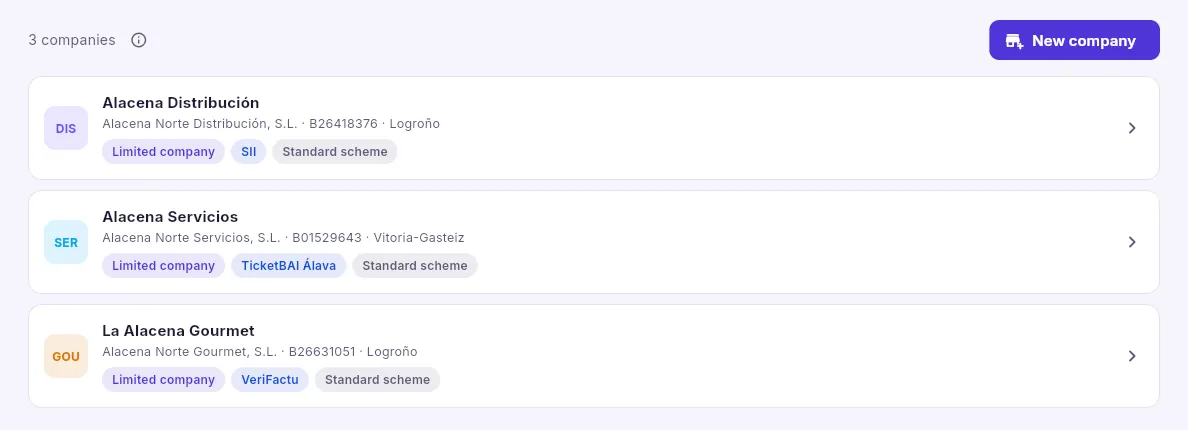 12
- 1Add another company (the plan limits how many there can be).
- 2Each company with its company name, tax ID, legal form, tax reporting system (SII, TicketBAI, VeriFactu) and VAT scheme. Click it to open its record.
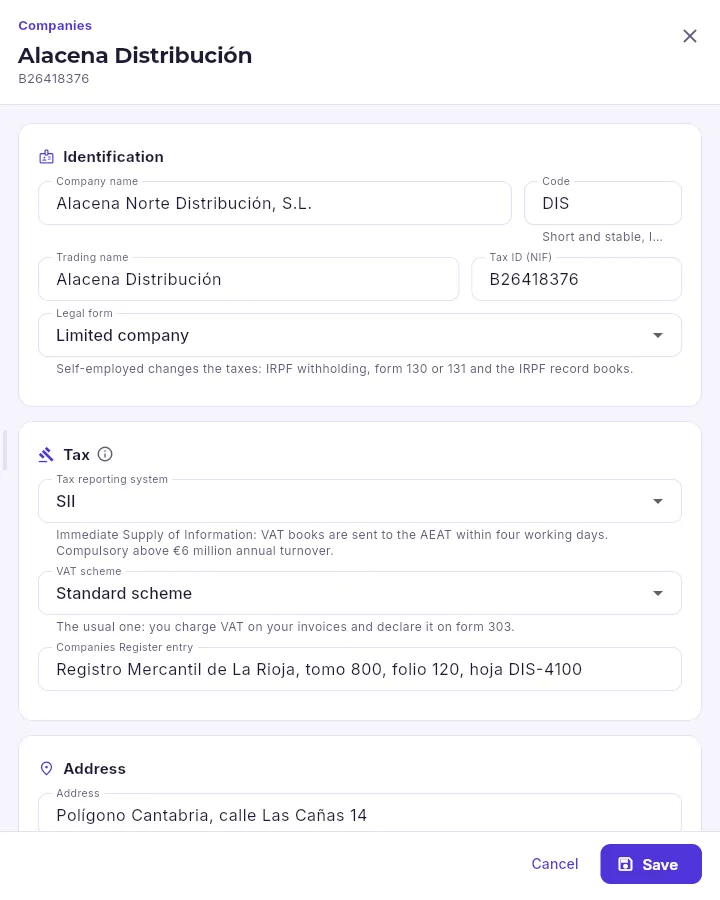 123
- 1Company name, short code, trading name, tax ID and legal form (company or sole trader).
- 2The tax reporting system and the VAT scheme: they decide how each invoice is recorded with the tax authority.
- 3Saves the changes. Further down are its address and its documents: the language they go out in, their colour and the month its financial year starts.
#The features
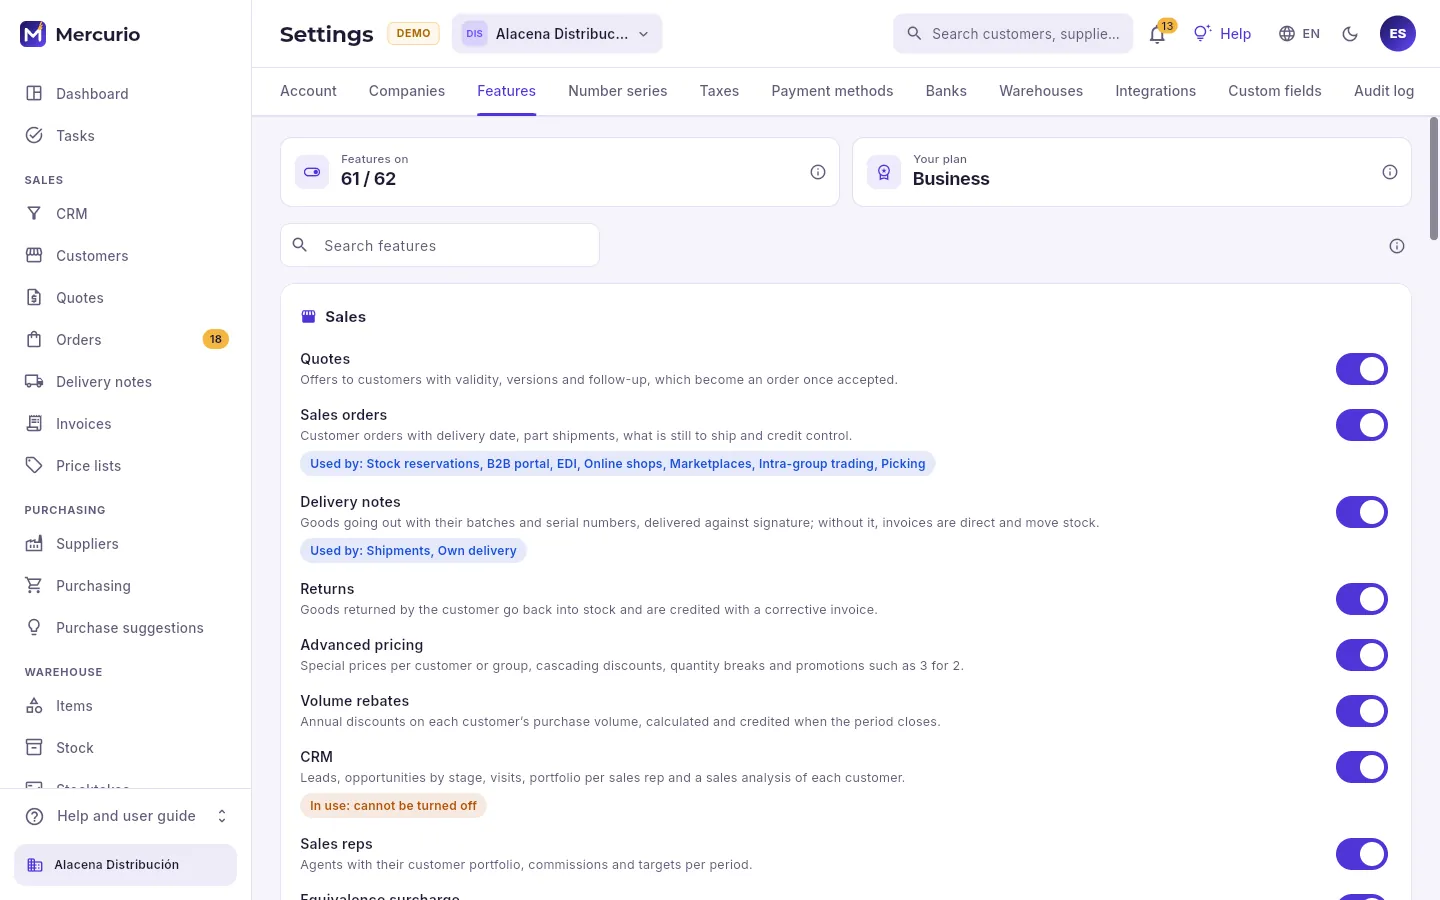 123456
- 1How many features you have switched on out of all the ones Mercurio has.
- 2Your plan: it lets you switch on its features and those of lower plans.
- 3Search for a feature by its name or by what it does.
- 4Features are arranged in groups: sales, purchasing, warehouse, logistics, planning, services, finance, accounting, B2B, integrations and system.
- 5Each feature with what it does and its switch. Underneath, in blue, who uses it: the features switched on that need it.
- 6If it already has data or another feature needs it, it cannot be switched off, and the reason is given.
Each capability in Mercurio is a feature that is switched on or off for the whole account: quotes, batches, picking, contracts, the B2B portal, the Claude connector… Switching on only what you use makes the application clearer: each person sees fewer sections and fewer fields.
- Switching on a feature also switches on the ones it needs (expiry dates need batches; transfers need multiple warehouses).
- Switching off deletes nothing: the feature is no longer shown and the database rejects anything belonging to it, but its data is kept for when you switch it on again. It cannot be switched off if another feature that is on depends on it or if it would leave data half-finished.
- The plan limits which ones can be switched on: those from a higher plan show “From the … plan”. Google Workspace and Microsoft 365 are mutually exclusive: one or the other.
- Changes apply to everyone from their next request, without leaving the application.
In Settings → Features, type its name (or what it does) in Search features.
Read its description and what it says underneath: who uses it, what it needs or whether it is in use.
Click its switch. If it needs others, they are switched on with it; if it cannot be switched off, the notice gives the reason.
#Number series
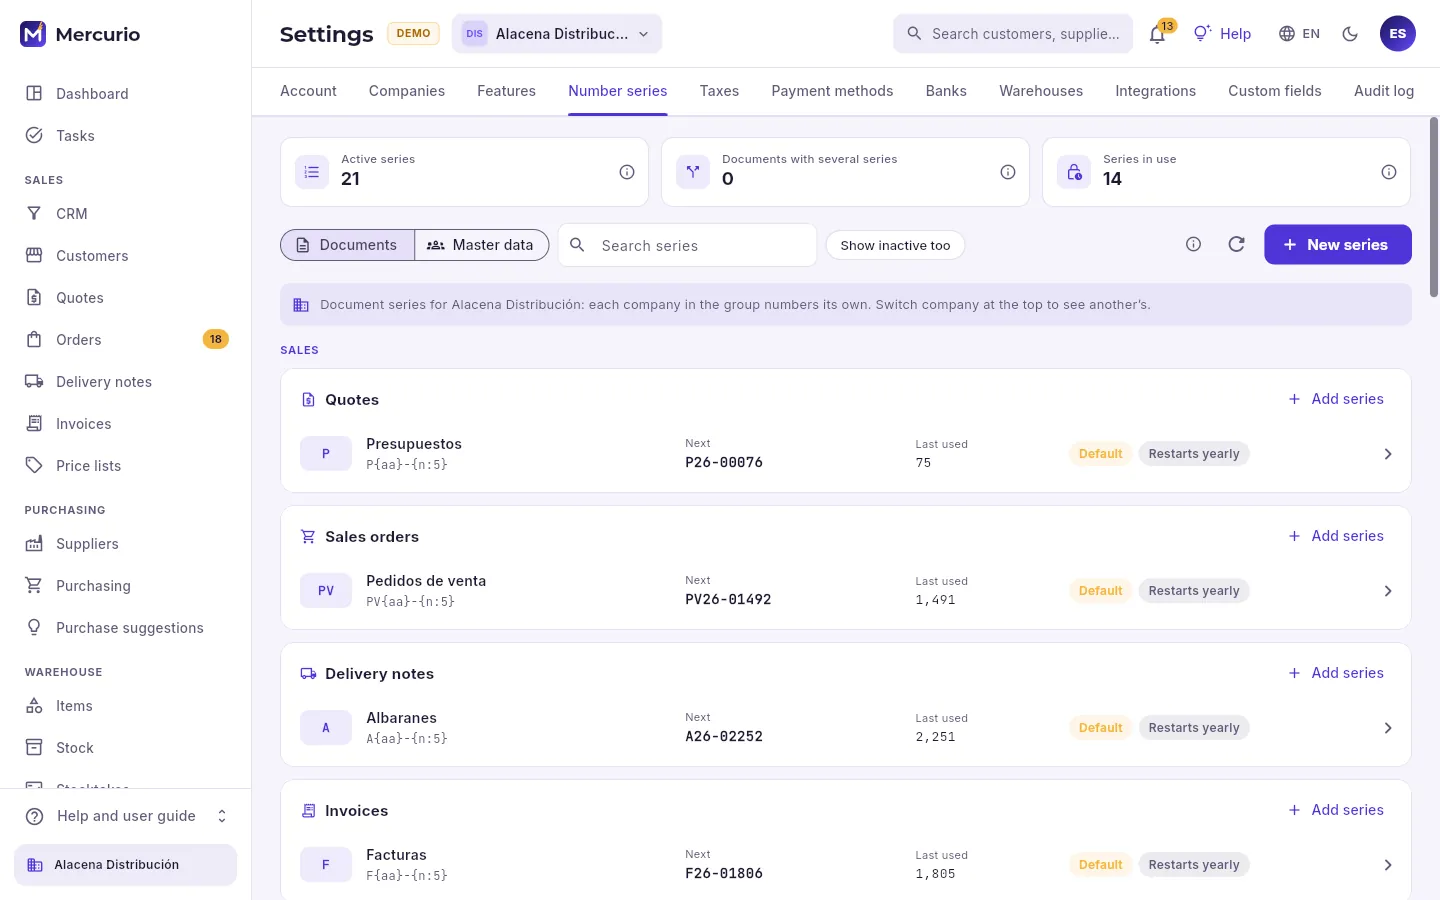 123456
- 1The active series, how many documents have several series and how many have already numbered something.
- 2Those for the selected company’s documents or those for the account’s master data (customers, suppliers, items, tasks…).
- 3Search for a series and also see deactivated ones.
- 4Each company in the group numbers its own documents: these are the ones for the company selected at the top.
- 5Each document with its series: the format, the next number, the last one used, which one is the default and whether it restarts at 1 every year. Add series adds another one.
- 6Create a series for any document.
A series is a numbering sequence of its own: F26-00001, F26-00002… Each document (quote, order, delivery note, invoice, corrective invoice, purchase order…) can have several series: one for the online shop, one for exports, one for the counter. One is the default, the one proposed when you create a document; the others are chosen in the document itself.
The number is assigned on issue, with no gaps and in date order: drafts have no number. Once the series has numbered something, its format and its yearly restart can no longer change (so no number is ever repeated or changes its appearance); its name, whether it is the default and whether it is active can.
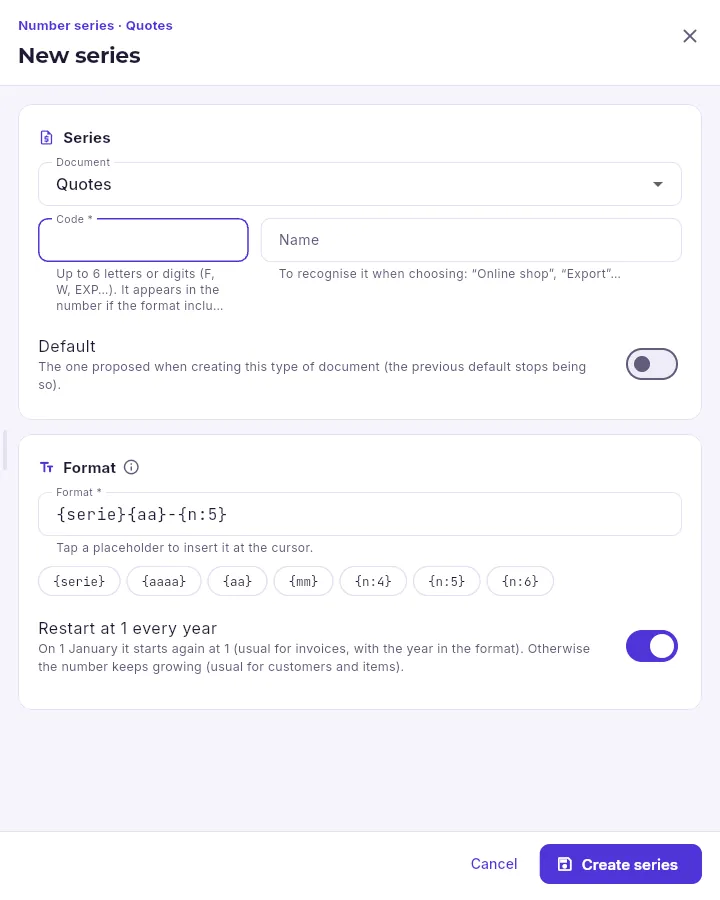 123456
- 1The document it will number.
- 2Its code (F, W, EXP…), which goes in the number, and a name to recognise it when choosing it.
- 3Whether it will be the one proposed when creating that document (the previous one stops being the default).
- 4How the number is written: click a placeholder ({serie}, {aaaa}, {aa}, {mm}, {n:5}…) to insert it at the cursor.
- 5Whether it starts again at 1 on 1 January (normal for invoices, with the year in the format).
- 6Creates the series.
In Settings → Number series, with the company selected at the top, click New series (or Add series on its document’s card).
Choose the document, type its code and a name (“Online shop”).
Check the format and whether it restarts at 1 every year; tick Default only if you want it to be the one proposed.
Click Create series.
#Taxes, payment methods and banks
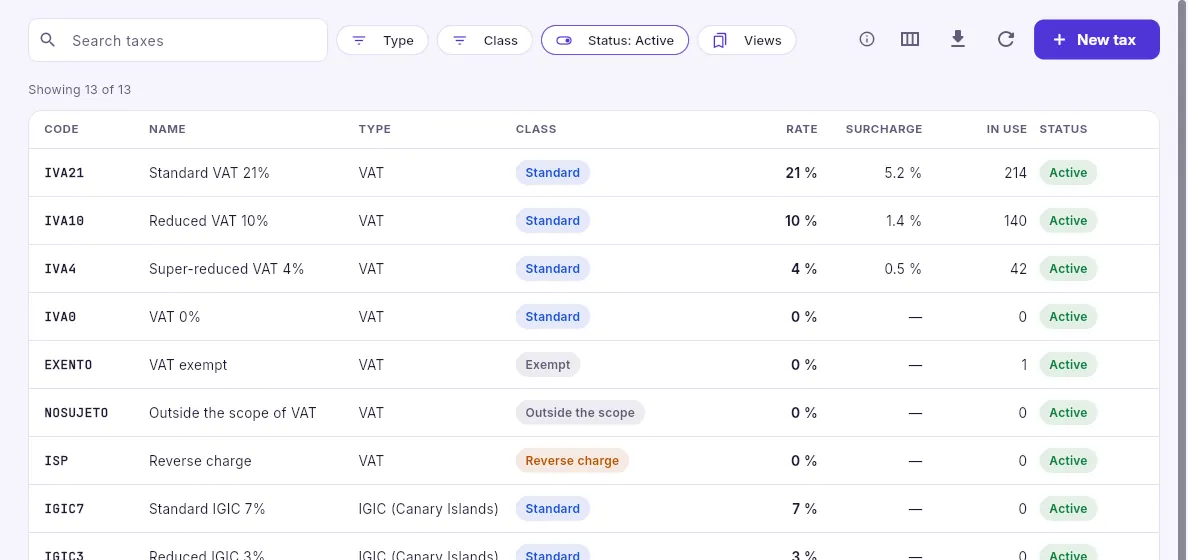 1234
- 1Search and filter by type (VAT, IGIC, IPSI, withholding), by class and by status.
- 2Add another tax.
- 3Each tax with its code, its rate, its equivalence surcharge and how many items and families use it. Click it to see its record with its ledger accounts.
- 4The class says how it is treated: standard, exempt, outside the scope or reverse charge.
Taxes belong to the whole account: VAT, the Canary Islands’ IGIC, Ceuta and Melilla’s IPSI and IRPF withholdings. Each item and each family carries its own, and the document changes it depending on the transaction: an intra-EU sale is exempt and a customer under the equivalence surcharge scheme adds their surcharge.
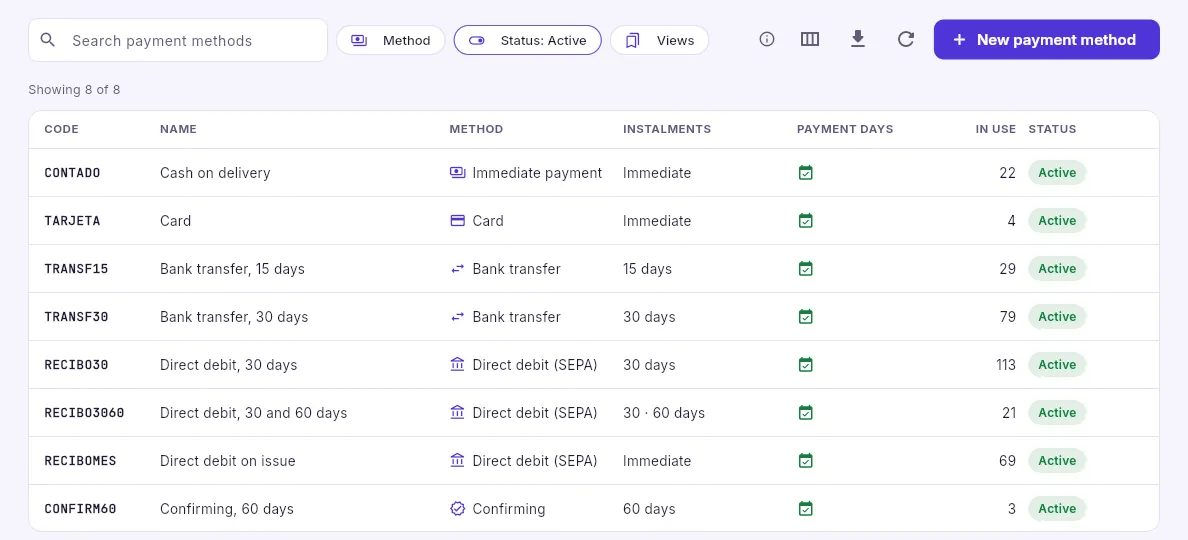 12
- 1Each payment method with its means of payment (bank transfer, direct debit, card, confirming…), its instalments and how many customers and suppliers have it.
- 2Create another one.
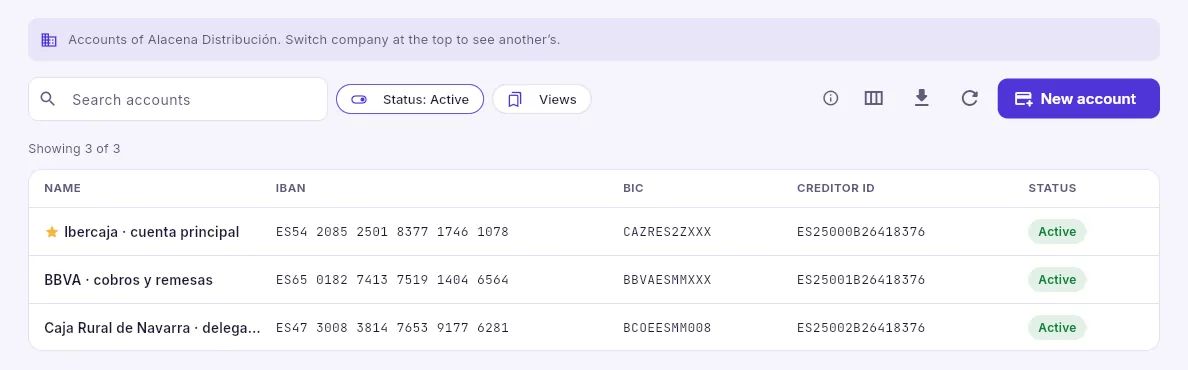 123
- 1The accounts belong to the company selected at the top.
- 2Each account with its IBAN, its BIC and its SEPA creditor identifier; the star marks the default one.
- 3Add an account.
When an invoice is issued, its due dates come from its payment method: each instalment falls due a set number of days after the invoice date and takes its percentage of the total (“30 · 60 days” with 50% and 50% means two instalments at 30 and 60 days); if the customer has fixed payment days, they are moved to those. Bank accounts belong to each company: the default one appears on invoices and in batches, unless the customer has another.
#Warehouses and locations
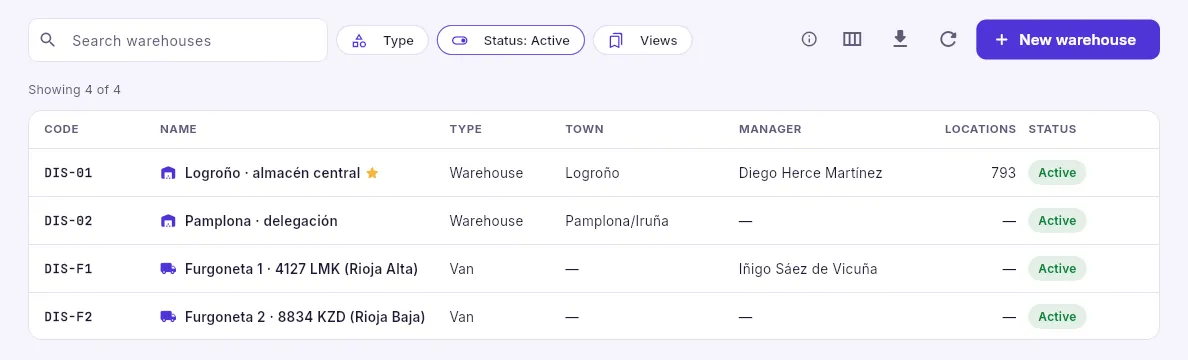 123
- 1Filter by type (warehouse, shop, van, consignment stock) and status.
- 2Each warehouse of the selected company, with its manager and its locations. The star marks the default one.
- 3Add another warehouse.
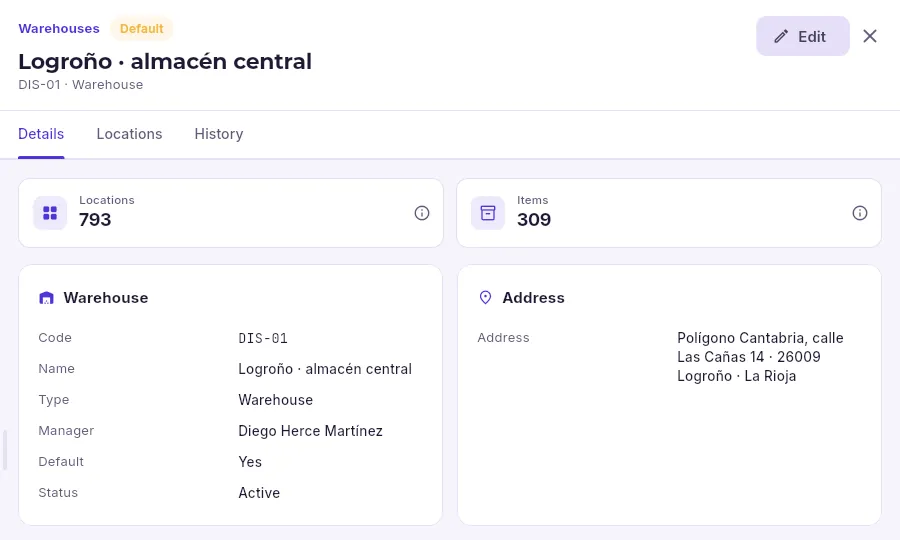 123
- 1The record opens read-only: Edit to change it.
- 2Its details, its locations (generated by ranges: aisle, rack, level and slot) and its history.
- 3How many active locations it has and how many different items it stores.
Each warehouse has its own stock. With the Multiple warehouses feature a company can have warehouses, shops, van-sales vans and consignment stock at customers’ premises; without it, only one. With Locations, each slot in the warehouse has its code (A-03-2-B), its type (picking, reserve, goods-in, dispatch, quarantine, cold storage, returns) and its walk sequence, which is the one picking follows.
#Integrations
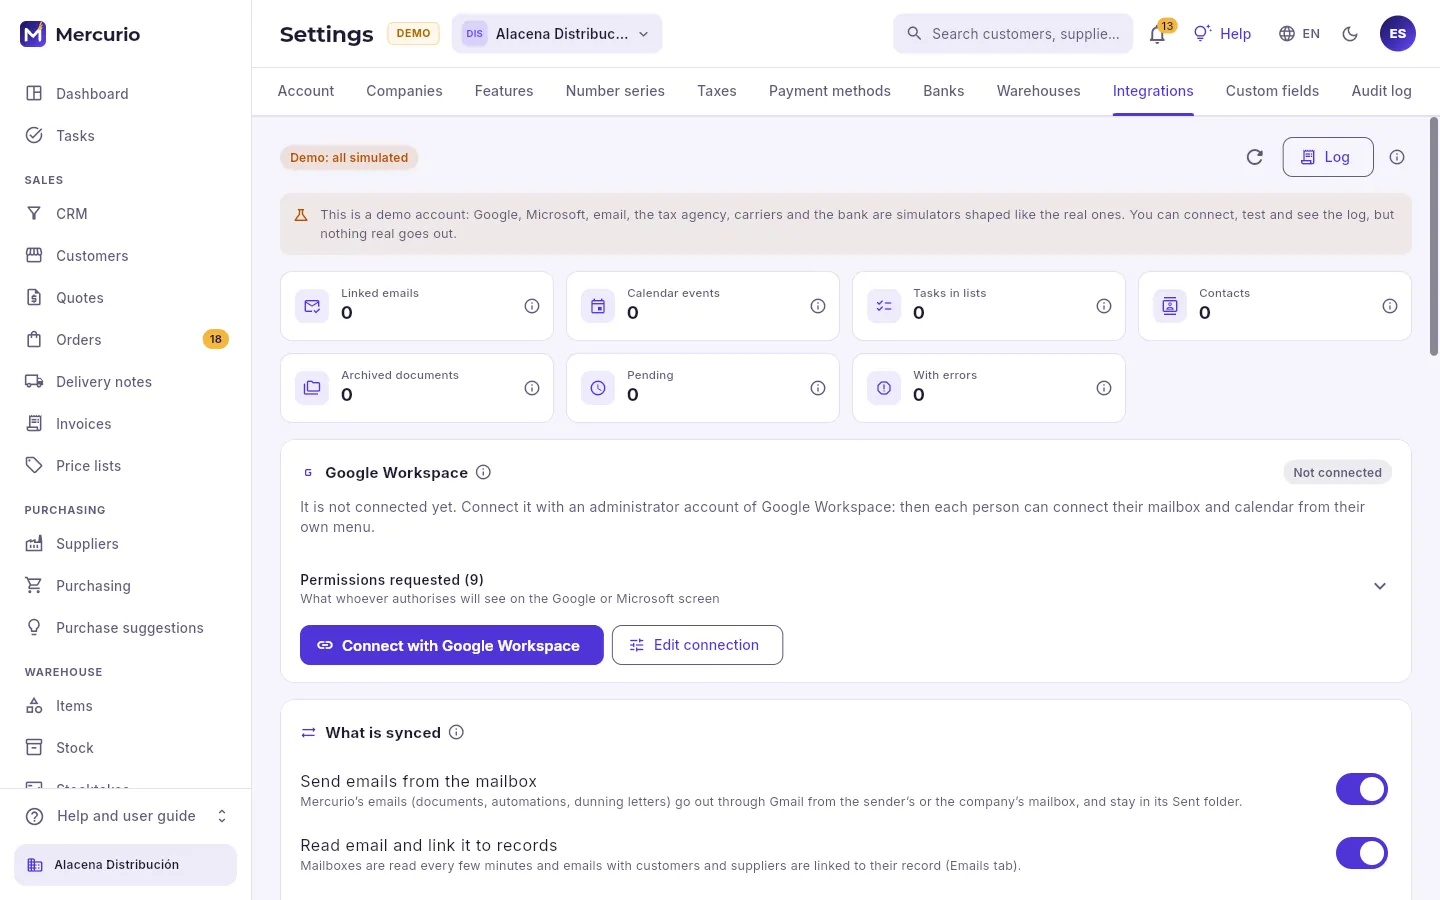 123456
- 1In the demo, Google, Microsoft, email, the tax authority, carriers and the bank are simulators with the same shape as the real ones.
- 2The log: queue jobs and every call to the providers, without contents or keys.
- 3What has been sent and brought back: emails linked to records, events, tasks, contacts, archived documents, what is pending and what has failed.
- 4The connection with Google Workspace (or with Microsoft 365, whichever is switched on in Features): its status and the permissions requested.
- 5A Google administrator connects it and authorises it on Google’s screen.
- 6What is synced for the whole account (below, each item with its switch).
With Google Workspace or Microsoft 365 connected, Mercurio works with your office tools:
| What | What it does |
|---|---|
| Documents, automations and dunning letters go out from the sender’s mailbox (and stay in their Sent items); emails from customers and suppliers are linked to their record (Emails tab). | |
| Calendar | Timed tasks, visits, jobs and routes go to their owner’s calendar; if the time changes there, it changes here. |
| Task list | Untimed tasks go to their owner’s “Mercurio” list; done there, done here. |
| Contacts | Customers and their contacts, in the “Mercurio” group of the mailbox that receives them. |
| Document archive | Document PDFs, in Drive or OneDrive, by company, year and type. |
| Notices to Chat or Teams | The chosen bell notifications and the “Post to a channel” step in Automations. |
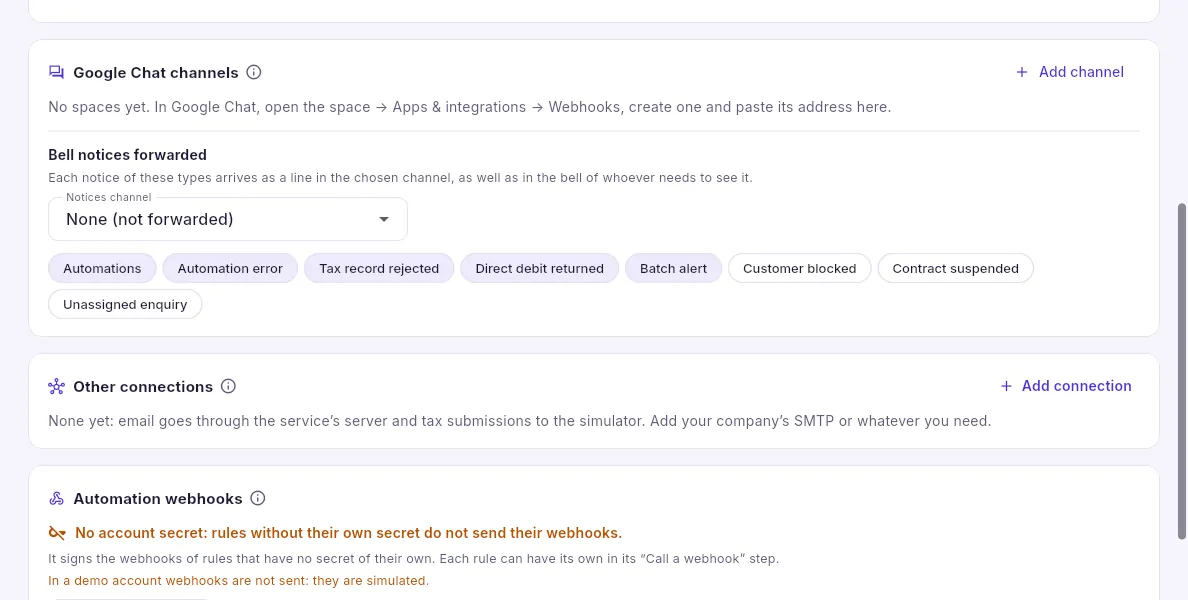 123
- 1Each thing that is synced, with its switch for the whole account.
- 2The Chat spaces (or Teams channels) where Mercurio posts and which bell notifications are forwarded.
- 3Other connections: the mail server (SMTP), the tax authority, VIES, carriers and the bank.
In Settings → Features, check that Google Workspace (or Microsoft 365) is switched on.
In Settings → Integrations, open Permissions requested to see what will be authorised.
Click Connect with Google Workspace and sign in with a Google administrator account: authorise the permissions.
Back in Mercurio, decide in What is synced what is sent and, in Mailboxes, what Mercurio does with each mailbox.
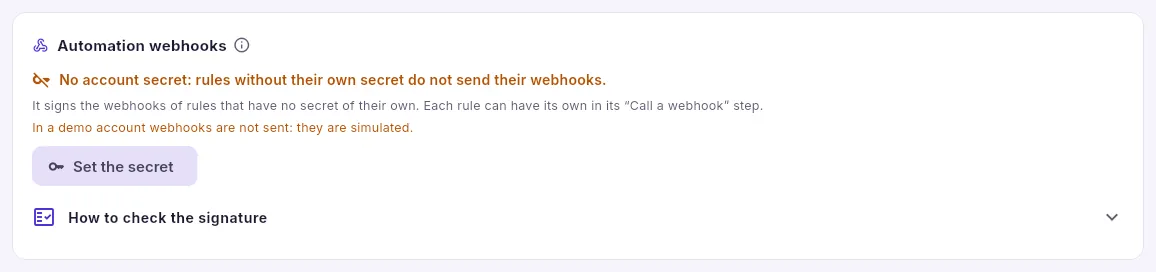 123
- 1The account secret used to sign the webhooks of Automations that do not have their own.
- 2You type it or generate it, copy it and save it: after that only its fingerprint is shown.
- 3Open it to see how the receiver checks the signature: the X-Mercurio-Firma and X-Mercurio-Entrega headers, and an example in Python.
A rule in Automations can call a webhook: tell another program over the internet what has happened. Every call is signed, so whoever receives it knows it comes from Mercurio and that nobody has changed it on the way: with the rule’s own secret or, if it has none, with the account secret, which is set here. Without either, the webhook is not sent. Like the other credentials, the secret is shown only once, when you save it; after that only its fingerprint, which lets you check, without revealing it, that the receiver has the same one. The card only appears when automations are switched on.
 123
- 1Google or Microsoft activity, or the calls to all providers.
- 2The queue jobs: what the server has done or has pending. One that fails completely can be retried.
- 3What Google or Microsoft rejected, with its error.
#Custom fields
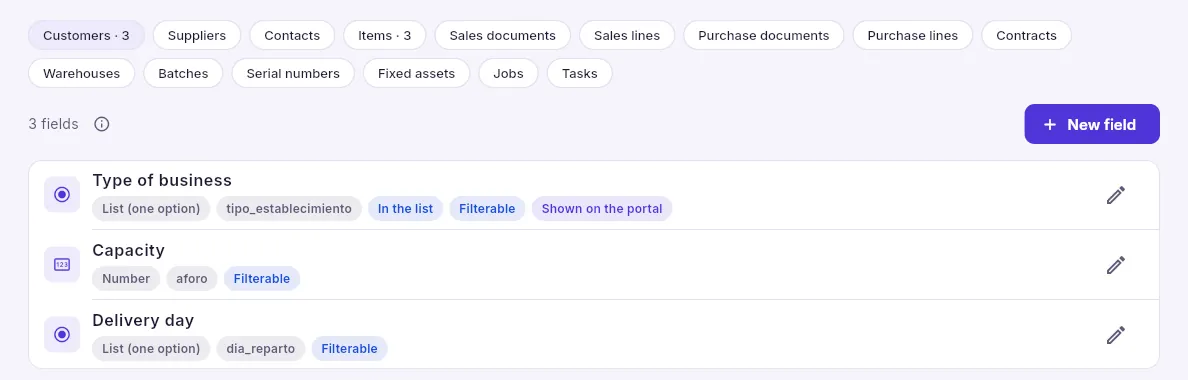 123
- 1What they are added to: customers, suppliers, contacts, items, documents and lines, contracts, warehouses, batches, serial numbers, assets, jobs and tasks.
- 2Each field with its type and where it appears: in the list (column), filterable and shown on the portal.
- 3Add another field.
Custom fields are the data your business needs that Mercurio does not include: a customer’s type of establishment, their capacity, their delivery day… Each one has its type (text, number, amount, date, yes or no, one or several options from a list, email, phone, link…), its name in the five languages, whether it is required and which section of the record it appears in. Those marked In the list become one more column in the list, and filterable ones appear in Filter by custom field. The database checks the value on saving, whether it comes from the app, the portal, Claude or the API.
#Audit log
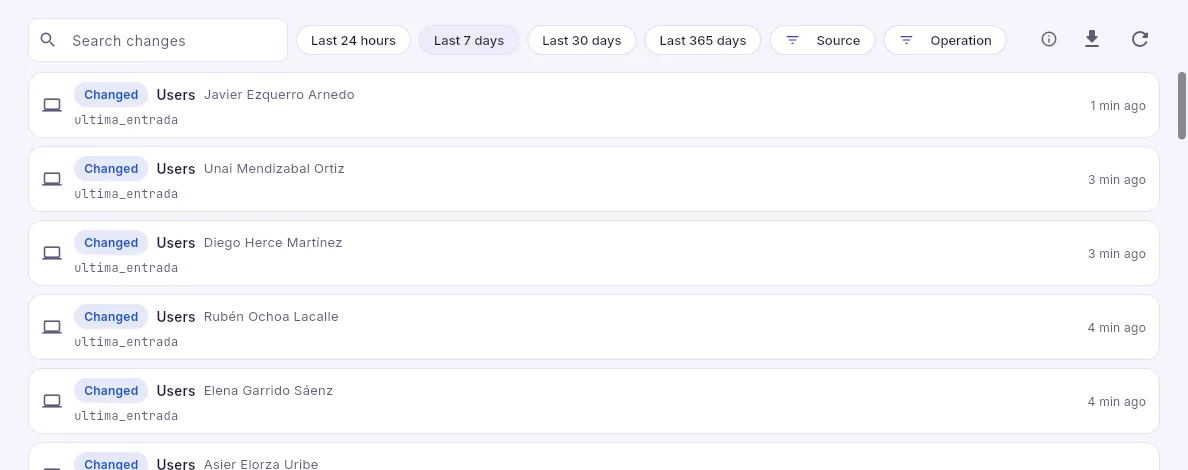 12345
- 1Search by record, table or person.
- 2The period.
- 3Where the change came from: the management app, the warehouse app, the B2B portal, Claude, the API, scheduled tasks, support or the system.
- 4Additions, changes or deletions.
- 5What is filtered, to a spreadsheet.
The audit log is the record of every addition, change and deletion of the account’s data: which record, who, from where, when and which fields changed, with their value before and after. The database writes it in every table, not the application, so everything is kept, wherever it comes from, and nobody can change or delete it; it is kept for six years. Click a line to see the details. Each record also has its History tab with the changes to that record.
Set-up
Users and profiles
Who signs in to the account, what each person can do according to their profiles, which companies they work with and what the Claude connector allows.
Each person who works with Mercurio has their own user. What they can see and do comes from their profiles (Management, Sales, Warehouse, Admin and accounts…), and the data they see, from their companies. The database enforces all of this: every query and every operation checks the account, the permission, the feature and the company, whether it comes from the management app, the warehouse app, the portal, Claude or the API. The application only hides what is not for you.
The account administrator is special: they have no profiles, they see everything in every company and they are the only one who can get into Settings and change profiles.
#Users
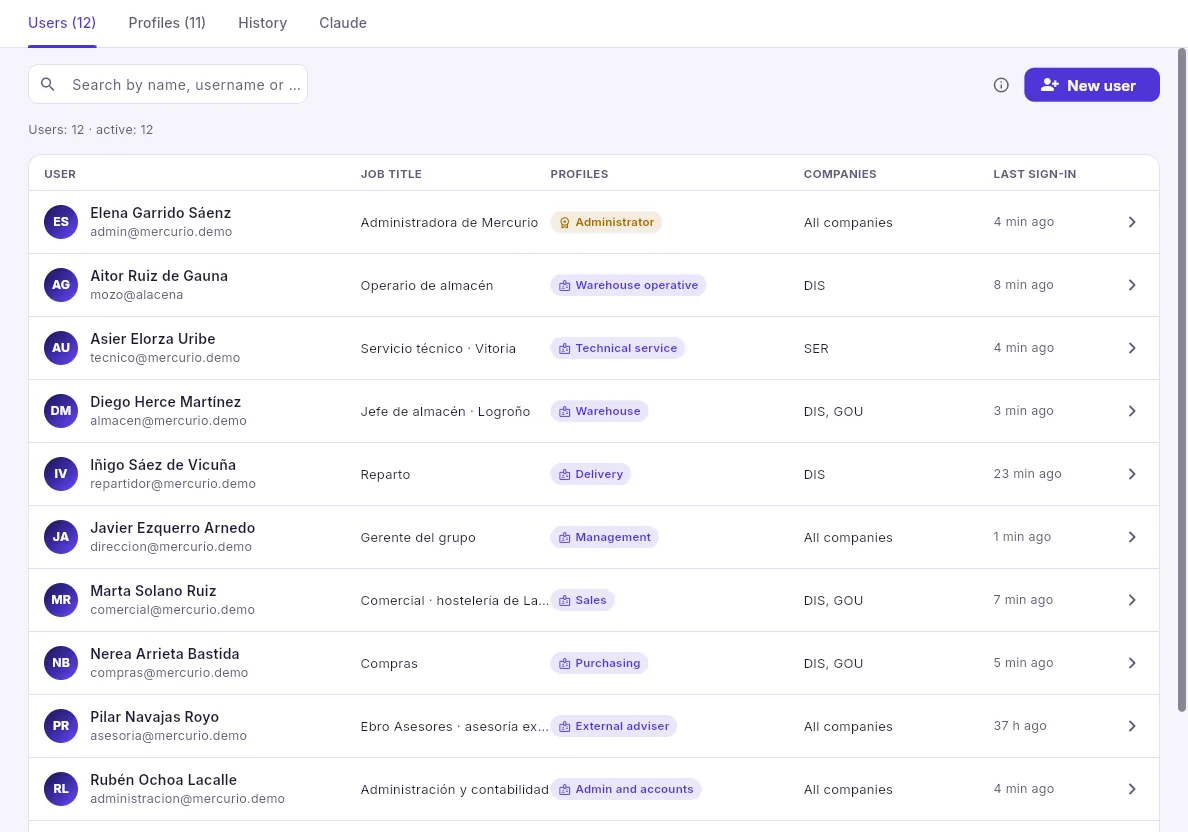 123456
- 1The tabs: users, profiles, the change history and Claude.
- 2Search by name, username or job title.
- 3How many users there are and how many are active (deactivated ones do not count towards the plan limit).
- 4Add a person.
- 5Each person with their username, job title, profiles, the companies they work with and their last sign-in. Click one to change it.
- 6Anyone without their own email (a warehouse operative, a delivery driver) signs in with their username and the account code: mozo@alacena.
When you add a person you enter their name, their username or email, their job title and a temporary password (the app suggests one; Generate another gives you another), which they will change the first time they sign in. Below, you choose their profiles and their companies: with none ticked, they will see every company in the account. If they already have a user in another Mercurio account (the accounting firm that handles several clients), this account is added to it without touching their password.
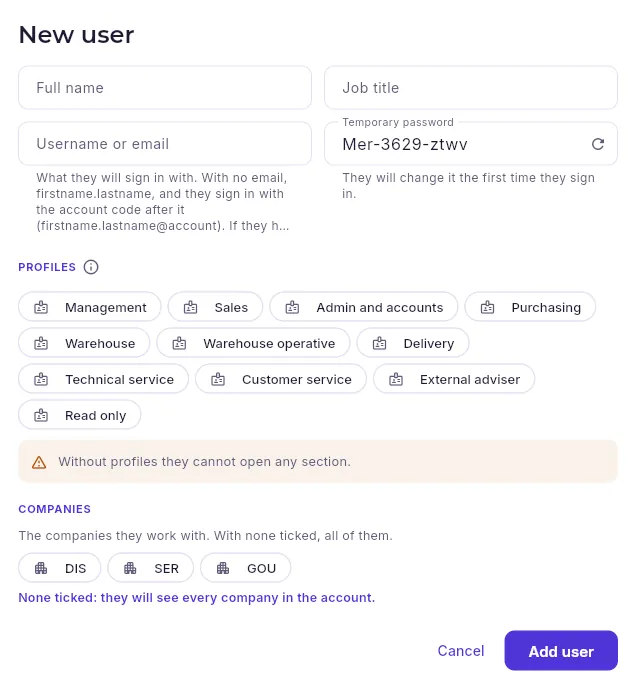 123456
- 1Their full name (their username is suggested from it) and their job title.
- 2What they will sign in with: their email or, if they have none, a username with the account code after it (firstname.lastname@alacena).
- 3The suggested temporary password (the circular arrow gives you another): you give it to them and they change it the first time they sign in.
- 4Their profiles: what they will be able to see and do. Below, what they allow together (with none, they cannot open any section).
- 5Their companies; with none ticked, every company in the account.
- 6Adds the person and shows their username and password once, so you can give them to them.
To stop someone signing in, open them and switch off Active: they cannot sign in, but their history is kept. From the same window you can give them a new password if they have forgotten it and have no email to recover it themselves.
In Users and profiles → Users, click New user.
Type their full name, their username or email and their job title; note down the suggested temporary password.
Tick their profiles (what they will be able to do) and their companies (none: all).
Click Add user and give them their username and temporary password.
#Profiles and their permissions
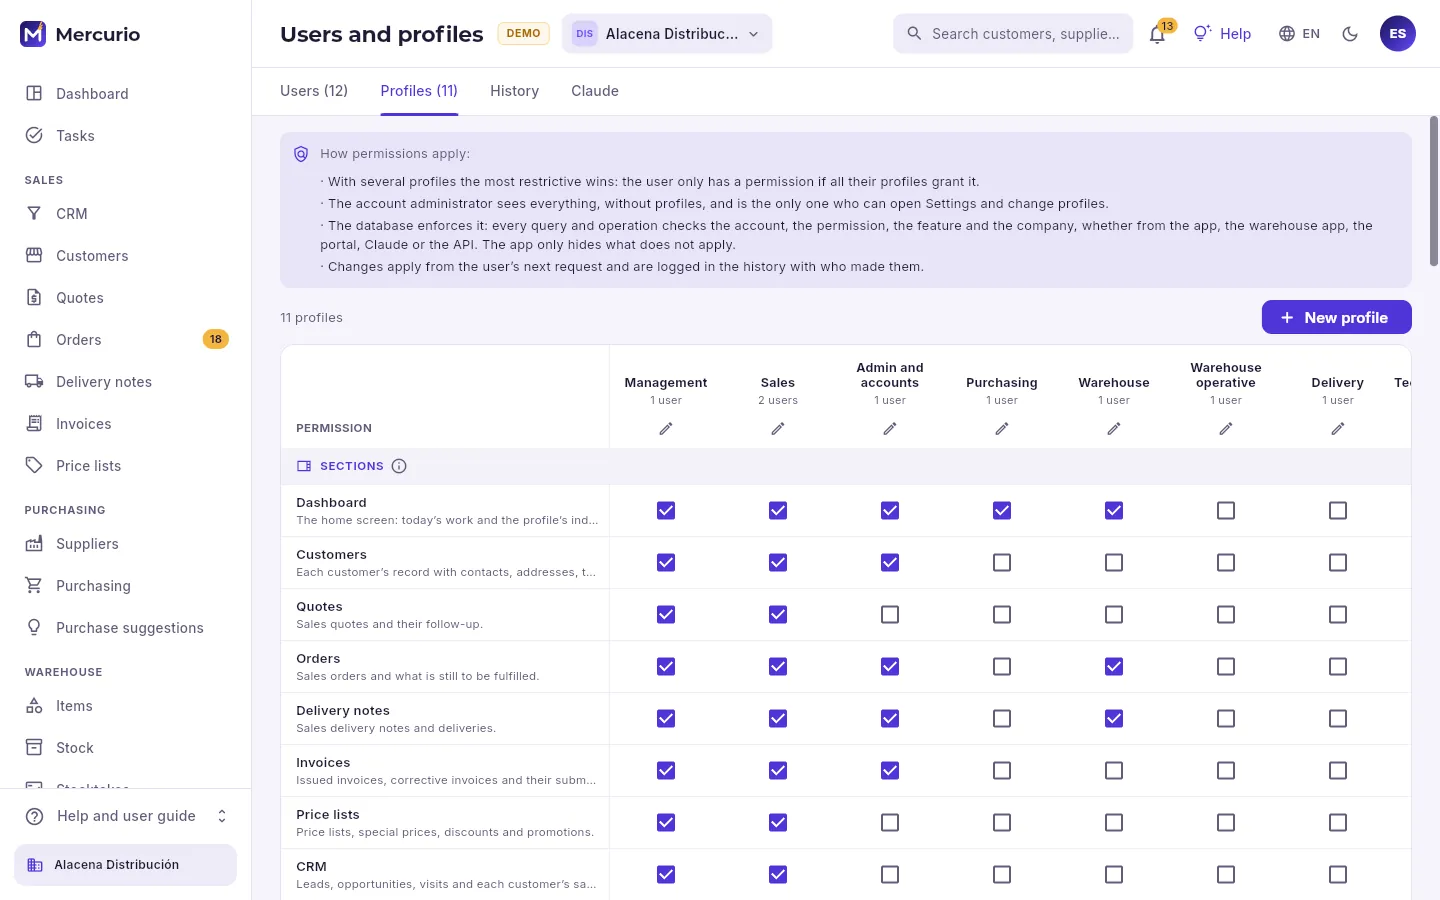 12345
- 1How permissions apply: with several profiles the most restrictive wins, and the database enforces it.
- 2Create a profile of your own.
- 3Each column is a profile, with how many users have it; the pencil changes its name and description.
- 4Permissions are grouped: sections (what is shown in the sidebar), actions, sensitive data and Claude.
- 5Each box grants a permission to a profile or takes it away. It is saved when you click it and applies from each user’s next request.
A profile is a set of permissions for a job role. The account comes with eleven as standard (Management, Sales, Admin and accounts, Purchasing, Warehouse, Warehouse operative, Delivery, Technical service, Customer service, External adviser and Read only) and you can create your own. Permissions come in four groups:
| Group | What it decides |
|---|---|
| Sections | Which sections they see in the sidebar (Dashboard, Customers, Orders, Stock, Treasury…). |
| Actions | What they can do inside them: edit customers, issue, collect payments, create direct debit batches, move stock, pick orders, manage users… |
| Sensitive data | Whether they see costs, margins, bank details and people’s contact details. |
| Claude | What they can do through the Claude connector: look up, make changes, see contact details. |
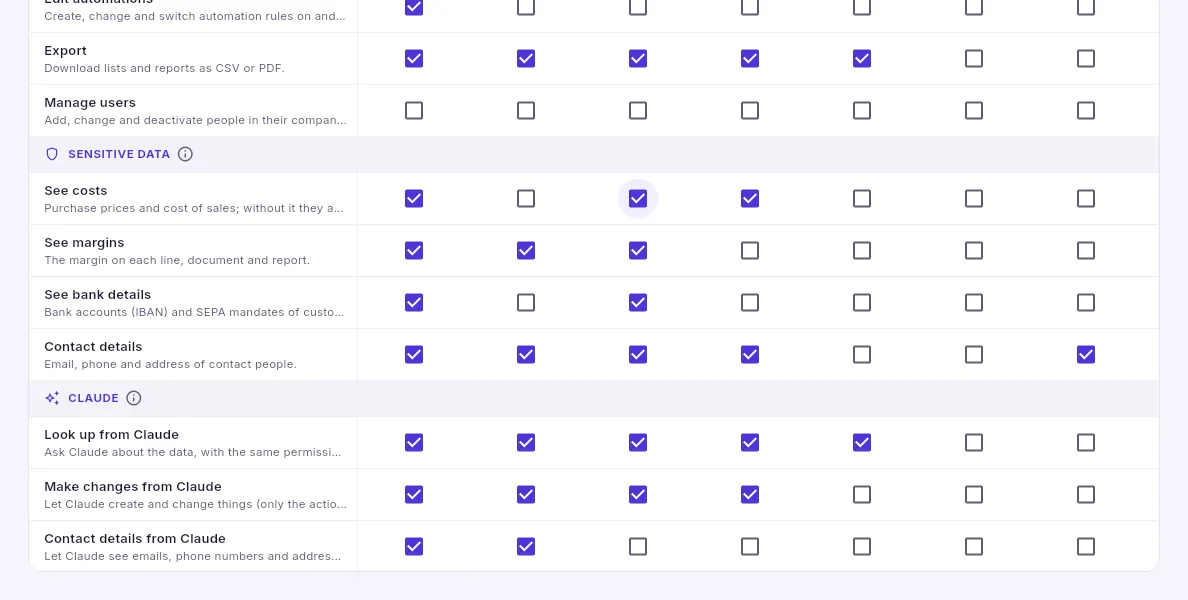 12
- 1Sensitive data: without “See costs” purchase prices are not shown; without “See bank details”, neither IBANs nor mandates.
- 2What Claude is allowed to do: look up, make changes (always provided the person approves them) and see contact details.
 123
- 1Its name.
- 2Who it is for: the description shown under its name.
- 3Standard profiles are shown translated; if you change them, they are shown exactly as you write them.
#Claude
The Claude connector lets you ask Claude about Mercurio’s data (“what does Hotel Ciudad owe me?”, “prepare a quote like last month’s”) and, if the profile allows it, make changes. Claude signs in on behalf of each person, with their permissions and only in their companies; before changing anything it shows what it is going to do and waits for the person to approve it.
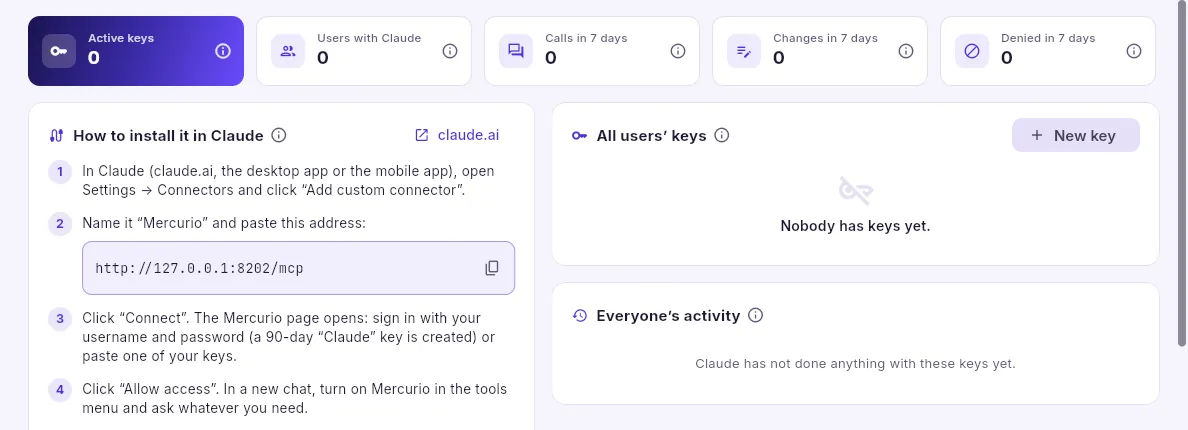 12345
- 1The active keys, how many people use it, the calls, the changes and what was denied in the last seven days.
- 2The steps to add Mercurio to Claude (on the web, in the desktop app or on mobile), with the connector address to copy.
- 3Everyone’s keys (none here yet): whose they are, when they expire and when they were used. The administrator can revoke any of them.
- 4Create a key.
- 5The latest things Claude has done with each key, whether they went well and how long they took.
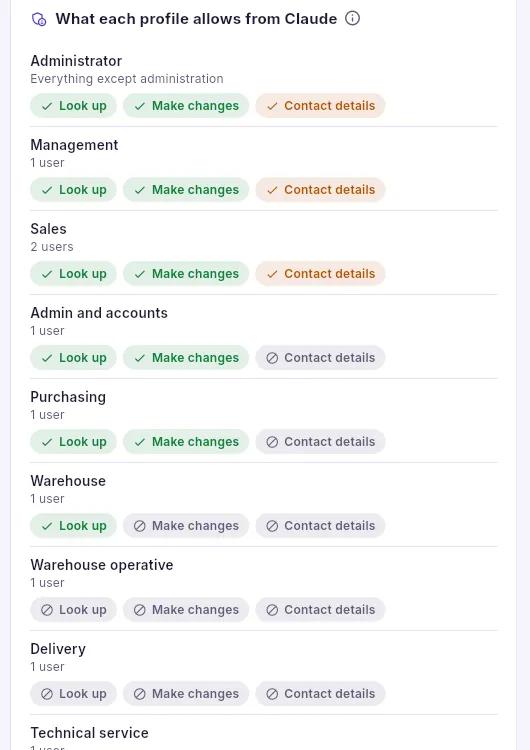 12
- 1What each profile lets you do from Claude; its ⓘ explains how the profile’s permissions combine with Claude’s.
- 2Each profile with what it lets you do from Claude, allowed in green and not allowed in grey: look up, make changes and contact details.
A key is what Claude uses to sign in to Mercurio on behalf of a person. Each one is personal and belongs to this account; it is shown only once, when it is created (the database only stores its hash), and it expires when you choose. There are two ways to get one:
- Connecting Claude with your user: in Claude, you add the connector with the address this screen gives you, click “Connect”, sign in to Mercurio with your username and password and click “Allow access”. A 90-day key is created.
- Creating it here or in Connect to Claude (in the menu under your name, top right) and pasting it into Claude Code or another client that asks for it.
 123
- 1A name to recognise it (“Claude on my laptop”, “Claude Code”).
- 2When it stops working: in 30, 90 or 365 days, or never.
- 3Creates it and shows it once so you can copy it.
Click your name at the top right and choose Connect to Claude.
In the panel, click New key.
Give it a name that says where you are going to use it and choose when it expires.
Click Create key, copy it (it will not be shown again) and paste it into Claude.
#Your menu: Claude, your password and your Google or Microsoft account
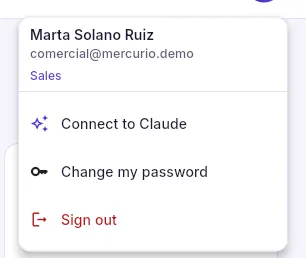 1
- 1At the top, your name, your username and your profiles. Below, Connect to Claude (your keys and your activity), change your password and sign out.
When the administrator has connected the organisation to Google Workspace or Microsoft 365 (see Settings), this menu also shows My Google account (or My Microsoft account): this is where each person connects their mailbox. From then on, what they send from Mercurio goes out from their mailbox, and their tasks and visits go to their calendar. They can switch each thing off, mark their mailbox as private (emails linked from it are only visible to them) or disconnect it.
Platform
Platform
The service console for those who operate it: how the subscription business is doing, every account with its usage and its record, and the announcements that reach everyone’s bell.
Platform is the console for those who operate the Mercurio service, not for the companies that use it: from here you can see every account (each customer of the service, with its companies and its users), how the subscription business is doing and what needs attention. Whoever signs in to the console does not see the business data of any account (its customers, its invoices, its stock): only its usage. To help inside an account, its administrator must grant support access, by the hour, from Settings → Account.
#The overview
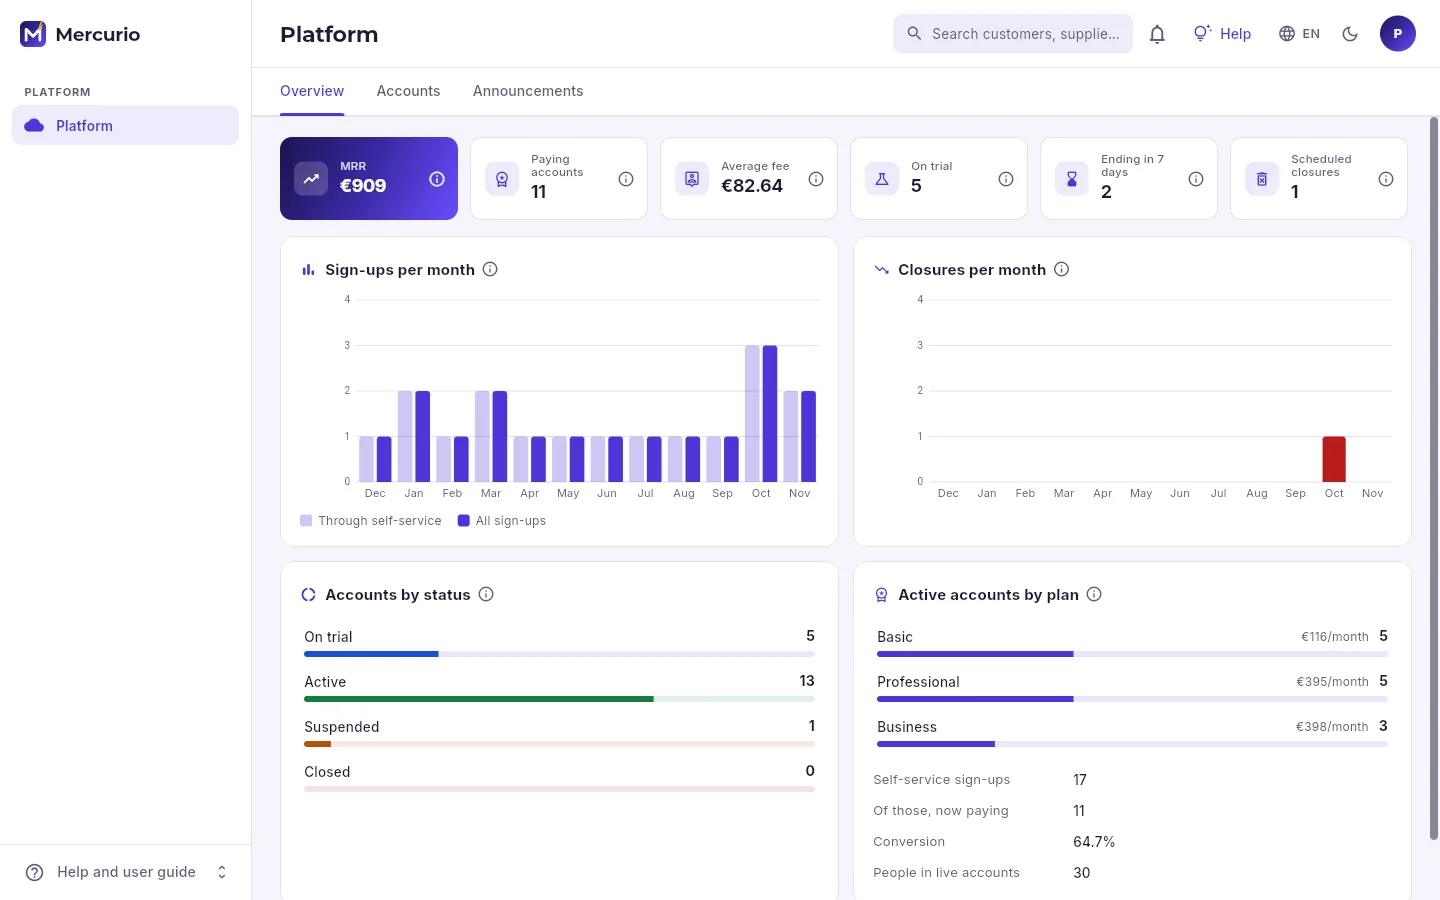 123456
- 1The MRR: what the service bills each month for paying accounts.
- 2The paying accounts, the average fee for each, those on trial, the trials ending this week and the scheduled closures.
- 3Sign-ups over the last twelve months; the light bar, those that came in on their own through self-service sign-up.
- 4The closures requested each month.
- 5Accounts by status: click one to see those accounts.
- 6Active accounts by plan, with what each one contributes to the MRR. Below, how self-service converts.
#The accounts
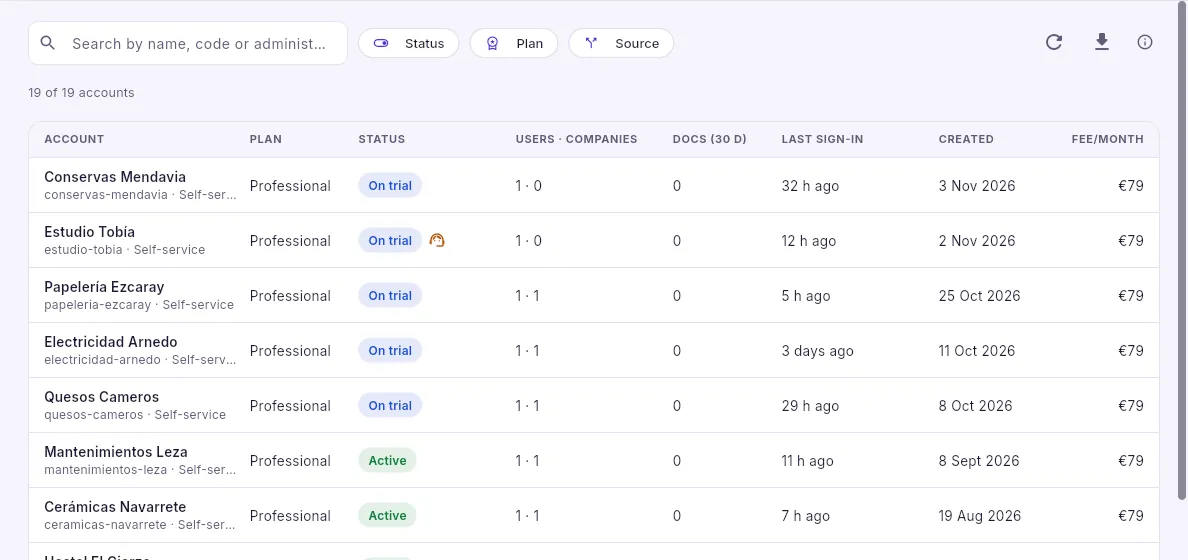 12345
- 1Search by name, code or administrator email.
- 2Filter by status, plan and source: self-service, created by the service, demo or dedicated installation.
- 3The list, to a spreadsheet.
- 4Each account with its plan, its status, its users and companies, its documents from the last 30 days, its last sign-in, its sign-up date and its fee. The headset icon: it has current support access.
- 5Click an account to open its record.
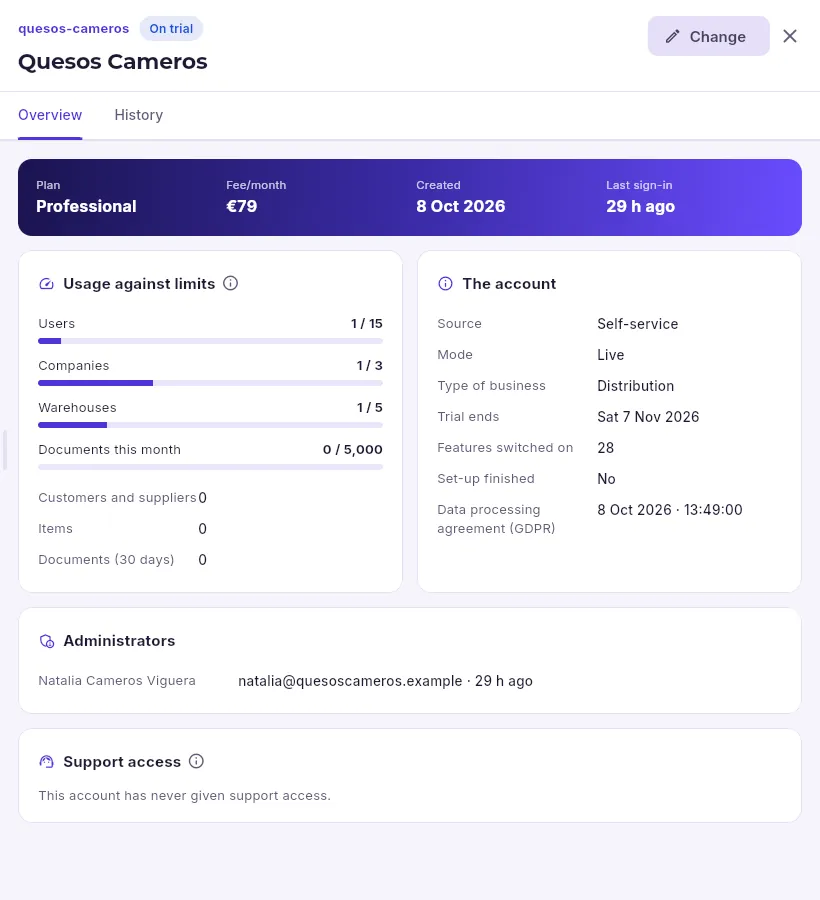 123456
- 1Change: its status (suspend or reactivate it), its plan, the end of the trial and its limits, always with a reason.
- 2Its summary and its history: every change, with who made it and the reason.
- 3What it uses against what its plan allows: shown as a warning past 80% and in red on reaching the limit.
- 4Where it came from, its mode, its type of business, the end of the trial, how many features it has switched on and whether set-up is finished.
- 5Who runs it and their email, to get in touch.
- 6When it has let support in and why.
An account’s record shows its usage (users, companies, warehouses and documents this month against its limit), not its data. On reaching a limit, the database will not let it create more: it is time to suggest another plan or to agree a custom limit (blank: the plan applies). Every change of status, plan, trial or limit asks for its reason and is recorded in the account’s history.
#Announcements
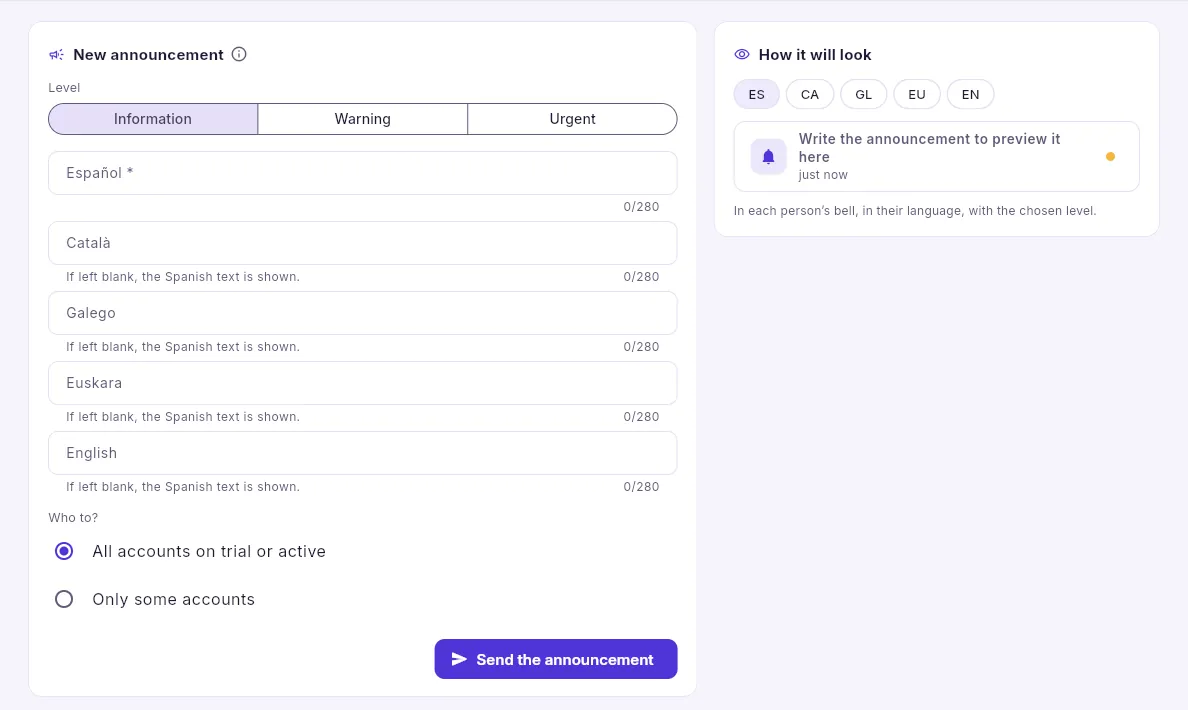 12345
- 1The level: information, warning or urgent.
- 2The text in Spanish (required) and in the other languages; any left blank is shown in Spanish.
- 3Who to: all accounts on trial or active, or only the ones you choose.
- 4Sends it to the bell of every person in those accounts.
- 5How it will look in the bell, in each language.
In Platform → Announcements, choose the level (scheduled downtime is a warning; a problem under way, urgent).
Write the text in Spanish and, if you can, in the other languages (280 characters at most).
Choose who to and look at How it will look to see how it appears in each language.
Click Send the announcement.
Appendices
Glossary
The sales, business and Mercurio terms used in this guide, explained in a few words.
#Mercurio
| Term | What it is |
|---|---|
| ⓘ | The explanation of a figure: what it shows, how it is calculated and how to read it. |
| Automation | A rule of the kind “when this happens, if this other condition holds, do that”: it creates tasks, notifies people, sends emails or changes data on its own. |
| Custom field | A piece of data your business needs that Mercurio does not include (a customer’s type of venue, its capacity…). It is created in Settings and shows on records, lists and filters. |
| Account | Each customer of the Mercurio service: a group of companies, a sole trader… Its data is isolated from every other account. One person can be in several (an accounting firm, for example). |
| Company | Each company or sole trader within an account, with its own tax ID, warehouses, series, documents and accounts. You choose it at the top, in the bar. |
| Tag | A free word on a customer record (#horeca, #gourmet…) to group customers: it is used to filter the list, in special terms and in automations. |
| Record | The screen for one entry (a customer, a document, an item), which opens in the right-hand panel, read-only, with Edit. |
| Feature | Each capability switched on or off for the account (batches, CRM, accounting, picking…). Whatever is switched off does not appear. |
| History | The tab of a record with every change: what changed, from what to what, who and when. |
| Profile | The set of permissions for a role (management, sales, warehouse…). What a person can do is the sum of their profiles. |
| Permission | What a profile lets you see or do: a section, an action (issue, collect, approve credit risk) or a piece of data (margins, costs). |
| View | A combination of filters on a list saved under a name, so you can come back to it. |
#Sales and customers
| Term | What it is |
|---|---|
| Delivery note | The document for a delivery: issuing it takes the stock out. It is then invoiced, in full or in part. |
| Draft | A document that can still be changed entirely: it has no number and has not moved anything. |
| Special term | A price or discount agreed with a customer or with everyone carrying a tag, for an item, a family, a brand or the whole catalogue, from a quantity and between two dates. |
| Terms | What applies to a customer with a company: price list, discounts, payment method, credit risk, sales rep, carriage. |
| Customer return | Goods a customer sends back: it is created from the invoice for what was sold, the stock comes back when it is recorded and, when it is credited, its corrective invoice is issued. |
| Issue | Finalising a document: it is numbered with its series and, depending on the type, moves stock, creates the instalments or is recorded with the tax authority. |
| Quantity break | The price of an item in a price list from a given quantity (from 6 units, from 24…). |
| Corrective invoice | One that corrects an issued invoice (which is never changed): for differences or cancelling it. |
| Simplified invoice | One without the recipient’s details (the till receipt), with its own series and a limit: €400 (€3,000 in retail and hospitality). |
| Payment method | How and when a customer pays (bank transfer at 30 days, direct debit…): the instalments come from it. |
| Mandatory statement | The wording the law requires on an invoice for its type of transaction (exempt, intra-EU, reverse charge, cash accounting…). Mercurio adds it on issue, in the document’s language. |
| Margin | What you make on the selling price: (price − cost) / price. |
| Pricing engine | The calculation that sets the price of each line, the same in the office, on the portal, over EDI or with Claude: the price list, the special term, the trade discount and the promotions, in that order. |
| Order | What the customer has ordered; it is delivered with one or more delivery notes. |
| Carriage | The transport of a shipment: carriage paid (the sender pays), carriage forward (the recipient pays) or paid from a given amount. It is set in the customer’s or the supplier’s terms. |
| Quotation | An offer to the customer, valid for a period; if they accept it, it becomes an order. |
| Promotion | An offer on certain dates and channels: buy and pay (3-for-2), second unit, volume discount or free gift. |
| On hold | An order that cannot leave the warehouse: it goes on hold automatically if the customer is over their credit limit or has unpaid items, or by hand with a reason. Someone with the “Approve credit risk” permission releases it. |
| Credit risk | What a customer has pending with a company (orders to deliver, uninvoiced delivery notes and uncollected instalments) against their credit limit. |
| Series | The numbering of a document type (A26-00477 is delivery note 477 in series A for 2026). There can be several per type. |
| Deliver | Fulfilling an order with one or more delivery notes. What is missing is still to deliver; Mark as delivered closes what is no longer going out. |
| Price list | The list of prices applied to a customer. |
| Instalment | Each part of an invoice to be collected (or paid, for purchases), with its due date and amount. |
#Purchasing and warehouse
| Term | What it is |
|---|---|
| Blind count | A stocktake where whoever counts cannot see what there should be, so they count what they see without being swayed. |
| ABC (class) | Items ranked by the value of what went out in 12 months: the A items make up the first 80%; the B, the next 15%; the C, the rest. It lets you count what is worth most more often. |
| Creditor | Whoever provides you with services or passes on expenses (the accountant, the rent, electricity): their invoices go to expenses, not to stock. A supplier, on the other hand, sells you the goods you store and resell. |
| Batch alert | The recall, notice or block of a batch, with the list of customers who received it so you can warn them and record what they return. |
| Expiry | The date a batch expires. The item’s minimum shelf life says how many days it must have left to be sold. |
| Quarantine | The status of a batch set aside while it is checked (a test, a complaint): it still counts as on hand but is not sold, just like a blocked or recalled one. |
| Available | What you can promise: on hand − reserved. Suggestions and forecasts also add what is on order. |
| FEFO, FIFO and LIFO | The outgoing policies: which batch or unit goes out first. FEFO, whatever expires first (food); FIFO, whatever came in first; LIFO, whatever came in last. Mercurio proposes it and whoever picks can change it. |
| On hand | What is in the warehouses, according to the movements ledger. |
| Van | A warehouse on wheels: a van sales or technical service van that loads from the main warehouse and sells or repairs on the road. |
| Stocktake | A count of what is really in a warehouse (full, partial or cycle count) against what Mercurio says. When stock is adjusted, each difference corrects the stock. |
| Kit | An item made of others (a tasting box, a hamper): selling it takes out what each component contains. It can also be assembled in advance and kept in stock. |
| Movements ledger | Every goods receipt, delivery note, transfer, stocktake or adjustment writes a line in it with what comes in or goes out. Stock is its sum: it never changes without leaving a trace. |
| Batch | The units of an item made together, with their code and expiry date. Every receipt and every issue says which batch it is: that is how you know which supplier it came from and which customers it was sold to. |
| Write-off | What leaves stock because it is broken, expired or lost. |
| Serial number | The code of each unit tracked one by one (a coffee machine, a piece of equipment): where it is, when it was sold, its warranty, its contracts and its jobs. |
| Reorder point | The stock level at which you need to order: what will be sold while the supplier’s order arrives, plus the safety stock. |
| Goods receipt | What arrives from a supplier: it goes into stock with its batches and serial numbers and waits for its invoice. |
| Adjust stock | In a stocktake, turning each difference between what was counted and what was expected into a stock adjustment. (In accounting, regularisation is part of the year-end closing.) |
| Reserved | What is set aside for confirmed orders that have not gone out yet: it is still in the warehouse, but it already has an owner. |
| Minimum, safety and maximum stock | The replenishment settings of each item in each warehouse: below the minimum it shows as below minimum; safety stock is the cushion for the unexpected; stock is replenished up to the maximum. |
| Transfer | Moving goods from one warehouse to another (also to a van): they leave the origin, are in transit and enter the destination when received, at the cost they left with. |
| Location | The spot inside a warehouse (aisle, shelf, bin). The picking location is where goods are taken from to prepare orders; the reserve location, where the rest is kept. |
| Valuation | How each company costs what goes out: weighted average cost (each purchase recalculates the average cost) or FIFO (by layers of receipts: it goes out at the cost of the oldest receipt). |
#Logistics
| Term | What it is |
|---|---|
| Parcel | Each box or pallet in a shipment, with its actual weight and its SSCC label. |
| Cash on delivery | The carrier collects from the customer on delivery and pays it to you afterwards. |
| Shipment | Sending one or more delivery notes with a carrier: its label, its tracking number and where it is. |
| Wave | A picking run that combines the lines of several orders into a single walk through the warehouse; when it is finished, each order has its delivery note. |
| Packing | Preparing the parcels for each delivery note, with their weight and label. |
| Picking | Collecting in the warehouse what the orders ask for, in route order and with their batches and locations. When it is finished, the delivery notes are created. |
| Route | In your own deliveries, a van’s stops for one day, in order, with the signature of whoever receives. In the CRM, a sales rep’s plan of visits for one day. |
| SSCC | The Serial Shipping Container Code: 18 digits that identify a parcel all the way. Its label carries it as a GS1-128 barcode. |
#Services and contracts
| Term | What it is |
|---|---|
| Cover (of a job) | Who pays for a repair: the contract, the warranty, the customer or nobody (free of charge). The database decides it when the job is created, and it can be changed by hand. |
| Contract | What a customer is invoiced every so often without anyone having to remember: renting a coffee machine, a maintenance plan, coffee with a monthly minimum. |
| Fee | What a contract invoices each period: fixed (its monthly price times the months in the period) or usage-based (what was used minus what is included, with a minimum). |
| Warranty | The period in which a fault on a sold unit is not invoiced: it starts when the unit is sold, for the months the item says. |
| CPI | The consumer price index published by the INE. In a contract’s anniversary month, the price review raises its reviewable lines by the year-on-year CPI or by the agreed percentage. |
| Preventive maintenance | The service of a contract machine every N months: the system creates its job automatically every morning. |
| Job | In technical service, a visit to a customer’s machine (breakdown, installation, removal or maintenance) with the work, the material and the signature. In the CRM, the visit report: what was discussed with a customer and what comes next. |
| In advance and in arrears | In advance, a contract invoices each period on the day it starts (a rental); in arrears, on the day after it ends (usage). |
| Pro-rating | Invoicing a contract’s first and last periods only for the days used. |
| Suspension | A suspended contract stops being invoiced. It is suspended automatically when the number of returned debits set in the settings builds up (and reactivated when they are collected), or by hand. |
#Treasury and accounting
| Term | What it is |
|---|---|
| Depreciation | The cost of an asset spread over the years it lasts. Mercurio posts its entry every month (or every year). |
| Cost centres | Accounting by centre (a shop, a line of business): each line carries its centre, from invoices, assets or templates, to see where money is made and where it is spent. |
| Line | Each line of a journal entry: an account with its amount on the debit or the credit side. |
| Journal entry | Each record in the accounts, with its lines. It always balances (debit equals credit) and is numbered per financial year with no gaps. Mercurio makes almost all of them itself when issuing, collecting, paying or creating direct debit batches. |
| Trial balance | For each account, the opening balance, the debits and credits in the period and the closing balance. |
| Receivables and payables | In Treasury, the company’s instalments to collect and to pay, with their status. In the CRM, the portfolio: the customers each person is the sales rep for. |
| Year-end closing | What is done when the financial year ends: the regularisation (expenses and income against account 129, “Profit for the year”), the closing entry and the opening entry of the next year. It is undone by reopening the year. |
| Reconcile | Matching each bank movement (from a statement) with what it is in Mercurio: a customer’s payment of an invoice, a payment to a supplier, a bank charge. The database suggests what each one might be. |
| Consolidation | The group’s accounts as if it were a single company: each company’s balance sheet and profit and loss account, added together and without what they sell to and owe each other (the eliminations). |
| Returned debit | When the bank returns a direct debit (with its reason code, such as MD06), the instalment becomes outstanding again, with its charges. |
| Financial year | A company’s accounting year. It is opened and closed, and its months can be locked so that nobody posts with those dates. |
| Statement | The movements of a bank account in the file your online banking provides: Norma 43 (the Spanish banks’ “cuaderno 43”) or camt.053 (the European XML). You upload it to reconcile. |
| Unpaid | What a customer has not paid by its due date (or the debit the bank returned). It puts their new orders on hold, and dunning letters follow it up. |
| Fixed assets | What the company buys to use for more than a year (premises, a machine, a vehicle): each asset has its record with its depreciation schedule. |
| SEPA mandate | The customer’s signed authorisation to collect from them by direct debit, with its reference, signature date and scheme: CORE (individuals and businesses) or B2B (between businesses only). It expires after 36 months without use. |
| Ledger | All the lines of an account, with their contra account and the running balance. |
| Payment run | The opposite of a direct debit batch: a pain.001 file with a transfer to each supplier, uploaded to online banking to pay them all at once. |
| PGC | The Spanish General Accounting Plan (2007): the chart of accounts and the accounting rules in Spain, in its standard or SME version. |
| Match | Marking as matched the lines of an account that offset each other (a customer’s invoice and its payment). What is left unmatched is what is still open. |
| Direct debit | An instalment collected by charging it to the customer’s account (SEPA direct debit). It needs a mandate and goes to the bank in a batch. |
| Dunning letter | The letter or notice to a customer with overdue instalments, in levels by how many days they are overdue: it is prepared automatically every morning and, if the customer has an email address, sent automatically. |
| Direct debit batch | The direct debits falling due, together in a pain.008 file for the bank: the bank charges each customer’s account and pays the total to the company. |
#Tax
| Term | What it is |
|---|---|
| Box | Each numbered item on an official form, with its amount. Mercurio calculates them from the period’s invoices; they are reviewed, and adjusted if needed, before filing. |
| Cash accounting | A special VAT scheme (RECC): VAT is due when collected and deducted when paid, not when invoiced. Its invoices carry the statement. |
| Intra-EU supply | A sale to a business in another EU country with an EU VAT number valid in VIES: it is exempt from VAT, carries its statement and is declared on form 349. |
| Exempt and outside the scope | An exempt transaction is subject to VAT but none is charged (exports, intra-EU supplies, healthcare, education…); one outside the scope falls outside the tax altogether. Both carry their statement on the invoice. |
| Fingerprint | In VeriFactu, the encrypted summary (SHA-256) of each invoicing record, which includes the fingerprint of the previous record: so the records form a chain and any change shows. |
| IGIC and IPSI | The taxes that take the place of VAT in the Canary Islands (IGIC) and in Ceuta and Melilla (IPSI). |
| Reverse charge (ISP) | The tax is not charged by the seller but declared by the buyer (art. 84 of the Spanish VAT Act). The invoice goes out without VAT and with that statement. |
| Form (modelo) | The official return for a tax and a period: 303 (VAT), 347 (transactions with third parties), 111 (withholdings)… Mercurio calculates them, prepares their file and keeps what was filed. |
| Tax ID (NIF) | The Spanish tax identification number (DNI, NIE or CIF), with its letter or check digit. |
| EU VAT number | The tax ID with the country prefix (ES…) for transactions within the EU; it is checked against VIES. |
| Equivalence surcharge | What retailers under that scheme (a local shop) pay on top of VAT: 5.2% on 21% VAT, 1.4% on 10% VAT and 0.5% on 4% VAT. It is ticked in the customer’s terms and Mercurio applies it automatically. |
| IRPF withholding | The amount deducted from an invoice by a professional or sole trader on account of their income tax. |
| SII | Immediate Supply of Information: invoices are reported to the AEAT (Spanish tax agency) within four days (large companies or those who opt in). |
| TicketBAI | The system of the Basque provincial tax authorities: each invoice carries its code and QR code. |
| VeriFactu | The AEAT’s system for everyone else: each invoice is chained to the previous one and carries a QR code to verify it. |
#Planning and CRM
| Term | What it is |
|---|---|
| Stock cover | How many days the available stock lasts at the forecast rate of sale: if it is less than the supplier’s lead time, you will be late. In the suggestions settings, cover is the days of sales ordered on top of the lead time. |
| Commission | What a sales rep earns on their sales, calculated invoice by invoice with the most specific rule: on the amount or on the margin, on invoicing or on collection. When it is paid out, each invoice is recorded. |
| Pipeline | The stages an opportunity goes through (new, qualified, proposal sent, negotiation…) until it is won, lost or postponed. Each stage has its probability. |
| Sales status | How each customer stands according to their purchases over 12 months against the previous 12: prospect, new, won back, active, at risk, lost or dormant. A set of rules assigns it. |
| Service level | How many times out of 100 you want to have stock when an order is expected (95%, for example): the higher it is, the more safety stock. |
| Target | What you aim to invoice in a period (also margin, orders or new customers), for the whole company and for each sales rep, against what has been achieved so far. |
| Opportunity | A possible sale to a customer: what they want, how much it could be worth and when they will decide. It moves through the pipeline stages. |
| Weighted | An opportunity’s amount times the probability of its stage: what, realistically, you expect to win. |
| Sales forecast | How much of an item will be sold in a warehouse each week over the next 26. It is calculated every night with the method that would have been most accurate: moving average, exponential smoothing, Holt, Holt-Winters or Croston. |
| Lead | Someone who gets in touch: through the website, the portal, email, phone, a trade fair… Mercurio checks whether they are already a customer and assigns the lead to a sales rep. |
| Suggestion | What Mercurio proposes every night: what to order from each supplier (purchase) or what to move from one warehouse to another (transfer). You review it and turn it into draft orders or transfers. |
#B2B and e-invoicing
| Term | What it is |
|---|---|
| EDI | Electronic data interchange with large retailers through a network (VAN): orders come in and confirmations, despatch advices and invoices go out, with no typing. |
| Mapping | The translation of a code from the other side (an item’s EAN, SKU or ASIN; a customer’s GLN…) into a Mercurio one. |
| Facturae and FACe | Facturae is the signed e-invoice for Spanish public administrations; FACe, the point through which it is delivered to them and which reports how it is being processed. |
| GLN | The GS1 code of a location or a business (a shop, a customer’s warehouse): EDI and mappings use it. |
| Marketplace | Someone else’s sales platform (Amazon, Ankorstore, Faire): its orders come into Mercurio as sales orders. |
| Peppol | The European e-invoicing network: the invoice goes out in UBL to customers in other countries and you know whether it was delivered. |
| B2B portal | The website where your customers see their catalogue with their prices, place orders and check their delivery notes, invoices and instalments. |
Logistics
Warehouse app
The app for the warehouse’s handheld terminal or phone: receiving, putting away, picking orders, packing parcels, counting, transferring, looking up stock and delivering by scanning barcodes, even with no signal.
The warehouse app is a separate application, designed for a handheld terminal with a barcode scanner or a phone: large text and buttons and a scanning field that is always ready. It opens in the browser at Mercurio’s address with /almacen/ at the end (in the demo, https://comercial.appartisan.es/almacen/) and can be added to the phone’s home screen. It works on the same data as the management app: whatever is received, picked or counted on the handheld shows up in the office at once.
#Signing in
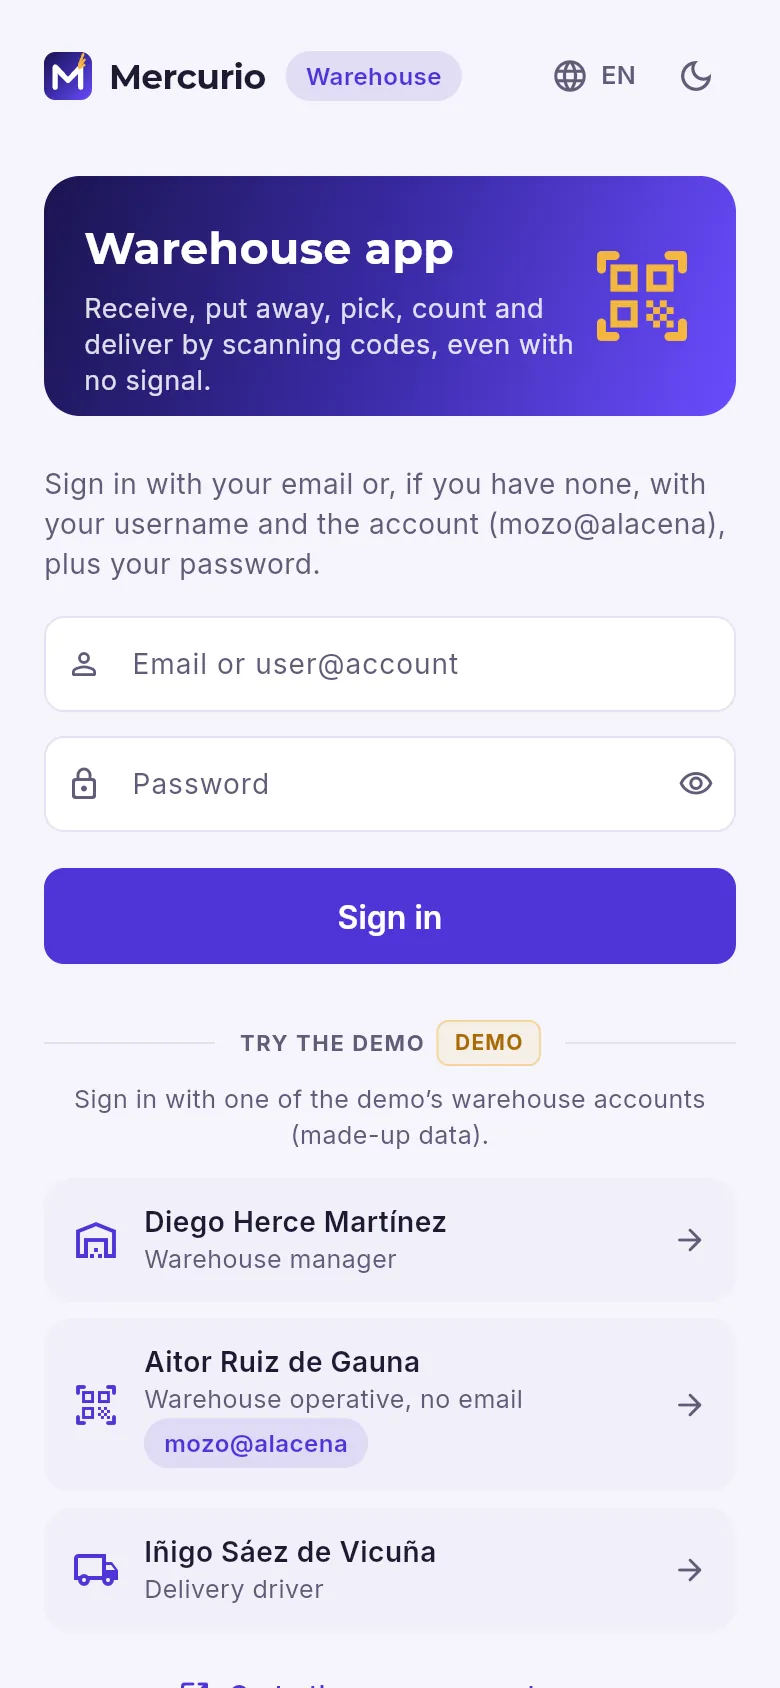 1234
- 1Your email or, if you have none, your user@account (such as mozo@alacena).
- 2Your password.
- 3Sign in.
- 4In the demo, the warehouse accounts at one click.
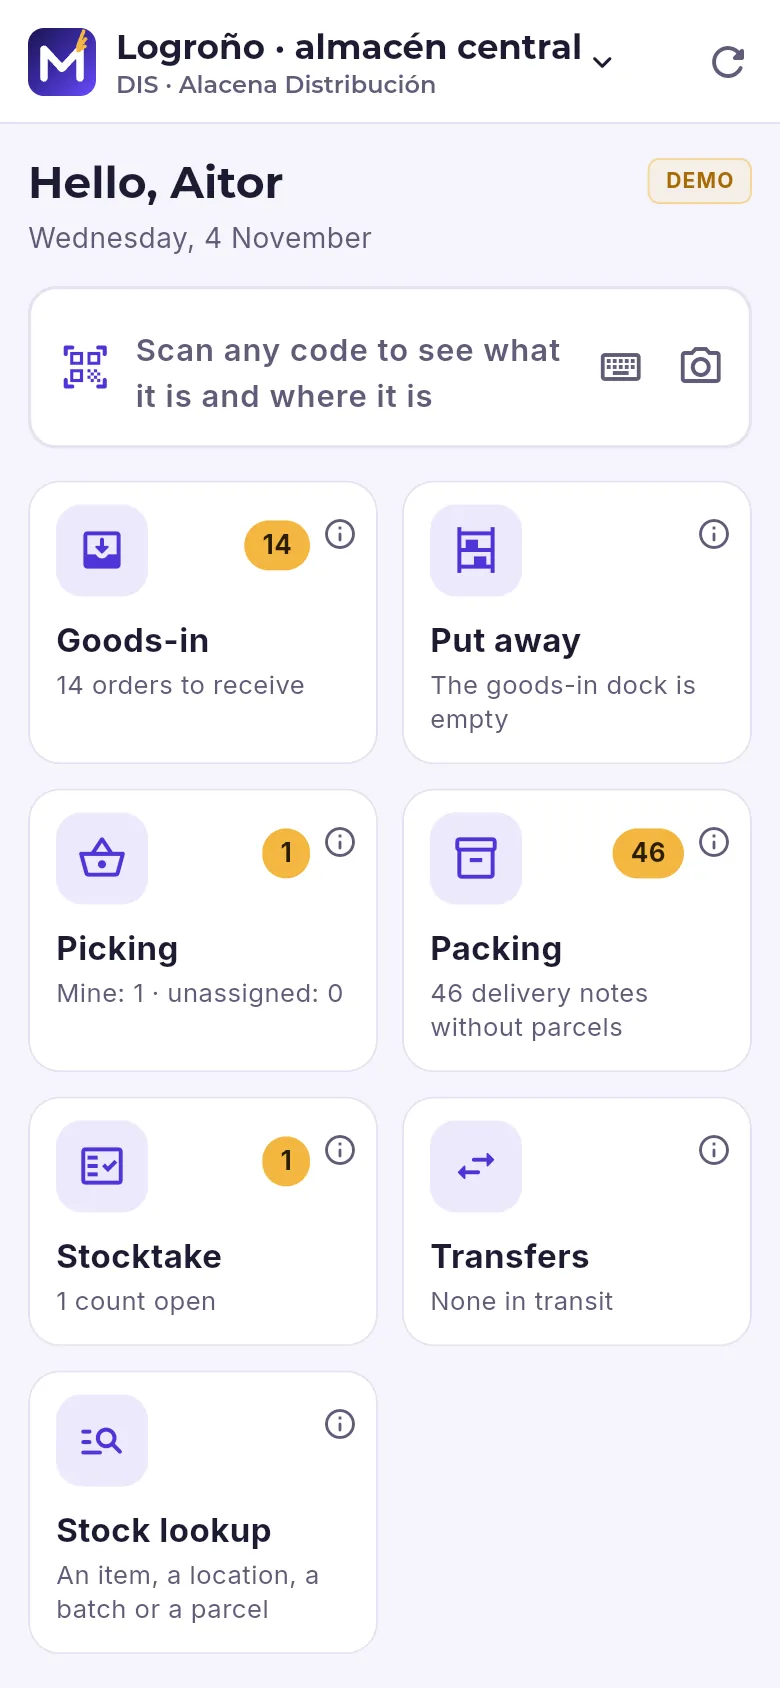 1234
- 1The warehouse you are working in (and its company): tap it to change warehouse.
- 2The scanner: scan any code to see what it is and where it is.
- 3Type it with the keyboard or scan it with the phone’s camera.
- 4The tasks for your profile, each with what is waiting (the number) and its ⓘ.
Anyone without an email (a warehouse operative, a stand-in driver) signs in with their username and the account: “mozo@alacena” is the user “mozo” of the account “alacena”. Users are set up by the administrator in the management app (Users). Once signed in, the app shows only the tasks your profile can do in the selected company: a warehouse operative sees receiving, putting away, picking, packing, counting, transferring and looking up stock; a driver, their deliveries.
| Task | What it is for |
|---|---|
| Goods-in | Receiving the goods from purchase orders, with their batches, expiry dates and serial numbers. |
| Put away | Taking what is waiting in the receiving bay to its place, or moving something from one location to another. |
| Picking | Preparing orders: the pick lists assigned to you and the unassigned ones. |
| Packing | The parcels of the delivery notes, with their SSCC label. |
| Stocktake | Counting the locations of an open stocktake, blind. |
| Transfers | Sending goods to another warehouse or receiving those coming from another one. |
| Stock lookup | What a code is and where it is: an item, a location, a batch, a serial number, a parcel or a document. |
| Deliveries | The driver’s stops, with the recipient’s signature. |
#The scanner and the codes
The scanner field always has the focus: with a handheld terminal you just press the trigger, because its scanner types the code like a keyboard and finishes with Enter. On a phone, the camera button scans the code with the camera; and the keyboard one lets you type it in by hand. When something is scanned, the border turns green if it was what was expected and red if not, and the last scan stays underneath.
The app understands item codes (EAN-13, EAN-8, UPC and the DUN-14 on their boxes), location codes, batches, serial numbers, document numbers and suppliers’ GS1-128 labels, which carry the item, the batch, the expiry date, the weight or the serial number in a single code: when receiving with one of them, all of that is filled in by itself.
#Picking an order
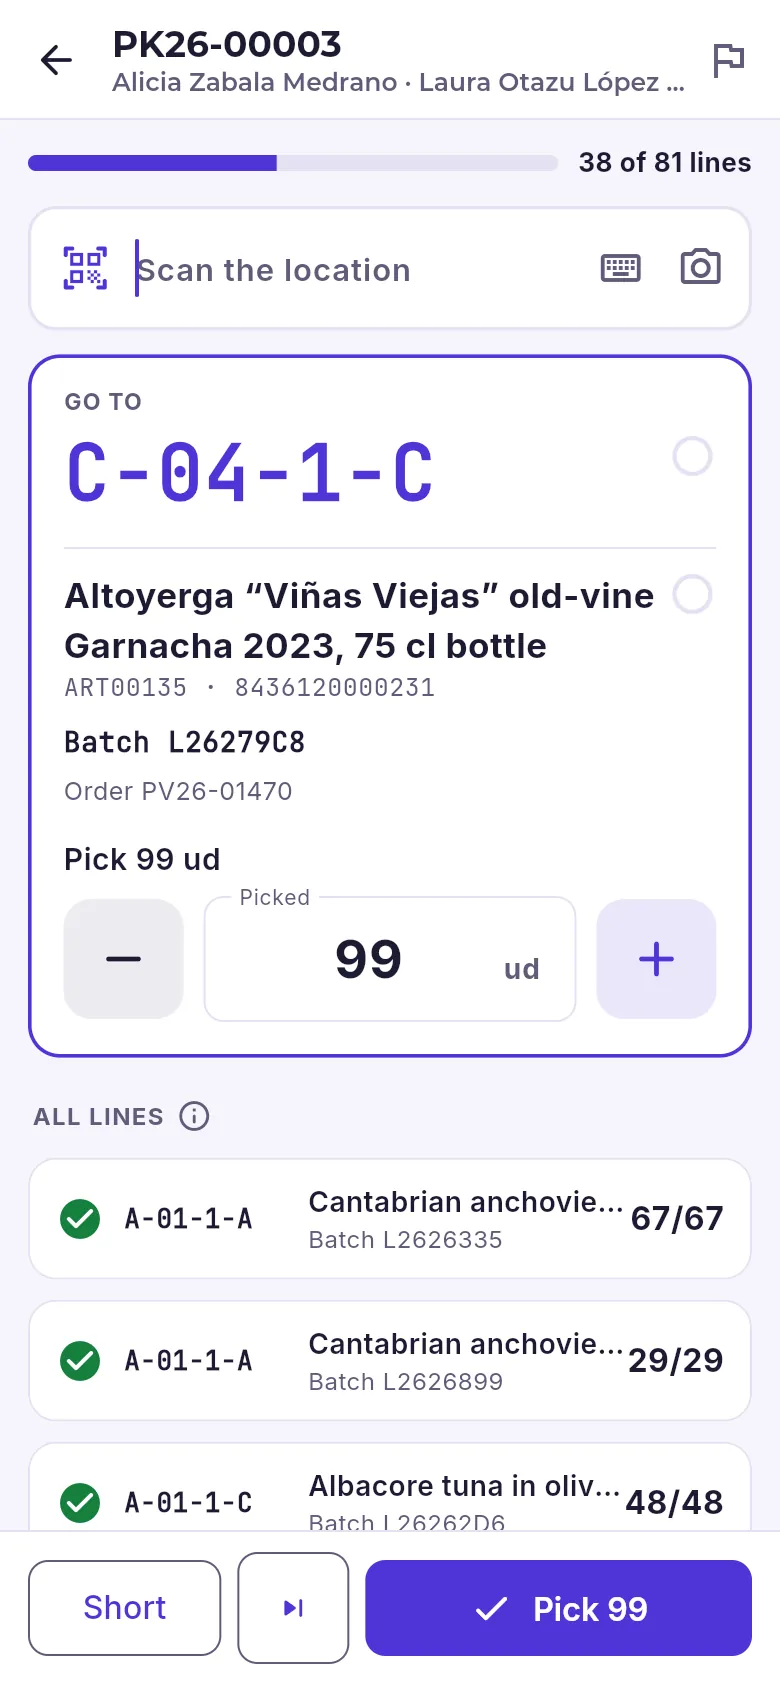 123456
- 1The pick list and its customers.
- 2Finish it: one delivery note per order with what was picked.
- 3What to scan now: the location and, after that, the item.
- 4The current line: go to that location and take that item, from that batch, for that order.
- 5How many you take (by default, what the line asks for).
- 6Record a shortage, skip to the next line or pick.
On the home screen, tap Picking: at the top, My lists; below, the Unassigned ones (when you open an unassigned one, it becomes yours).
Go to the location shown under Go to and scan its code.
Scan the item (or its box). If you scan a batch other than the one proposed, the app says so and changes it.
Check the quantity and tap Pick. If not everything is there, Short, how many you take and why.
Carry on with the next line: the app moves through the walking order by itself.
When you have finished, Finish picking: one delivery note is made per order with what was picked and its batches.
#Receiving, counting and looking up
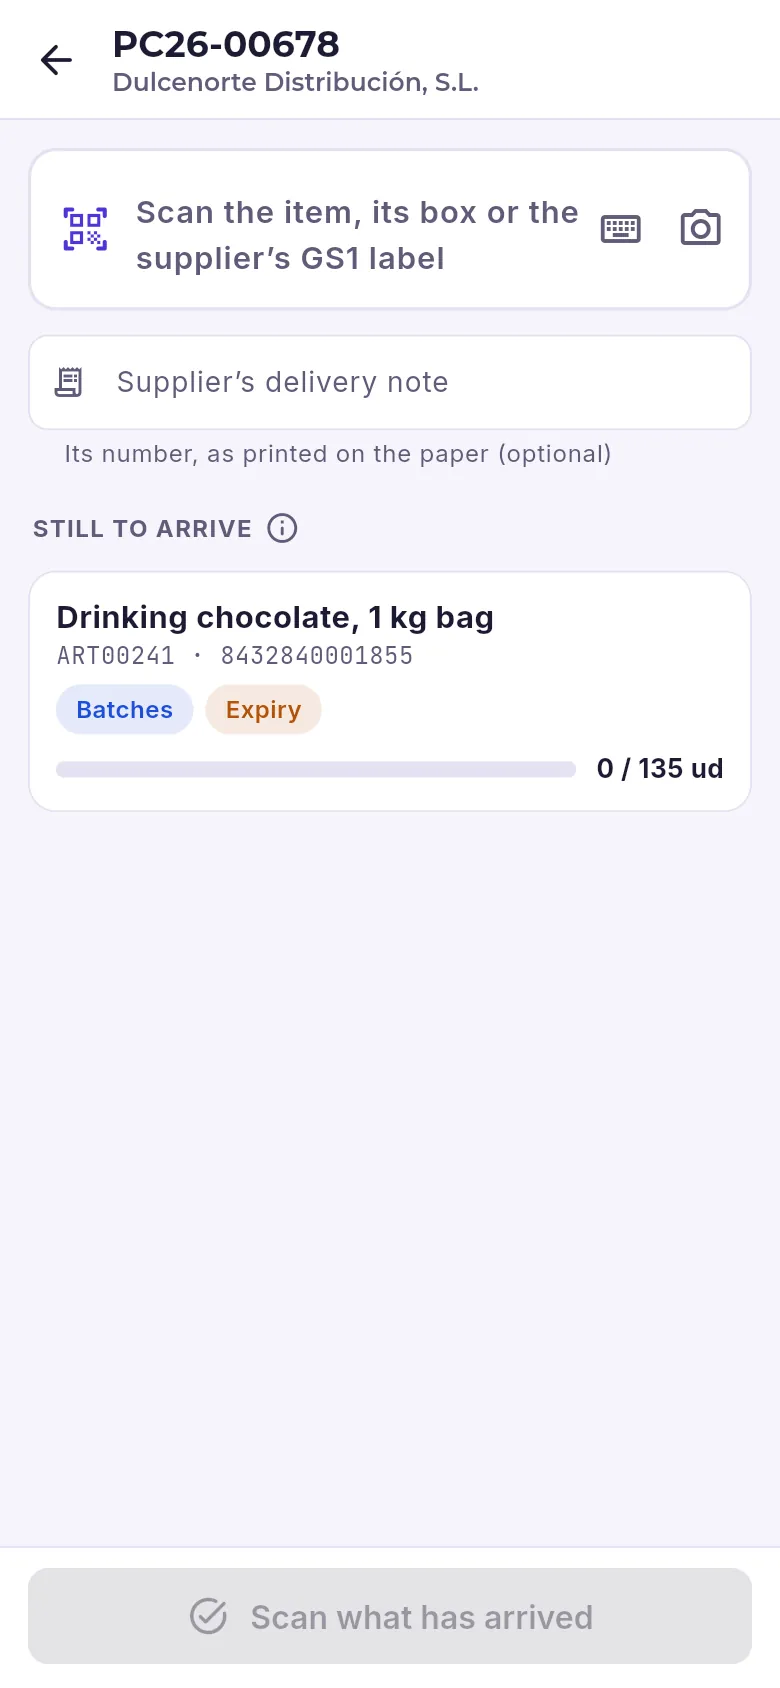 123
- 1Scan each item as it arrives: its own code, its box’s or the supplier’s GS1 label.
- 2The number of the supplier’s delivery note, if you have it.
- 3What is still to arrive on the order and, below, the receipt as it builds up.
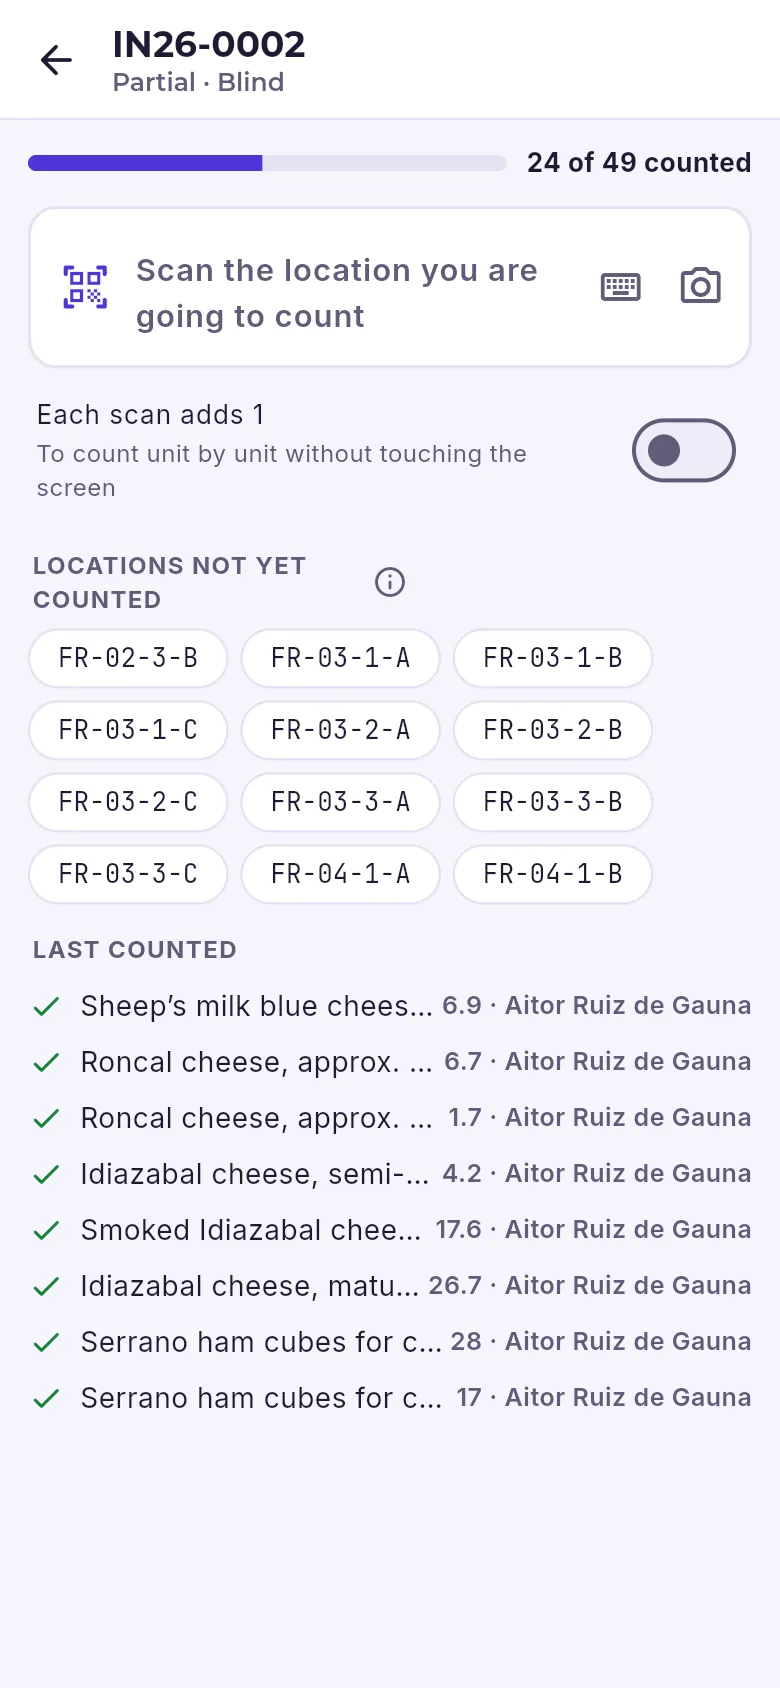 123
- 1Scan the location you are going to count and, after that, each item.
- 2To count unit by unit, scanning each one.
- 3The locations still to count, in walking order (tap one to go to it).
Goods-in. Scanning an item records what has arrived: the quantity, the batch and its expiry date (or the serial numbers, or the real weight if it is sold by weight) and where you leave it: its place or the receiving bay, to put it away later. At the end, Issue goods receipt puts the goods into stock; whatever has not arrived stays pending on the order.
Stocktake. It is blind: it does not show what there should be, so that what is really there gets counted. Scan the location, then each item, and enter how many there are (or switch on Each scan adds 1 and scan unit by unit). Anything that was not on the list is also counted when scanned. The office adjusts the stock once everything has been counted.
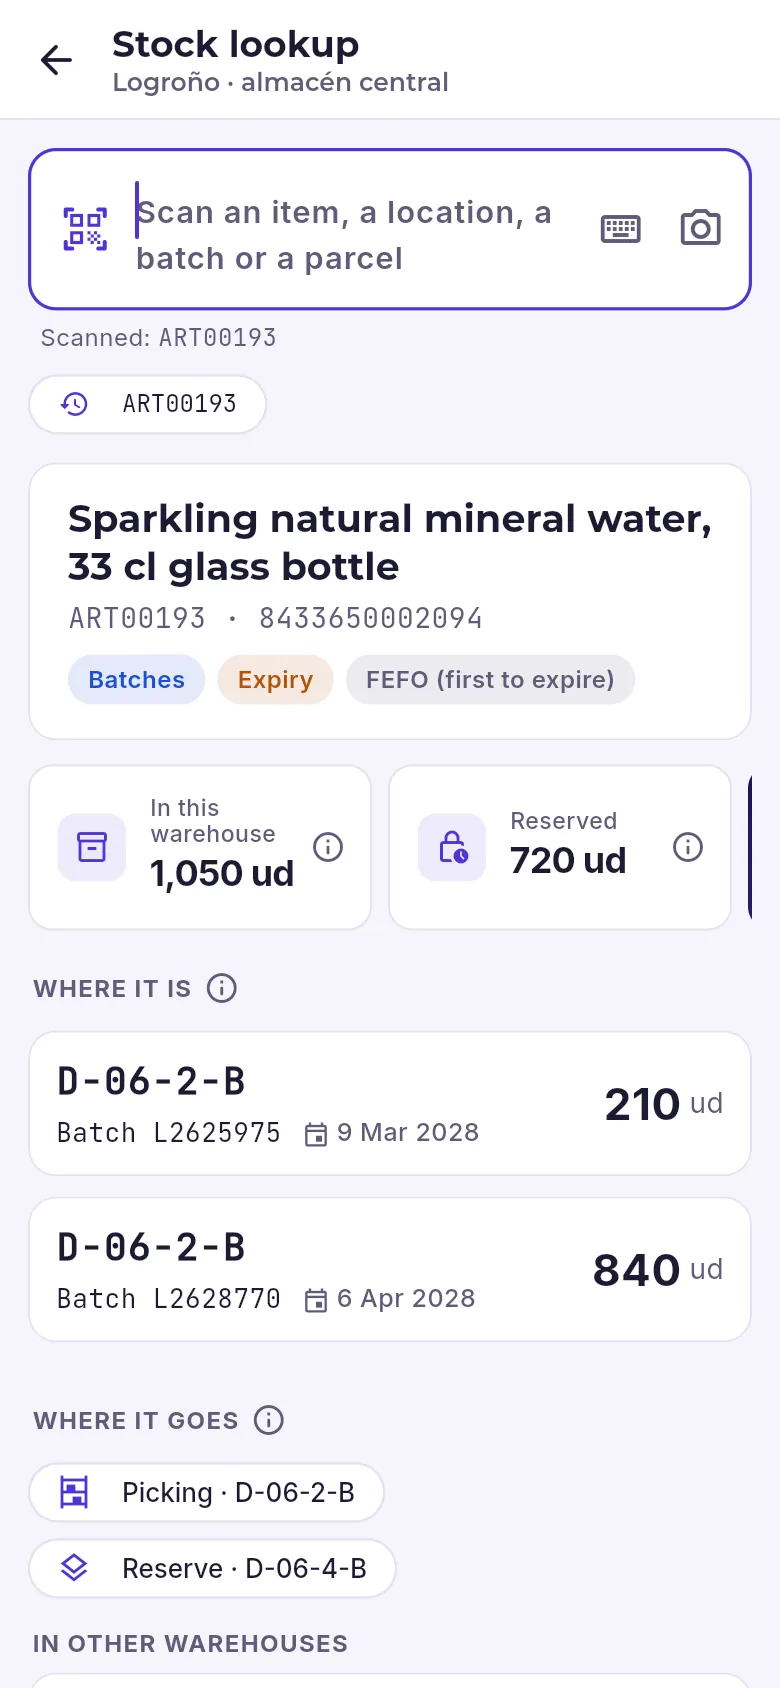 12345
- 1What was scanned: an item, a location, a batch, a serial number, a parcel or a document.
- 2What it is: the item, its codes and how it is controlled (batches, expiry, its issue policy).
- 3How much there is in this warehouse, how much is reserved for orders and (swiping) what is available.
- 4Where it is: each location with its batch, its expiry date and its quantity.
- 5Where it goes: its fixed picking and reserve locations.
#Delivering
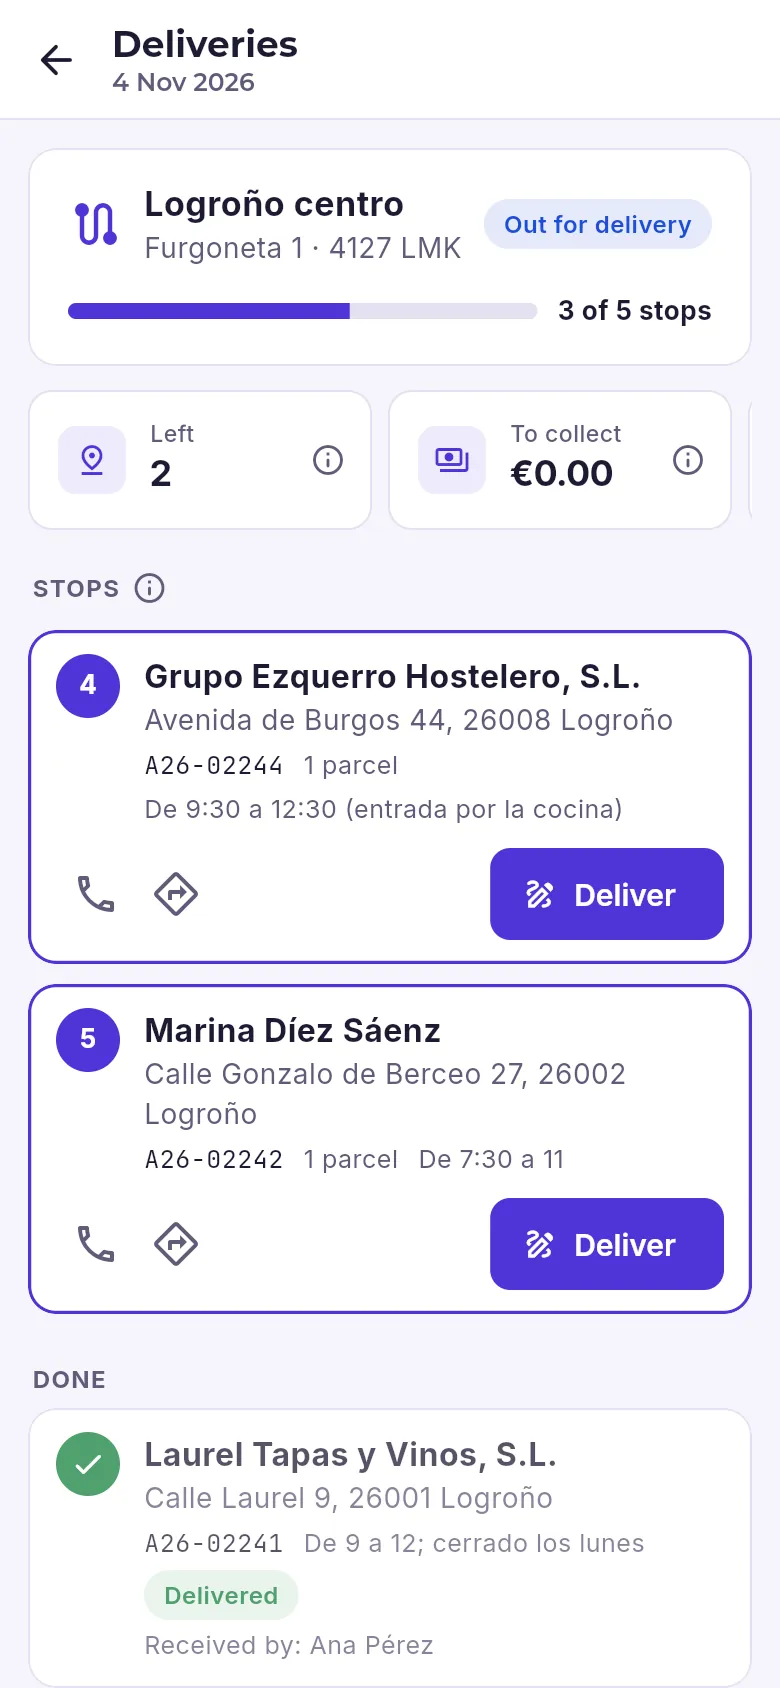 1234
- 1Each of today’s routes: its vehicle, its status and how many stops are done. Before setting off, with the Start the round button (and the odometer reading); with every stop done, with Close the route.
- 2The stops left, what has to be collected in hand and (swiping) what has been collected.
- 3What is left, in route order: call, get directions and deliver, with the recipient’s signature.
- 4Below, what is already done: what was delivered, with who received it, and what could not be delivered, with the reason.
Deliveries work the same as “My deliveries” in the management app (Logistics): start the round with the odometer reading, deliver with the signature, the photo and the payment, record what could not be delivered and close the route on return. In the warehouse app, they also work with no signal.
#Offline
In a warehouse or out on a route, the signal comes and goes. The app keeps working: everything you do (a pick, a receipt, a count, a delivery) is an operation with its own identifier. If there is a network, it is sent straight away; if not, it is saved on the device and Offline appears at the top with how many are waiting. When the network comes back they are sent by themselves, in the order they were made.
B2B
The customer portal
What your customers see on their B2B portal: their catalogue with their prices, the basket and the order, their orders, delivery notes, invoices and instalments, returns, service calls and their account, from a phone or a computer.
The B2B portal is the website where your customers’ people see their catalogue with their prices, place their orders and check their delivery notes, their invoices and what they owe, at any time and from their phone. It is at the same address as Mercurio, at /portal/, and is shown in each person’s language. Each person signs in with their email and password, and only sees what belongs to their customer: the database enforces it.
People are invited by the office from the customer’s record (see B2B channels) and each one has a role:
| Role | What they can do |
|---|---|
| Everything | Everything below and, in addition, invite their colleagues and change the delivery addresses. |
| Purchasing | Catalogue, basket and orders, delivery notes, returns and service calls. |
| Accounts | Delivery notes, invoices, instalments and payments. |
#Signing in
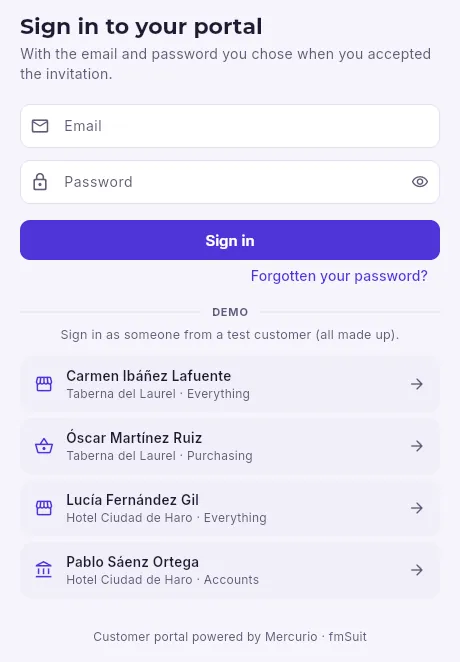 1234
- 1The email and password they chose when accepting the invitation.
- 2Sign in.
- 3If they have forgotten it, they get a link by email to choose another one (valid for two hours).
- 4In the demo, people from two test customers, to sign in with one click.
The invitation arrives by email with a single-use link: on opening it, the person chooses their password and signs in. If the customer works with several companies in the group (Hotel Ciudad de Haro buys from Alacena Distribución and has a contract with Alacena Servicios), at the top left they choose which one to work with: each has its own catalogue, prices and documents.
#The catalogue
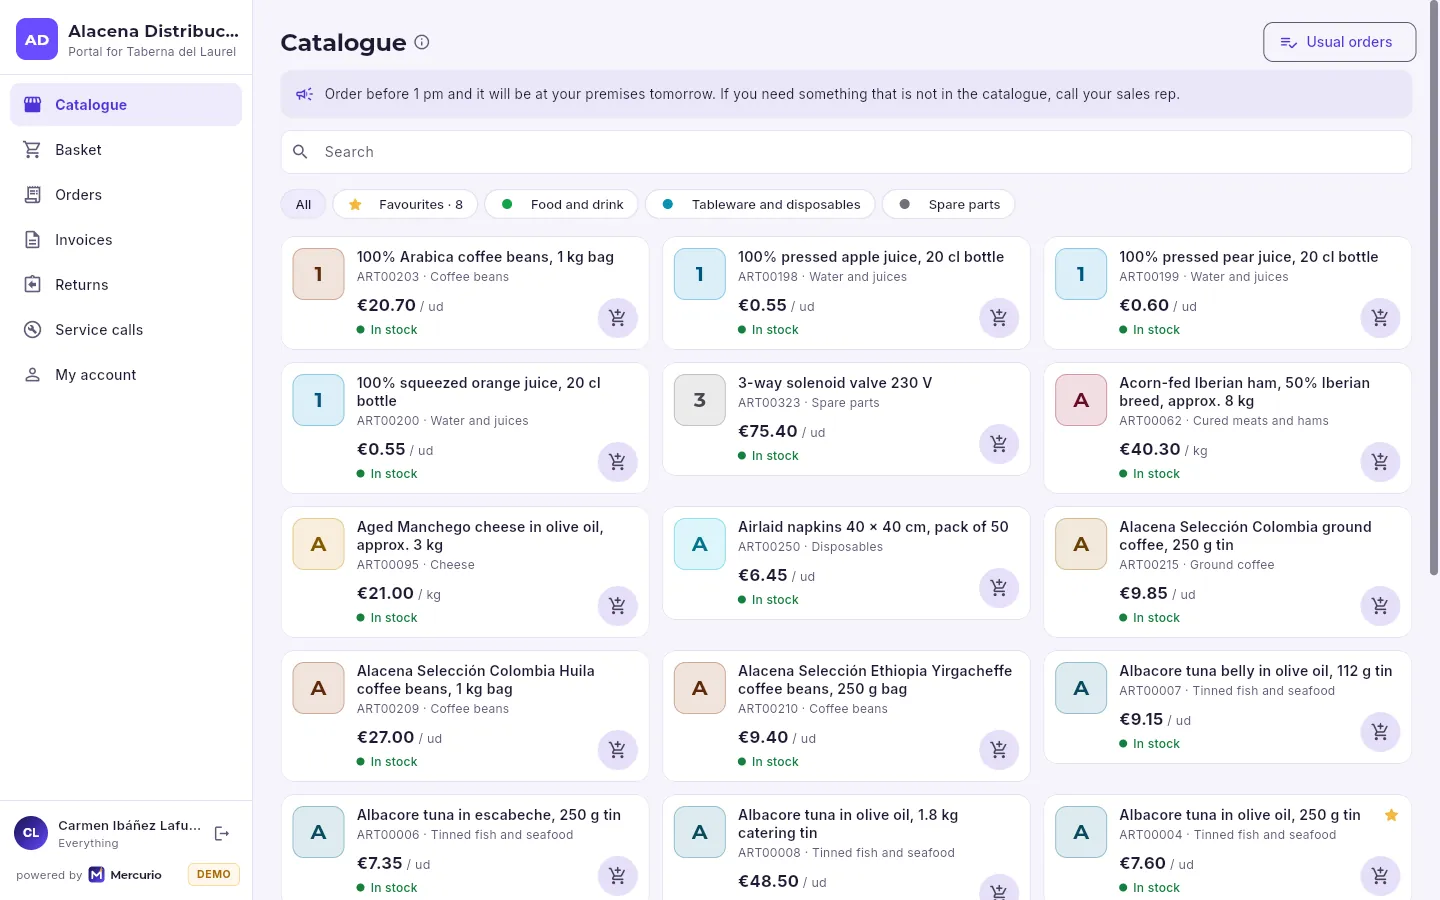 12345678
- 1The company that sells and the customer. If they work with several, this is where they switch.
- 2The sections: catalogue, basket, orders, invoices, returns, service calls and their account (depending on their role).
- 3Usual orders: saved lists to order again in one go.
- 4The company’s welcome text (what the office writes in the portal settings).
- 5Search by name, code or brand.
- 6Their favourites and the families the company shows on the portal.
- 7Each item with its price (from their price list and their terms) and whether it is in stock. The star: it is a favourite.
- 8Add it to the basket in one go.
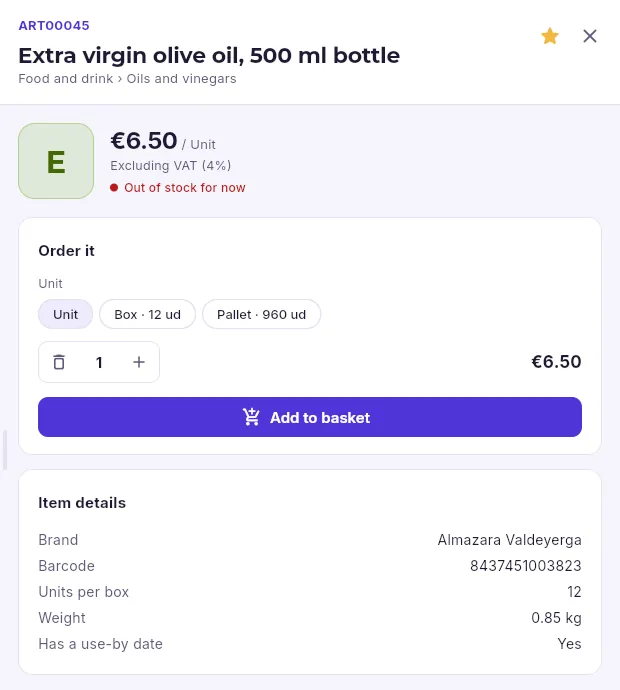 12345
- 1The star adds it to or removes it from favourites.
- 2Its unit price, excluding VAT, and whether it is in stock (as the company chooses to show it: in stock, only a few left, out of stock or the quantity).
- 3Order by the unit, by the case or by the pallet, if the item is sold that way.
- 4The quantity and Add to basket. If it is sold in multiples, the quantity respects that.
- 5Its brand, its barcode, the units per case, the weight and whether it has a use-by date.
The catalogue only shows the items the company shows on the portal, from the families it chooses, each with that customer’s price: their price list, their special prices and their discount. If an item has no price for them, it says “Price on request”: they need to ask their sales rep for it.
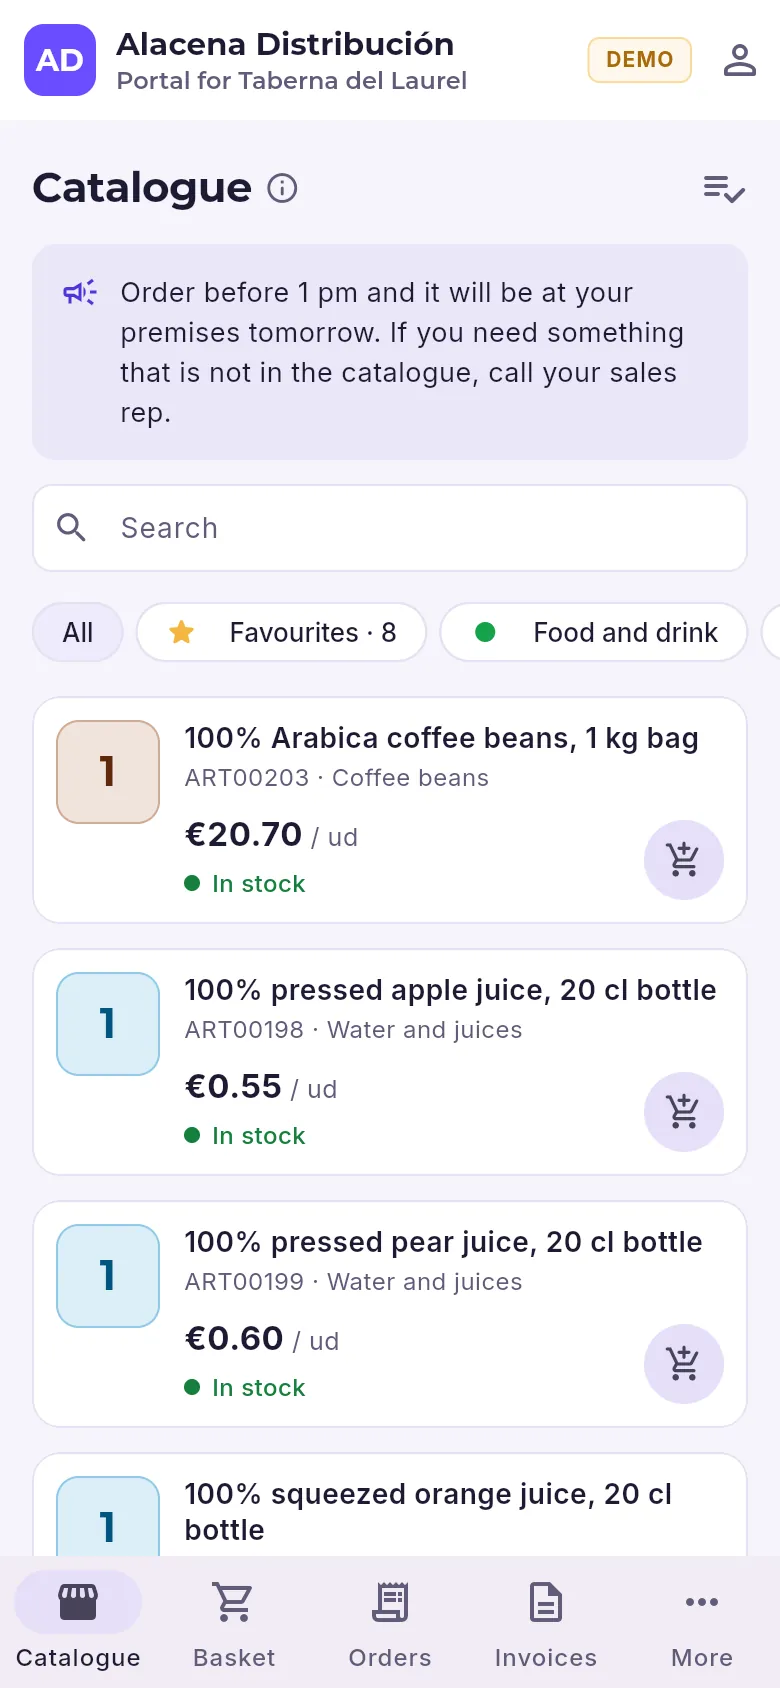 123
- 1Their account.
- 2Usual orders.
- 3On a phone, the sections are at the bottom: catalogue, basket, orders, invoices and More.
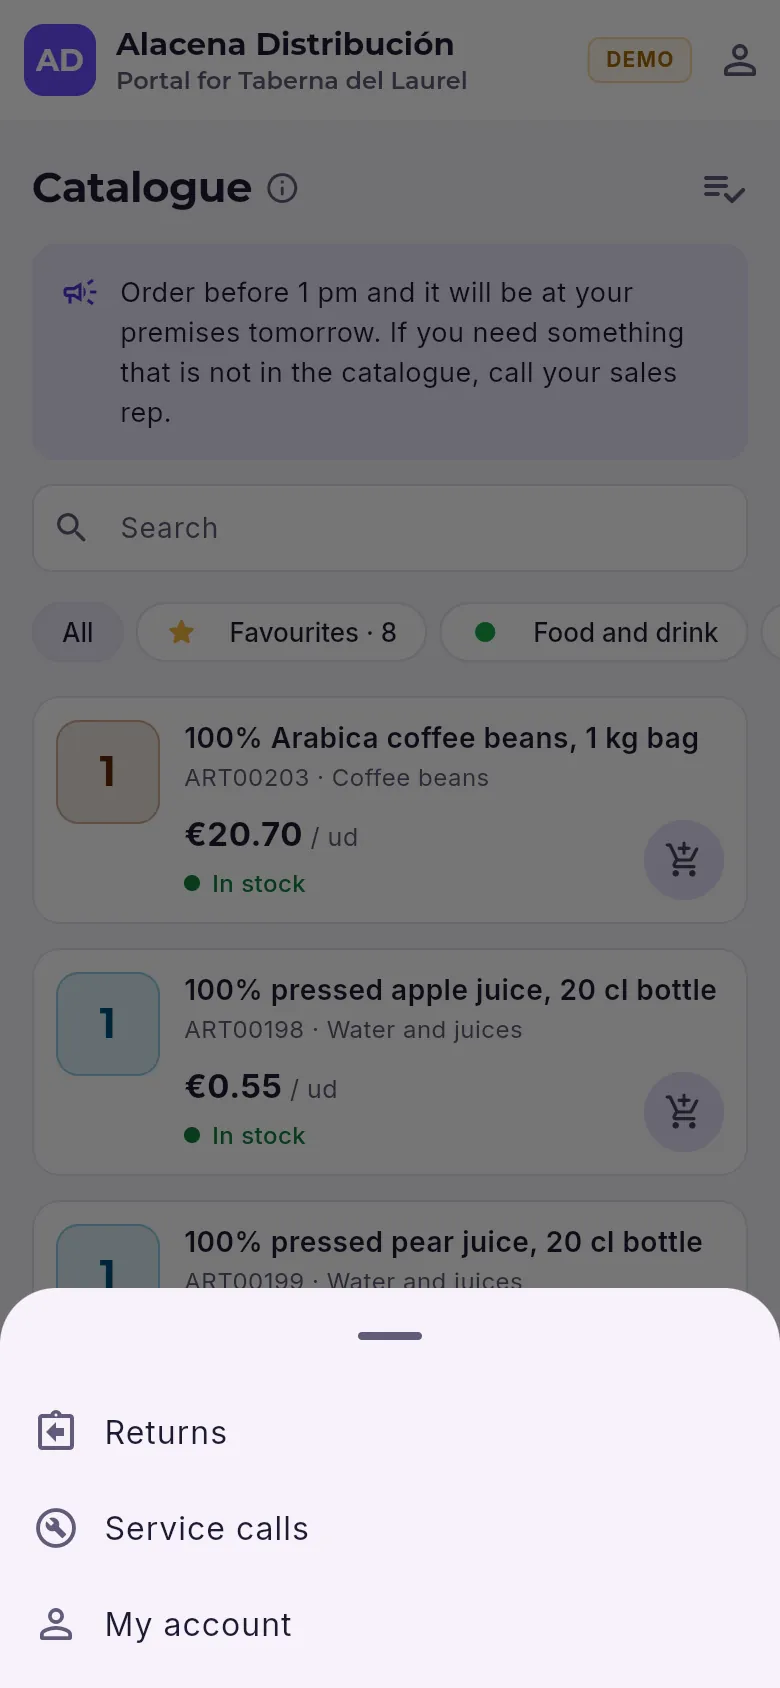 1
- 1More: returns, service calls and their account.
#The basket and the order
The basket holds what is going to be ordered from the selected company, at today’s prices: each line with its price times the quantity and, below, the delivery charge (and how much more is needed to avoid paying it), the minimum order, taxes by rate and the total. Before placing the order they choose the address and the delivery date, and can enter your order number (it appears on the delivery note and the invoice) and some notes (unloading hours, which entrance to use).
In Catalogue, search for the items and click the basket on each one (or open its record to choose case or pallet and the quantity). You can also start from a usual order or from Repeat the order on a previous one.
Open Basket and check the quantities: if you are close to the minimum order or to free delivery, it says so.
Choose the delivery address and date, and type your order number and the notes if needed.
Click Place order.
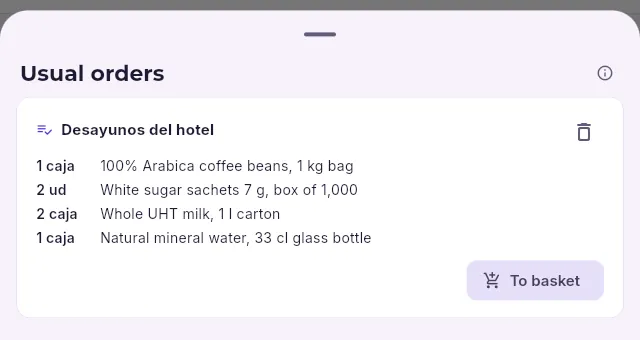 12
- 1Each usual order with its items and their quantities.
- 2To basket adds everything in one go.
#Orders
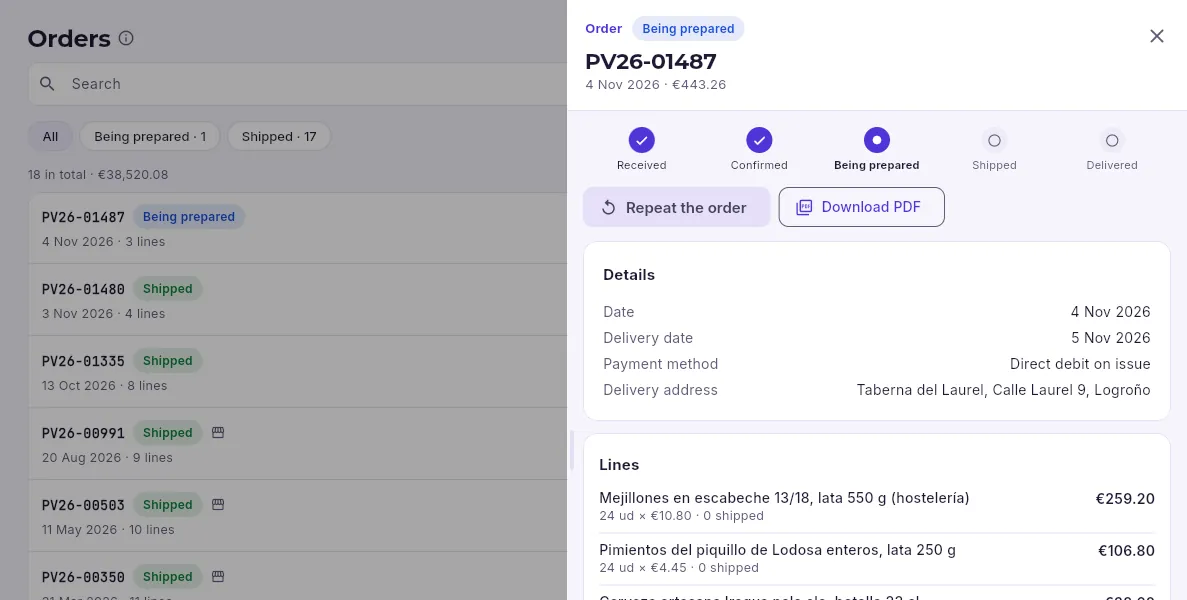 123456
- 1Search by number or by your reference.
- 2All of them or by status, with how many there are of each.
- 3On the record, its progress: received, confirmed, being prepared, shipped and delivered.
- 4Puts its lines in the basket.
- 5Its PDF.
- 6The delivery date, the payment method and the address; below, the lines (with what has been shipped) and the totals.
All the customer’s orders with that company are shown, both those from the portal and those placed by phone or through their sales rep (those from the portal carry its icon). The status comes from the office and the warehouse. When an order ships with a carrier, its record shows the tracking.
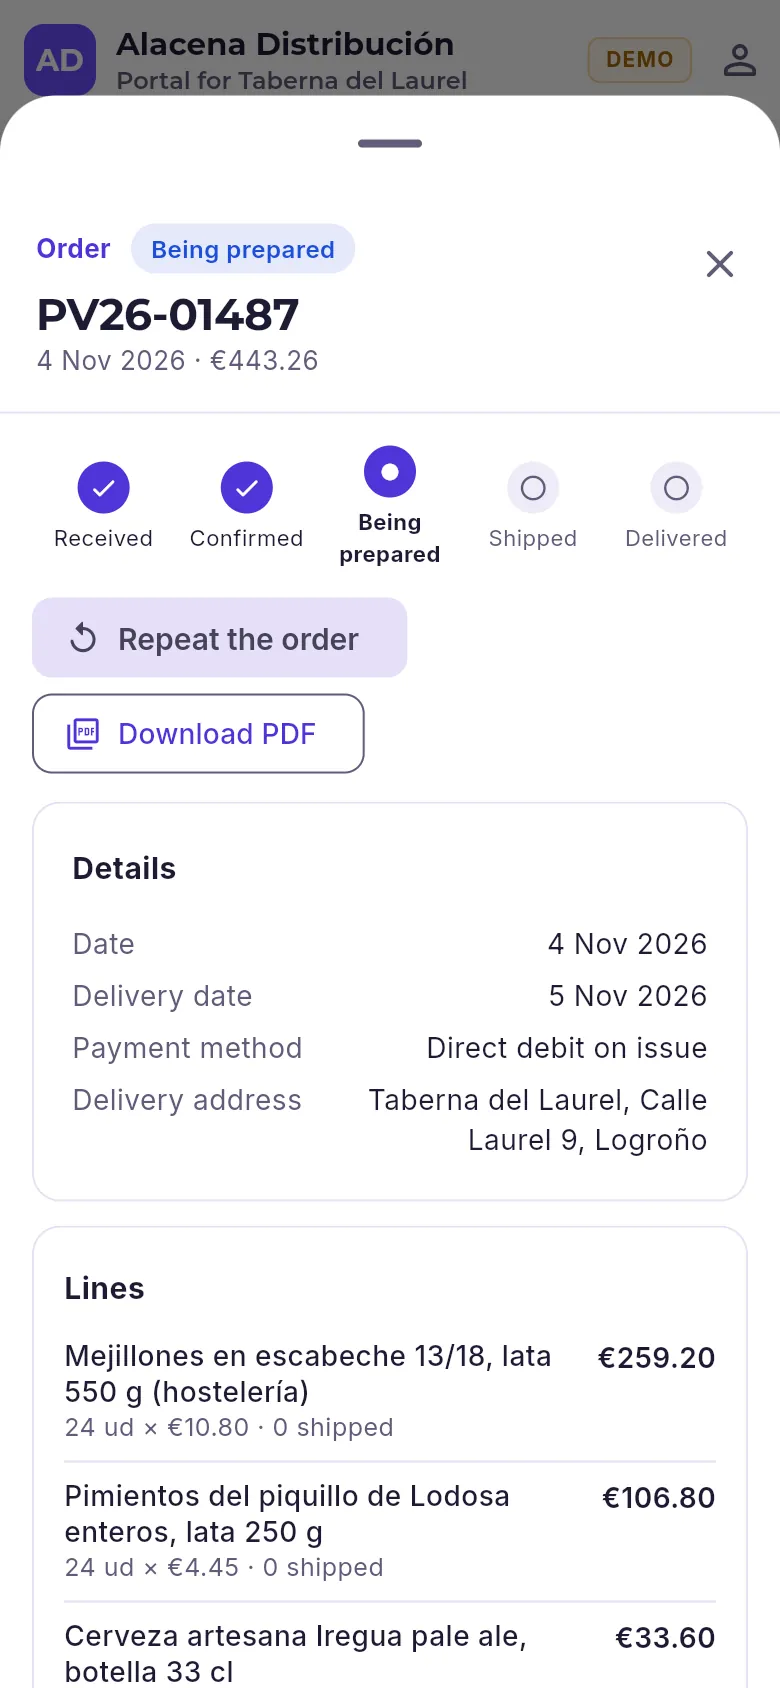 123
- 1On a phone, the record slides up from the bottom: the order’s progress…
- 2…repeat it or download its PDF…
- 3…and its details and lines.
#Invoices, delivery notes and instalments
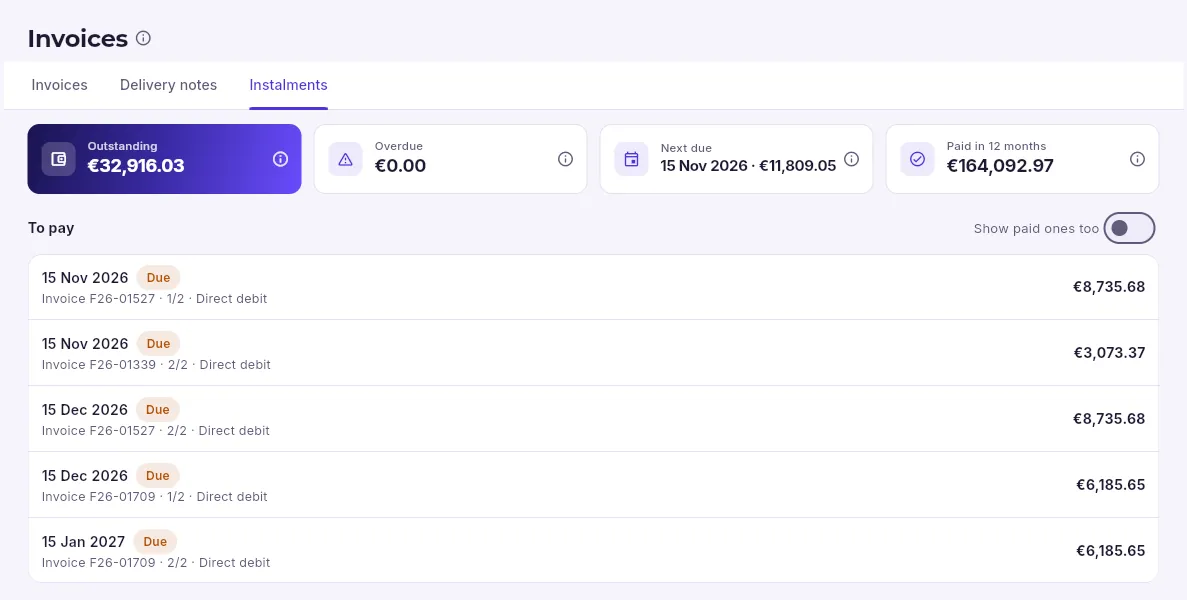 1234
- 1Their invoices, their delivery notes (with batches, expiry dates and shipment tracking) and their instalments.
- 2What they owe today, what is overdue, the next due date and what they have paid in the last twelve months.
- 3Also see what has already been paid.
- 4Each payment due with its invoice, its due date and how it is paid.
Each invoice and each delivery note opens in its record with its lines and its PDF (the official one, the same one that is archived and sent by email, with the tax QR code). An invoice is paid when its instalments have been collected, and overdue if any of them is past its date. Direct debits are charged automatically on their date.
#Returns
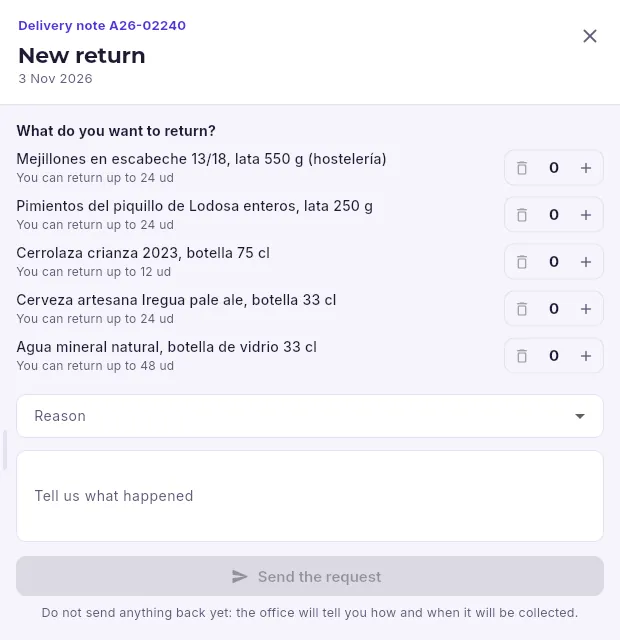 12345
- 1From the delivery note (or invoice) they choose…
- 2…which lines and how much: up to what they received and have not yet returned.
- 3The reason…
- 4…and what happened.
- 5Sends the request to the office. Below, the reminder: do not send anything back until the office says how and when it will be collected.
The office reviews each request in B2B channels → Portal returns: if it accepts it, it prepares the return and credits what comes back; if it rejects it, the customer reads its reply here. Returns can only be made within the period set by the company, and as long as the office has not resolved it, the customer can withdraw their request.
#Service calls
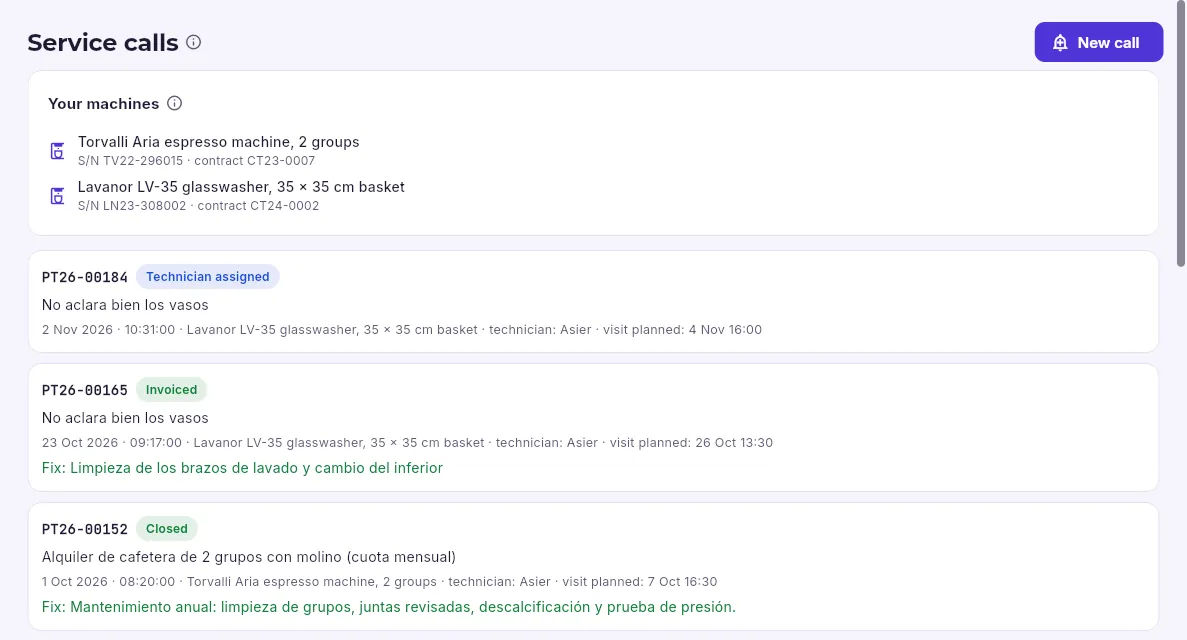 1234
- 1Report a breakdown.
- 2Their machines from this company (sold or rented), with their serial number and their maintenance contract.
- 3Each service call with its number, its status (open, technician assigned, closed, invoiced), the machine, the technician and the planned visit.
- 4Once it is closed, the fix the technician recorded.
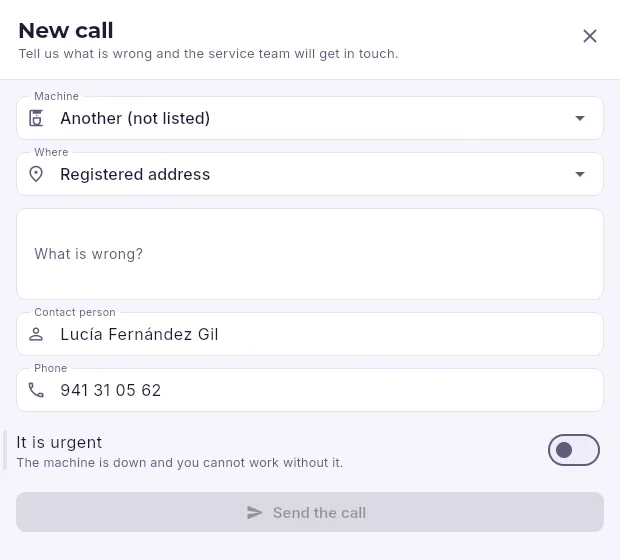 12345
- 1Which machine (or “Another”, if it is not on the list) and where it is.
- 2What is wrong with it, in their own words.
- 3Who to call.
- 4It is urgent: the machine is down and work cannot go on without it.
- 5Opens a job in the company’s technical service.
Each service call is a technical service job for the company: it is handled in Technical service like any other, and the customer sees its status here. If the machine is under contract or under warranty, it says so.
#My account
 123456
- 1Their details and their role; change password and sign out.
- 2Their preferences: the language (of the portal and of their emails) and the light or dark theme.
- 3Their company’s details, as the office has them.
- 4Their terms with this company (payment method, delivery charge, minimum order) and their sales rep, with their phone and email.
- 5Their delivery addresses, with their delivery hours; whoever has the “Everything” role adds and changes them.
- 6The people from their company on the portal. With the “Everything” role, they can invite others and suspend them.